%20-%20Copy%20copy.png?width=143&height=69&name=Black%20logo%20(002)%20-%20Copy%20copy.png)

Sleepover Cinch Sack
This week for Sew Together Tuesday, National Educator Teresa Coates will be showing off the new Sleepover Cinch Sack pattern, made extra special with a little embroidery. We collaborated with Embroidery Garden to create bedtime-themed embroidery designs that will work with small embroidery hoops.
If you’ve been wanting to try some embroidery with Cuddle, but been intimidated by some of the designs, this is a great place to start. We’ll go over the basics of embroidery and show you just how easy it is to add a fun dimension to your Cuddle projects. You can purchase the Bedtime Night Sky set from Embroidery Garden. The designs were made especially for this project—some include appliqué and all were designed to fit a 4” x 4” hoop.
Embroidery Gardens Bedtime Night Sky set: https://www.embroiderygarden.com/shop/applique-designs/bedtime-night-sky-set/
After adding a personalized touch to the Cuddle, Teresa will show you how to whip it up into a quick and easy Sleepover Cinch Sack, perfect for tossing in some PJs, a toothbrush and a favorite lovey for an overnight trip.
For more information on embroidering with Cuddle, watch our Embroidery Tips for Cuddle Minky Plush Fabric video on YouTube: https://www.youtube.com/live/rOR_VrBc6oQ with Sheila Ryan from Designs by Babymoon and Baby Lock educator, Mike Johns.
Join us at 10am PDT/1pm EDT for Sew Together Tuesday.
THIS EPISODE HAS AIRED. Click Below to watch episode and download the pattern and show notes. Scroll down to see step by step.


Cinch Sack by Reen Wilcoxson
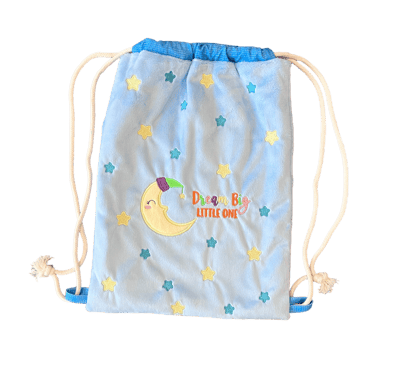
Do your little ones need a cute Cuddle® bag to carry their pajamas, toys, toothbrush, etc. to Grandma’s or a friend’s house for a sleepover? Stitch them one of their own using the Cinch Sack pattern from Teresa Coates, national educator for Shannon Fabrics.
In collaboration with: Shannon Fabrics Brand Ambassador Embroidery Garden https://www.embroiderygarden.com/
This sample was embellished with machine embroidery designs from the Bedtime Night Sky set available at https://www.embroiderygarden.com. All the included designs fit within a 4x4 hoop so anyone can stitch them. You can mix and match the designs creating a larger design like it is for this project. The front and back pieces of the cinch sack are made using Cuddle® 3. It has a short pile and is perfect for the bag. This one was made in Baby Blue. In addition to what is listed in the instructions, I also used the following items for embroidering: •
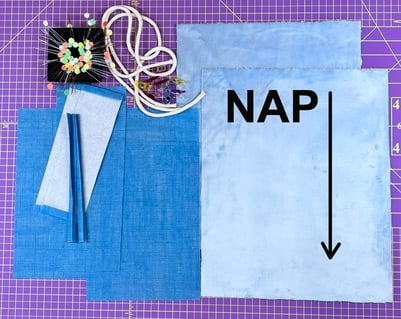
SF101 - This is a lightweight fusible interfacing that was ironed to the backside of the front piece that is machine embroidered. It will prevent the Cuddle® from stretching during the embroidery. • Polyester embroidery thread and a 75/11 needle • A plastic film topper made for machine embroidery. This will keep the embroidery stitches from sinking into the pile. Cut and prep all the pieces needed for the cinch sack following the pattern instructions.
1) Be aware that Cuddle® has a nap. When cutting the front & back pieces, the nap should go downward.
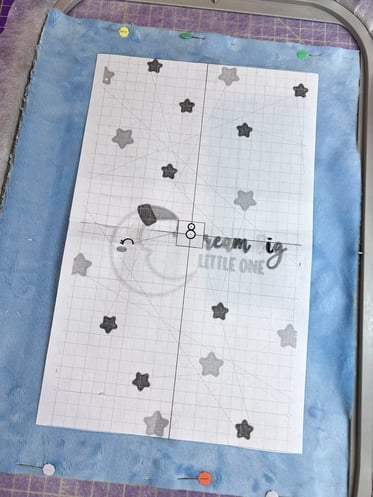
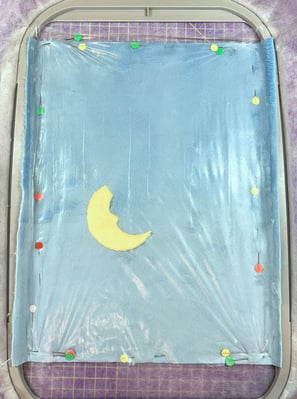
2) I like to print a template of my embroidery design after I’ve created it to check placement and get a feel of how it will look on the fabric. It’s not necessary, just a personal preference. You can place your design wherever you like on the fabric, just be mindful your design may be in the folds created when the sack is cinched up. To embroider the design, I’ll be using a technique called floating. Floating is when the stabilizer is hooped and the fabric being embroidered is placed on top and secured with either a basting stitch, pins or spray.
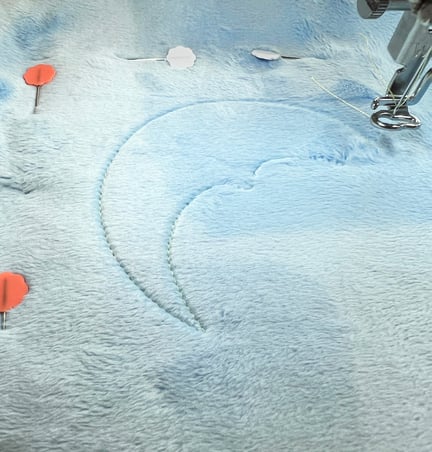
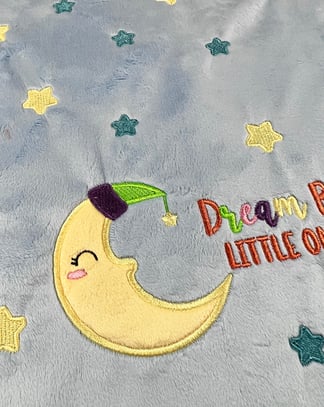
3) I chose to use the Sleepy Moon Appliqué design as part of the embroidery design for the cinch sack. I also used the Dream Big and both Star files to create my desired layout. If you cannot stitch everything you want in one hooping, just re-hoop the Cuddle® and embroider your next section. Appliqués have 3 basic steps. Step 1 is a placement stitch so you know where to place the appliqué fabric. Step 2 is a tack down stitch that will secure that fabric in place. You will trim close to the stitching after step 2. The third step will sew a finishing stitch that is usually a satin stitch, blanket stitch or other decorative stitch. Some designs can be raw edge meaning after the fabric is stitched down and trimmed around, there will not be a finishing stitch. This is a great option for Cuddle® as it doesn’t fray. I’ve stitched the placement step of the moon.
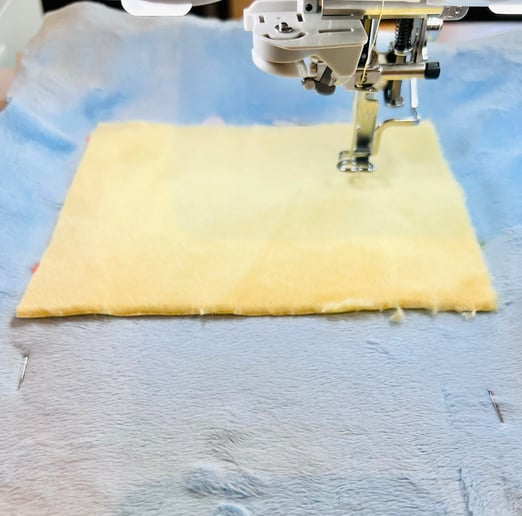
4) I’m using a piece of Cuddle® 3 in Yellow for the moon appliqué. Since the piece is small, I’ve chosen not to use fusible on the back side of the fabric. Make sure your appliqué piece completely covers and is slightly larger than the placement that was sewn.
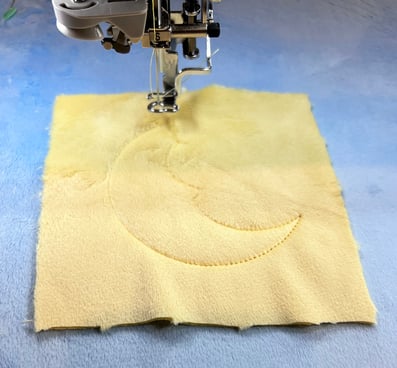
5 & 6) After the tack down step is stitched, carefully trim close to the stitching around the shape.
7) At this point, place a piece of topper over the whole design area. I like to pin it in place to make sure it doesn’t shift. The topper will keep the embroidery stitches from sinking into the pile of the Cuddle®.
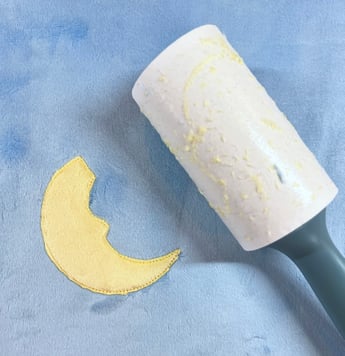
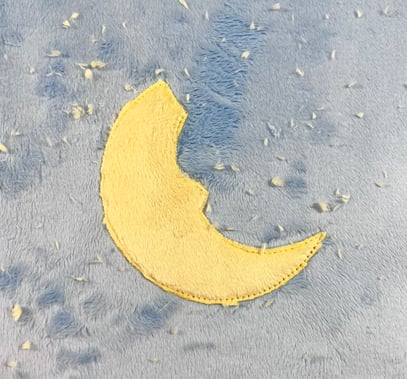
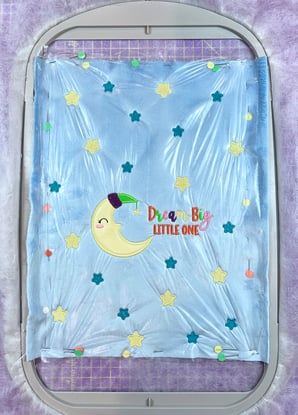
8) The next step will stitch the finishing step of the appliqué. In this case it is a satin stitch. Follow the steps in the instructions for completing all the embroidery. Remove the topper by gently pulling it away from the stitching. Any small bits left can be removed with tweezers or slightly wetting the area with a sponge to dissolve it.
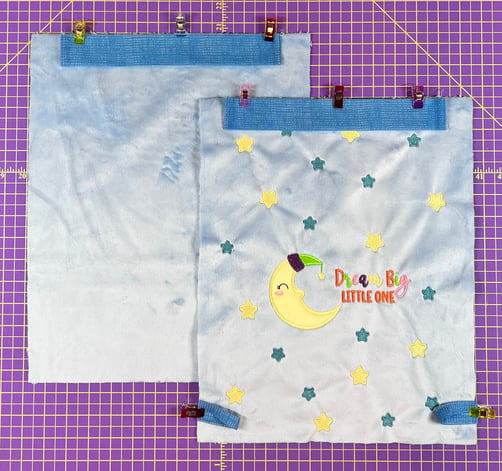
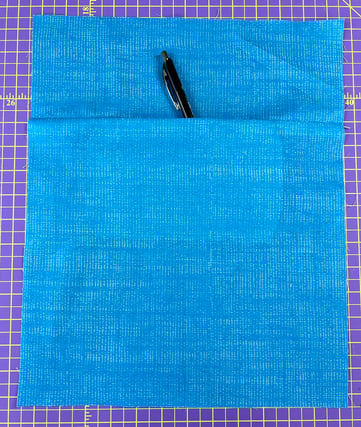
9 & 10) Once the embroidery is finished, proceed with the instructions for stitching the cinch sack together. Again, refer to the cinch sack instructions and video for complete details. The 2 end loops are stitched near the bottom of the front piece. The cord channels are centered at the top on the front and back pieces on the right side and stitched in place.
11) Place the front and back pieces right sides together and stitch the sides and bottom using a ½” seam. Construct the lining front and back per the instructions. I love the clever inside pocket!
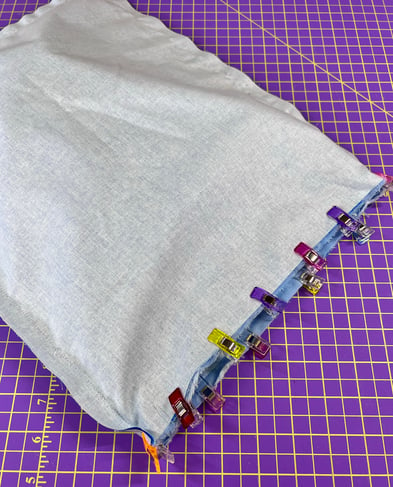
12) Place the front and back lining pieces with the right sides together and stitch both side and bottom edges leaving an opening for turning on one of the side edges. Turn the embroidered outside section to the right side. Push those bottom corners out nicely. Place the outside piece into the lining with right sides together matching the side seams. Pin or clip the top edges together. Sew around the top.
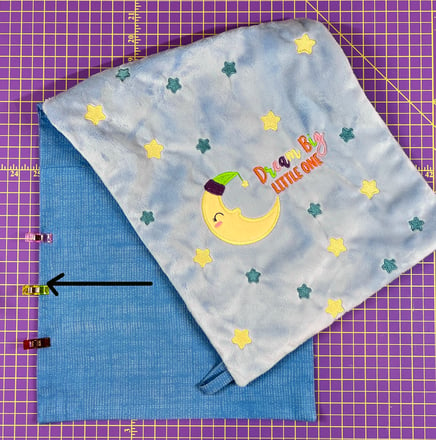
13) Turn the sack through the opening in the lining. Machine sew the opening closed by stitching close to the folds.
14) Push the lining down inside the bag. Add the cords for the drawstring. Your adorable cinch sack is done! Once you have machine embroidered Cuddle® and realize how easy it is, you will be using it for all your projects, appliqué pieces, accents and more. You can follow Embroidery Garden on Facebook (https://www.facebook.com/EmbroideryGardenITH/) and Instagram (@embroiderygarden) to see more projects I have stitched using Cuddle® fabrics.


.jpeg?width=640&name=Image%20(5).jpeg)


.png?width=640&name=STT%20S11E09%20YouTube%20V1%20(1).png)

.png?width=640&name=STT%20S11E07%20YouTube%20V2%20%20(1).png)

.png?width=640&name=STT%20S11E05%20Instagram%20Posts%20(1).png)

.png?width=640&name=STT%20S11%20Facebook%20Event%20Cover%20%20(1920%20%C3%97%201005%20px).png)


.jpg?width=640&name=self%20binding%20blanket%20c3%20caramel%20Image%20from%20iOS%20(5).jpg)


Leave a Comment