%20-%20Copy%20copy.png?width=143&height=69&name=Black%20logo%20(002)%20-%20Copy%20copy.png)

Hi this is Bia from Ms.Elaineous and today I've got a simple project that will make you LOVE Cuddle! This composition book cover makes the perfect travel journal for all your summer adventures and is so fresh and fun that you'll want to keep it out for everyone to see! You'll not only make a cute Cuddle Composition Book Cover, but you'll learn a little bit about interfacing! And this project is a great way to use up scraps!
OVERVIEW: This is a quick project that nets great results. I've incorporated a wonderful interfacing (fusible knit interfacing) that when fused correctly, reduces the stretch and makes the Cuddle easier to sew! To use it, all you need to do is determine the stretch.
DETERMINE STRETCH: When you gently pull vertically and then horizontally, you'll quickly notice that the knit interfacing stretches in one direction but not the other. The same holds true for the Cuddle. So to reduce the stretch, you need to cut your fabric and determine what way it stretches. Then lay out your fusible and determine the stretch. Cut your fusible so the stretch is going in the opposite direction!
SUPPLY LIST:
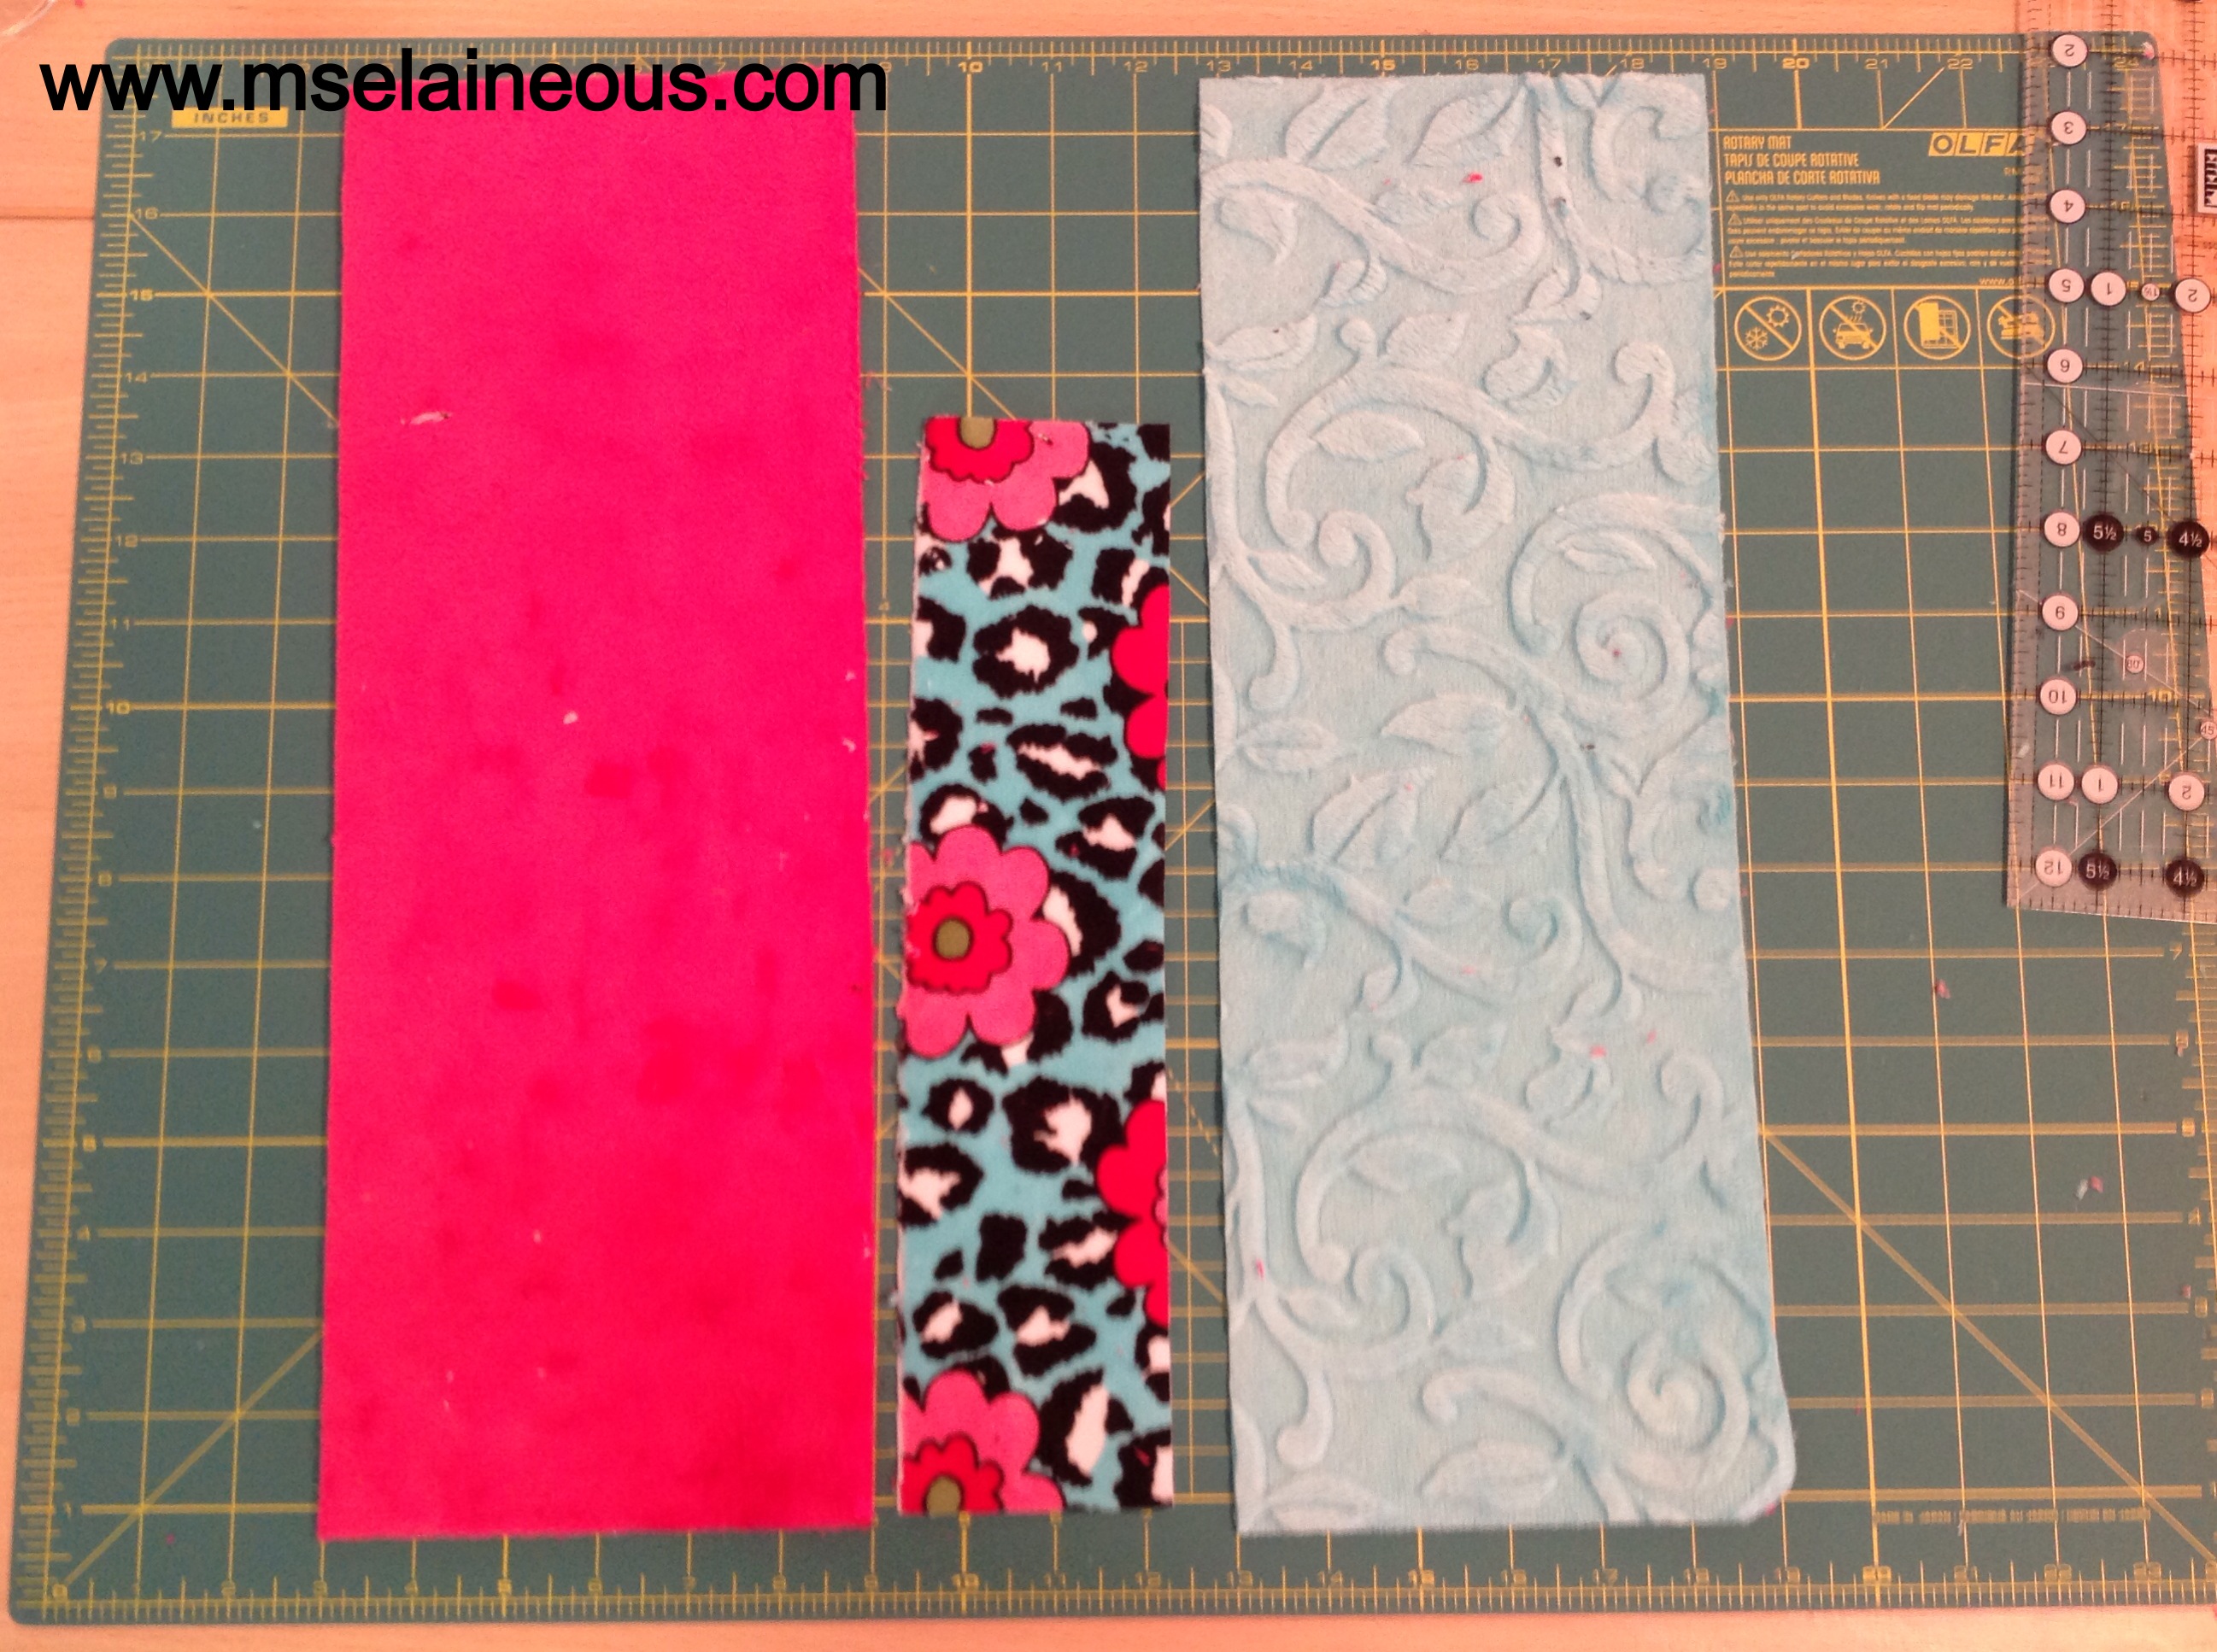
- 1 - 6 1/2" x 17" - Vine Cuddle Marina
- 1 - 6 1/2" x 17 - Mar Bella Cuddle Fresa
- 1 - 3 " x 12" - Lagoona Jaguar
- 1– 11 x 14” rectangle of coordinating fabric for lining - I used Silky Satin Sage - but cotton would be really cute and easier to work with!
- 2- 11” x 10” pieces of coordinating fabric for lining pocket/flaps - I used Silky Satin Sage - but cotton would be really cute and easier to work with!
- 1– 11 x 14” rectangle of Pellon Sheerweight (906F) fusible interfacing for lining
- 2– 11” x 10” pieces of Pellon Sheerweight (906F) fusible interfacing for interior pockets/flaps
- 1/2 yard of Pellon Easy Knit (Ek 130) for the Cuddle fabric
- 14/90 Schmetz Ball Point Needle
- 1– 7½” x 9¾” Composition Book
- 2 – 14” length of grosgrain ribbon (width of ribbon is personal preference) - for decoration and book mark
MAKE OUTER COVER:
1. Cut your fabric and sheerweight interfacing as instructed above.
2. Put lining and pocket/flaps and sheer weight fusible aside.
3. Before cutting your Easy Knit fusible interfacing, determine the stretch of the Cuddle and the stretch of the interfacing. You want the stretch going in different directions - this stabilizes the Cuddle! Once you've done this, cut your fusible knit interfacing to same size of the three pieces of Cuddle.
4. Place Cuddle wrong side up. Place Easy Knit interfacing on top with glue side facing down. Fuse interfacing to the back of the Cuddle. Be careful - go slowly and try to avoid stretching!
5. Turn the Cuddle over. If you pull on the Cuddle, it shouldn't stretch!
 6. Using a 1/4" seam, sew the Vine and Mar Bella together along the 17" side.
7. Press seam open as shown. This should be about 12 1/2" tall and 17' wide.
 8. Now cut this into two pieces: 11" x 12 1/2" and 6" x 12 1/2".
 9. Sew the Lagoona as shown.
This is a bit bigger than what you need, so you'll want to cut it down to the correct size, which will also even things out!
10. Cut this to 11" tall and 16 1/2" wide.
 11. Sew decorative ribbon as shown. Placement is up to you! The ribbon will be a bit longer than needed. This just makes it easier to hold on to when you sew it! Once you are done, cut off excess ribbon.
Set aside and get lining and pocket/flap fabric and sheerweight fusible interfacing.
MAKE POCKETS/FLAPS:
 1. Fuse the interfacing to the back of the lining and pocket/flaps following manufacturer's directions.
2. Fold pockets in half, WST (wrong sides together), to create a 5" x 11" rectangle.
3. Top stitch about 1/4" from the folded edge of each pocket/flap. This isn't necessary, but it is a nice finishing touch!
ASSEMBLE COVER:
1. Place outside/Cuddle right side up.
2. Place the pockets/flaps at each end, lining up the raw edges as shown.
3. Place the ribbon book marker next to the left pocket. Loosely pin excess ribbon so you don't sew it into the bottom or the side.
 4. Baste pockets/flaps in place using a 1/4" seam. See the pink stitch lines in the diagram.

5. With RST, place the lining on top of the pockets (the wrong side of the lining will be facing you). It will be about 1" smaller from the ends. Don't worry! The raw edges of the ends of the lining will not show! They will be tucked inside the pockets/flaps!
6. Sew around the entire piece using a 1/2" seam. You will not sew the ends of the pockets.
FINISH!
1. Clip corners and cut seam allowances down to about 1/4" - I recommend using pinking sheers to cut the seam down.
2. Turn right side out by pulling through the unsewn ends of the lining. Make sure that you flip the pockets back!
3. Press flat.
4. Celebrate and get busy writing!

For more free patterns, please visit my website — www.mselaineous.com
You can check out more of my patterns – available for download in my Craftsy Pattern Store.
 And, we’re so excited about our new blog that we are having a Giveaway for a Cuddle Quarter (Q) Kit! To enter our Giveaway, be sure to comment on this post with words “Cuddle Quarter Kit” and also subscribe to us on YouTube here! There will be 3 winners and each will win a Kit!


.jpeg?width=640&name=Image%20(5).jpeg)


Leave a Comment