%20-%20Copy%20copy.png?width=143&height=69&name=Black%20logo%20(002)%20-%20Copy%20copy.png)

Hi, It's Jeni from jeni ro designs back on Shannon Fabrics My Cuddle Corner! This time I am sharing a cute travel pillow made with the amazing Shannon Fabrics Cuddle™.
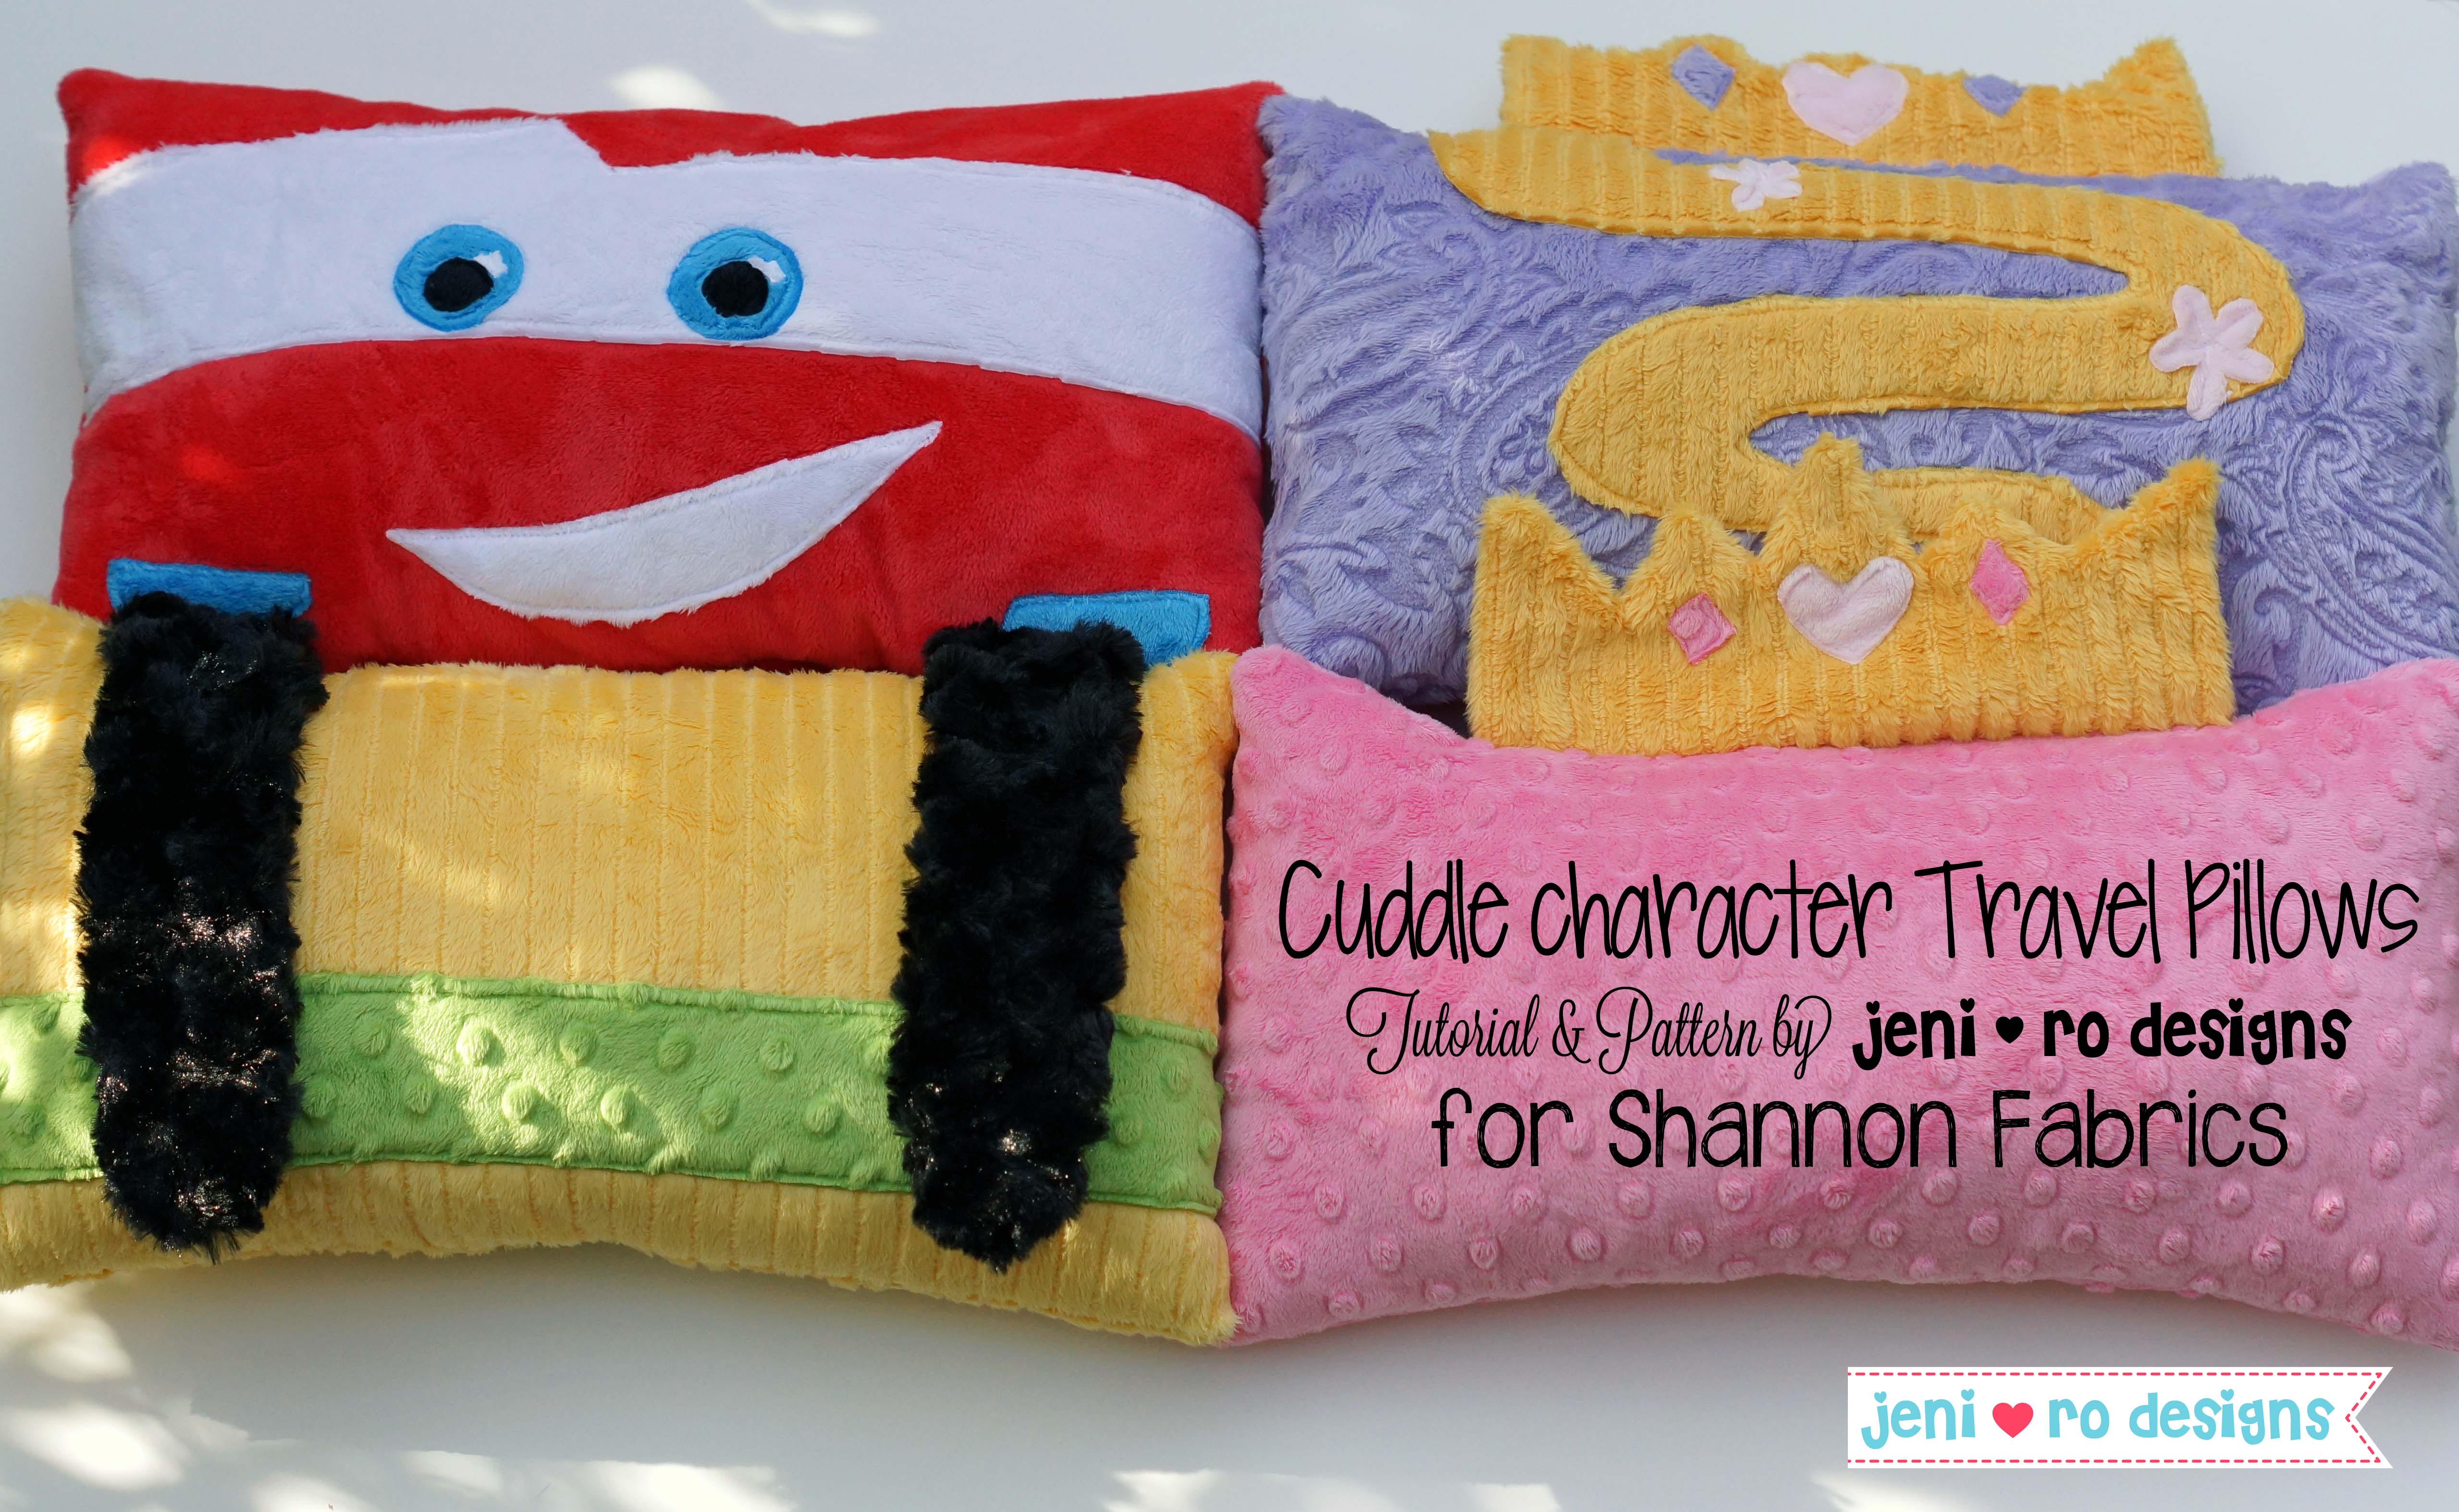
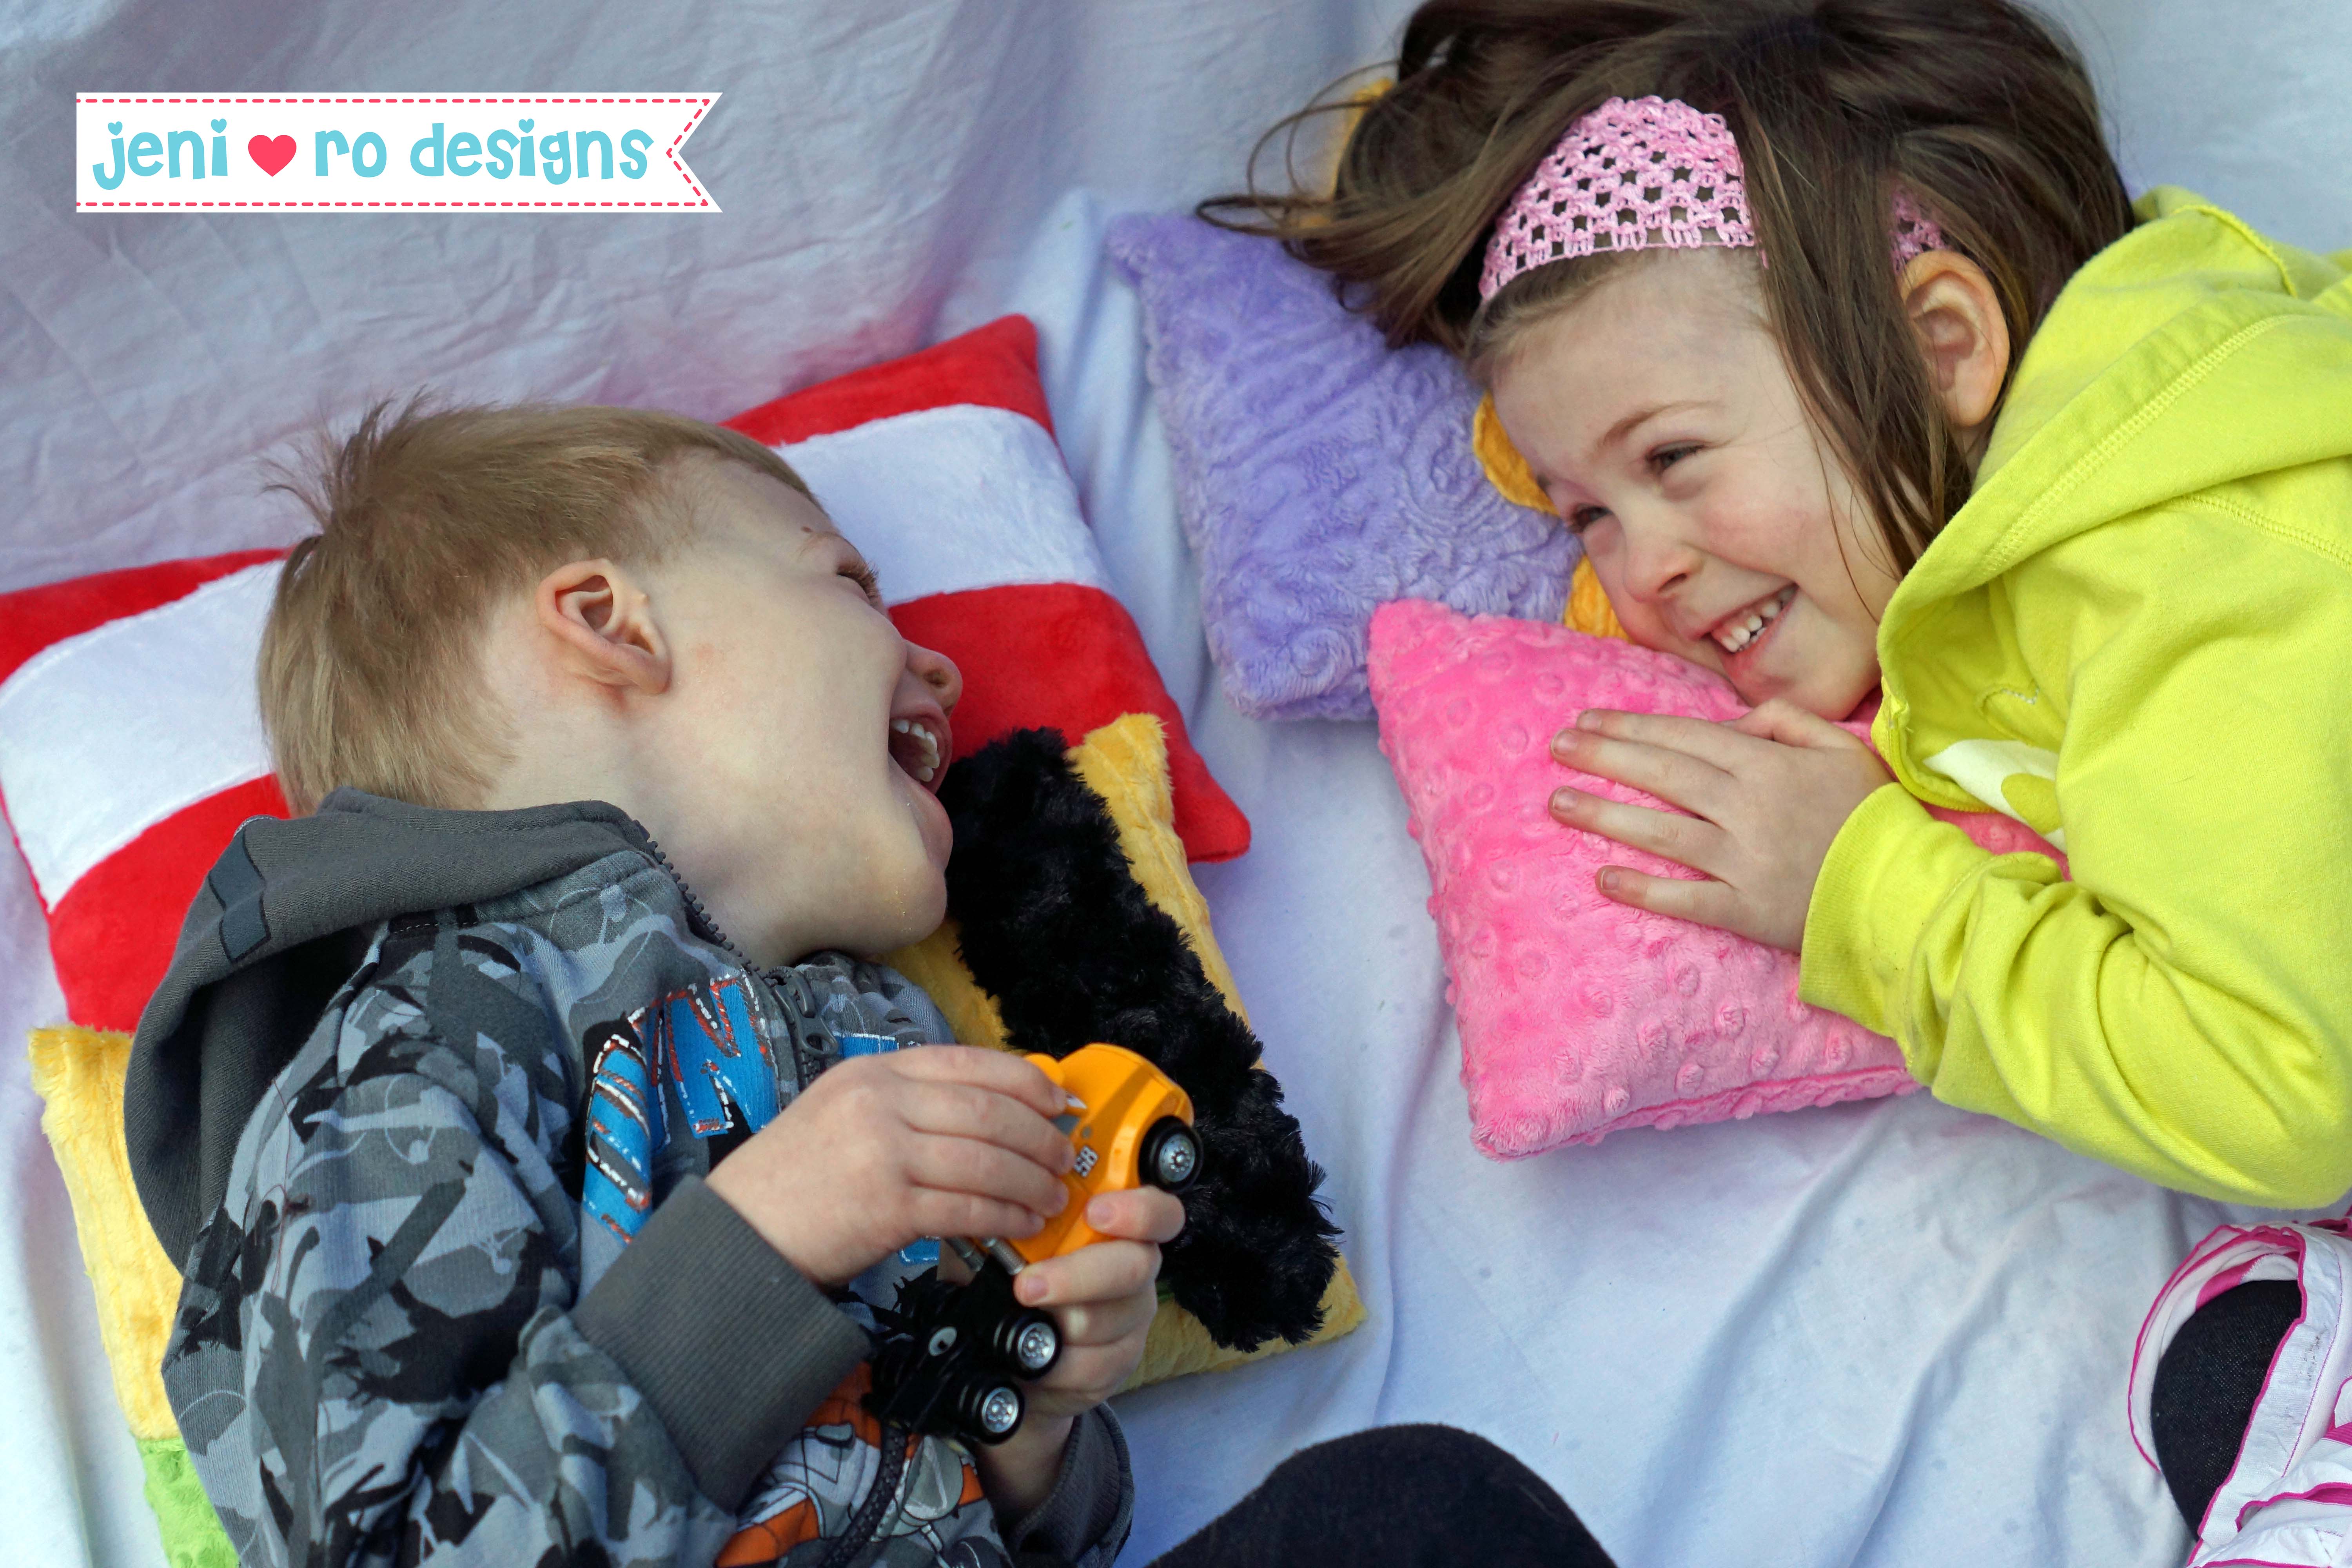
We are going to Disneyland for the first time with our kiddos and for the trip I wanted to make them travel pillows. These are smaller pillows that could easily be taken on the plane and used in the hotel. Because we were heading to Disneyland, I just had to make them Disney character inspired!!
These pillows are great for trips but they would make cute accent pillows for a bed as well! My daughter will love taking her princess pillow on our trip and now they are already a staple in her bed! They are pretty simple to make, do you want to know how? Of course you do!
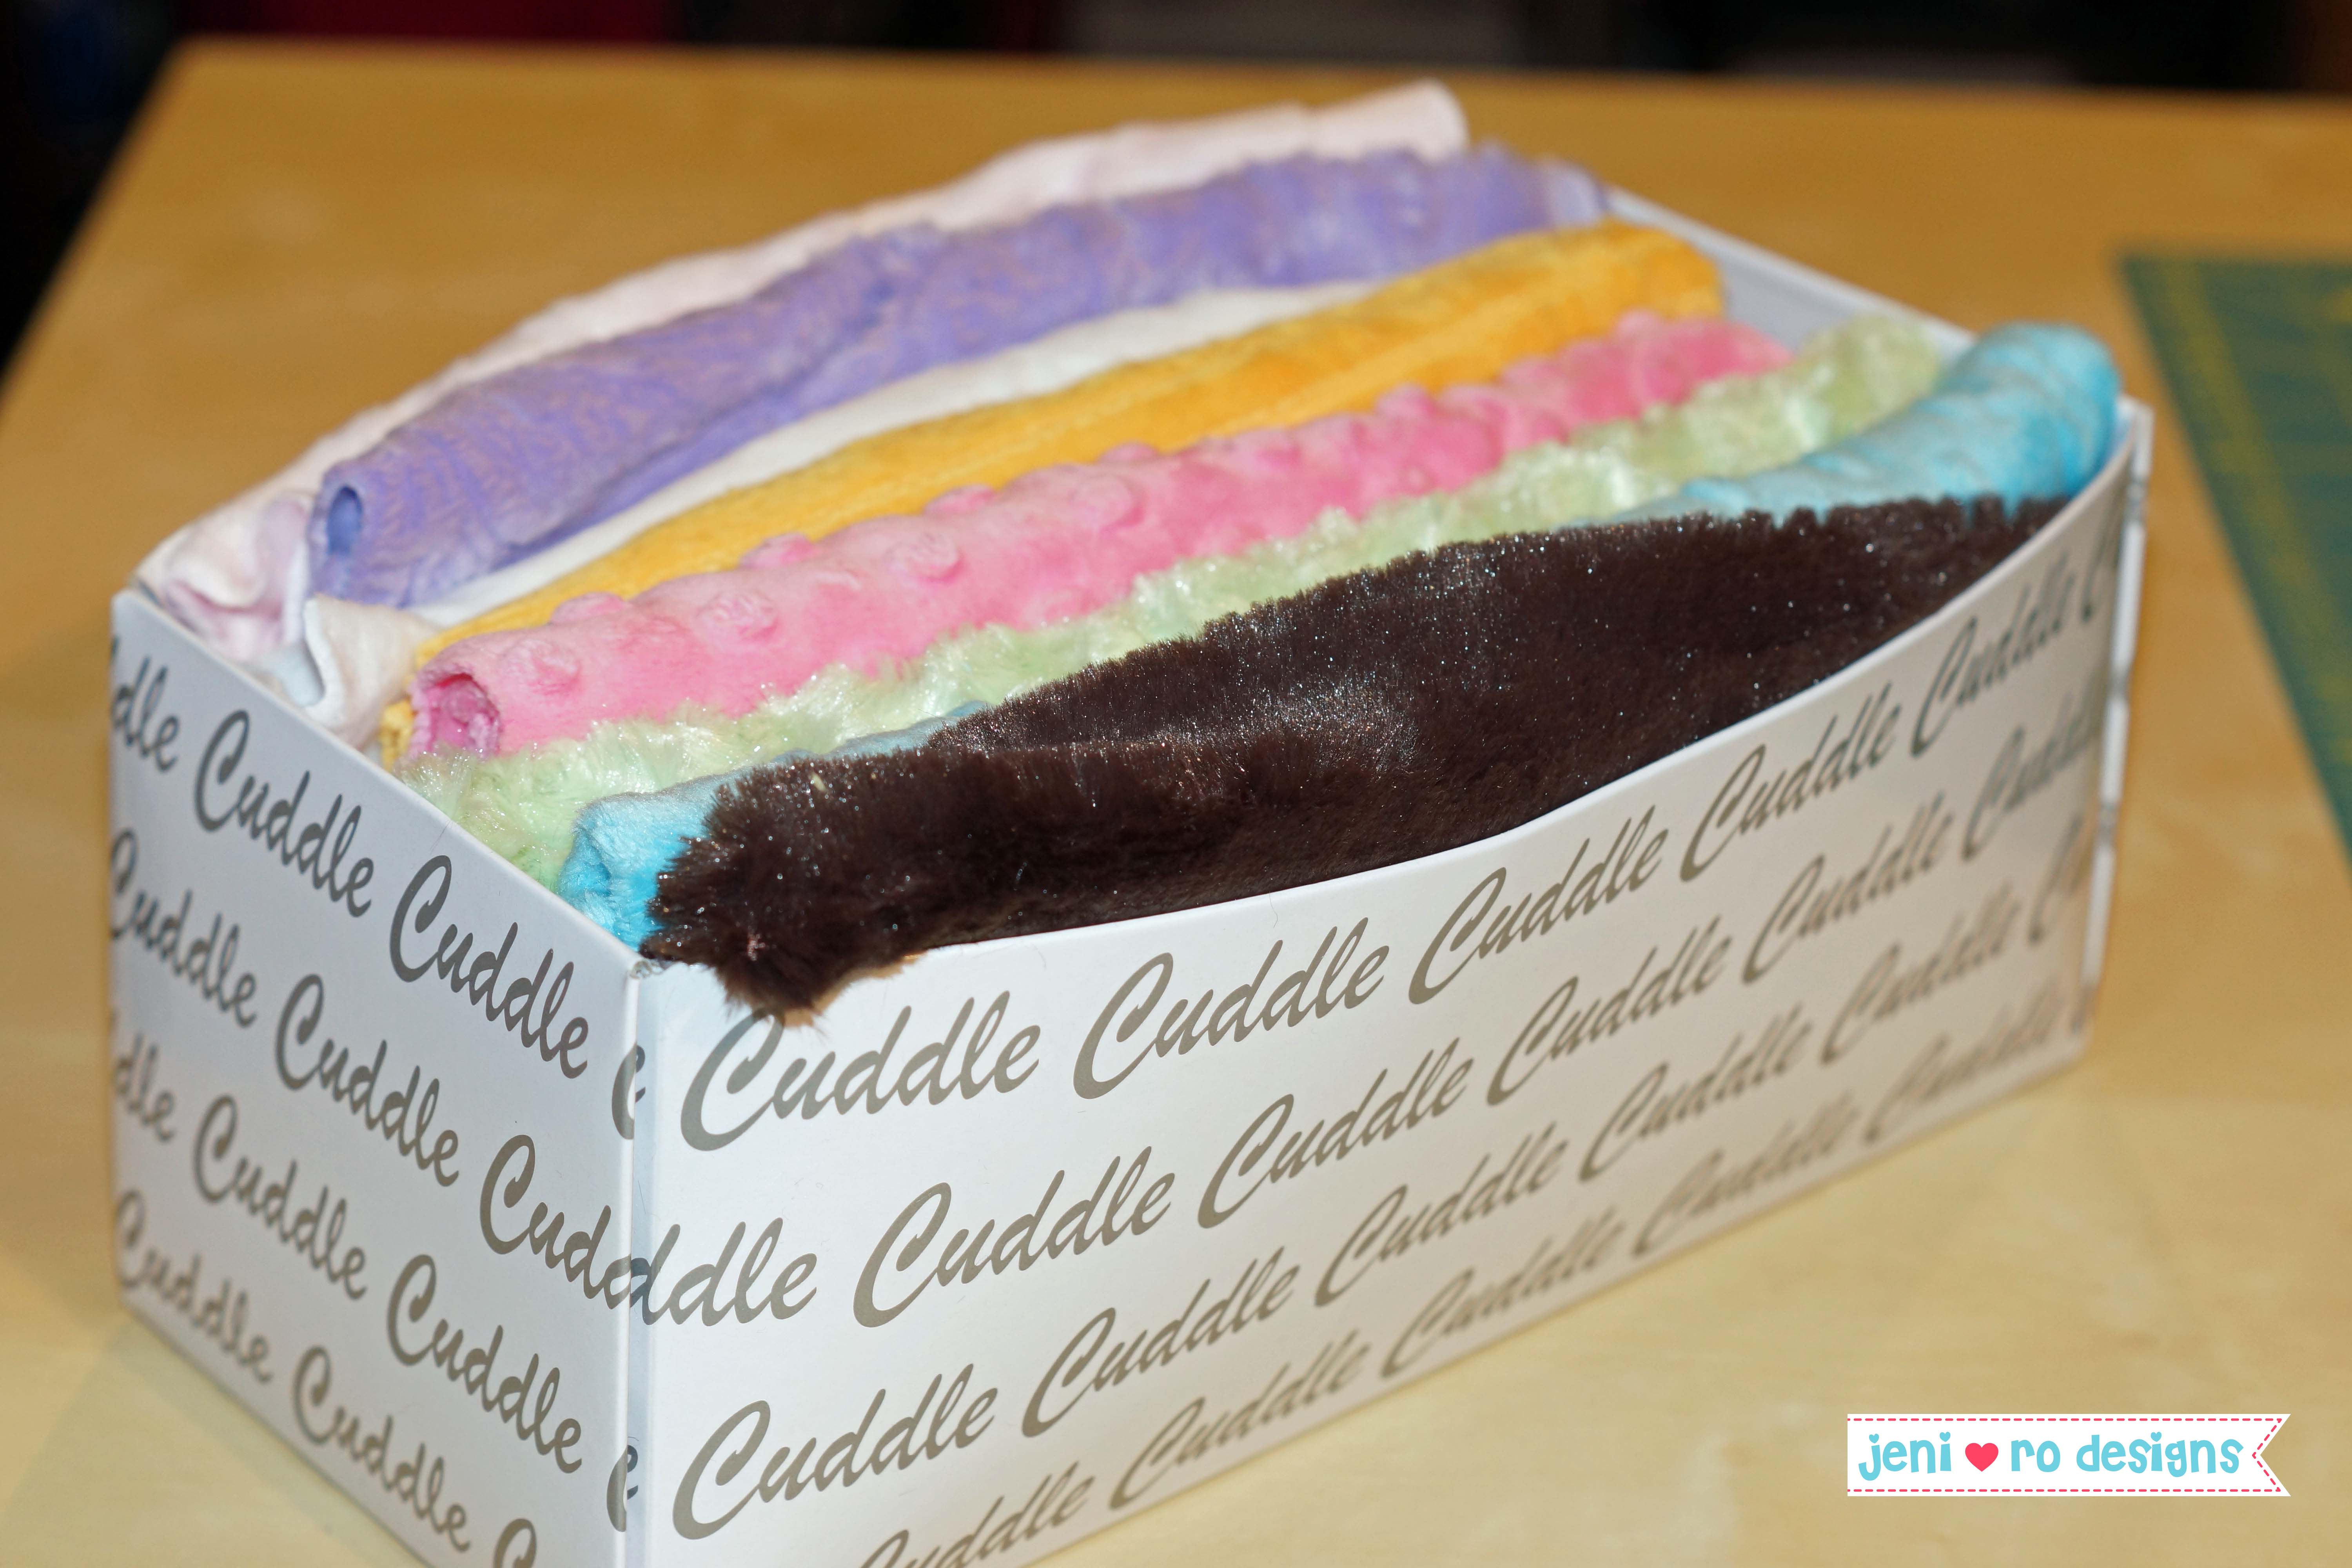
Shannon Fabrics sent me the Cuddle Quarter Kit - Kozy Pastel to work with, since I needed a variety of colors but didn't need a ton of yardage for the pillows. The kits worked out great! The kit I got had 8 pieces of different colors/textured Cuddle - cut to 9" x 54" (width of fabric) strips. The kit even comes with instructions on making a cute and simple baby blanket. Instead of making a blanket I cut up the pieces to make a few travel pillows! But you don't need the kit to make the pillows - all you need is 1/4 yard of cuddle, or even big scraps!
In this tutorial I will be going through the steps to make the pink Princess pillow version, my daughter says it's "Aurora" - aka Sleeping Beauty. **Keep reading and there might be a surprise at the end. Ok there will be a surprise!
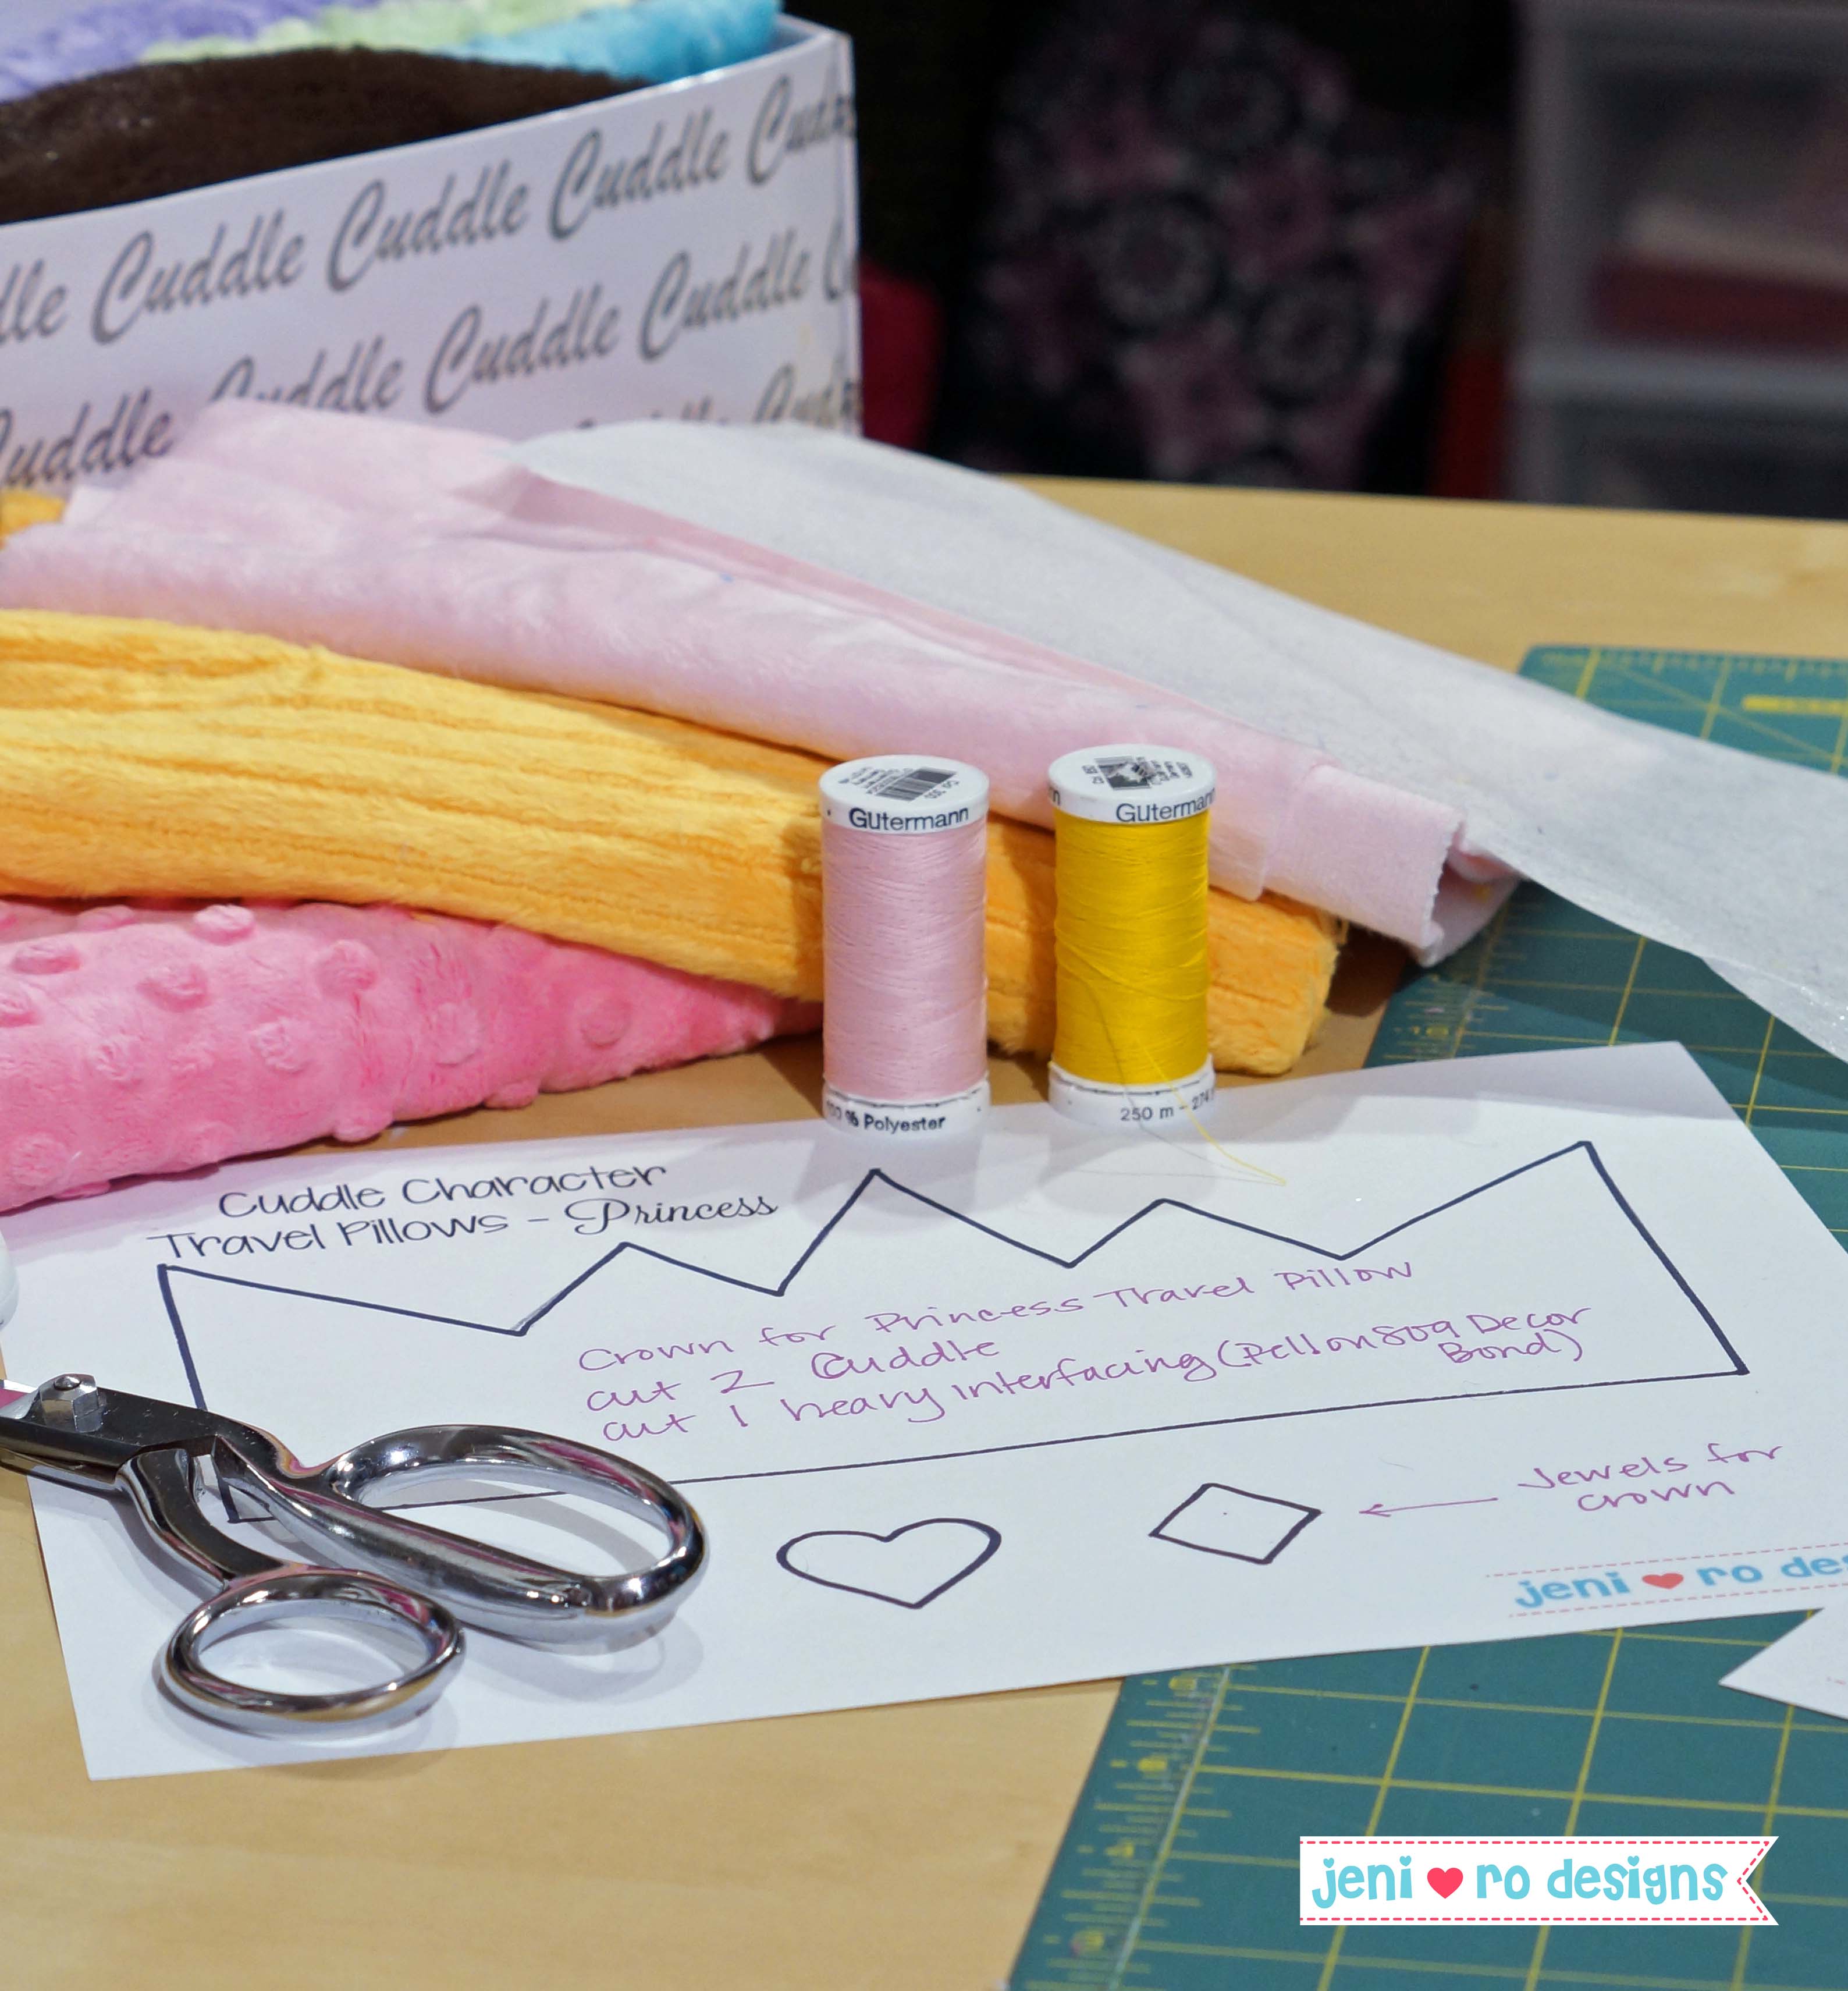 Materials needed:
- Dark pink Cuddle - 9" strips or 1/4" yard
- Scraps of yellow and light pink Cuddle
- Heavy interfacing - I used Pellon 809 Décor Bond
- Matching thread
- Dritz Flat Flower Head Pins
- Pins or clips - you know I love those Clover Wonder Clips
- Fairfield Poly-Fil Stuffing
- Schmetz 90 sharp needle
- Pattern pieces for crown and jewels - Download the pattern here - cuddle travel pillow - princess crown pattern
Step 1: Gather materials listed above as well as print out the pattern for the crown and jewels.
Step 2: Cut pieces
For the Princess pillow you will need:
- 2 - 9" x 15" pieces of the dark pink Cuddle
- 2 - crown pieces from yellow Cuddle
- 1 - crown piece from interfacing
- 2 - heart jewel pieces from light pink Cuddle
- 4 - diamond jewel pieces from dark pink Cuddle (you can decorate the crown however you like, this is just what I did)
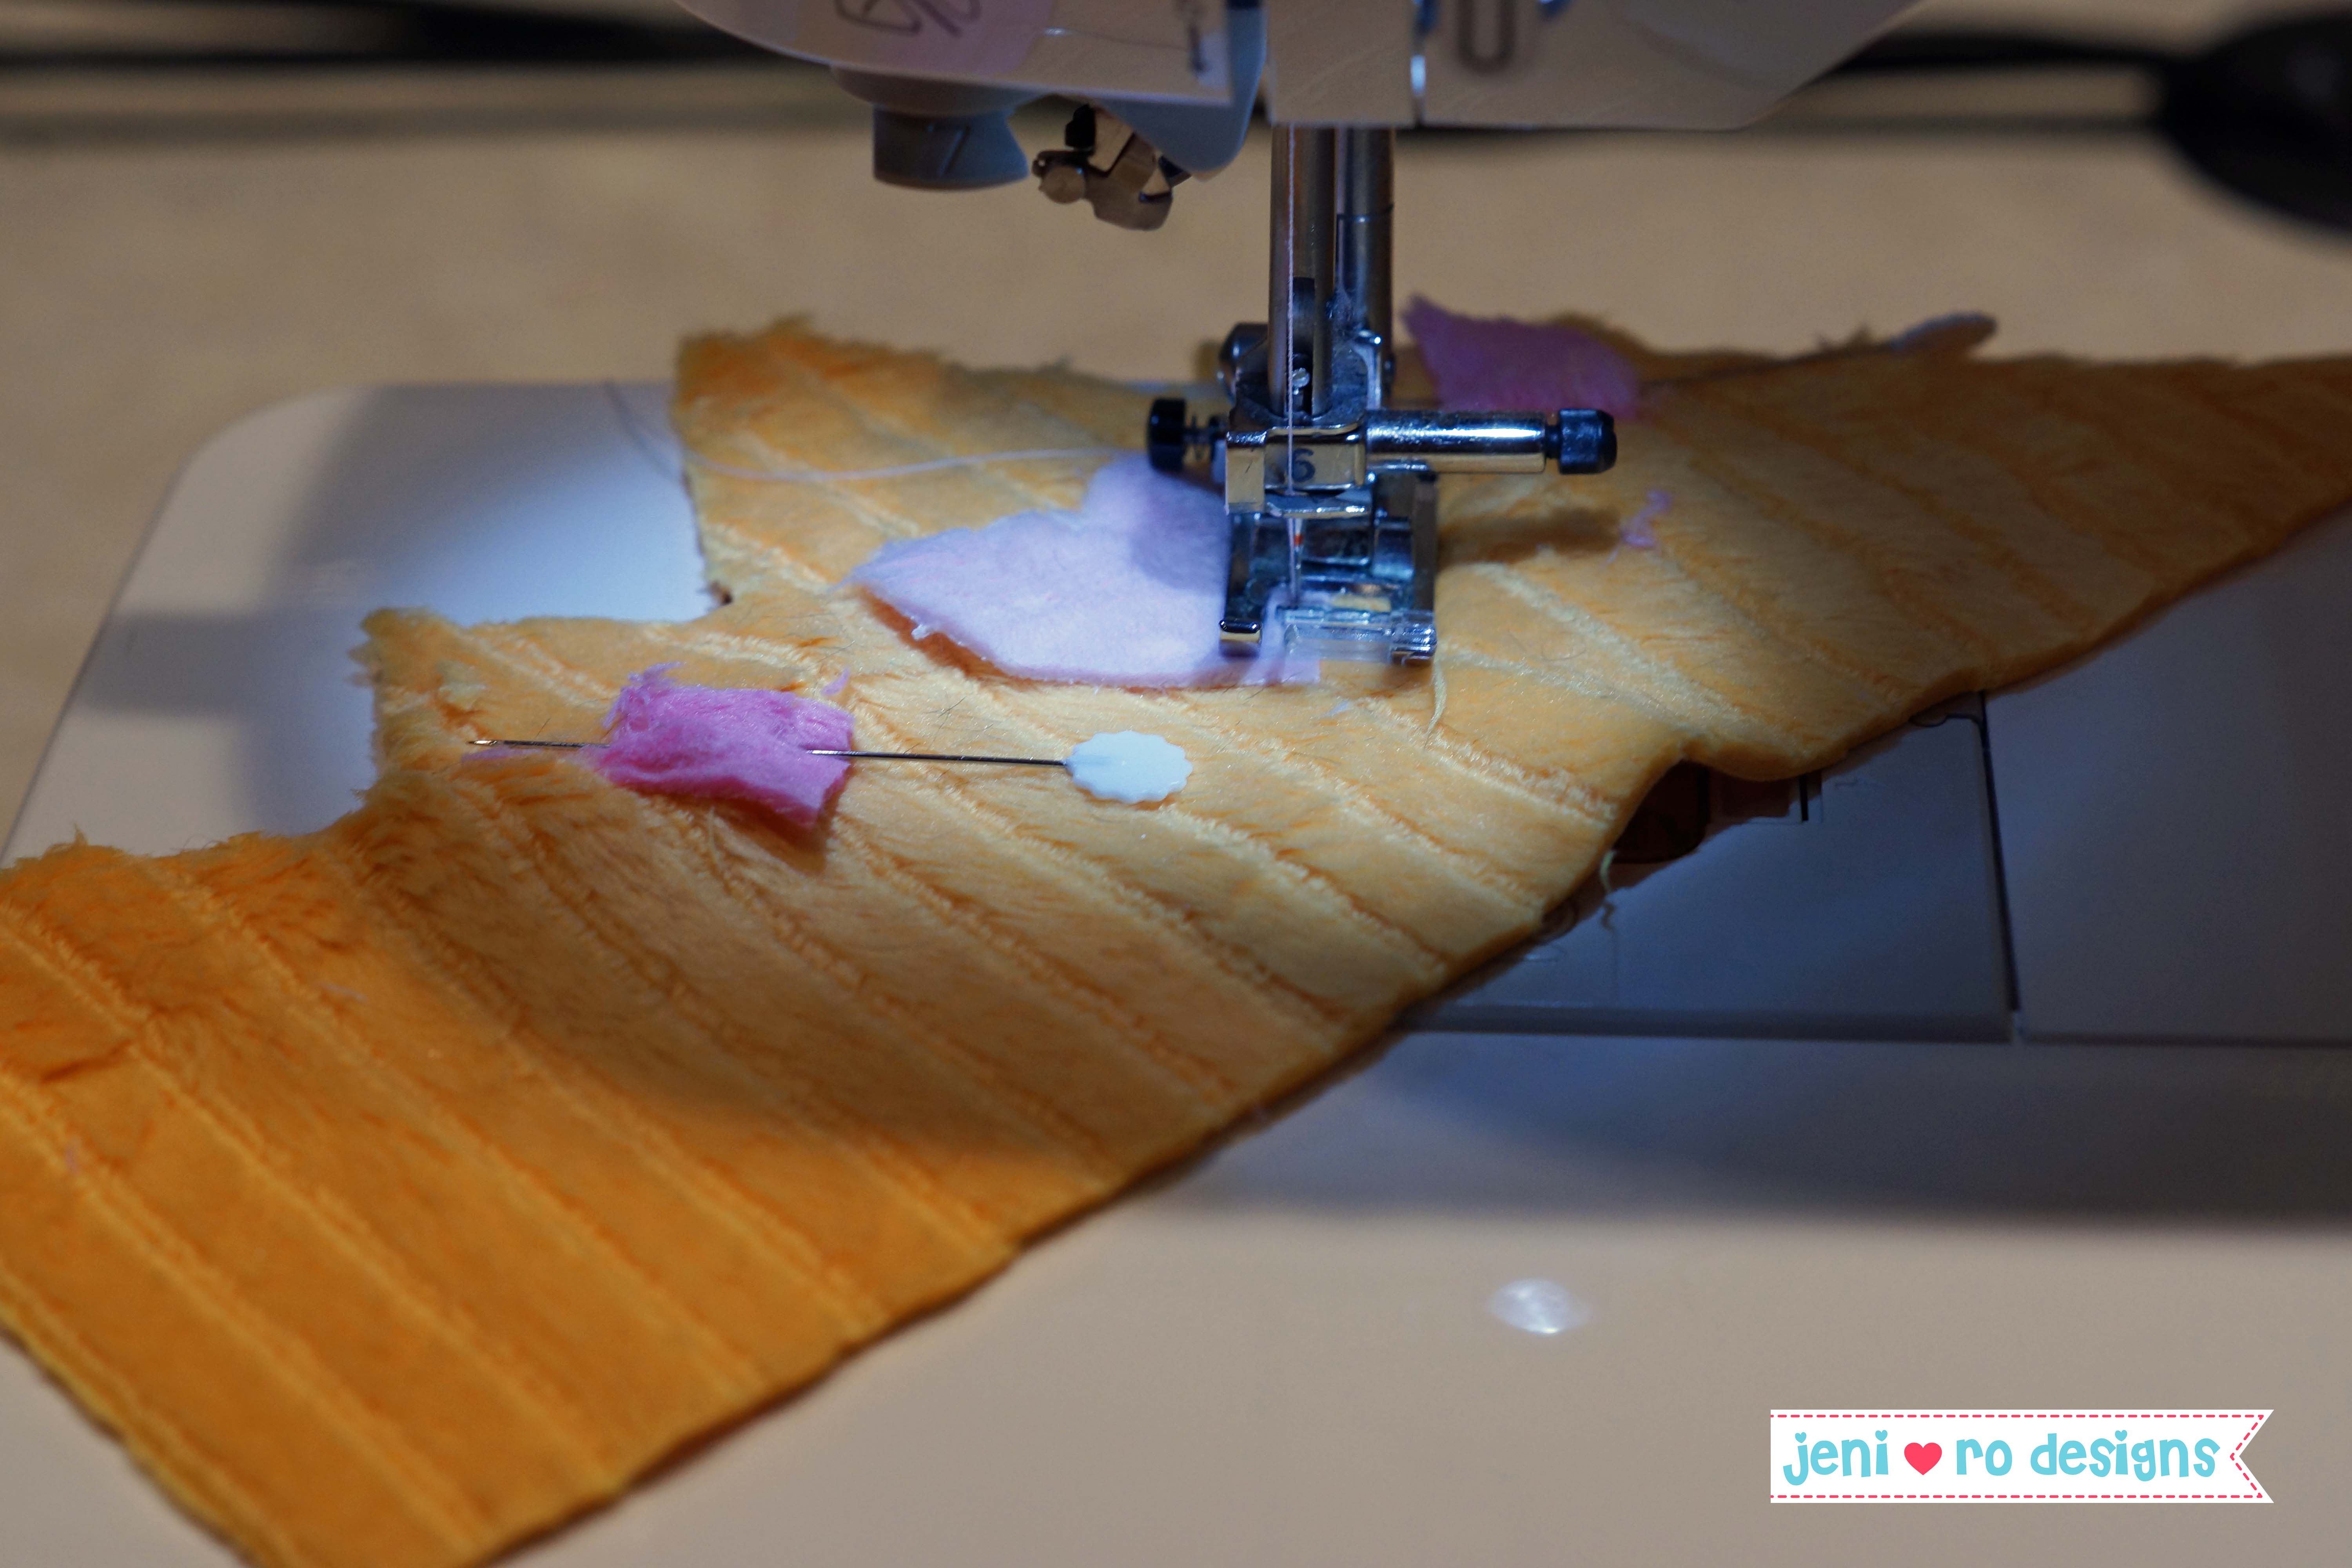
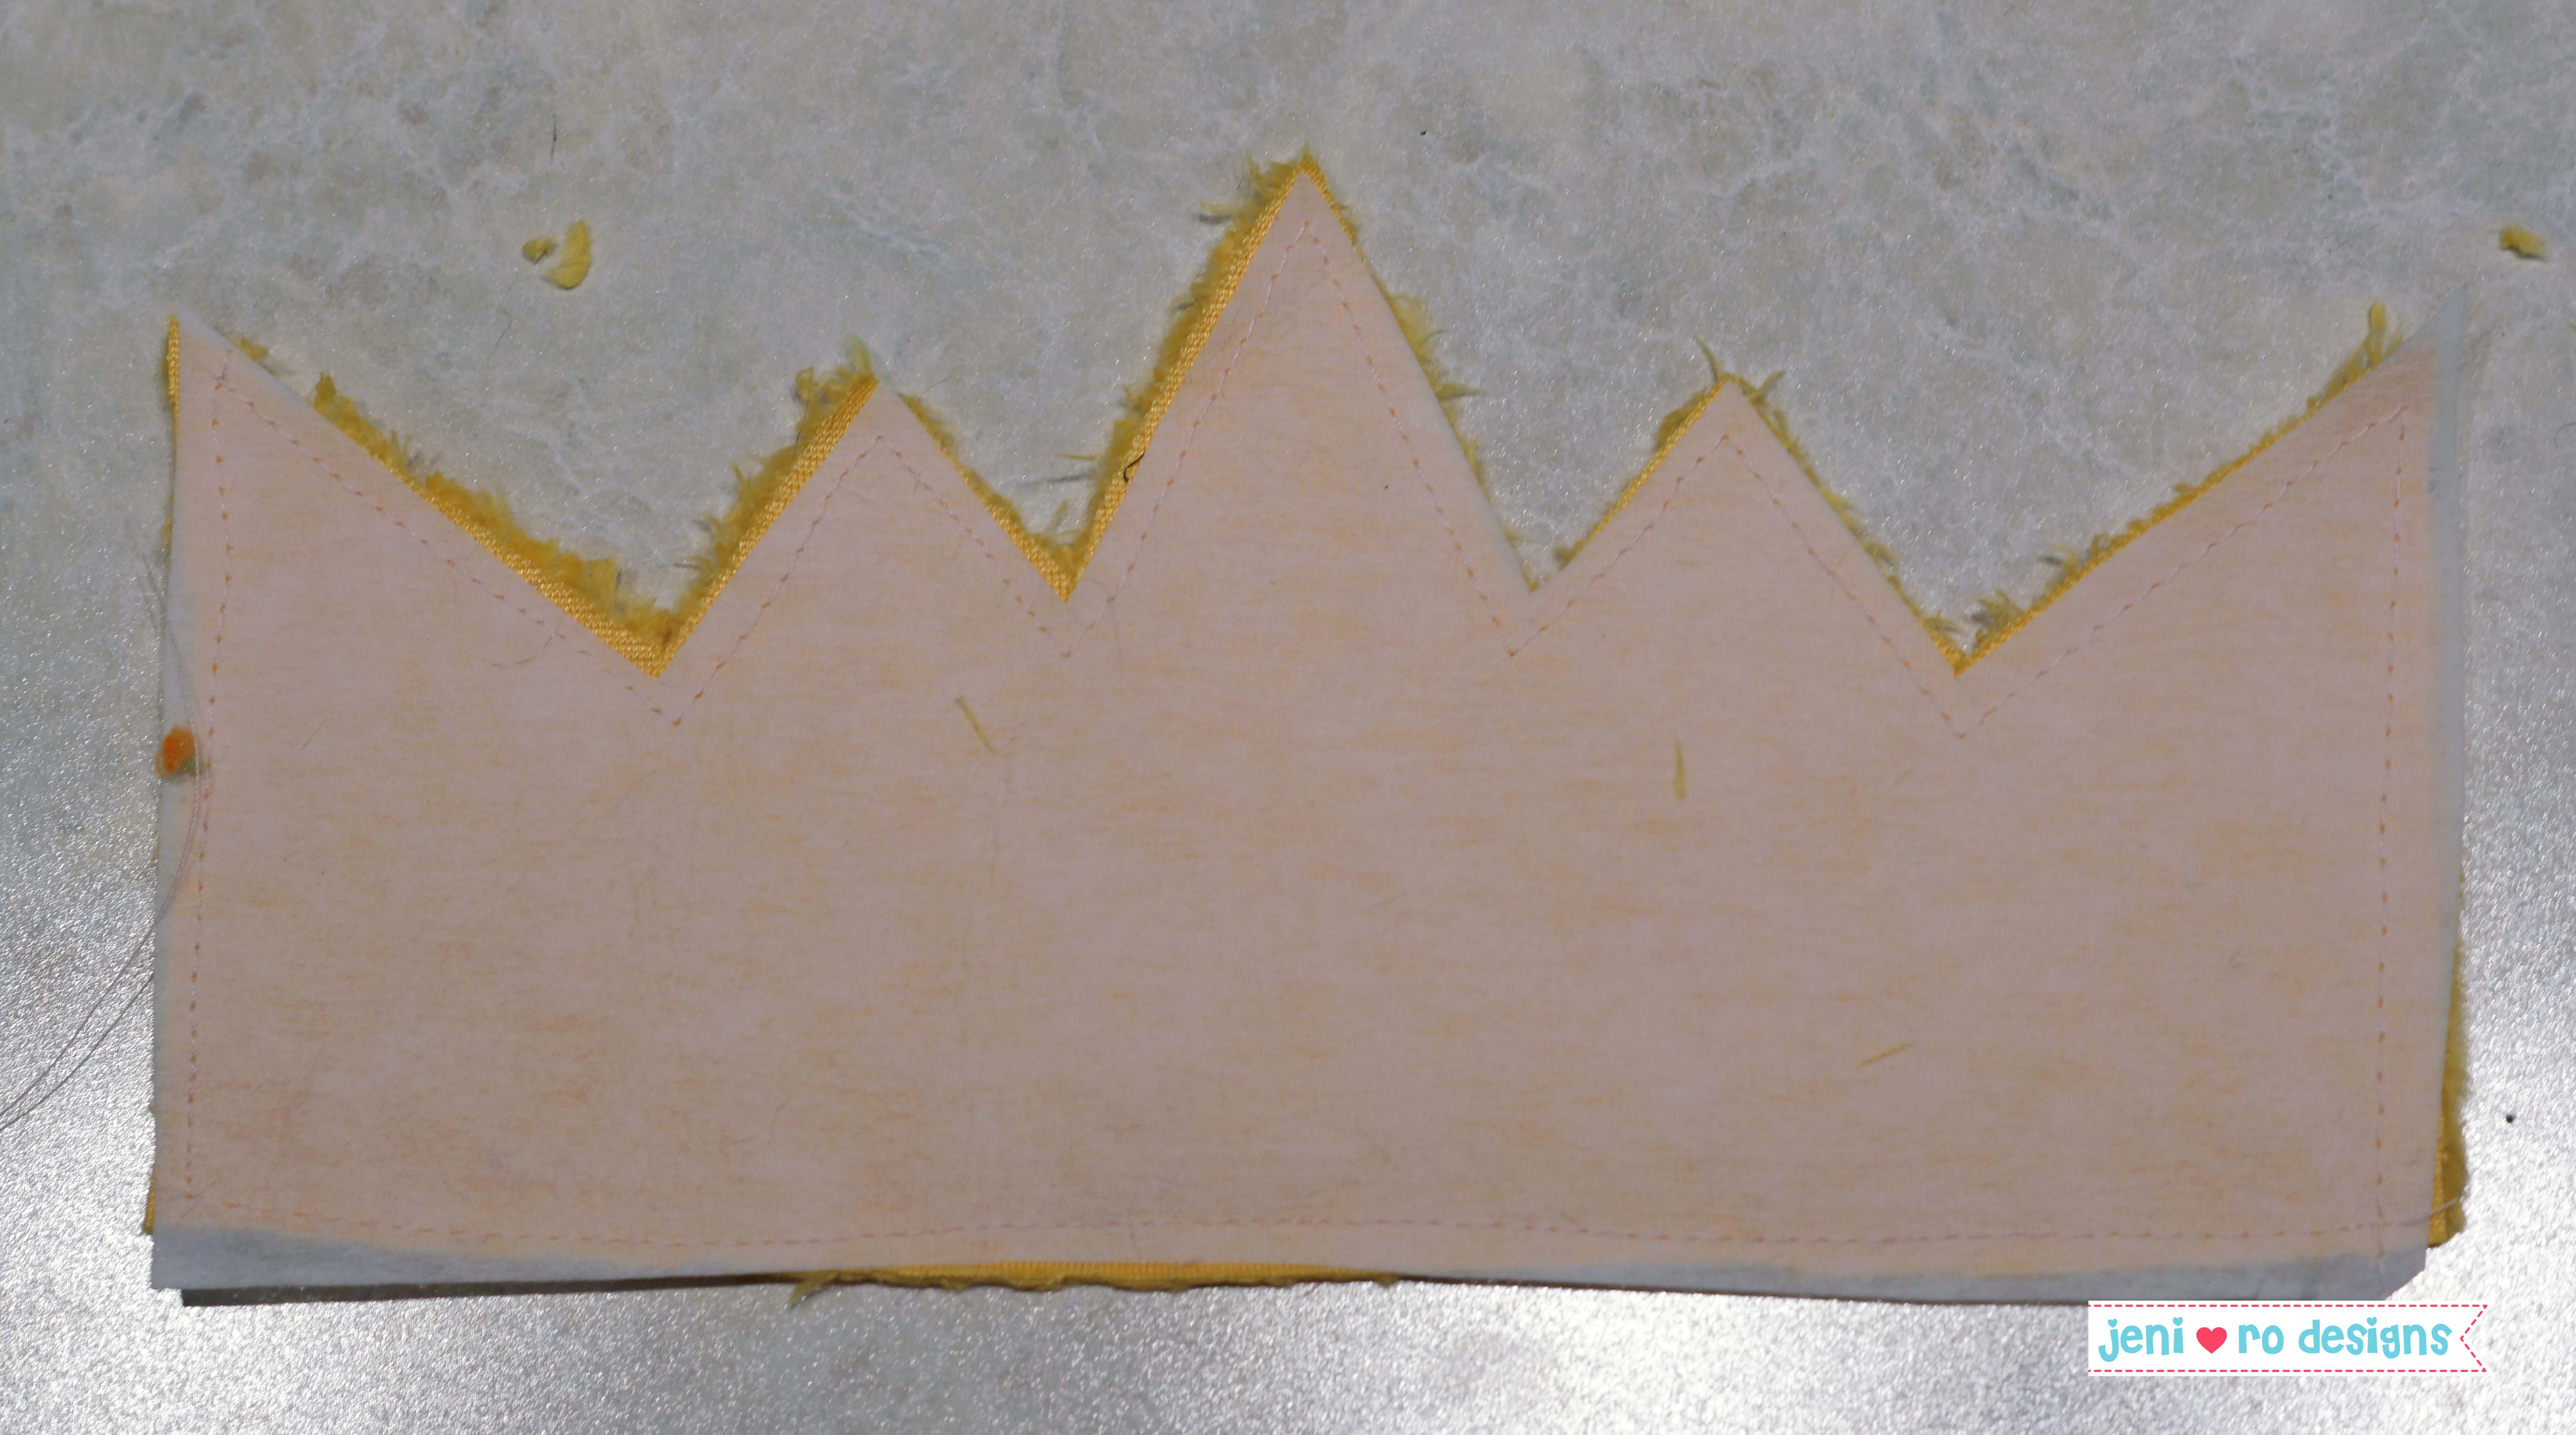
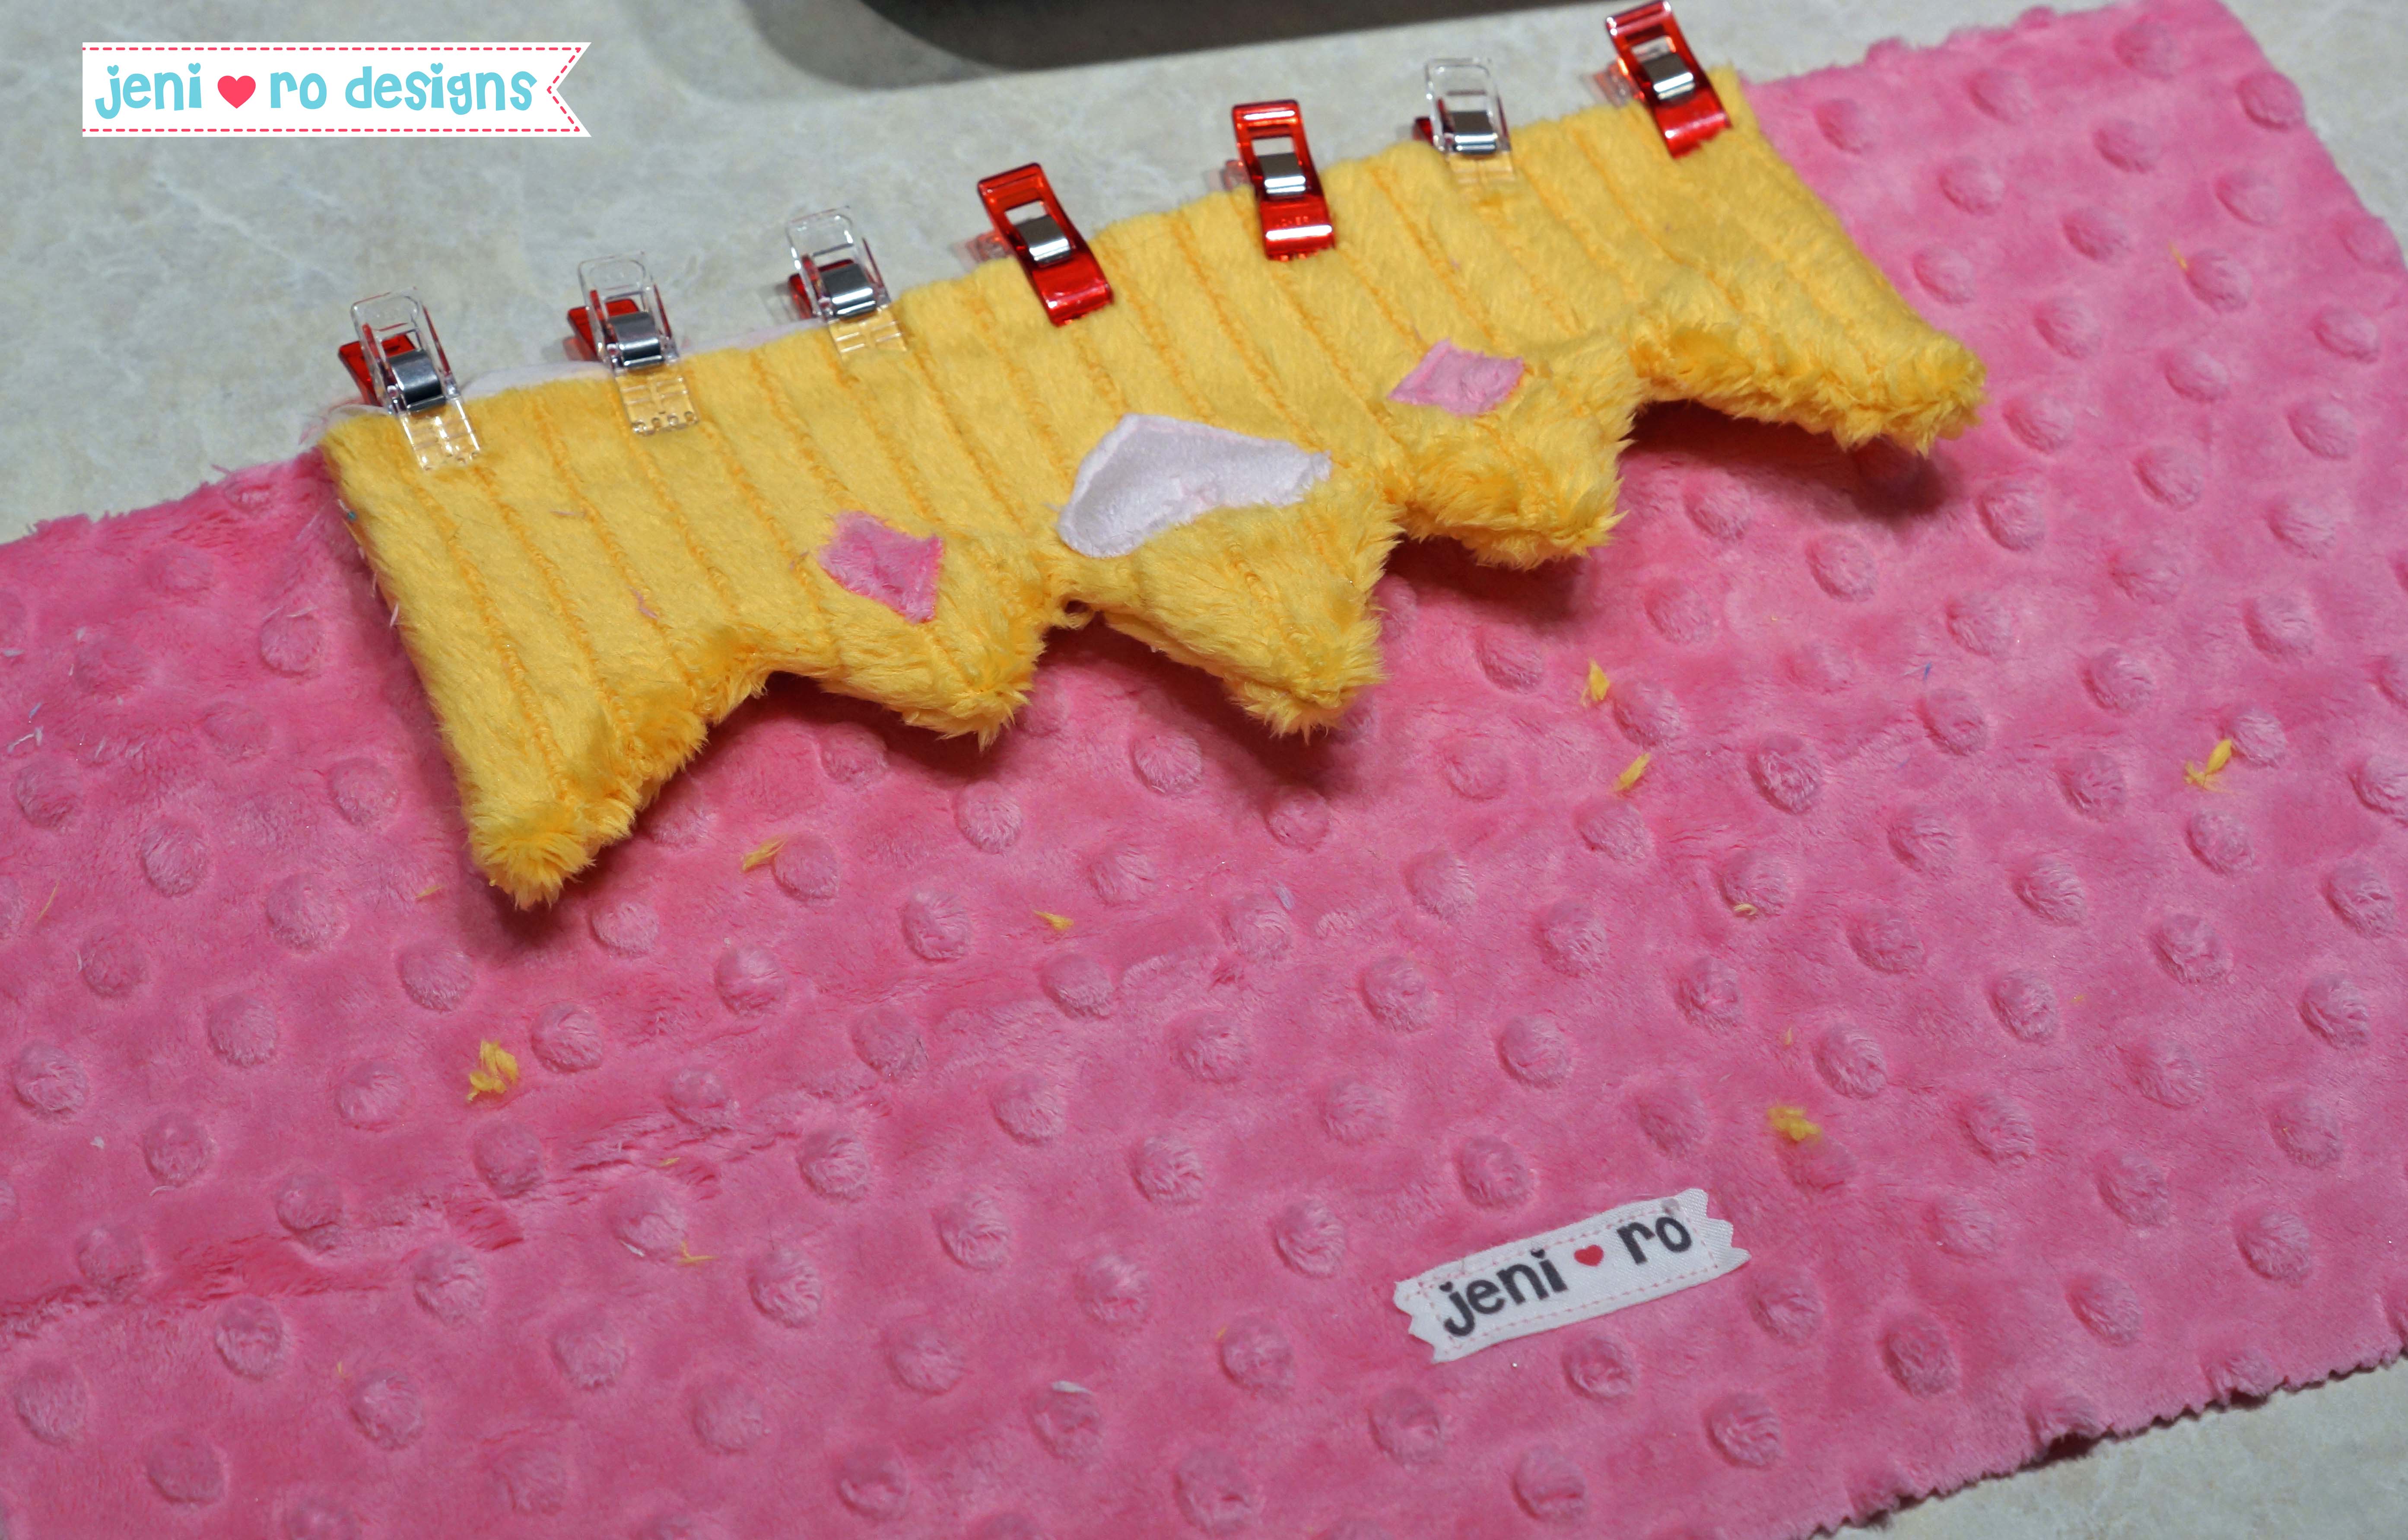
Step 3: Applique the jewels onto the crown
Pin the heart and diamonds to each crown piece as show in the picture
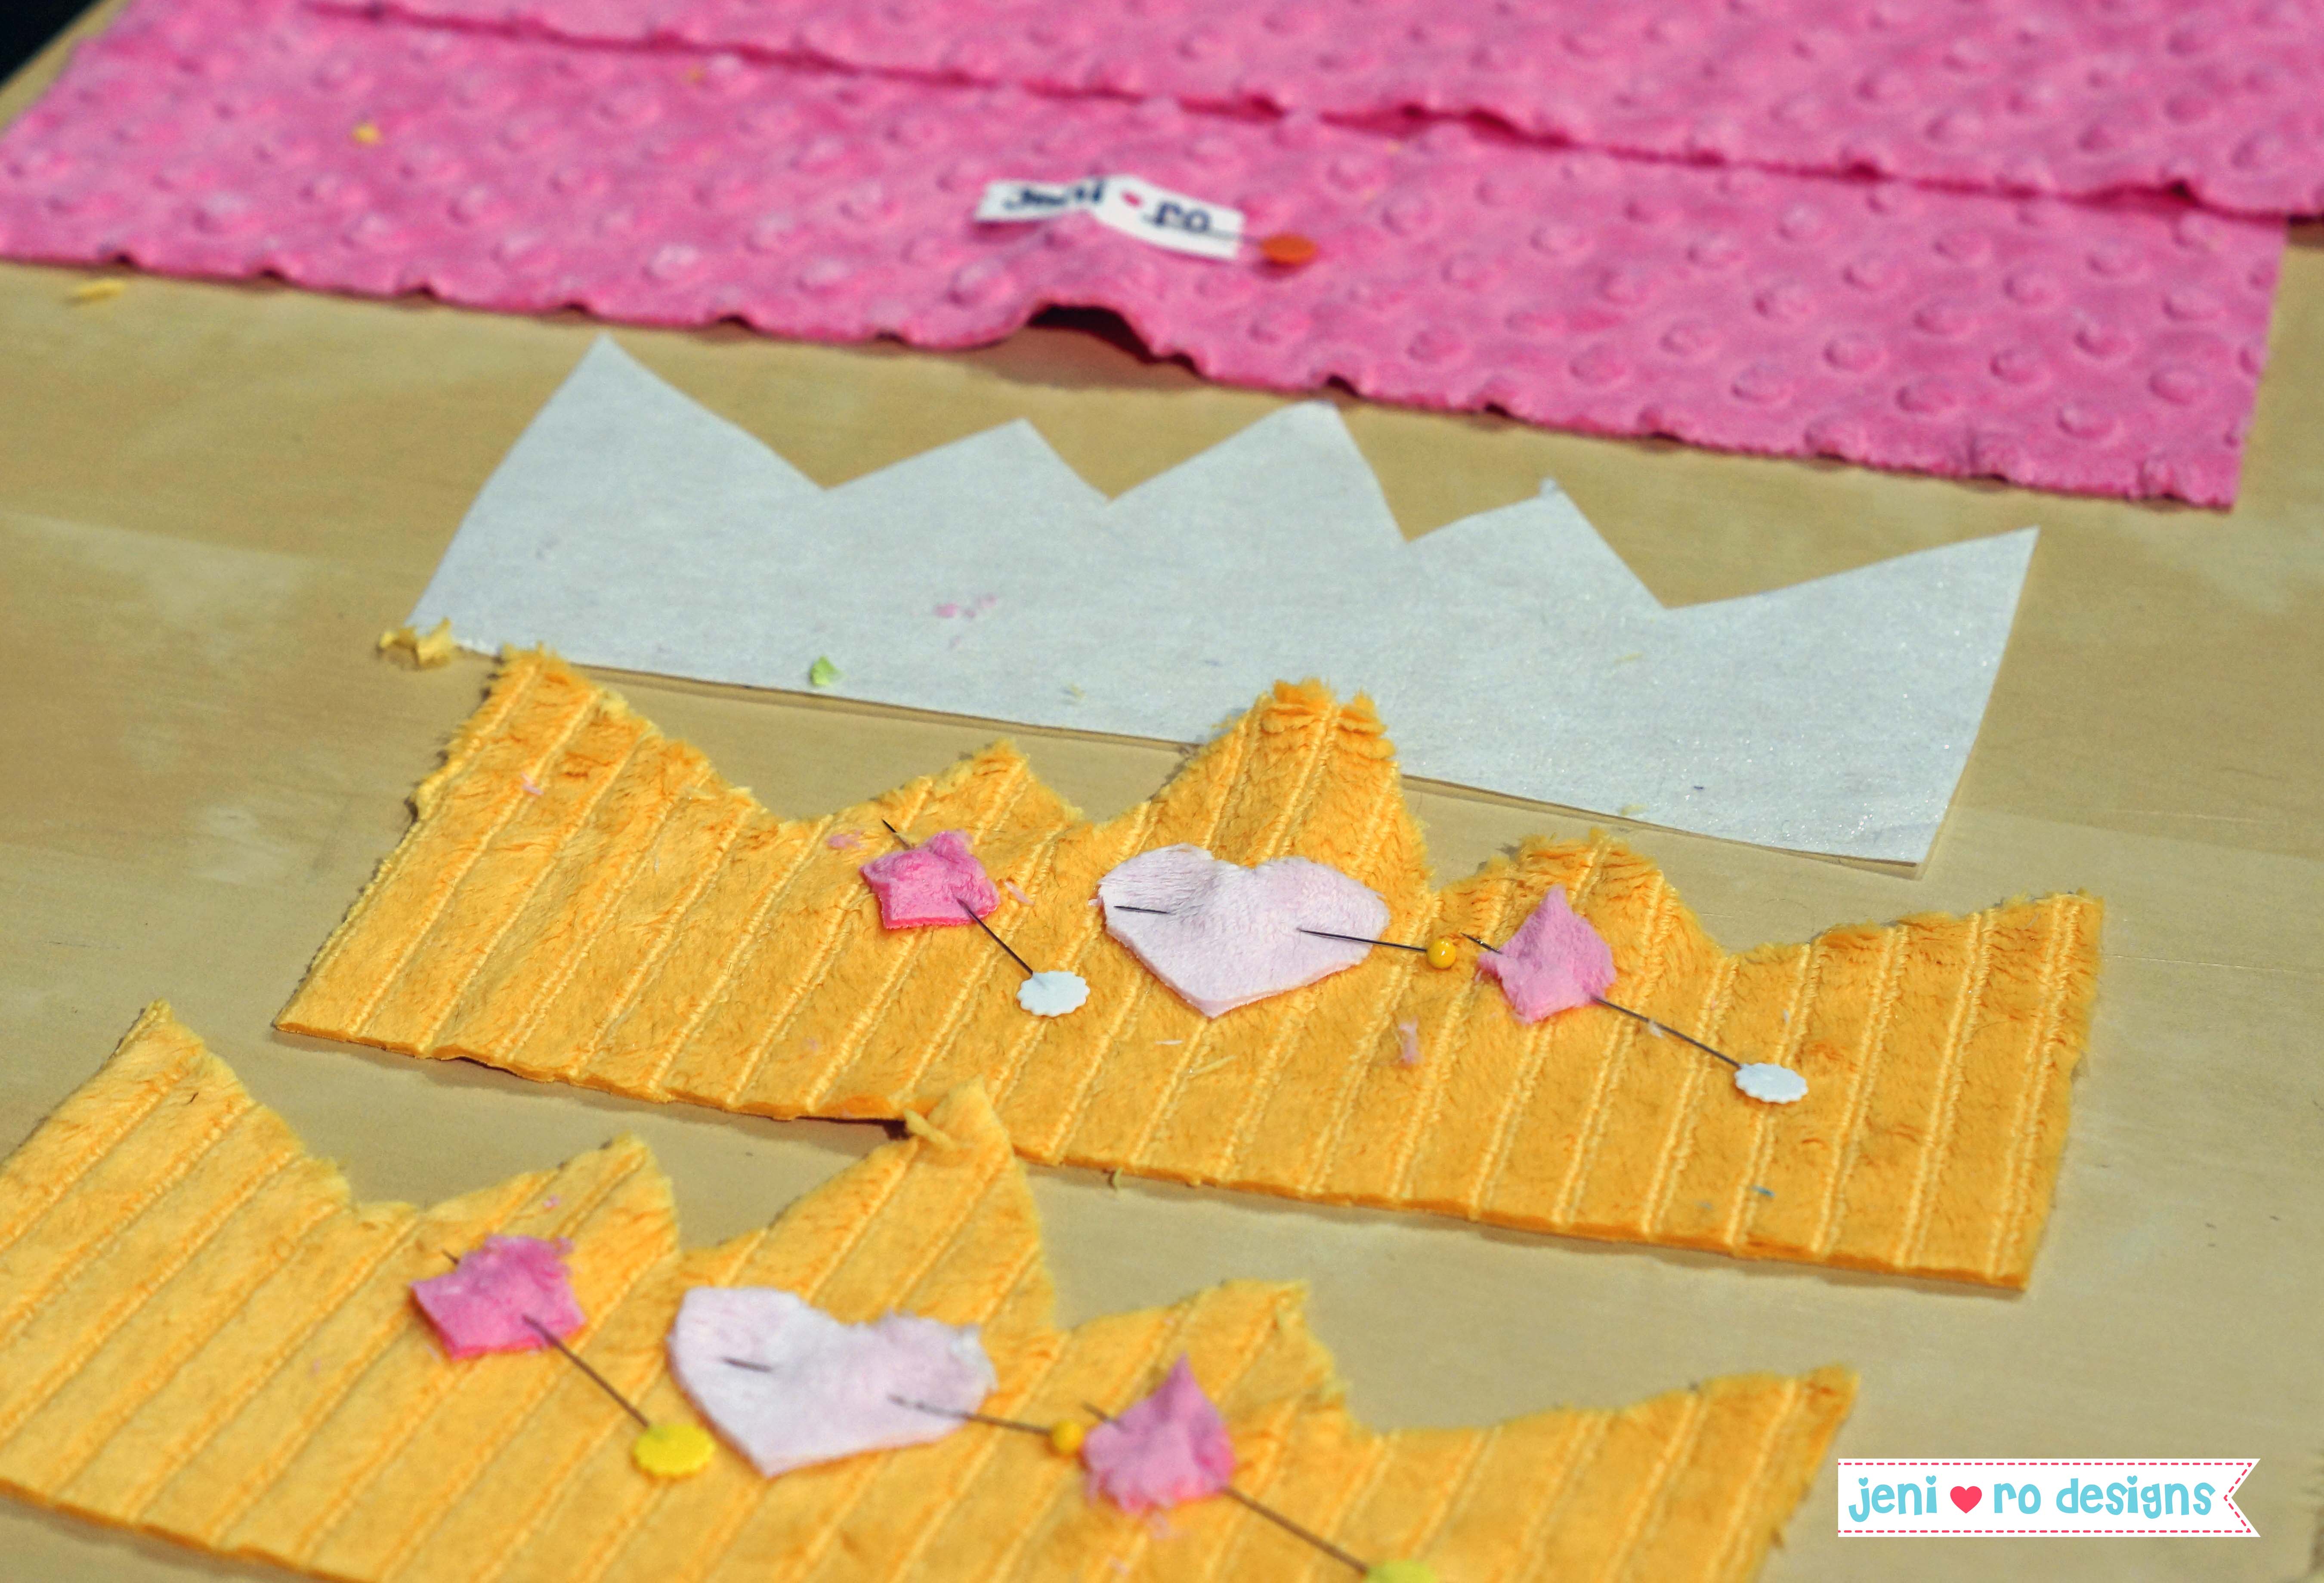
Sew around the edge of the jewel piece to secure to the crown.
At this point you can sew a tag onto one of the pillow pieces if desired.
Step 4: Baste the interfacing piece to the wrong side of one crown pieces. If you don't have textured cuddle, you can iron it on if the interfacing is fusible. Please excuse the "Cuddle dust" - sewing is messy, that's why it's great if you keep a lint roller handy!
Step 5: Pin the right sides of the crown pieces together. Remember to pin well, Cuddle is slippery!
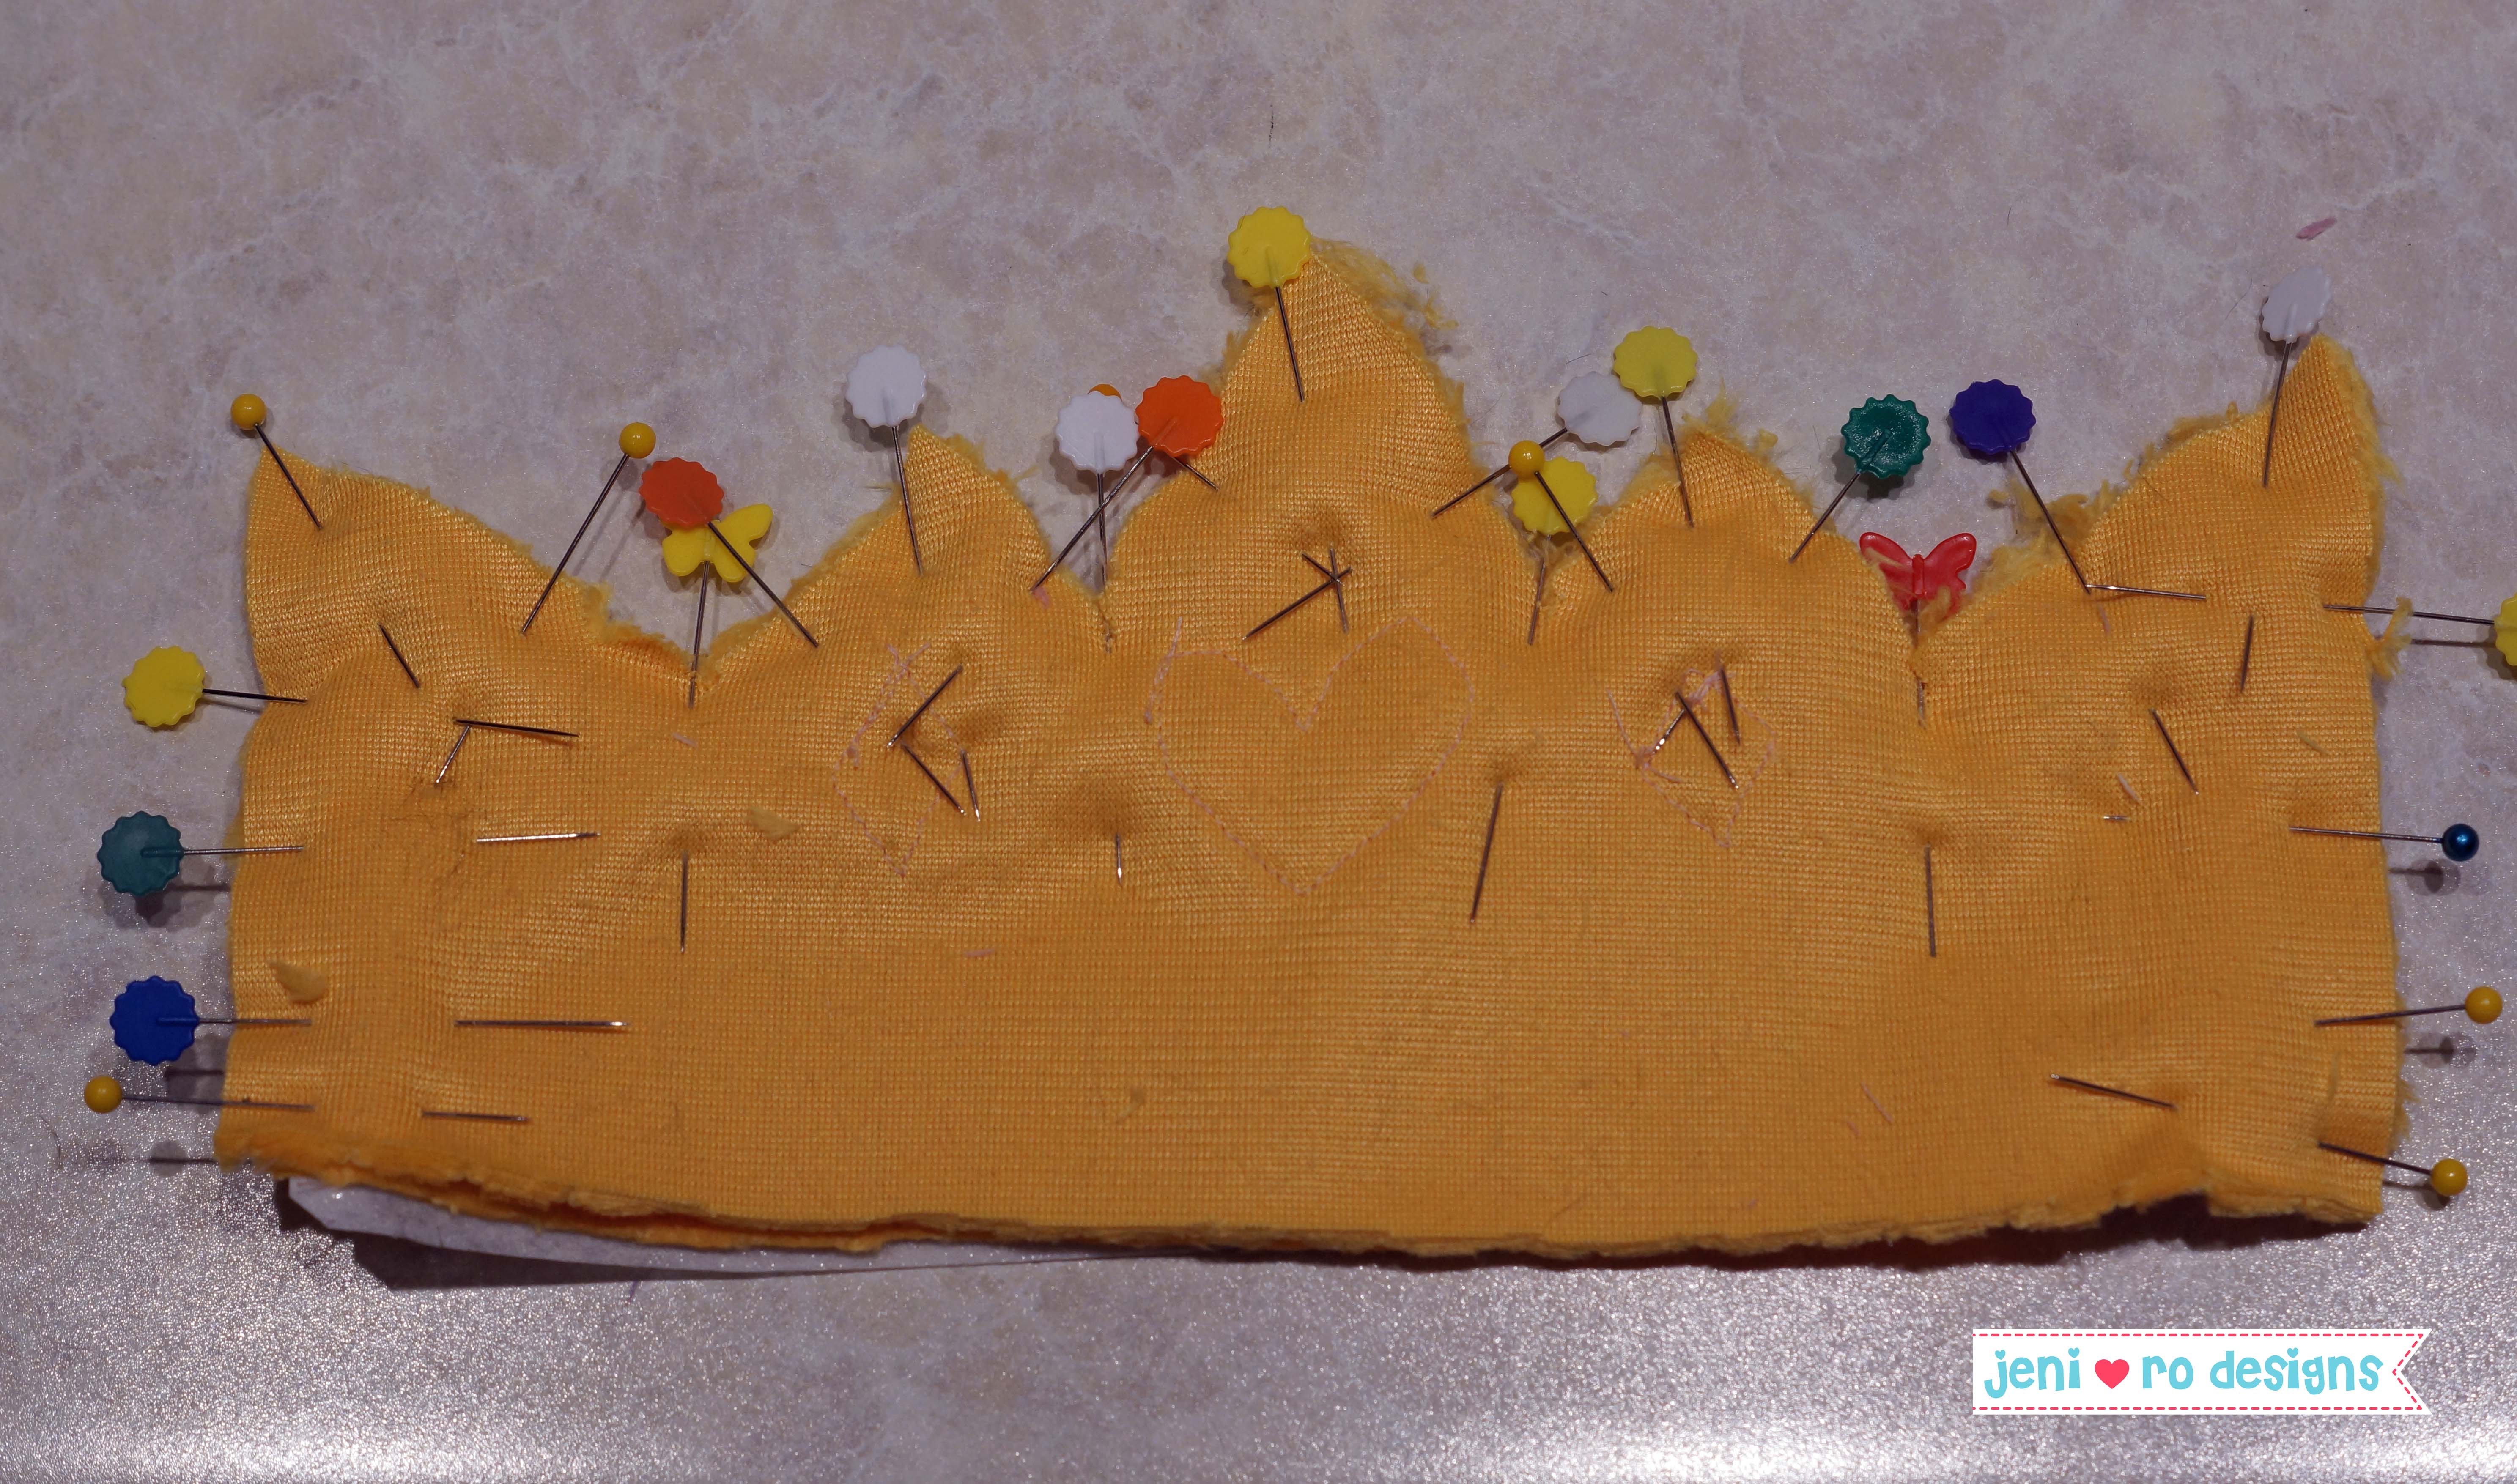
Sew the crown pieces with a 1/4" seam, pivoting at each point (up and down) and making sure both pieces are attached in the seam. Leave the bottom edge open for turning.
Step 6: Check to make sure that there are no holes in the stitching, if so, just re-sew the seam. Clip the tops of each spike.
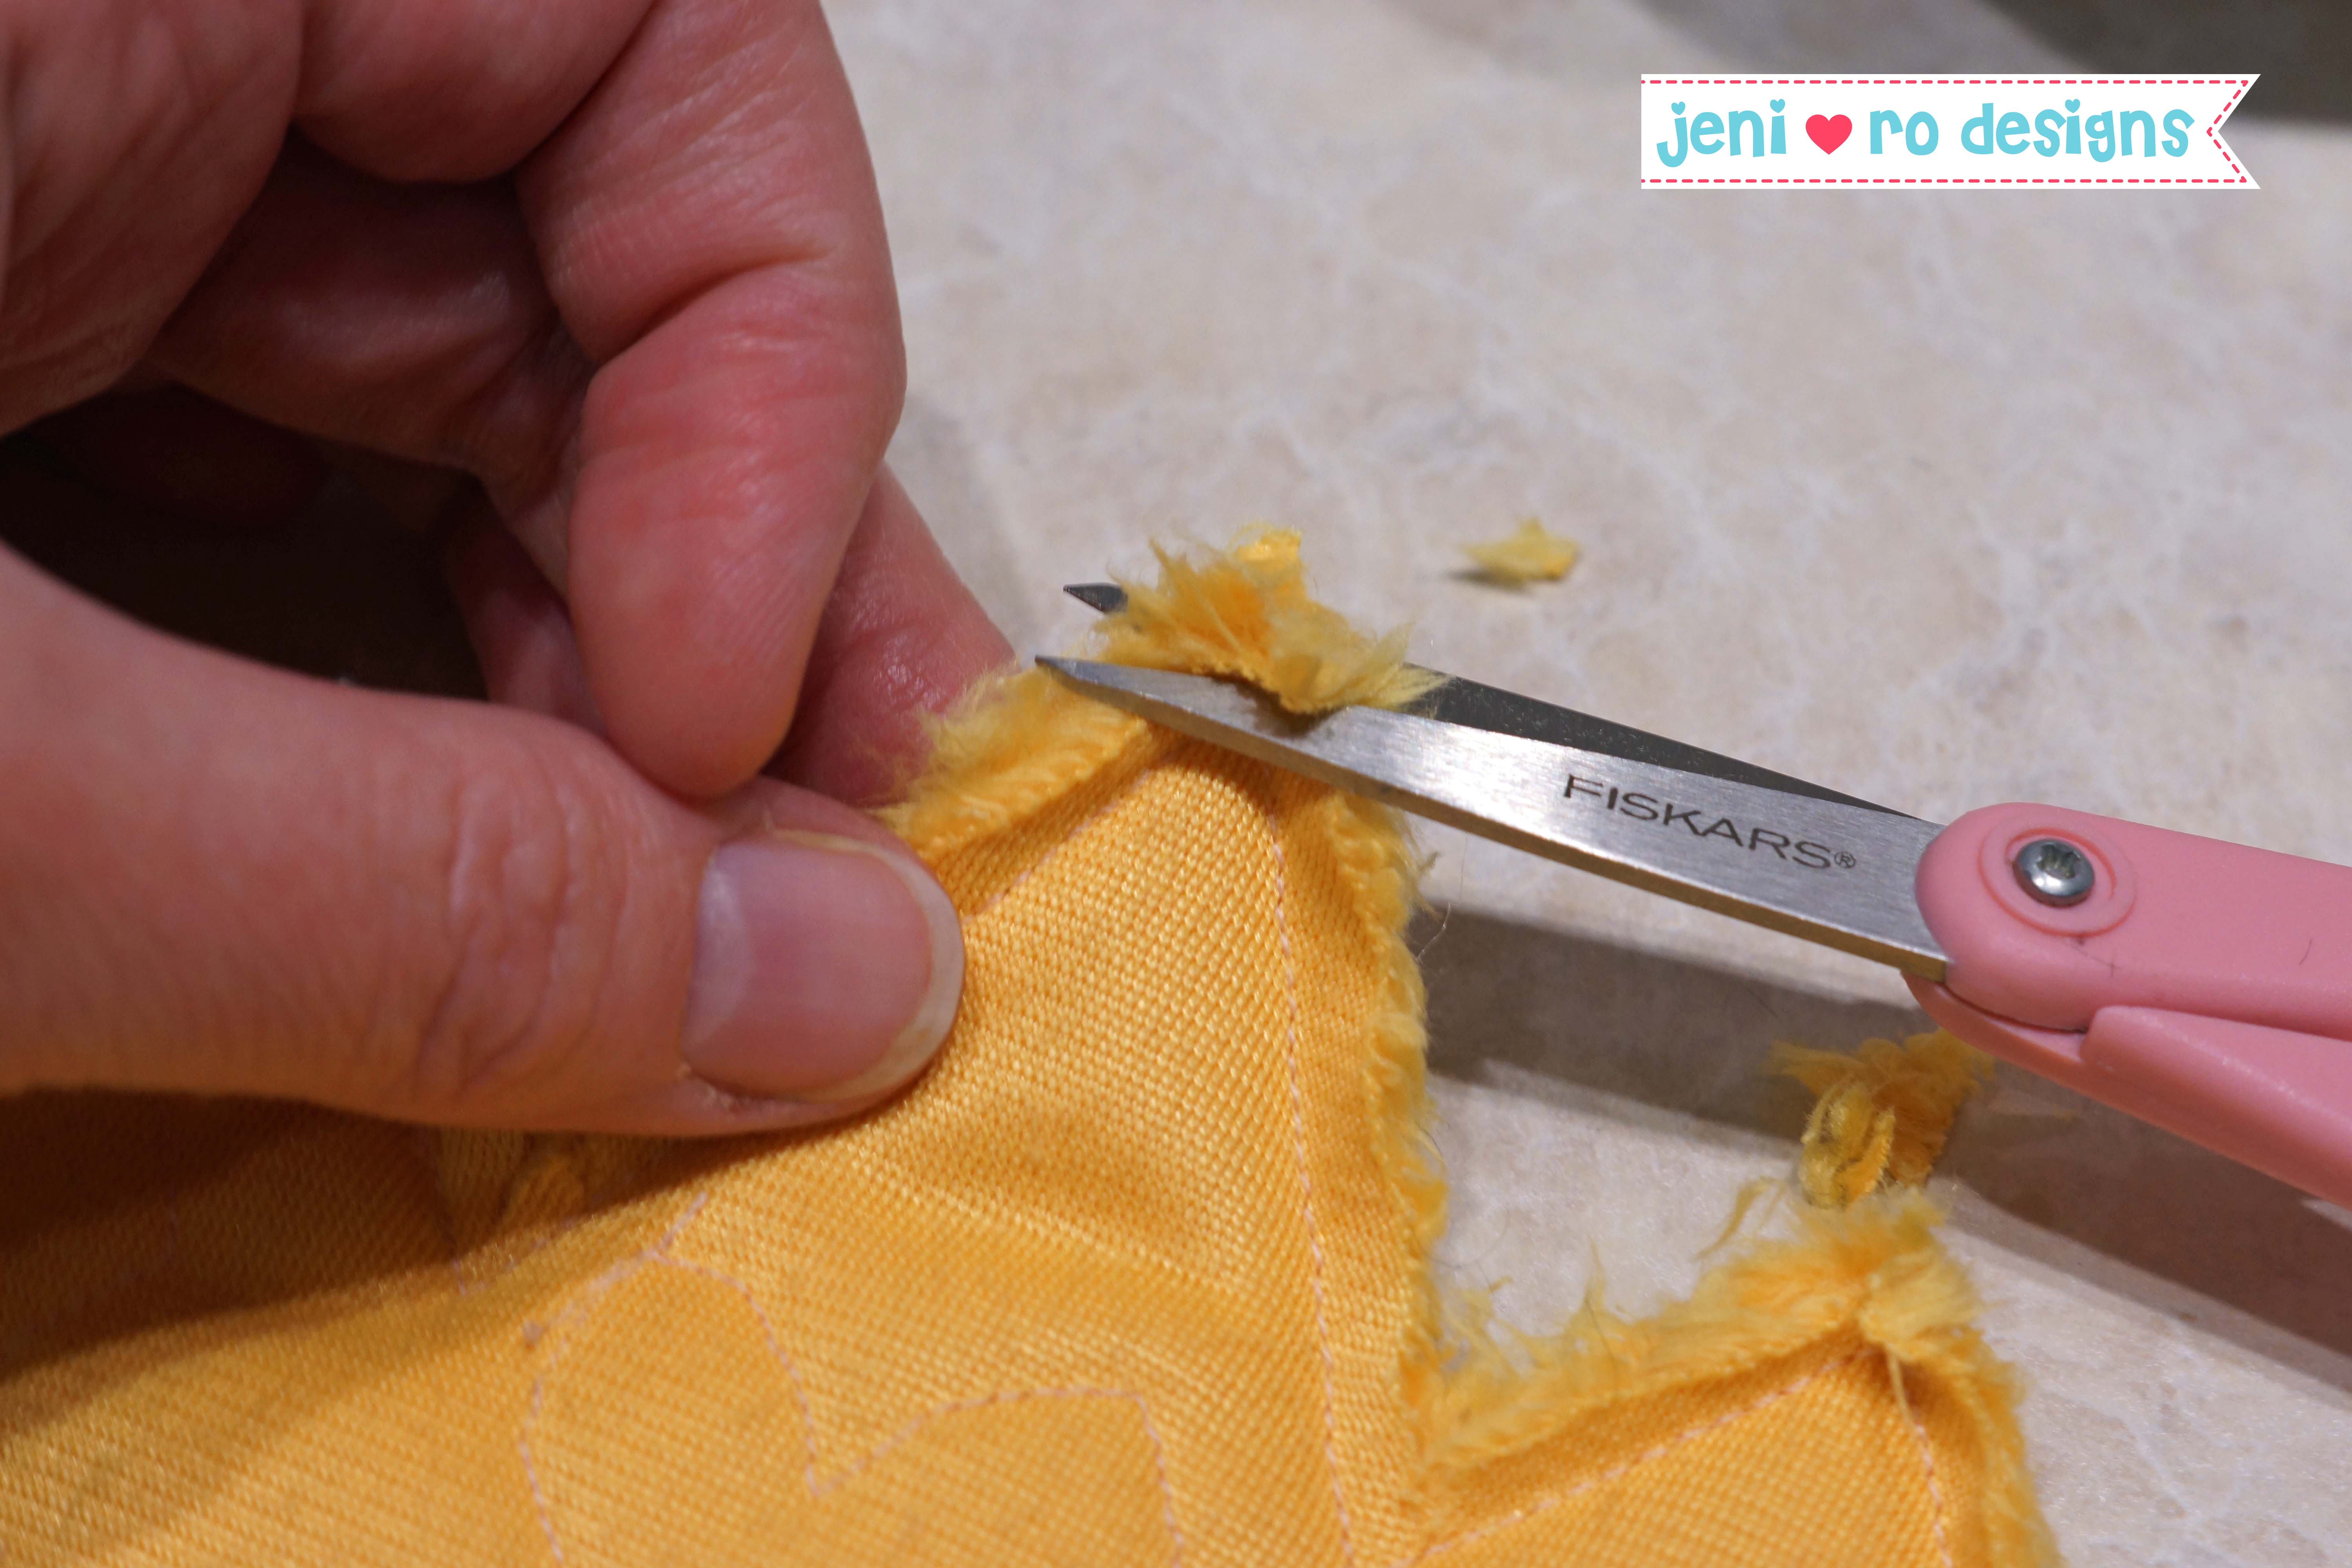
Then clip into each divot, making sure not to cut the stitching.
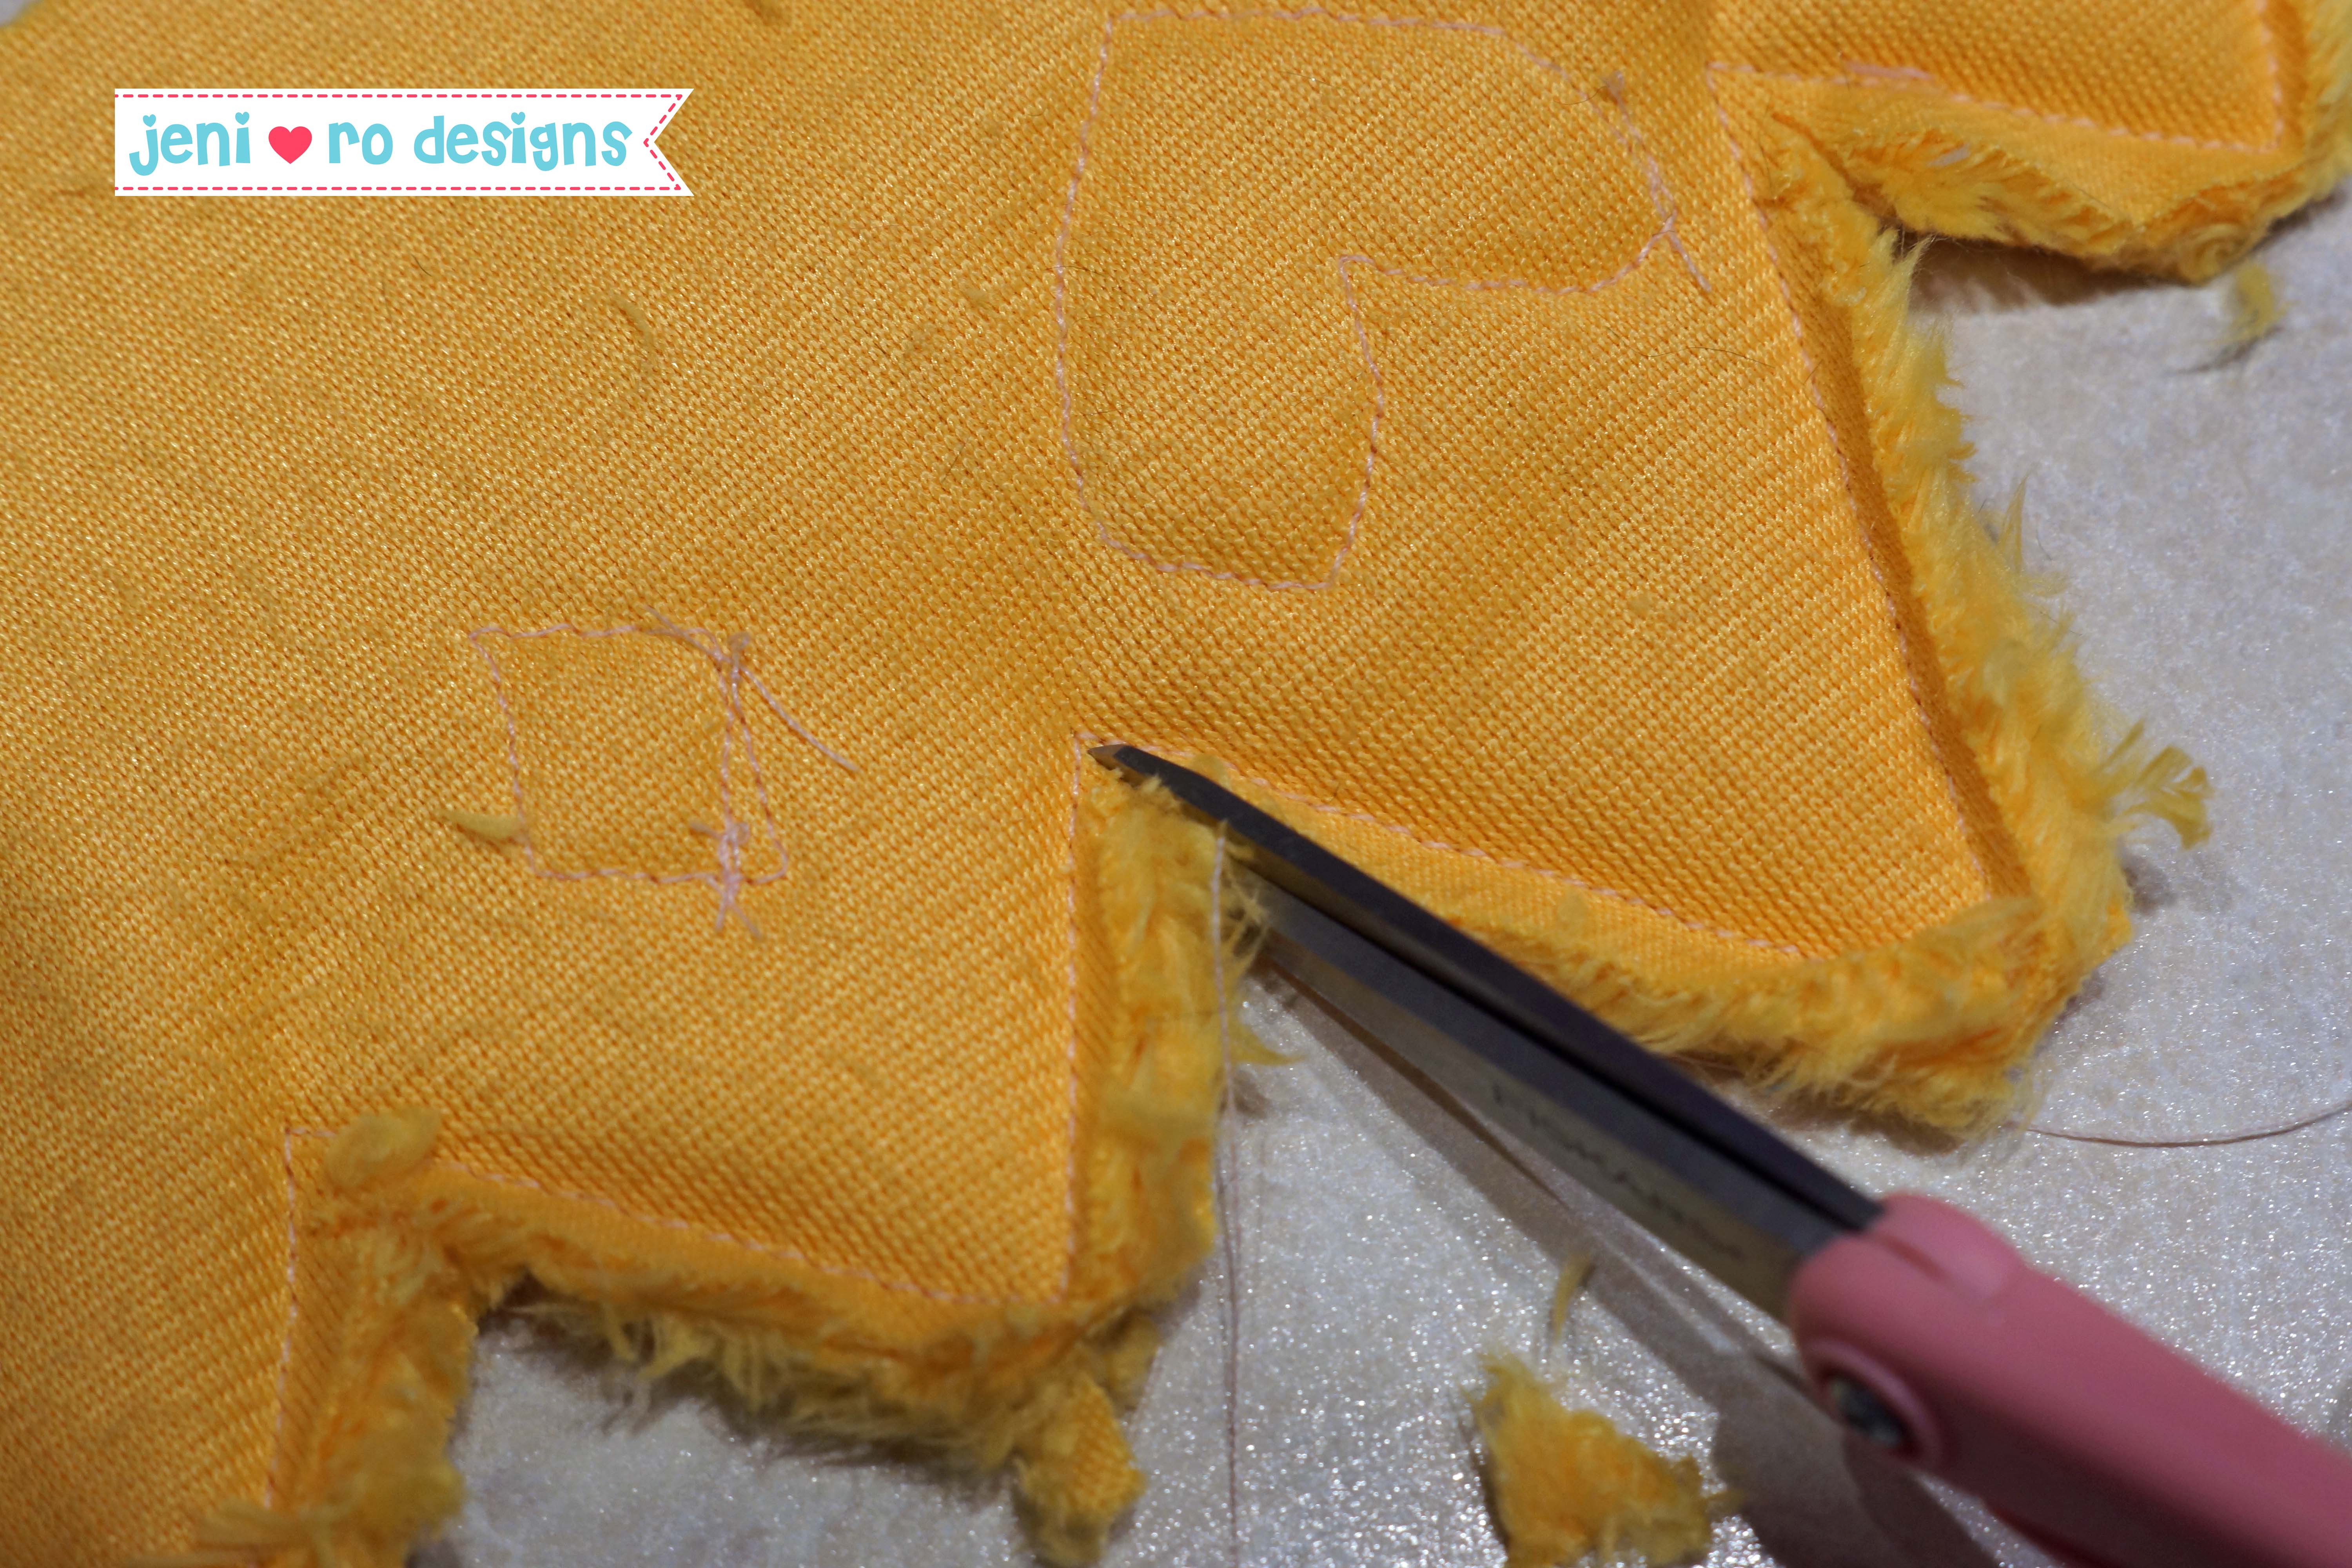
Use a chopstick to make sure there are no holes, again if there is, just re-sew the seam.
Turn the crown, poking out the spikes with a chopstick
Step 7: Find the center of one of the pillow pieces. Align the center bottom of the crown to the center of the pillow piece - pin or clip. (If the bottom edges of the crown do not match up, trim to make them even.)
Baste the crown into place on the pillow piece.
Step 8: Pin/Clip the 2nd pillow piece to the 1st pillow piece (with crown attached), right sides together
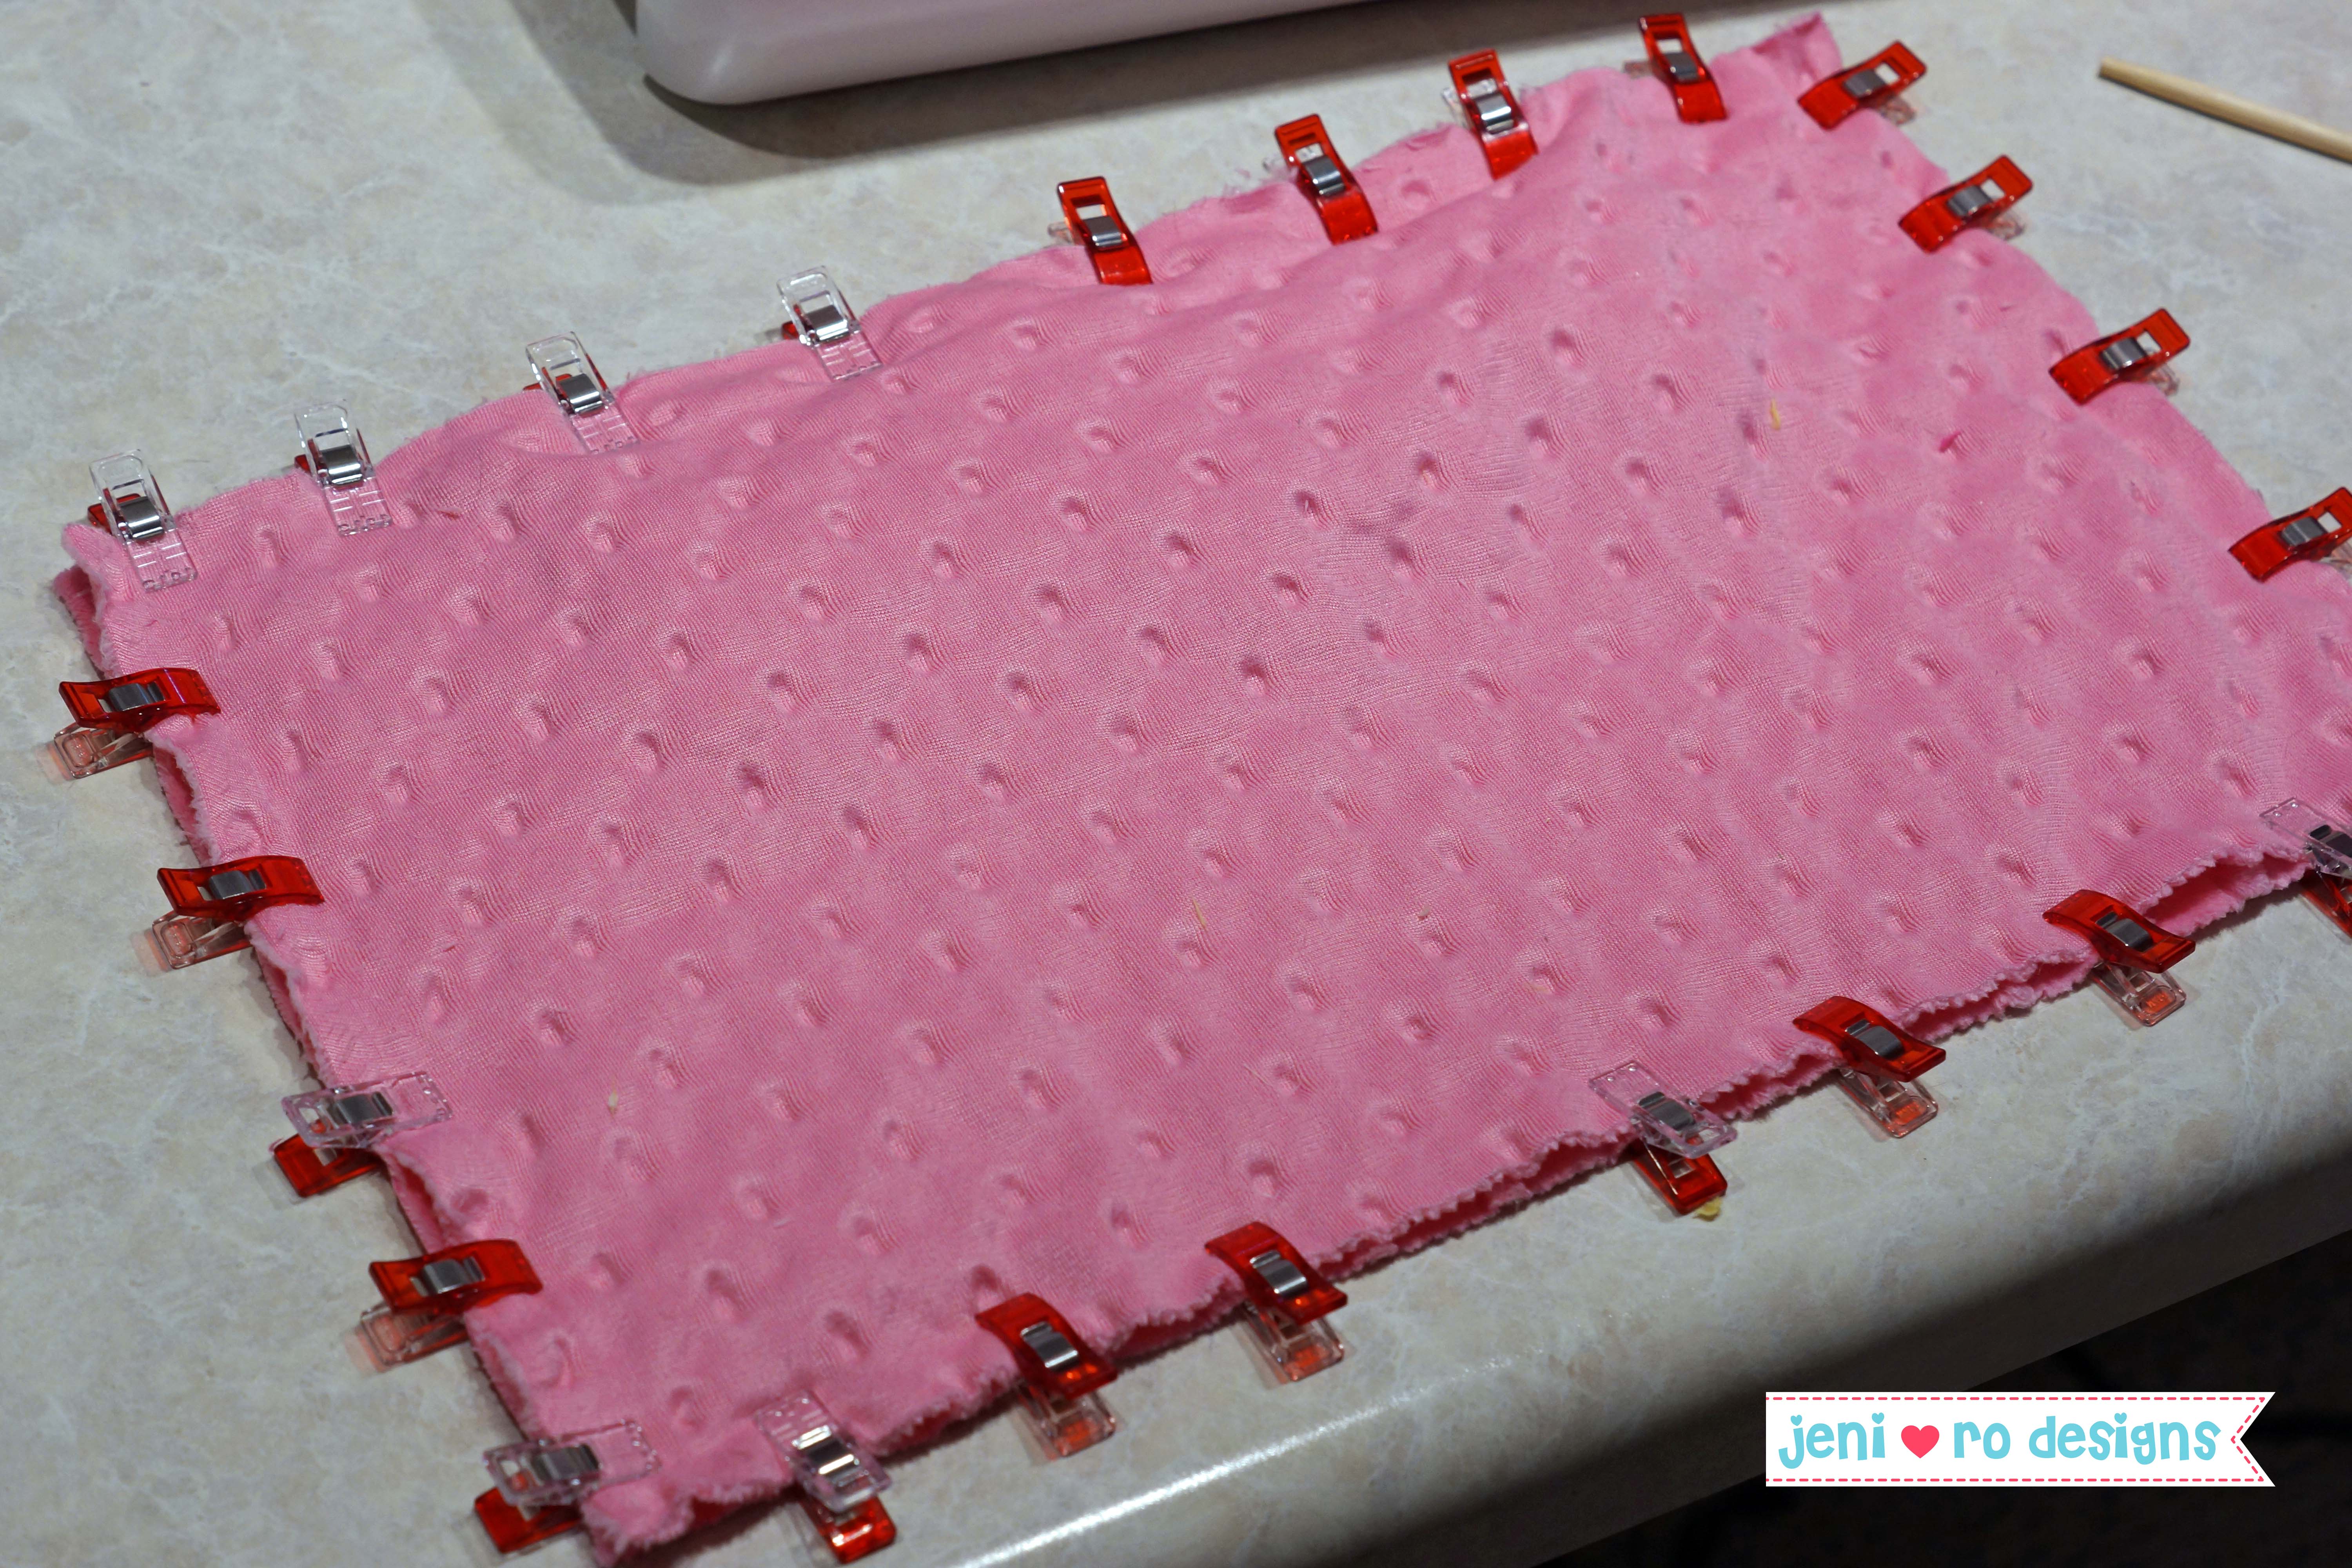
Sew the pieces together with a 1/2" seam allowance leaving a 2-3" hole at the bottom for turning and stuffing.
Step 9: Clip the corners of the pillow and turn. Stuff to the desired firmness. Close the hole with a ladder stitch. Here is a great video on how to ladder stitch, it's a great way to close up holes without the stitches showing. It works really great when sewing with Cuddle or fleece.
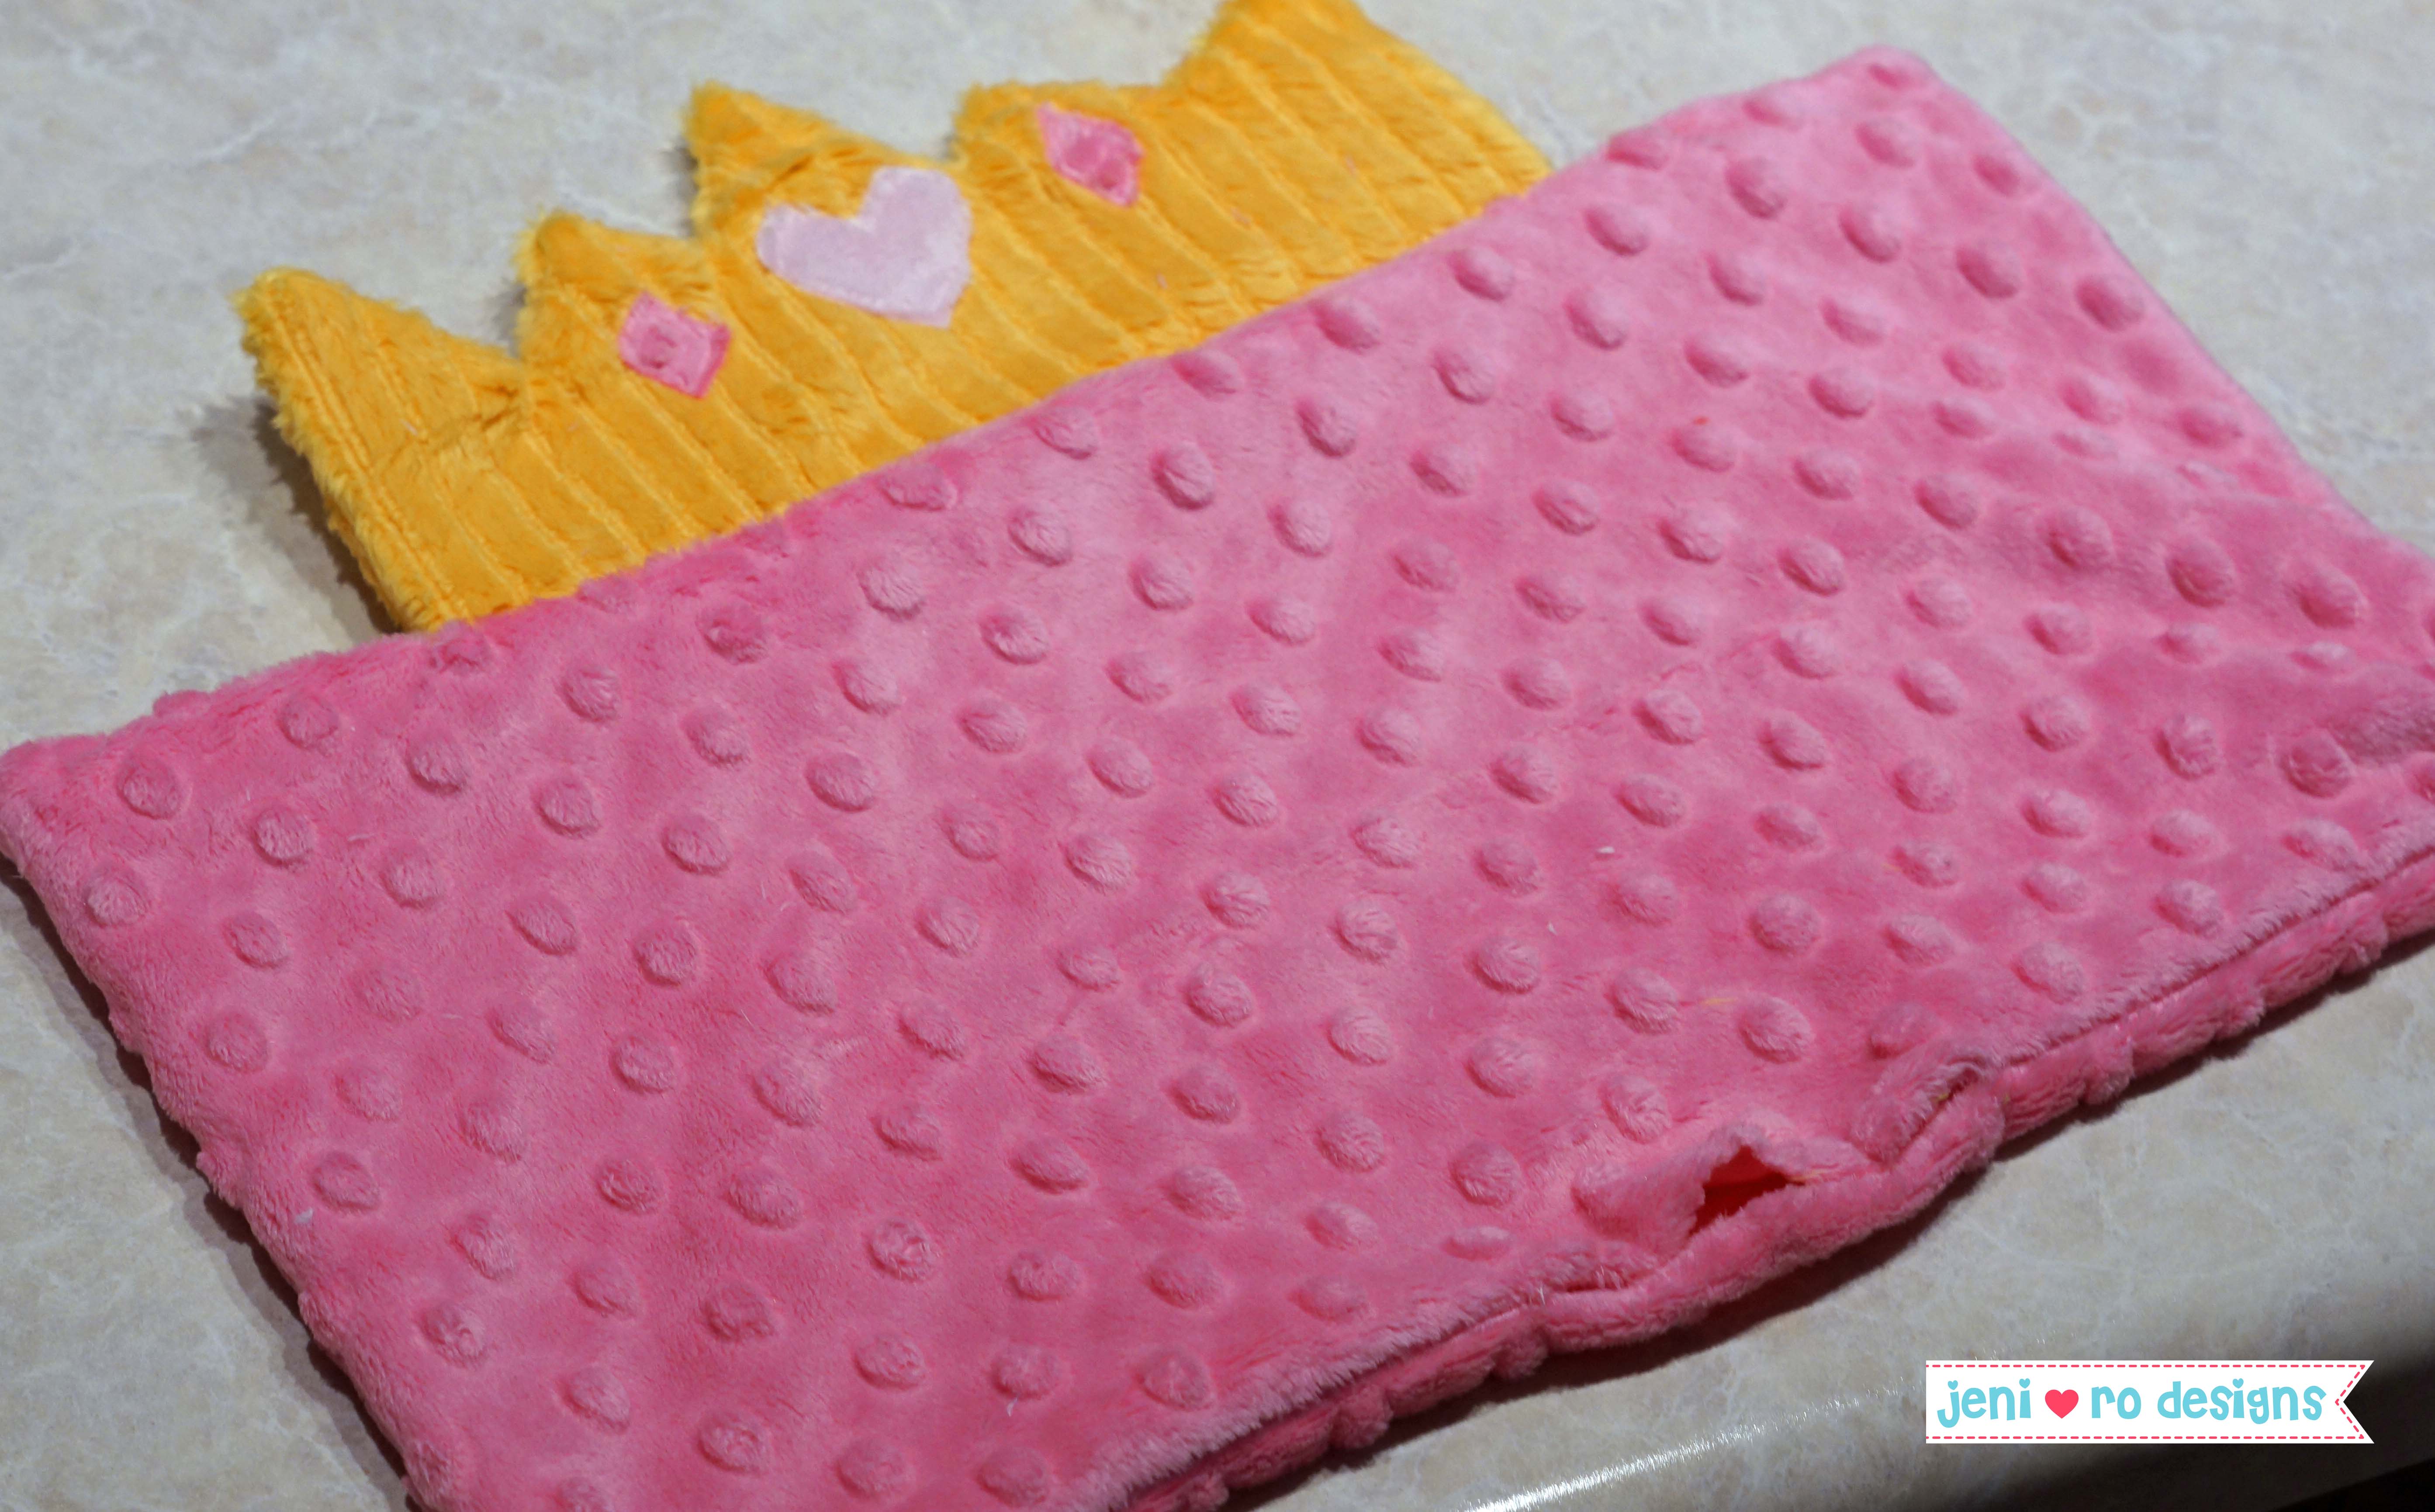
Voila! you have a cute new Princess travel pillow!

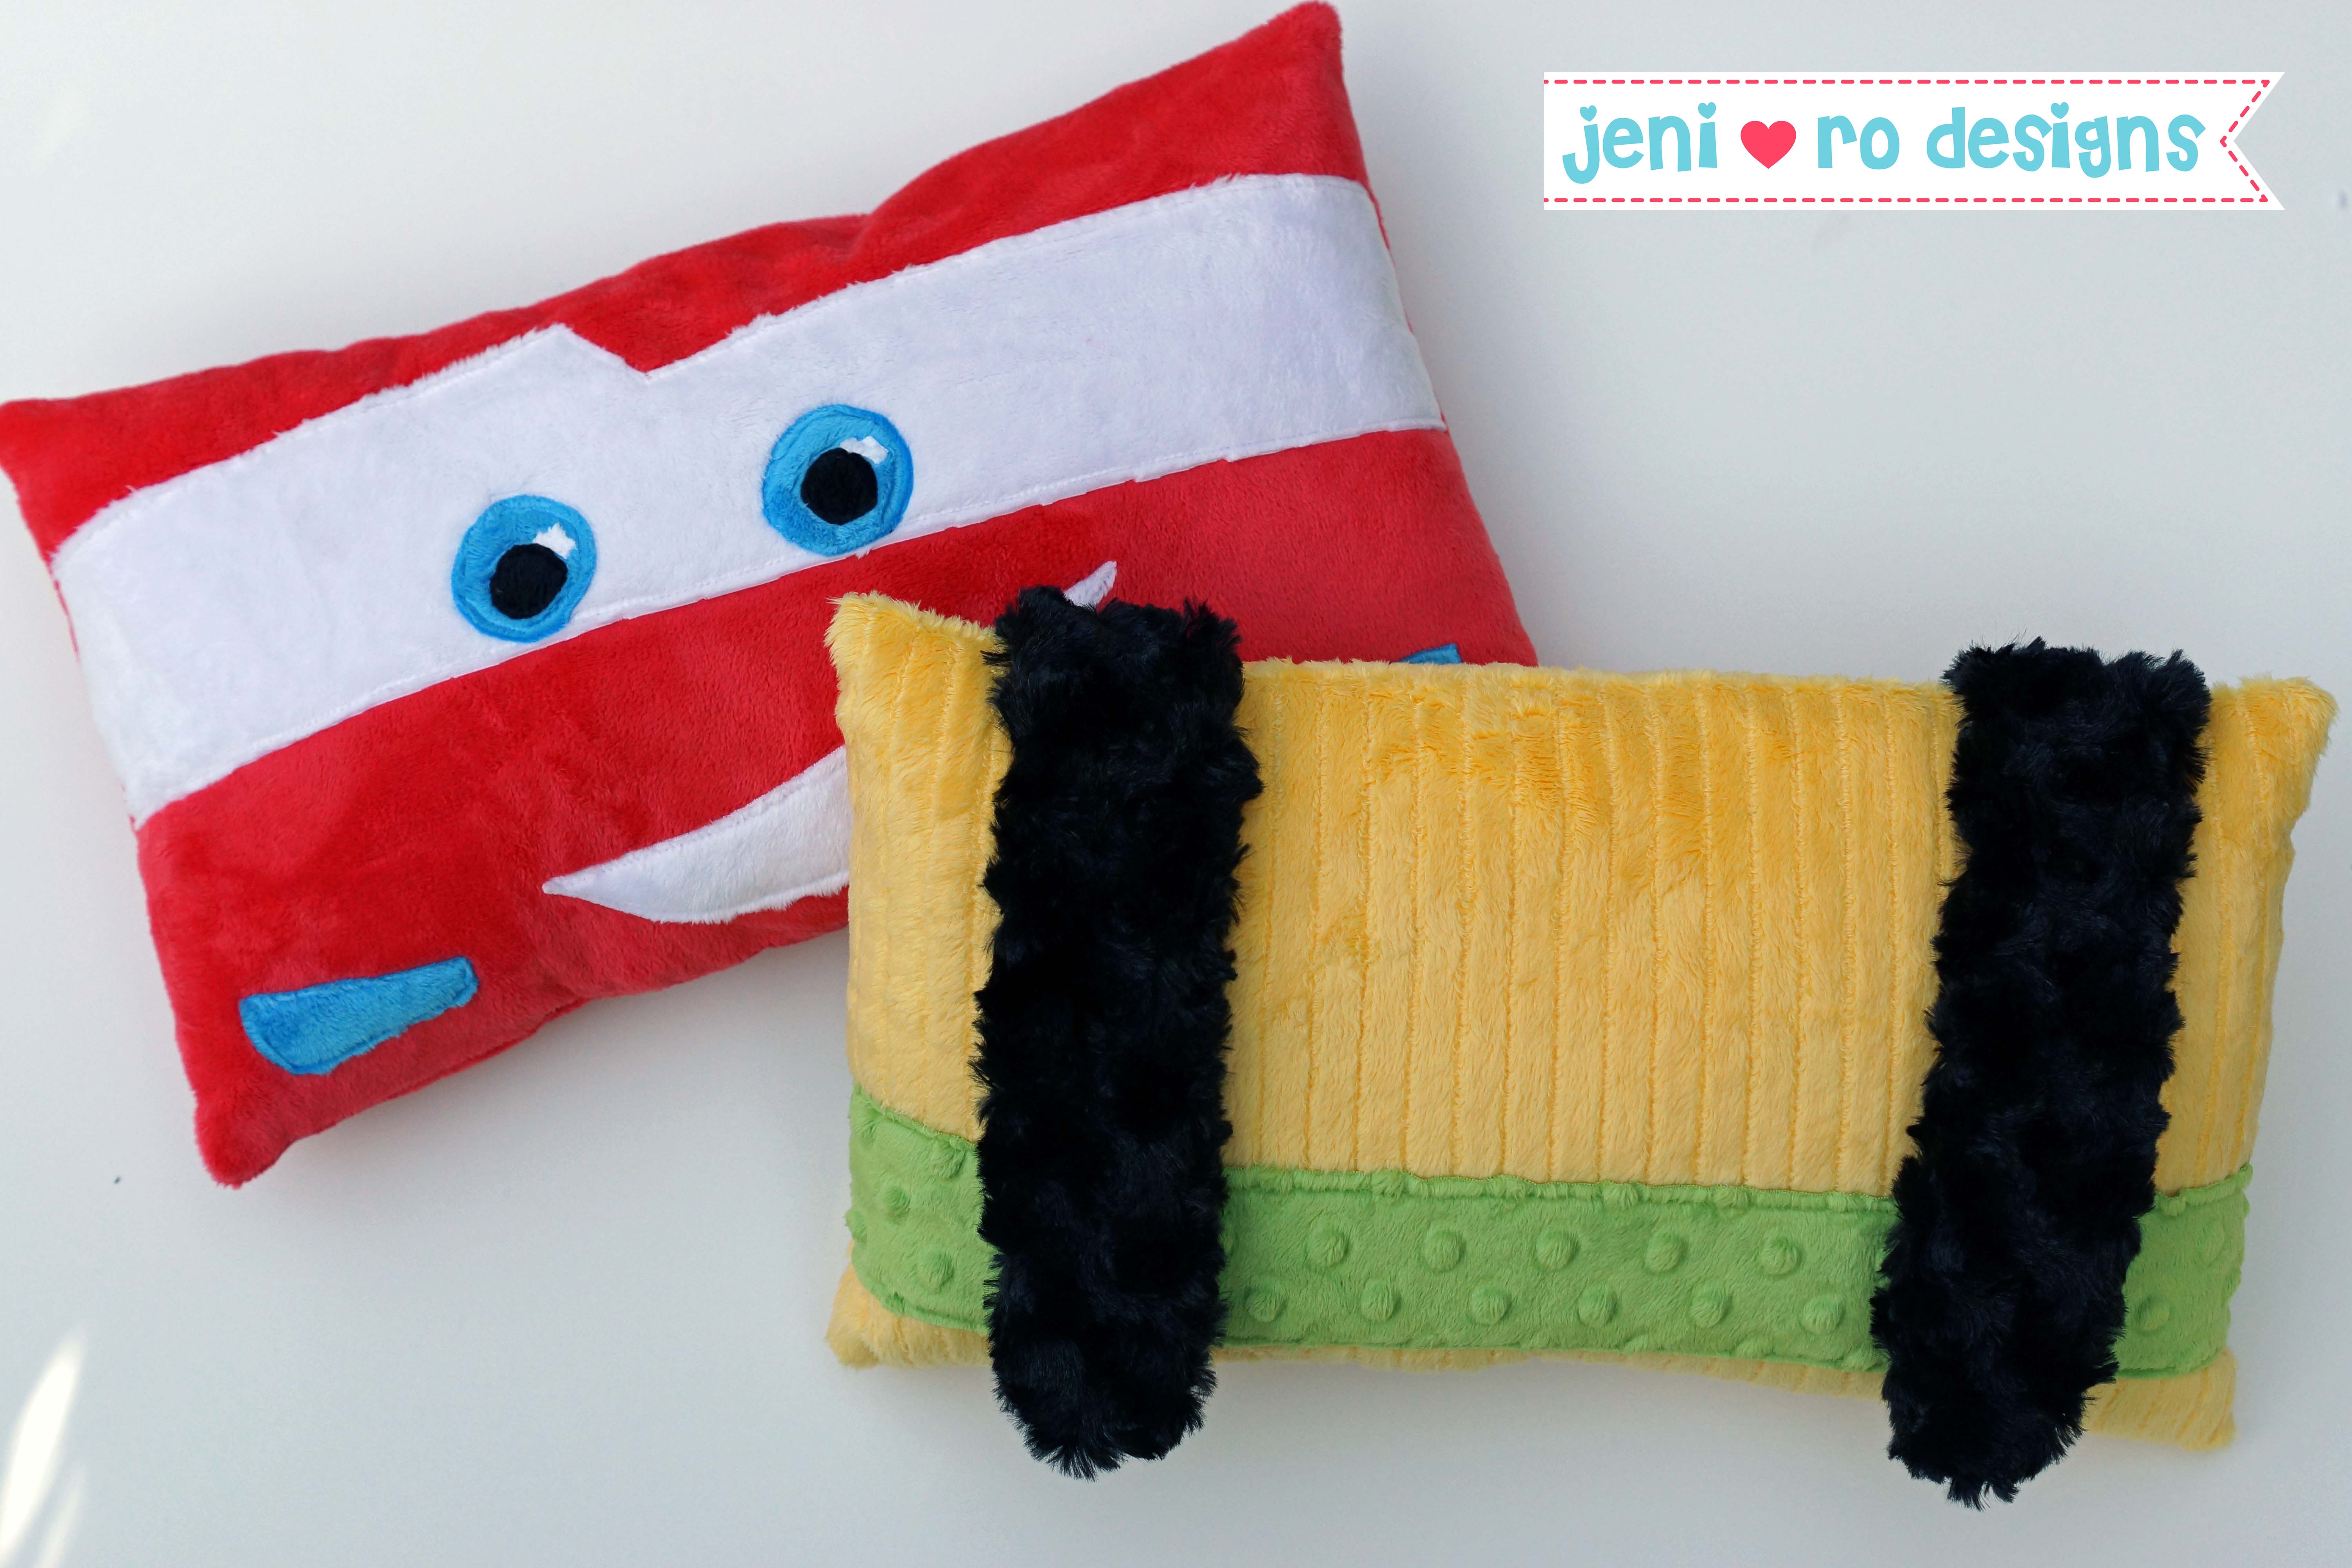
You could vary this princess travel pillow to whatever princess your little one is in love with. Light blue Cuddle for Cinderella, green Cuddle for Tiana or yellow Cuddle for Belle! I played around a little with more characters and made Rapunzel, Pluto (Mickey's dog) and Lightning McQueen (Cars) as well - since those are the favorites in my house.
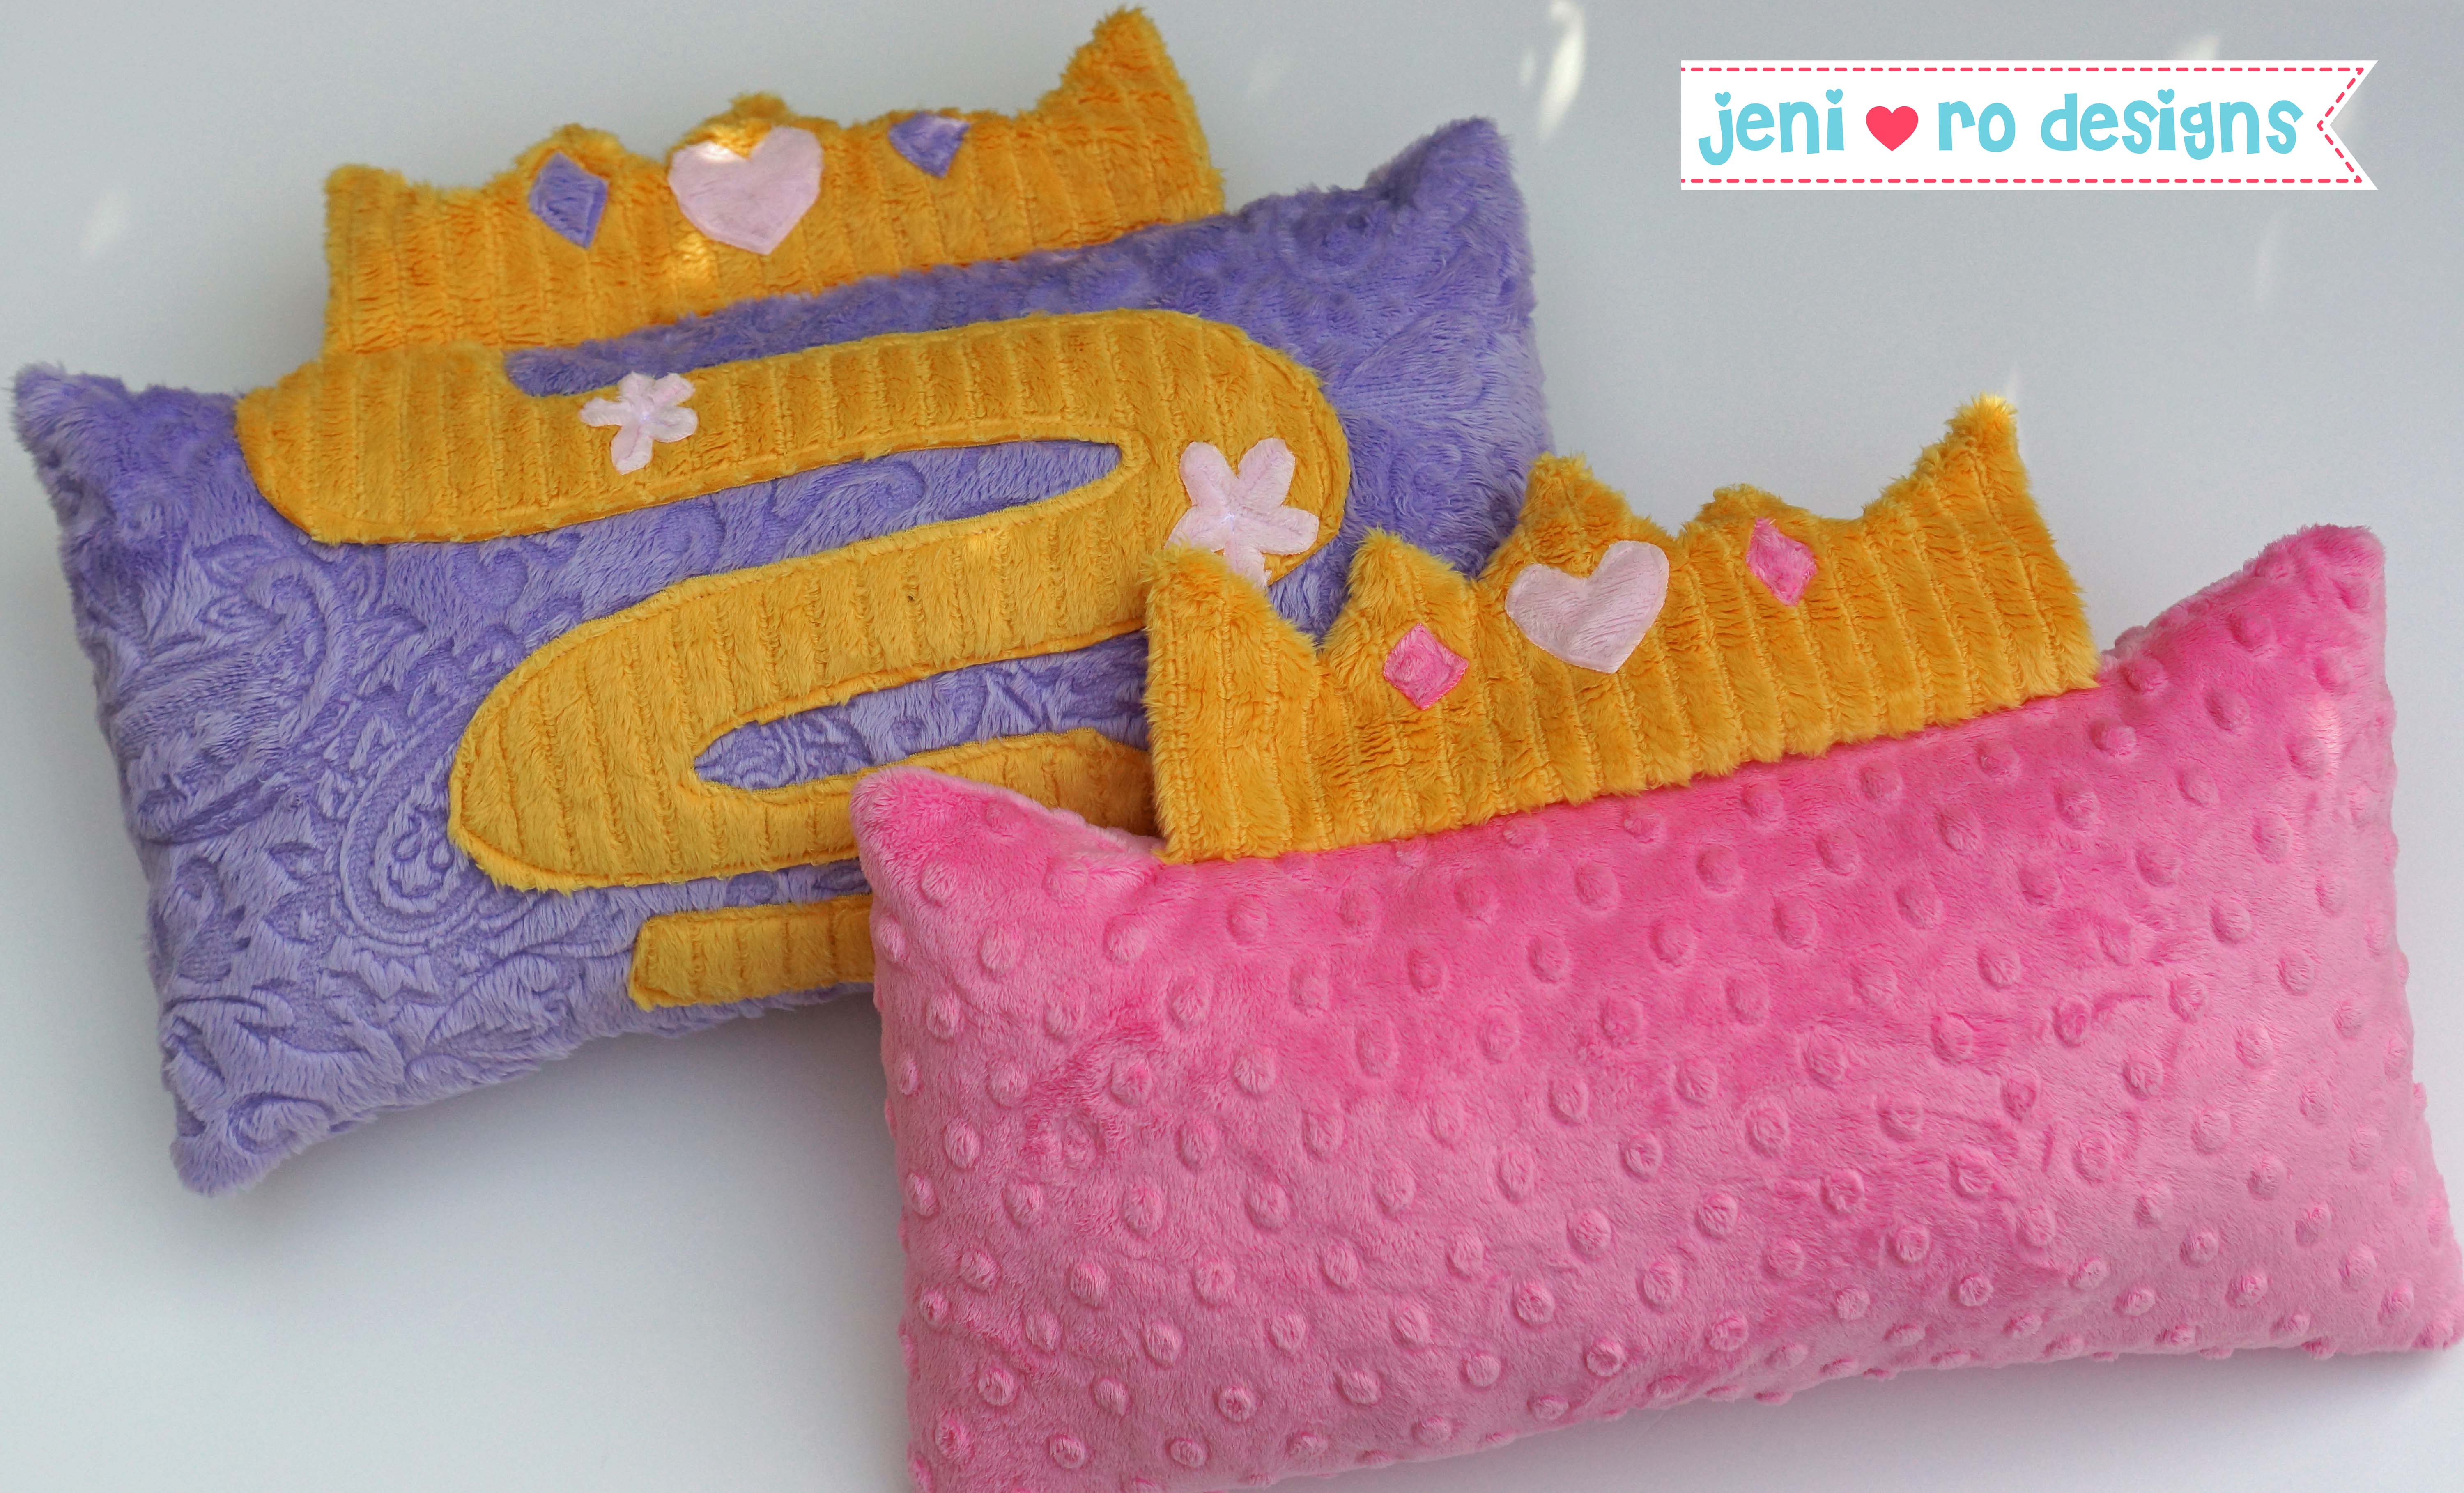
Of course my kiddos love them!
Oh I mentioned a surprise... if you were really hoping for the tutorial/pattern for the Pluto pillow - hop on over to my blog for all the Pluto goodness! AND enter to win a Cuddle Kit from Shannon Fabrics too! So many cute colors to make a number of fun character travel pillows!!
Thanks Shannon Fabrics for having me on My Cuddle Corner! Love me some cozy Cuddle!


.jpeg?width=640&name=Image%20(5).jpeg)

-Dec-11-2025-10-58-46-1415-PM.png?width=640&name=Untitled%20design%20(3)-Dec-11-2025-10-58-46-1415-PM.png)


.png?width=640&name=SEW%20TOGETHER%20livestream%20promo%20images%20(4).png)
.jpg?width=640&name=gencoreA%20(1).jpg)
-Oct-06-2025-07-25-25-9749-PM.png?width=640&name=SEW%20TOGETHER%20livestream%20promo%20images%20(1)-Oct-06-2025-07-25-25-9749-PM.png)

-4.png?width=640&name=SEW%20TOGETHER%20livestream%20promo%20images%20(3)-4.png)


.jpg?width=640&name=spring%20tea%20party_049%20(1).jpg)


.png?width=640&name=12%20Days%20of%20Cuddle%C2%AE%20(8).png)
.png?width=640&name=12%20Days%20of%20Cuddle%C2%AE%20(3).png)
-2.png?width=640&name=12%20Days%20of%20Cuddle%C2%AE%20(2)-2.png)

-2.png?width=640&name=12%20Days%20of%20Cuddle%C2%AE%20(4)-2.png)
.png?width=640&name=12%20Days%20of%20Cuddle%C2%AE%20(7).png)
.png?width=640&name=12%20Days%20of%20Cuddle%C2%AE%20(2).png)
.png?width=640&name=12%20Days%20of%20Cuddle%C2%AE%20(6).png)


Leave a Comment