Written by Cuddle® Ambassador Linda White
Hi, I'm Linda White, one of Shannon Fabrics Cuddle® Ambassadors. My project for the 12 days of Cuddle is a Family Throw using the 80” Luxe Cuddle® Mirage. I know most people don't have room enough to lay out a 72” x 80” piece of fabric. I'll walk you through how to manage a large piece of fabric in a much smaller space.
Materials Needed:
2 yds of 2 colors of Shannon Fabrics Luxe Cuddle® Mirage or 2 Mirage Precuts. There will be enough Cuddle® to make pillows.
Suggested Notions
- Polyester thread
- 90/14 stretch machine needle and polyester thread
- Felt tip marker
- Rotary cutter or craft knife and mat
- Clover Boxed Flower Head Pins
- Clover Wonder Pins or curved safety pins
- Jumbo Wonder clips
- Stiletto (ByAnnie Stiletto is a great choice)
- Point turner
- Sewing Machine with Walking foot
- Luxe Cuddle Throw Pattern
We will be adapting the Luxe Cuddle® Throw pattern for the Family Throw. Download the pattern at: https://www.shannonfabrics.com/download_patterns/50.LuxeThrow_23_0112.pdf
or ask your authorized Shannon Fabrics store for a copy.
Store locator: https://www.shannonfabrics.com/index.php?main_page=store_locator
- Lay one piece of Cuddle® right side up on the layout area, with the selvage edge even with the lower edge of the layout area and the cut edge to the one side. It's important that the whole piece of Cuddle® is on the surface, rather than hanging off an edge. Place some weights to hold the Cuddle® in place. I use rulers.

2. Place the second piece of Cuddle® right side down on top of the other piece of Cuddle®, matching the raw edge and selvage edge. Secure the layers together on the layout area with several Wonder Pins or baste by hand. Reposition the rulers on top of the second piece of Cuddle®.
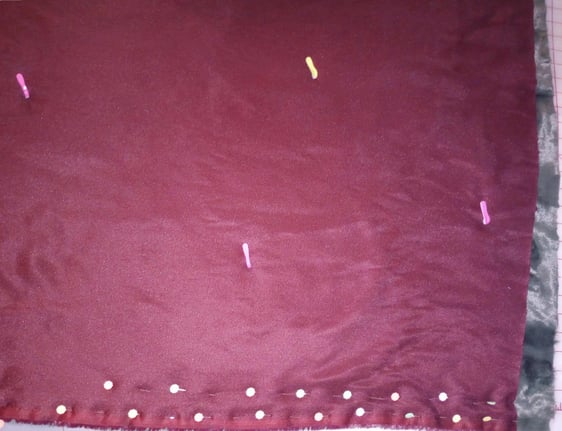
3. Begin with the selvage edge, rather than the top of the throw per the instructions on the Luxe Cuddle®Double pin with the pins going in the same direction as the selvage edge; the first row at 1/2", the second row at 1 1/2", wide enough apart that the walking foot will slide through that area without having to remove the second row of pins.
- Roll the pinned Cuddle® layers and reposition unsecured Cuddle® on layout area. Position Cuddle® layers so the selvage edges match. Double pin and use a few Wonder Pins to secure the Cuddle® about 18” away from selvage if possible. Repeat until the length of the Cuddle® is pinned.

- With a size 90 stretch needle, polyester thread, a walking foot, and stitch length about 3.5 mm, sew the seam with a 1/2" seam allowance. Lock the stitches at the beginning and end of each seam. Keep the Cuddle® Throw on the sewing table or your lap. Remove the first row of pins while sewing. Remove the second row of pins after seam is sewn. Leave securing pins in.
- Place your throw on the layout area with the sewn seam to one side. The raw edges may not meet so don't force them to do so. Gently Pat the Cuddle® so the layers are flat. Put a few securing pins about 6 inches away from the cut edges. Roll the Cuddle® and continue securing the edges till you reach the other side.
- Square up a corner using the sewn selvage edge as the guide.
 Draw a line at least one half inch away from the shorter raw edge. Continue across the width of the throw. Double pin 1/2" away from the drawn line.
- Sew the seam using the drawn line as the guide. The Cuddle® will be trimmed after all seams are sewn.
- Place your throw with the unsewn selvage edges at the lower edge of the layout area. The Mirage may not be the same width. Pin evenly along the selvages. On the wrong side of each of the edges, mark a 10" gap for turning. Staystitch between the marks on both pieces of Cuddle®. Double pin the selvages edges. If you are adding a Made with Love label, now is a great time to add it! Sew the edge seam, leaving the 10" gap open. Sew L-Pivots at the gap. See the Luxe Cuddle® Throw pattern for more information.
- Position the throw on the layout area and follow the square up and pinning instructions in step 7 for the unsewn raw edges. Sew the seam. Remove all.
- Trim the seam allowances at both ends to 1/2".Trim side seam if needed. Vacuum, shake outside, or toss in a dryer with a damp washcloth to remove Cuddle®
- Turn right side out. Push out the corners with a point turner. Pin the turning gap closed. Sew with a 4 x 4 zig zag or hand stitch with a ladder stitch.
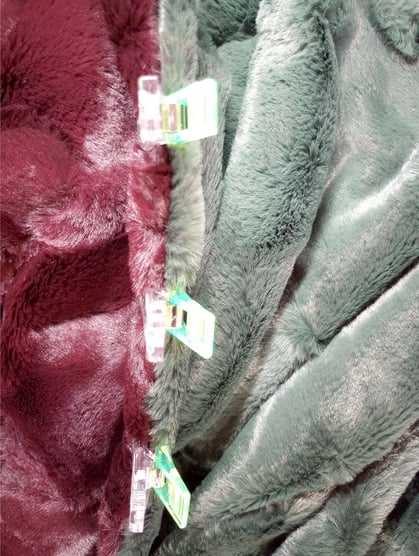
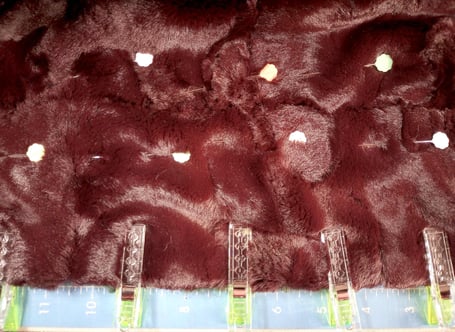
13. Lay the throw on the layout area. With the seam even on the throw, Jumbo Wonder Clip to secure the edges.

Making sure the throw is flat, double pin at 3” and 5”

Topstitch at 4”. Repeat for each side.
14. Enjoy your Family throw! Use it to watch holiday movies, football, hockey, basketball, and family get togethers.
.jpg?width=688&height=459&name=Mirage%20Throw%20Blanket%204%20(1).jpg)

%20-%20Copy%20copy.png?width=143&height=69&name=Black%20logo%20(002)%20-%20Copy%20copy.png)
.png)


-Dec-11-2025-10-58-46-1415-PM.png?width=640&name=Untitled%20design%20(3)-Dec-11-2025-10-58-46-1415-PM.png)


.png?width=640&name=SEW%20TOGETHER%20livestream%20promo%20images%20(4).png)
.jpg?width=640&name=gencoreA%20(1).jpg)
-Oct-06-2025-07-25-25-9749-PM.png?width=640&name=SEW%20TOGETHER%20livestream%20promo%20images%20(1)-Oct-06-2025-07-25-25-9749-PM.png)

-4.png?width=640&name=SEW%20TOGETHER%20livestream%20promo%20images%20(3)-4.png)


.jpg?width=640&name=spring%20tea%20party_049%20(1).jpg)


.png?width=640&name=12%20Days%20of%20Cuddle%C2%AE%20(8).png)
.png?width=640&name=12%20Days%20of%20Cuddle%C2%AE%20(3).png)
-2.png?width=640&name=12%20Days%20of%20Cuddle%C2%AE%20(2)-2.png)

-2.png?width=640&name=12%20Days%20of%20Cuddle%C2%AE%20(4)-2.png)
.png?width=640&name=12%20Days%20of%20Cuddle%C2%AE%20(7).png)
.png?width=640&name=12%20Days%20of%20Cuddle%C2%AE%20(2).png)


Leave a Comment