%20-%20Copy%20copy.png?width=143&height=69&name=Black%20logo%20(002)%20-%20Copy%20copy.png)
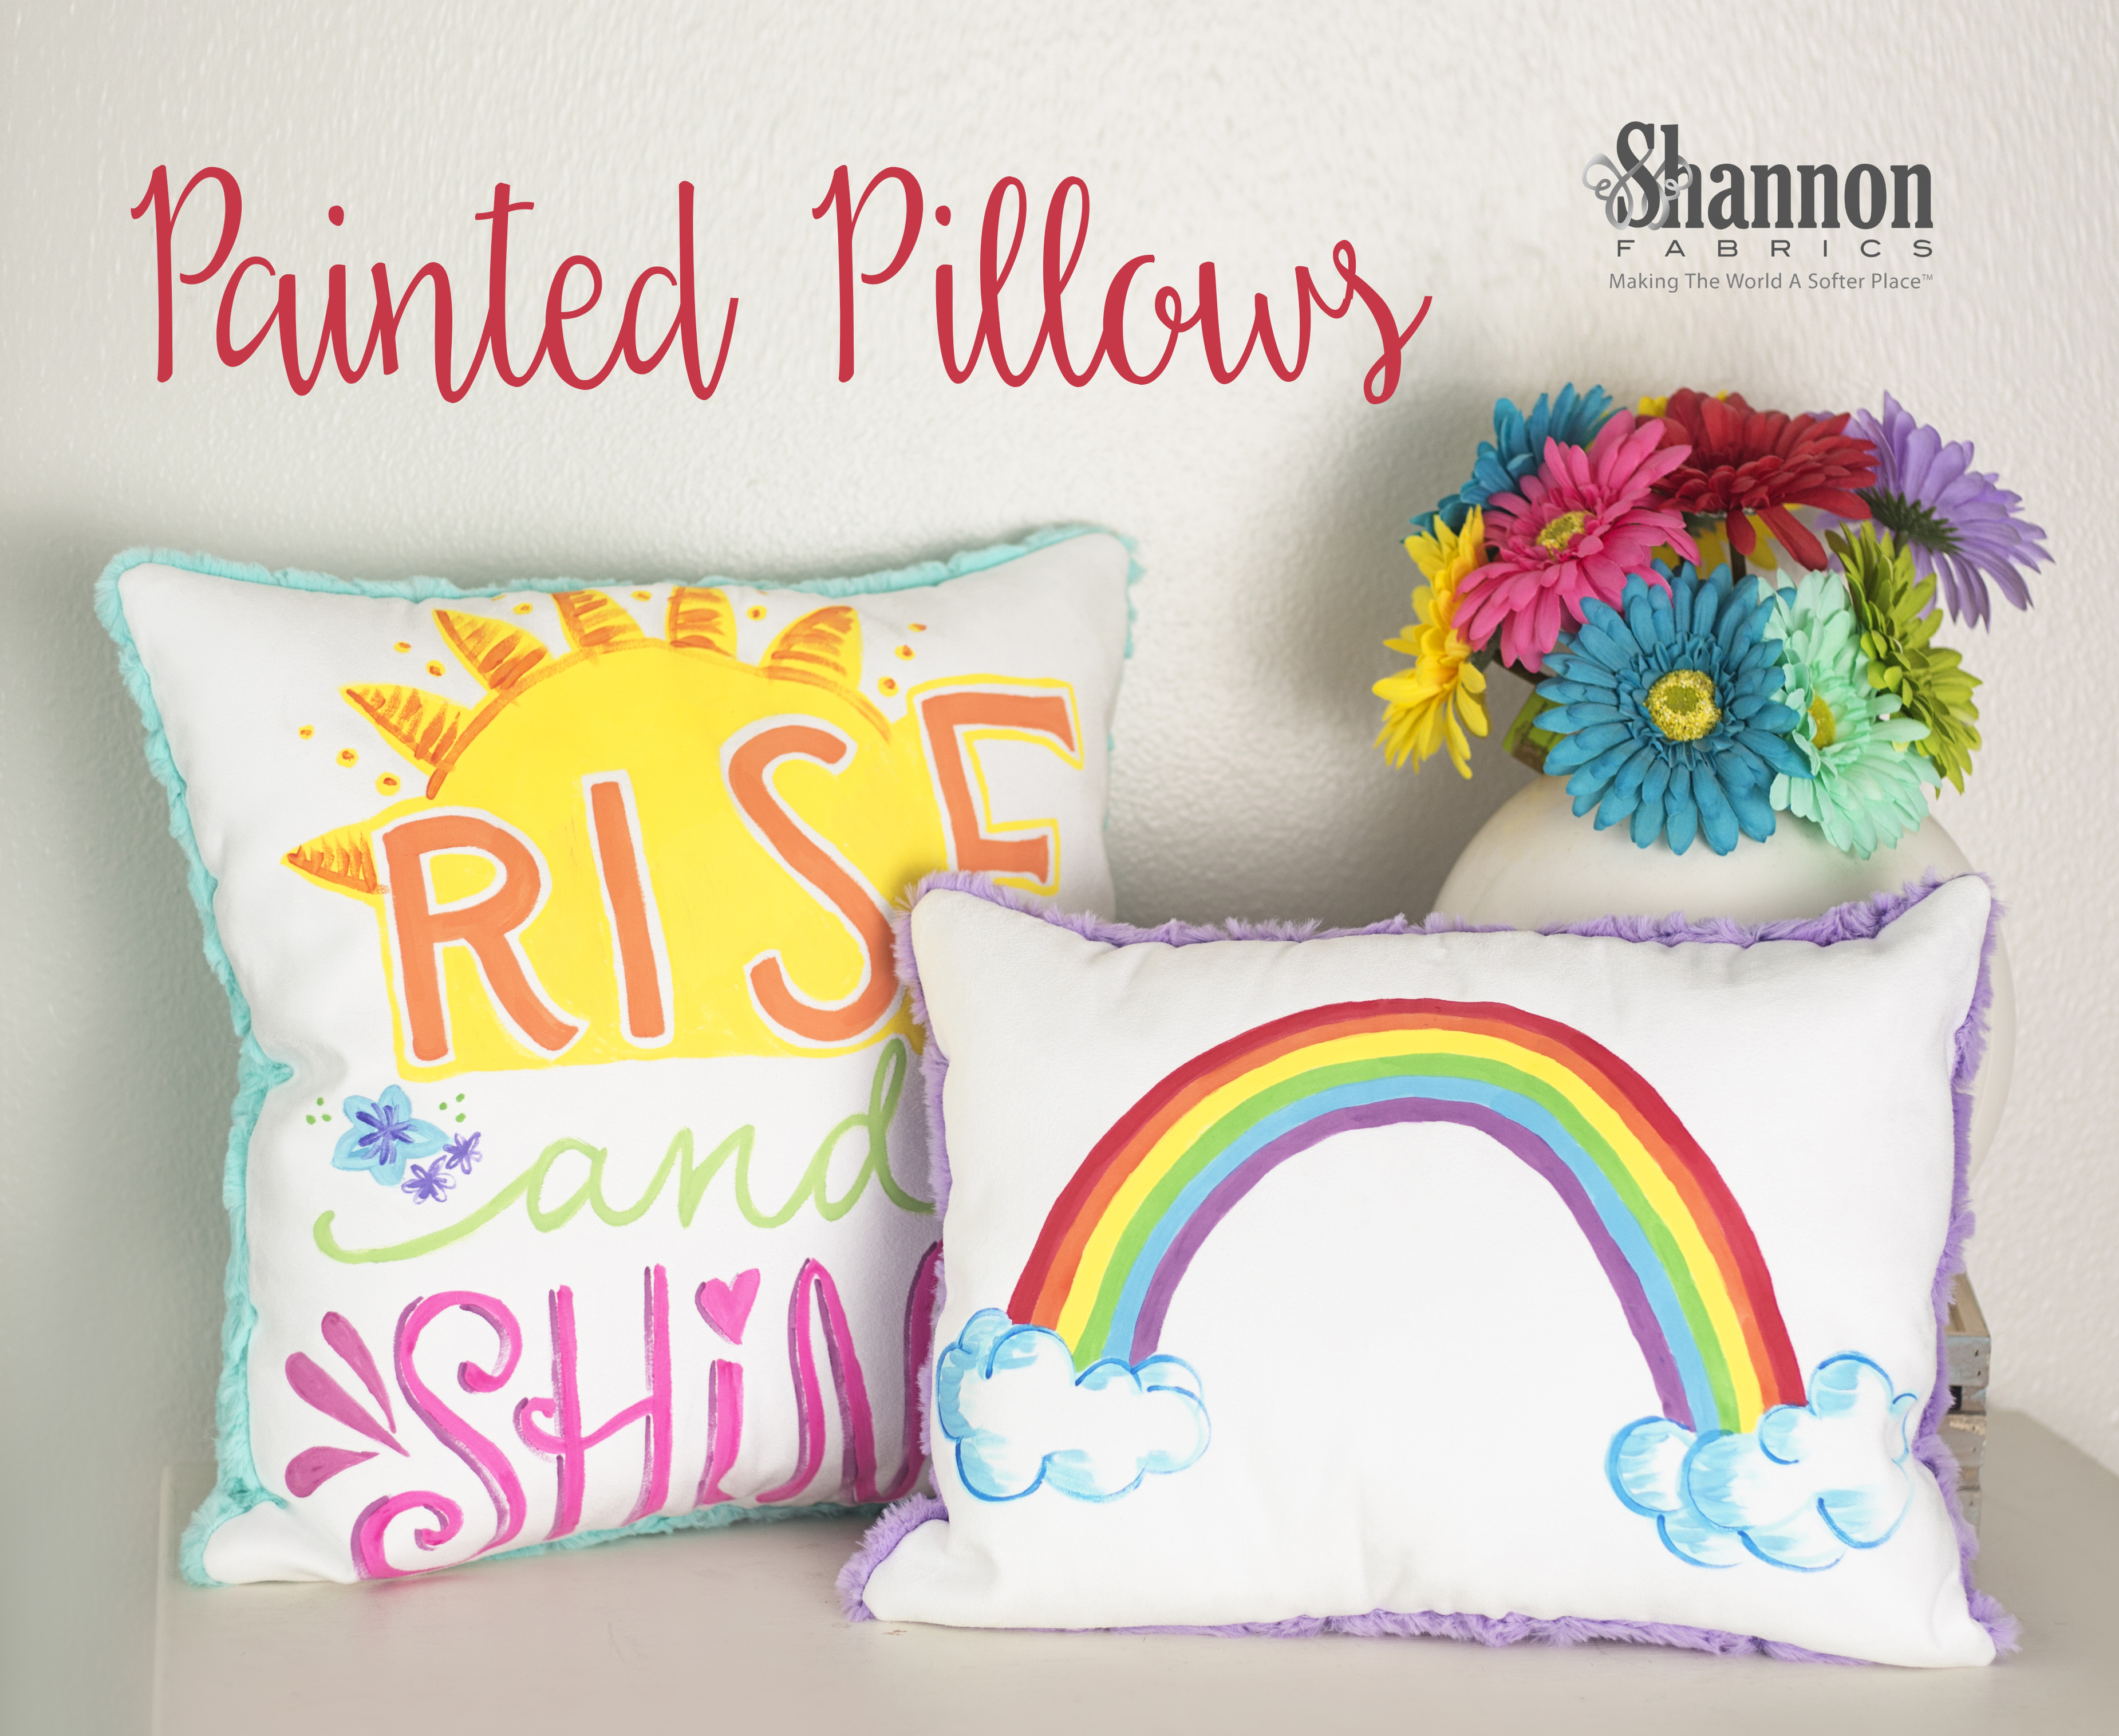
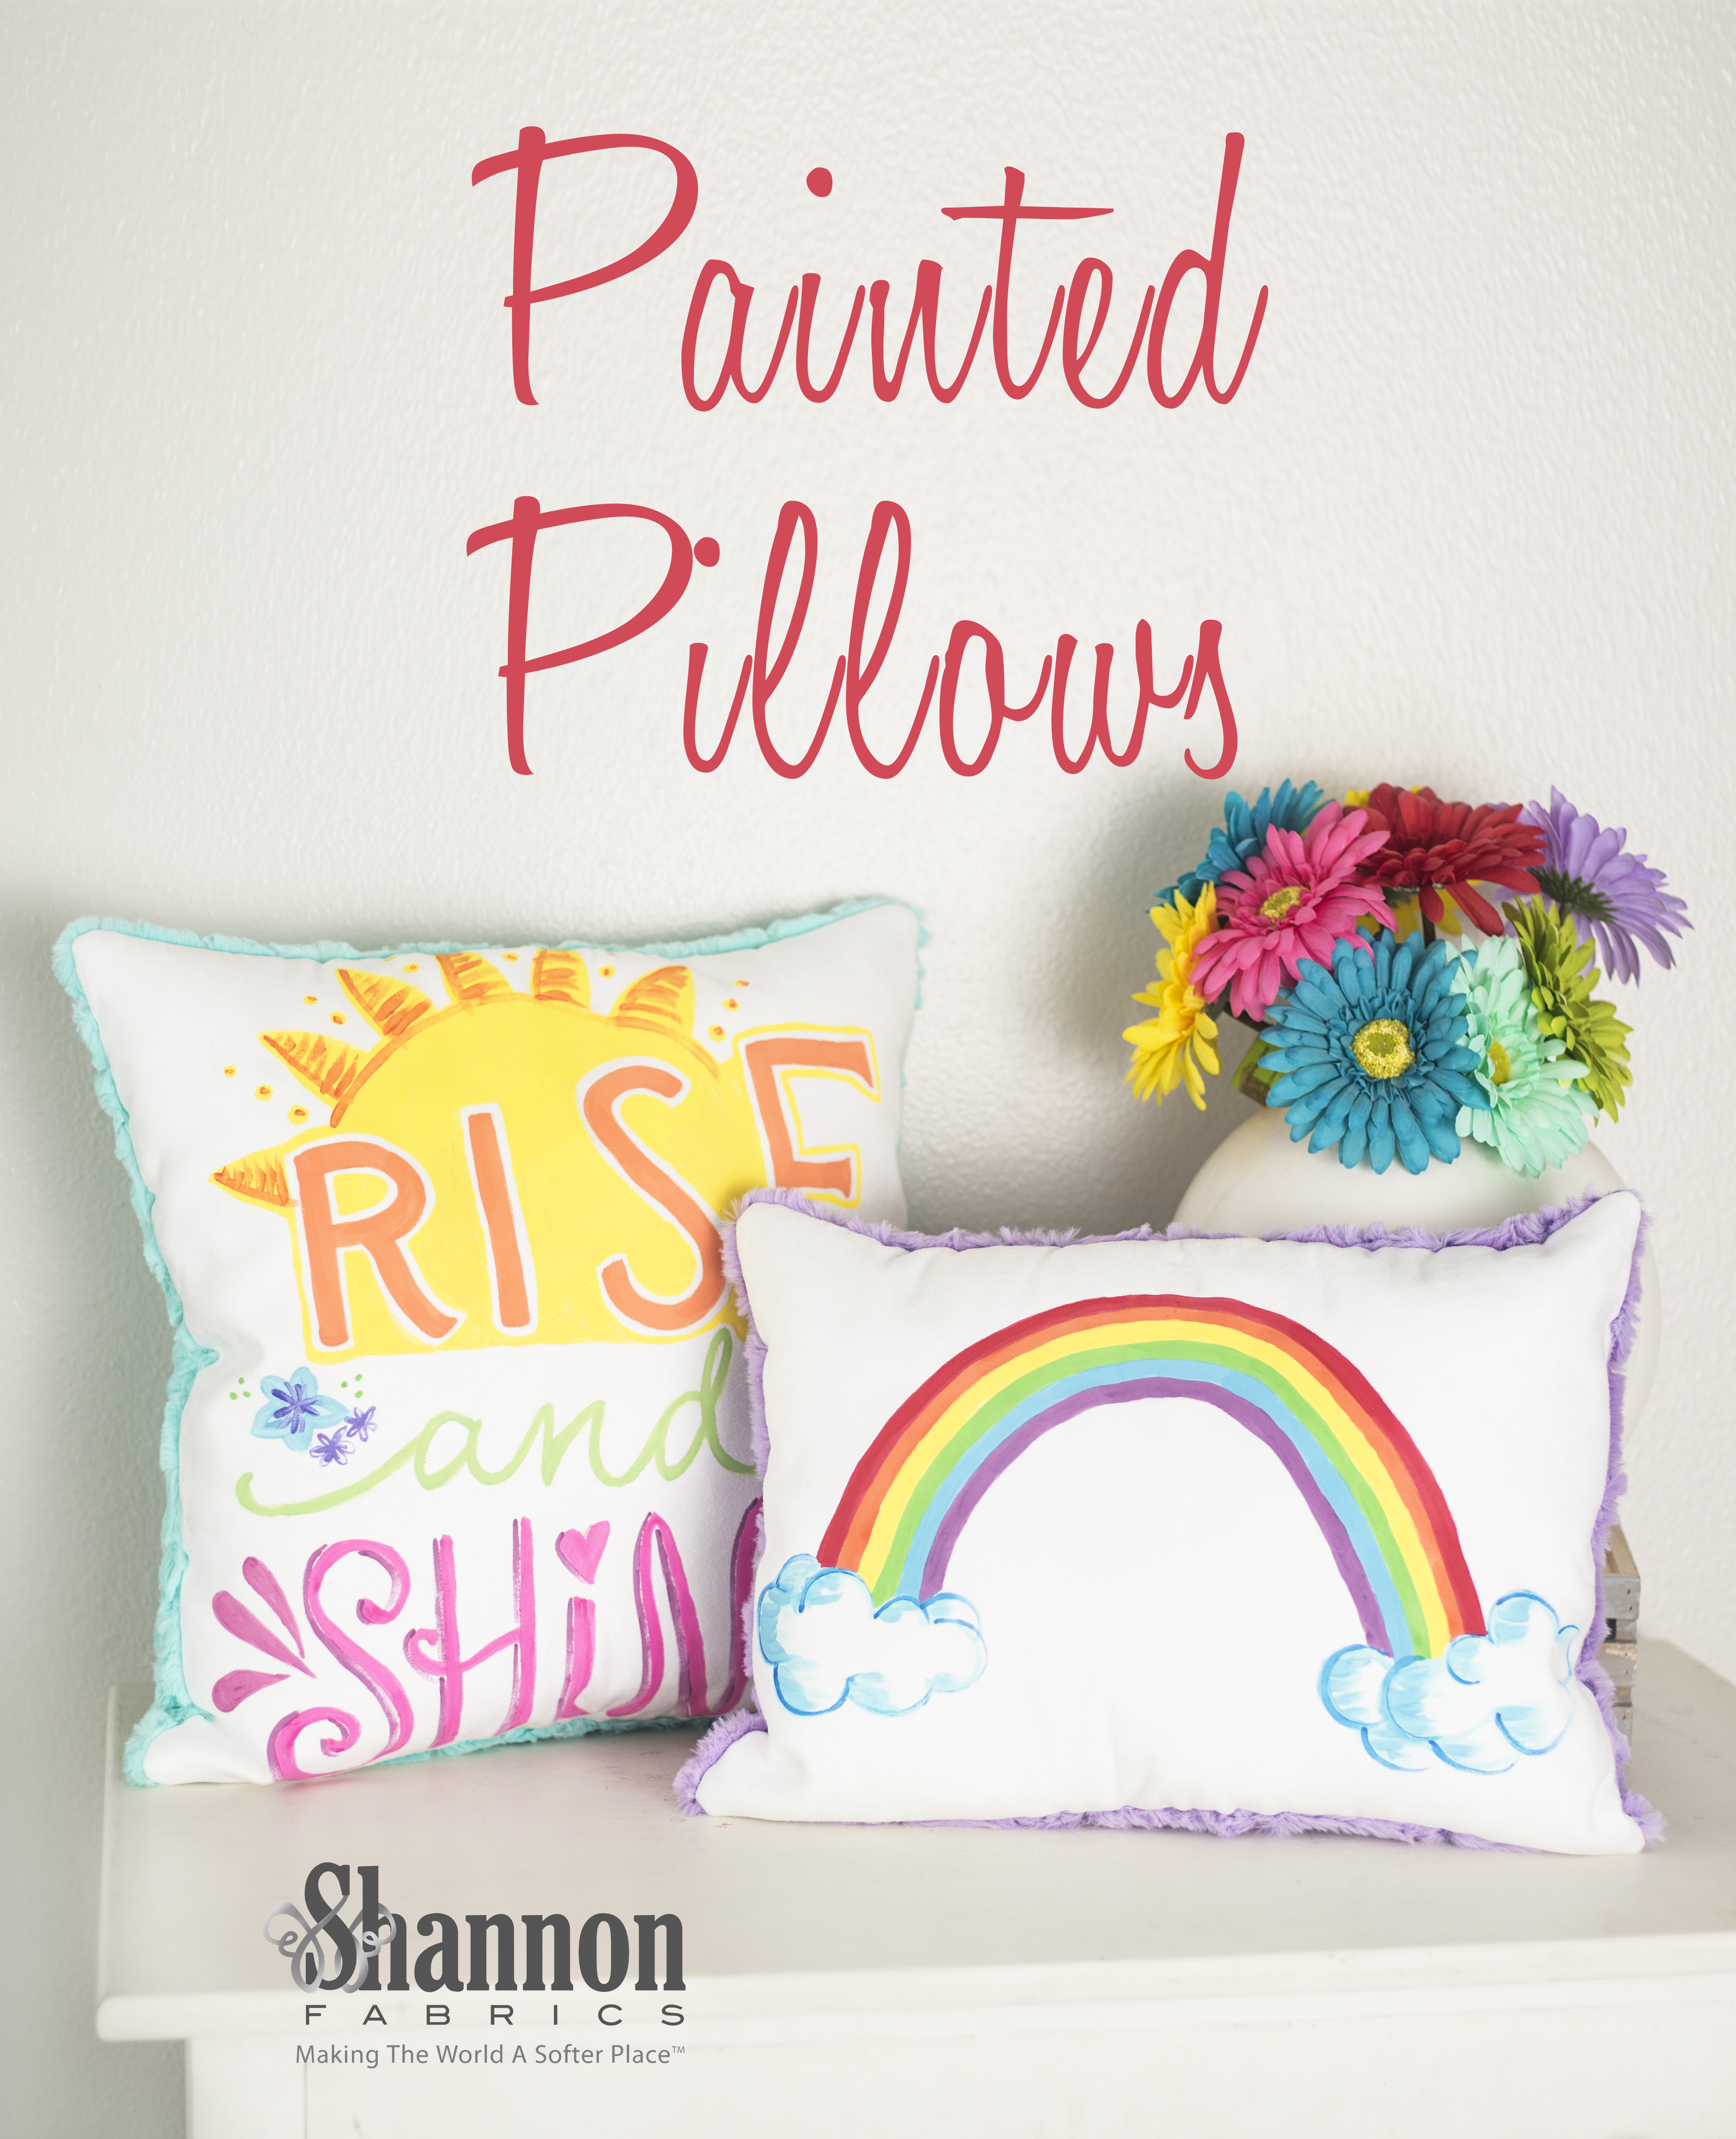
It’s me, Jayme, aka “Finding Sweet Land” in the quilting community, back on the Shannon Fabrics blog!! We have officially entered spring!! Even if it doesn’t quite feel like it yet. That did not stop me from starting on some spring projects this past week. One of the projects I had planned was painted pillows backed in Cuddle®.
I am not much of a detailed applique person. Really elaborate applique is just too time consuming for this mom of two. I am also not an artist. However, painting some simple words or pictures is right up my alley.
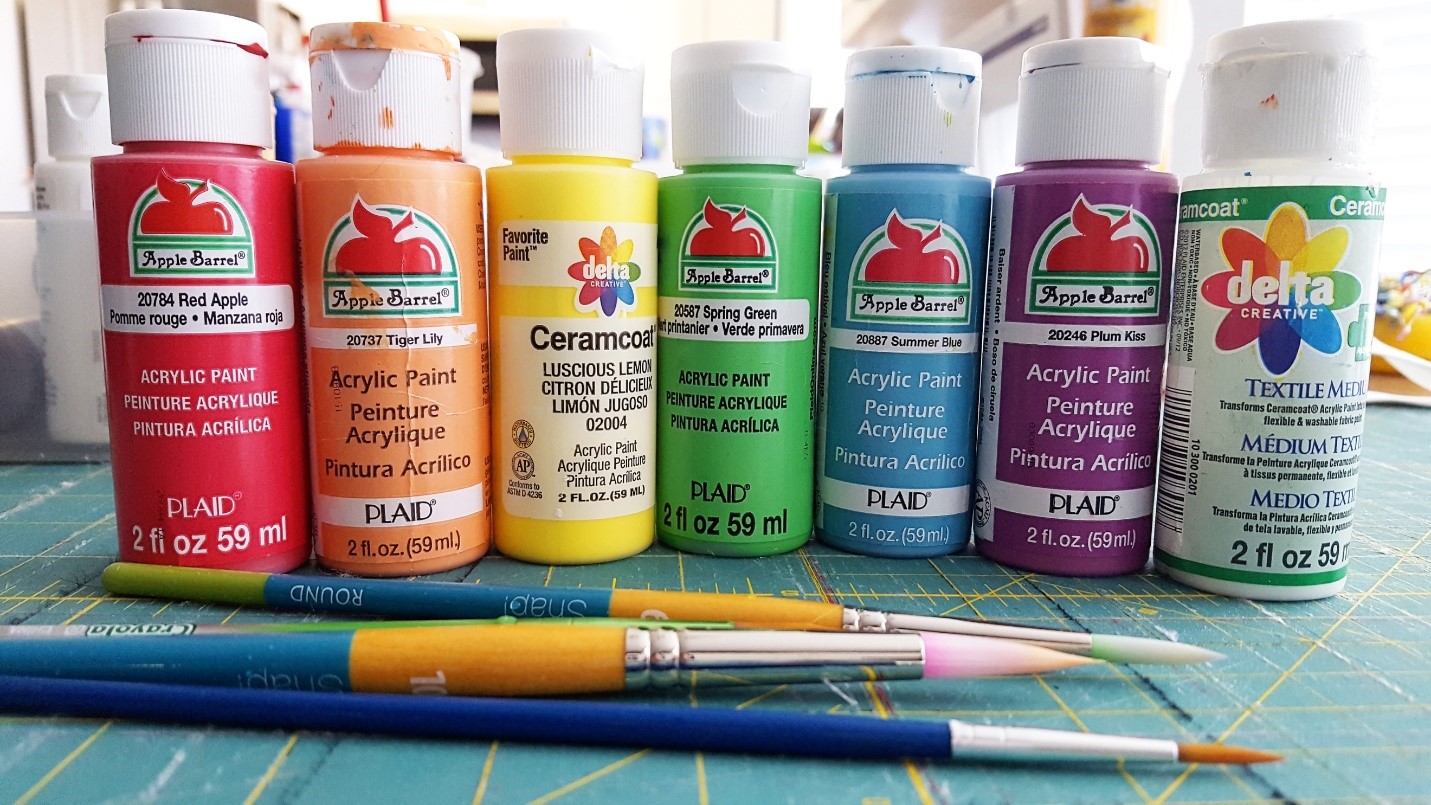
Supplies you will need for this project:
- Textile medium
- Acrylic paints (I used Apple Barrel® and Delta from Plaid®)
- Paint brushes
- ½ yard of Cuddle® Suede White
- ½ yard of Cuddle® for the backs – I used Luxe Cuddle®
- Scrap batting (I used Quilters Dream Puff)
- Polyester filling (I used Poly-fil® from Fairfield)
- Sewing machine needle (I like SCHMETZ needles)
- Hand sewing needle
- Thread for sewing shut (I used Superior Threads)
- Adhesive spray (I like ODIF® 505 Spray and Fix Adhesive)
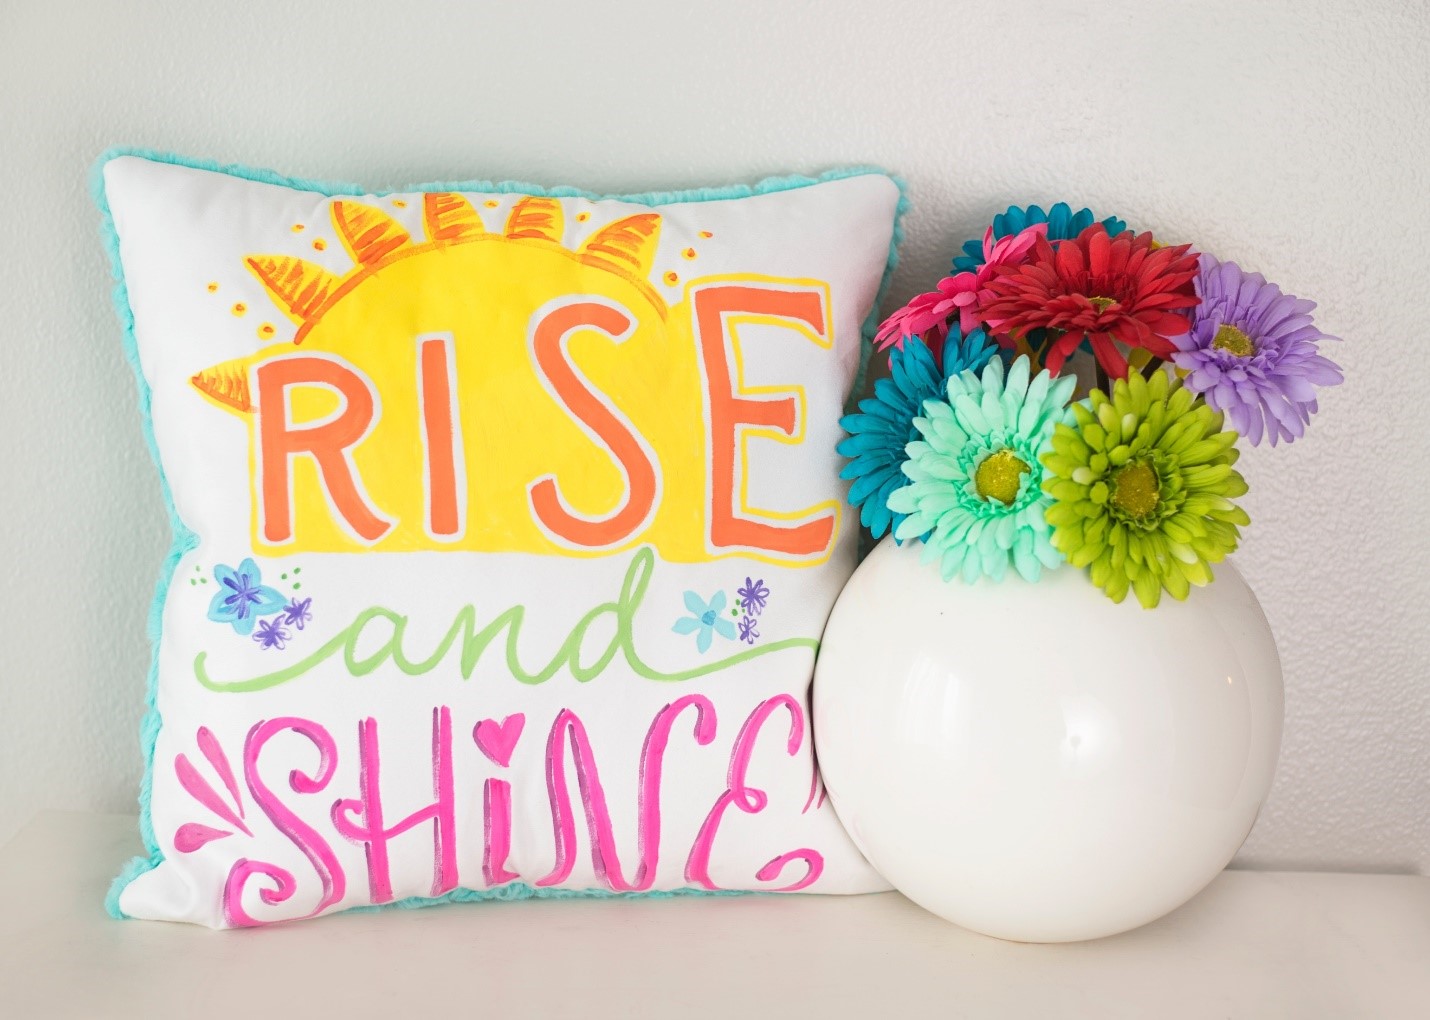
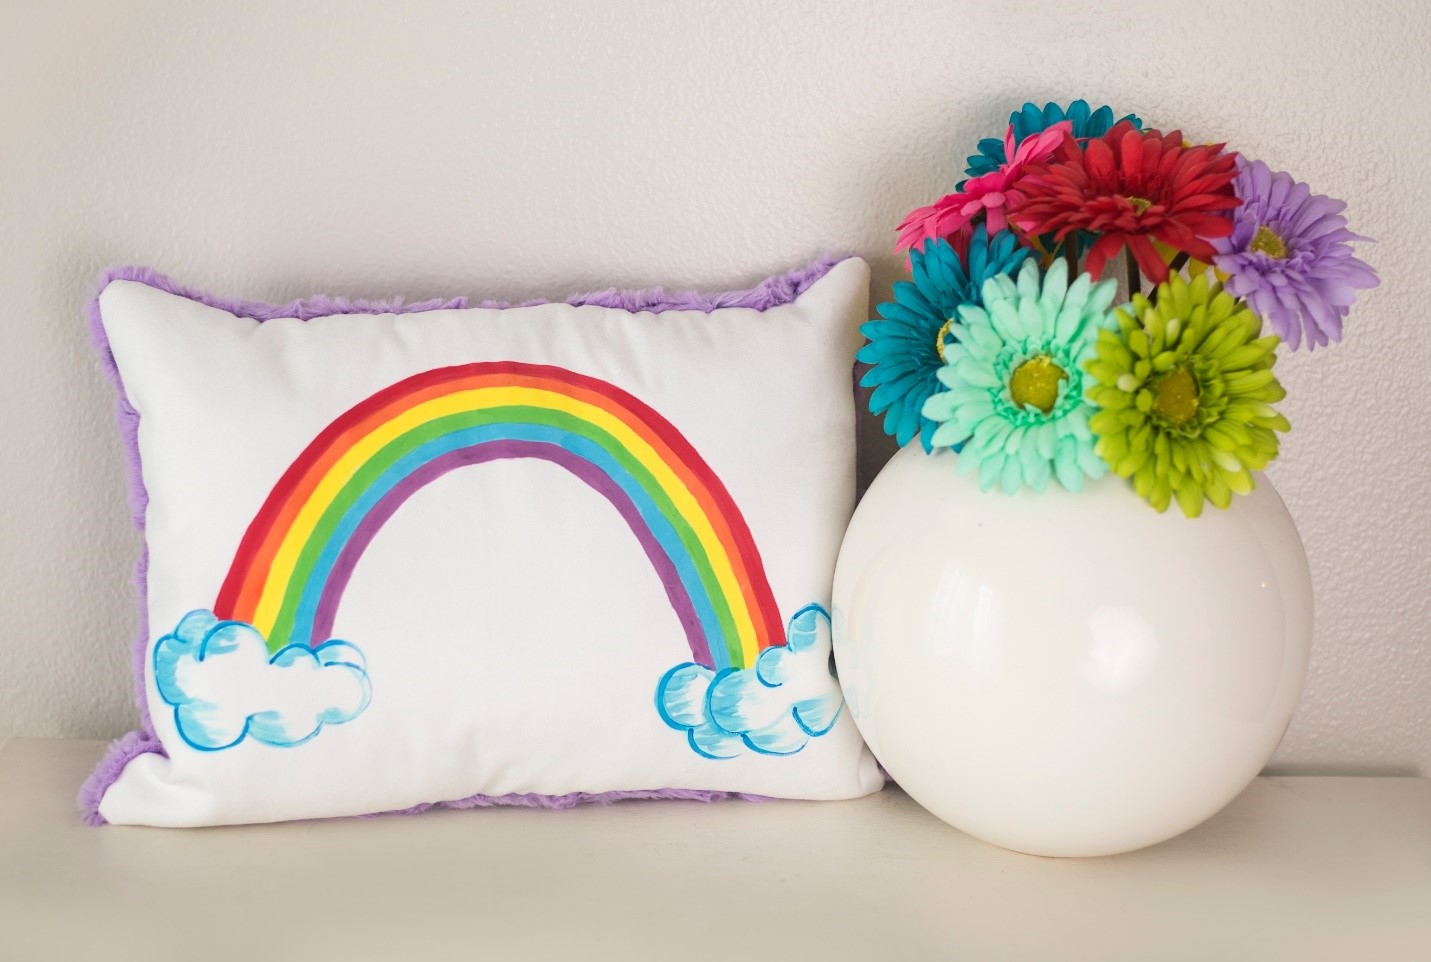
I decided to make two different pillows: rise and shine and rainbow.

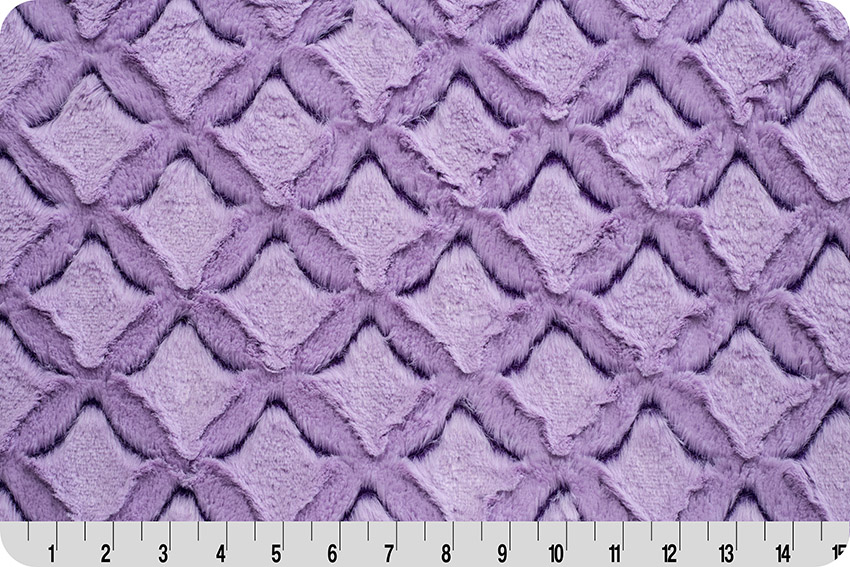
These are the fabrics that I used:

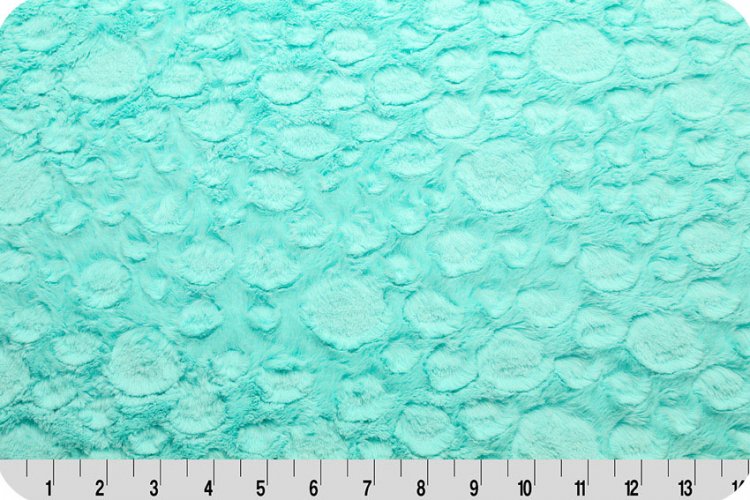
Luxe Cuddle® Frosted Gem Cuddle® Amethyst/Lilac
How to:
- I started off with a scrap piece of the suede so that I could make sure that the paint wouldn’t absorb too much, or run, and that my colors would be nice and saturated. It did wonderfully, so I moved on to my white Suede.
- Decide on your design and pick your colors. If you need to, use a pencil to lightly draw a basic outline of your design.
- For my Rise and Shine pillow I started with an 18” square.
- For the rainbow pillow I started with a 10” x 18” piece and ended up cutting it down a bit to even it up.
- Mix your colors and add the Textile Medium according to the directions on the bottle. Mine called for 2 parts paint to 1 part Textile Medium.
- Paint!! Then let dry.
- For a sturdy and smooth pillow, line your front and back pieces with batting. (Use adhesive spray to hold together the batting onto the wrong side of the front piece, and another on the wrong side of the backing piece.) I like ODIF® 505 Spray and Fix.
- Sew right sides together using a ½” seam allowance. Be sure to backstitch at your starting point and finish about 3 inches from your starting point to allow for stuffing (be sure to backstitch when you get to your finishing point).
- Clip your corners, turn right side out, stuff with polyester filling, and hand stitch closed.
That’s it!! You are now ready to add some super cute spring pillows to your home décor!
As always, you can find Shannon Fabrics at your local quilt stores, and online at fabric.com, theminkyboutique.com, and fabricdepot.com. You can also check out their Store Locator!
You can Join the Shannon Fabrics mailing list and Subscribe to the blog. And, be sure to follow them on social media – some of my favorites are: Facebook, Pinterest, Twitter, YouTube, and especially Instagram! It’s a great way to stay in the loop about new products, patterns, and to see what other people are making!
Happy Spring and Hugs from Idaho!
Jayme


.jpeg?width=640&name=Image%20(5).jpeg)


-Dec-11-2025-10-58-46-1415-PM.png?width=640&name=Untitled%20design%20(3)-Dec-11-2025-10-58-46-1415-PM.png)


.png?width=640&name=SEW%20TOGETHER%20livestream%20promo%20images%20(4).png)
.jpg?width=640&name=gencoreA%20(1).jpg)
-Oct-06-2025-07-25-25-9749-PM.png?width=640&name=SEW%20TOGETHER%20livestream%20promo%20images%20(1)-Oct-06-2025-07-25-25-9749-PM.png)

-4.png?width=640&name=SEW%20TOGETHER%20livestream%20promo%20images%20(3)-4.png)


.jpg?width=640&name=spring%20tea%20party_049%20(1).jpg)


.png?width=640&name=12%20Days%20of%20Cuddle%C2%AE%20(8).png)
.png?width=640&name=12%20Days%20of%20Cuddle%C2%AE%20(3).png)
-2.png?width=640&name=12%20Days%20of%20Cuddle%C2%AE%20(2)-2.png)

-2.png?width=640&name=12%20Days%20of%20Cuddle%C2%AE%20(4)-2.png)
.png?width=640&name=12%20Days%20of%20Cuddle%C2%AE%20(7).png)
.png?width=640&name=12%20Days%20of%20Cuddle%C2%AE%20(2).png)
.png?width=640&name=12%20Days%20of%20Cuddle%C2%AE%20(6).png)


Leave a Comment