%20-%20Copy%20copy.png?width=143&height=69&name=Black%20logo%20(002)%20-%20Copy%20copy.png)

Today is the third post in our blog series featuring Sew Cuddly-12 Plush Minky Projects for Fun & Fashion - Tips & Techniques to Conquer Cuddle®, by Judy Gauthier. This series features projects created with Cuddle® fabric by Shannon Fabrics Ambassadors using ideas from the book. Today we are excited to feature Shannon Fabrics Brand Ambassador April Woodside.
Hi! My name is April and I am a Brand Ambassador for Shannon Fabrics down in sunny Florida! I’m ready to come to your favorite quilt shop to show you a trick or two about Shannon Fabrics! For more information on the Shannon Fabrics Education Program and Brand Ambassadors, please click here or contact teresa@shannonfabrics.com.
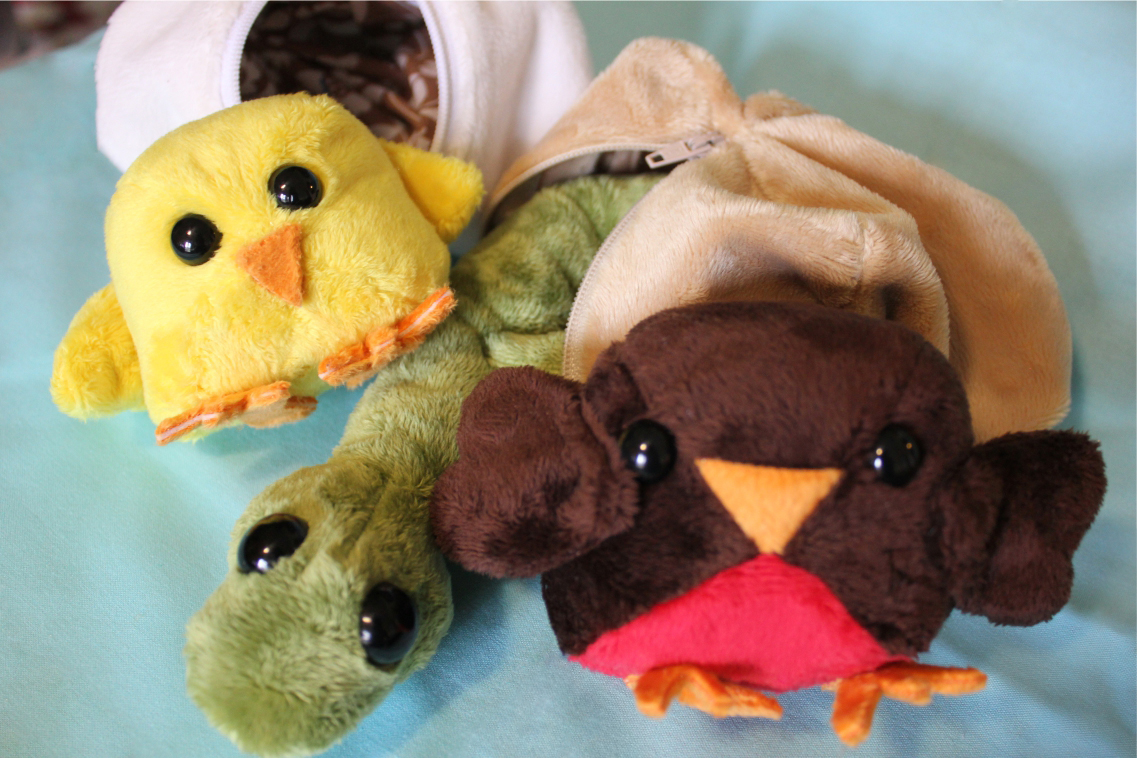
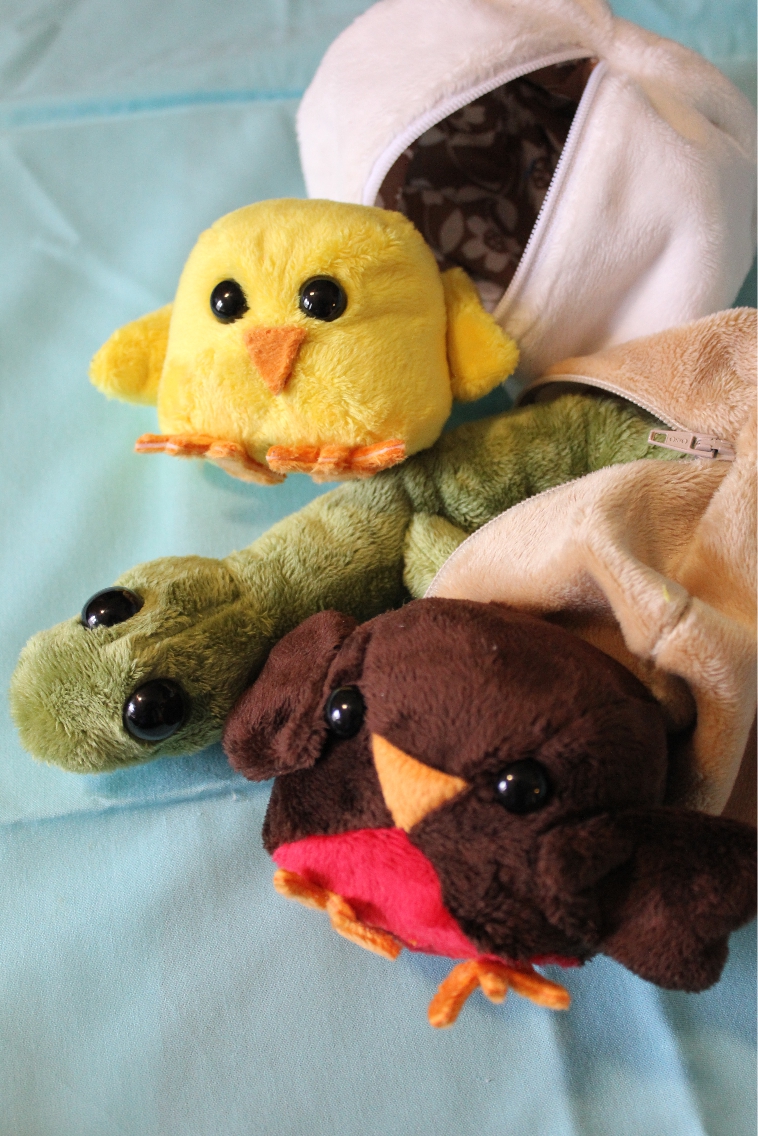
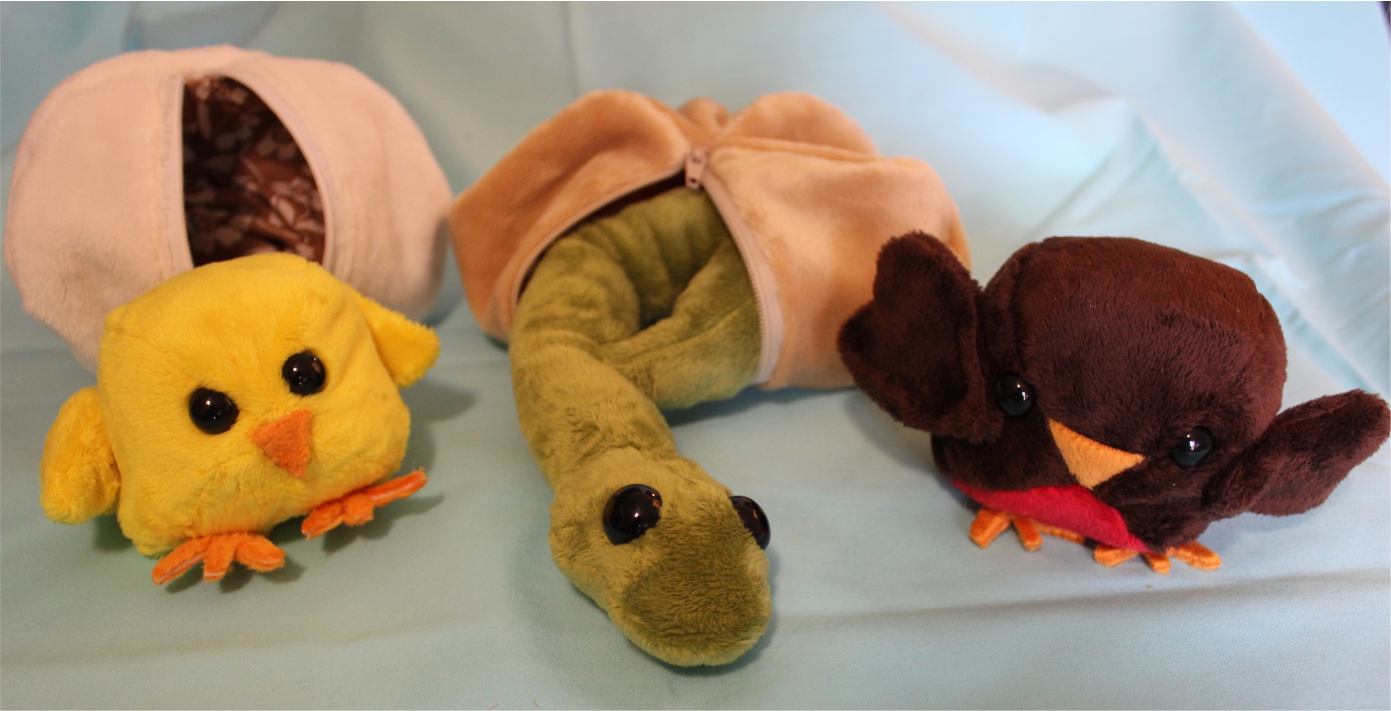
My fellow ambassador, Judy Gauthier, has written a book, Sew Cuddly. The book is filled with lots of great projects suited for the softest fabric on the planet! Ask for this book at your favorite quilt shop or buy it here from Judy’s shop Bungalow Quilting. For today’s sew-along, I chose to make the Hatchlings project. I’m always looking for a quick and easy project that gives me the satisfaction of getting something done right away, and between my kids always begging for something made of Cuddle and all the new babies arriving in our extended family, I knew this would be a great project.
To create this project as I did, you will need:
Supplies:
- Sew Cuddly book by Judy Gauthier
- Supplies listed in the pattern
- Sewing Machine with a walking foot
- SCHMETZ Size 90 Jersey or Stretch Needle
- So Fine! Polyester Thread by Superior Threads
Supplies I found helpful, but not listed in the pattern:
- Poly-fil Royal Silk Fiber Fill
- Bo-Nash Fuse-It Powder
- 10,12, or 15 mm safety eyes
- KAI 5100 scissors
- Scrap of Peltex, for double-sided fusing
- Wooden skewer
- Clover Wonder Clips® and flat flower head pins
**For Quilt Shops: if you are interested in creating or kitting any of the projects in the book or as seen in the blog series, please comment on the post and we’ll email you a list of fabrics used!**
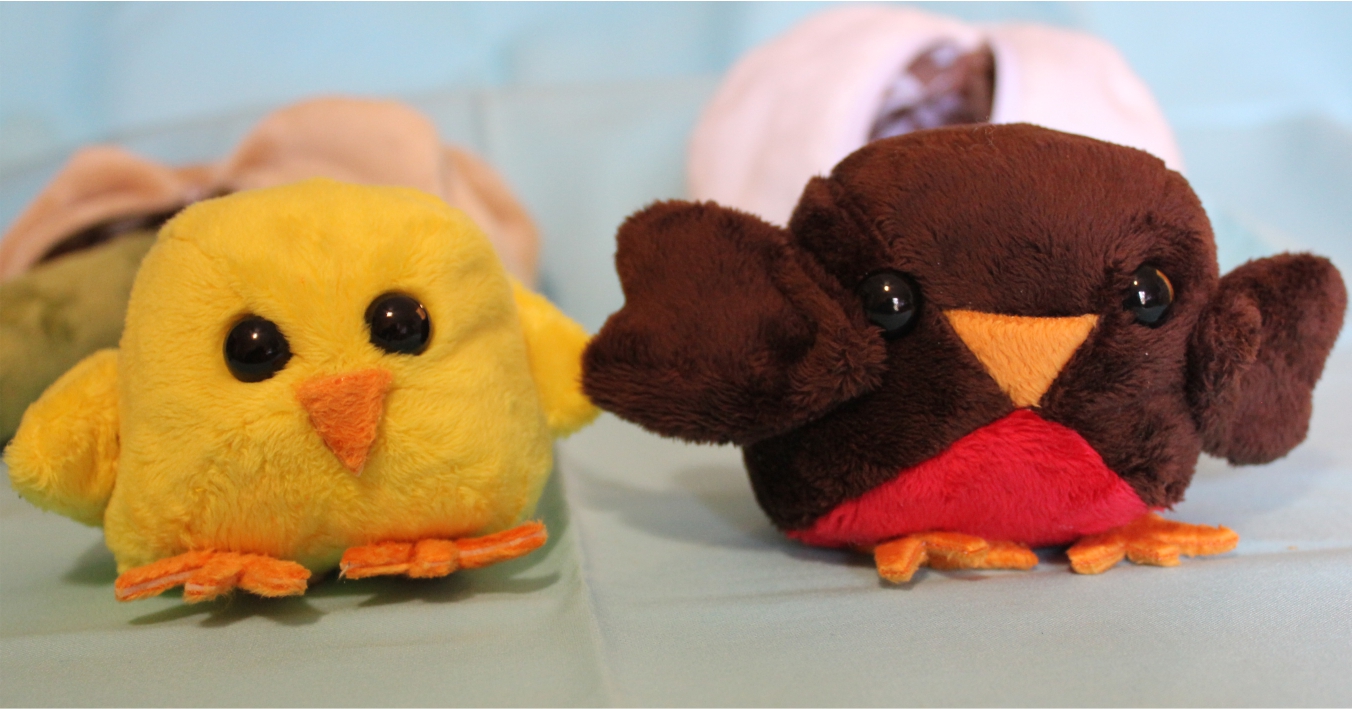
For my fabric, I started with the colors in the book. Now that I’ve made them once, I think it would be fun to use more unexpected colors too. All my Shannon Fabrics are basic Cuddle® 3 (C3) solids from the Kozy Cuddle Solids Collection. The colors are as follows:
Chick: snow white (egg), canary, mandarin (beak)
Robin: turquoise (egg), mahogany, red
This would also be a great project for scraps, too. How about a multicolor chick?
LET’S SEW!
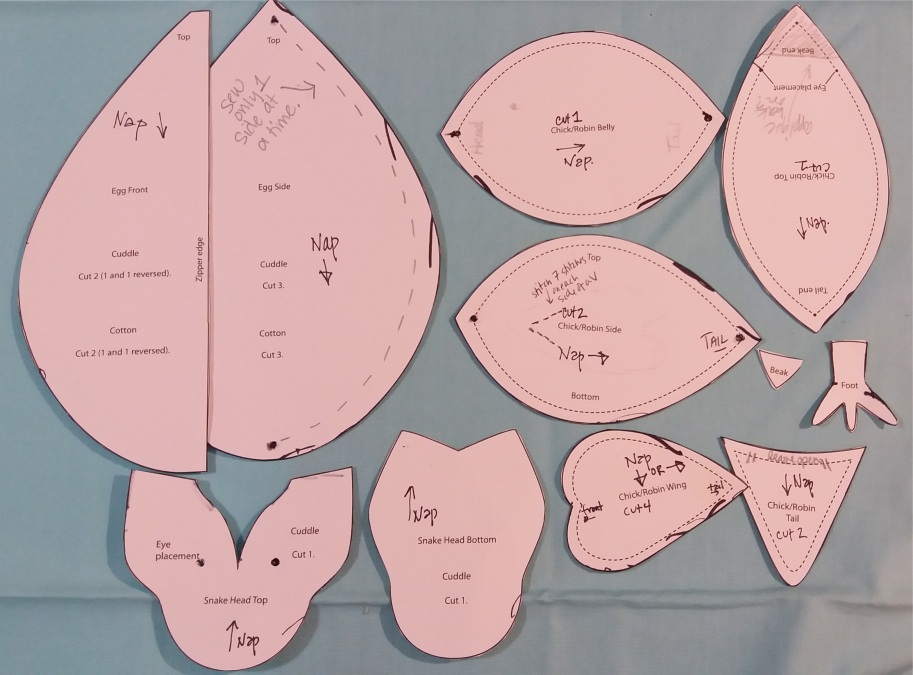
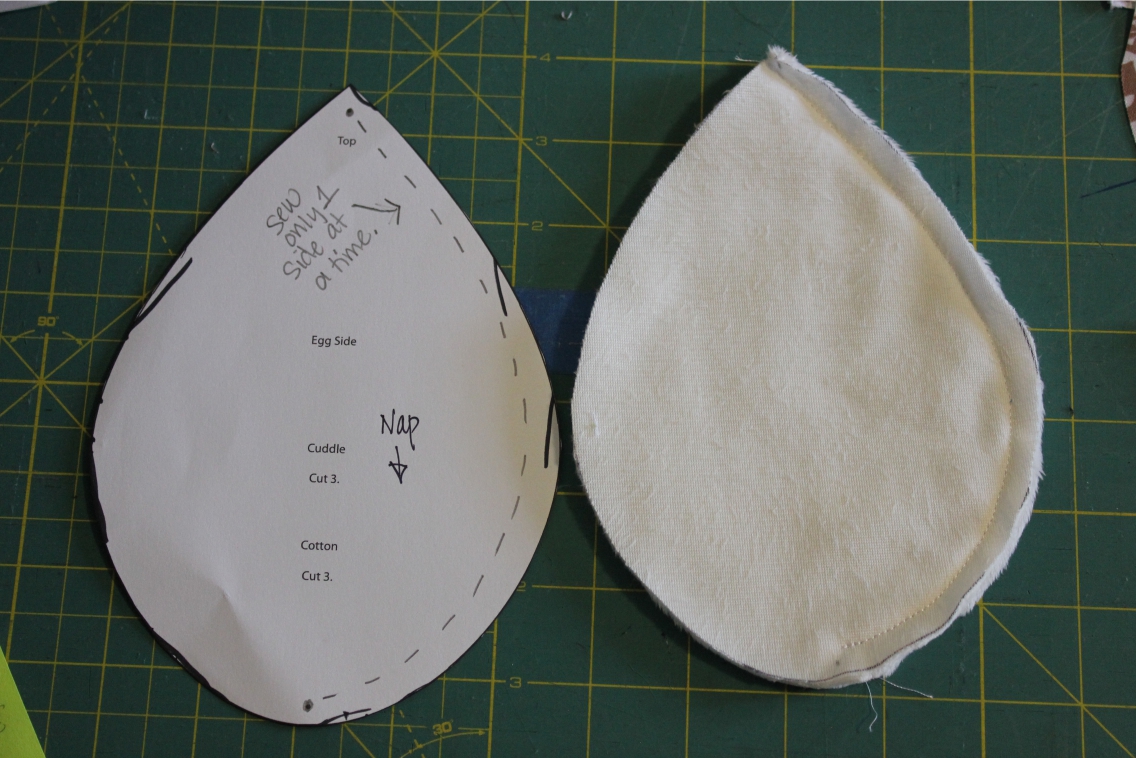
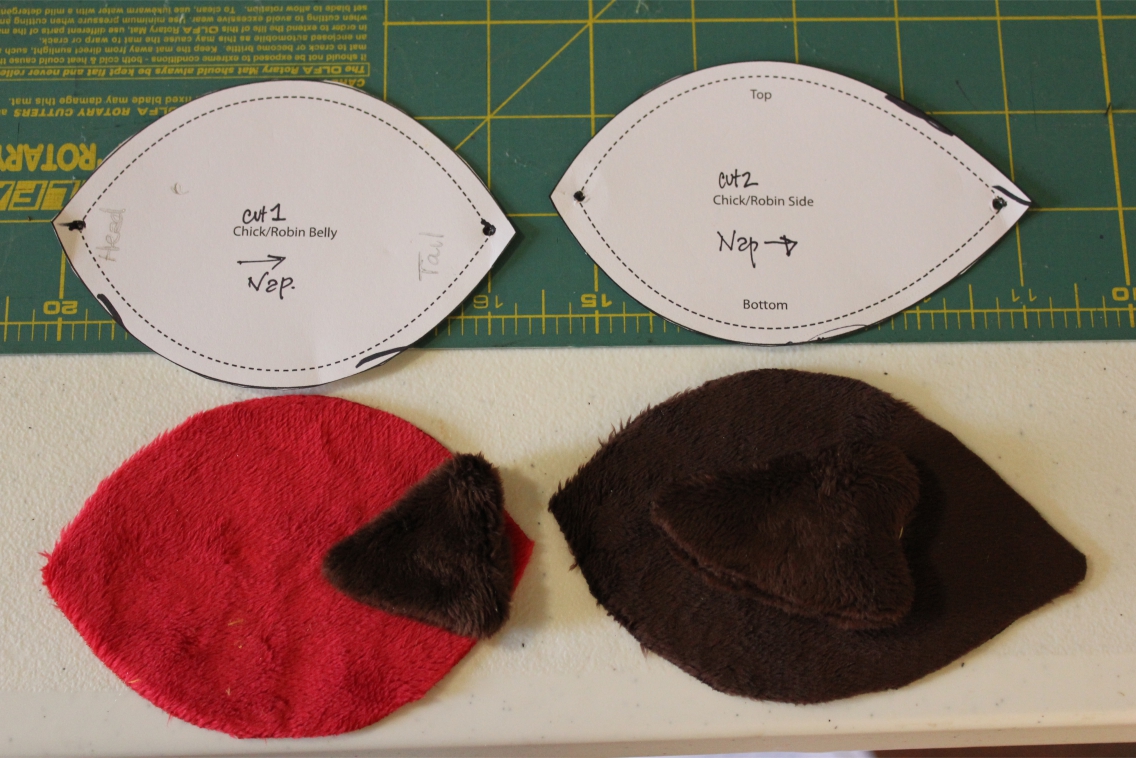
Start off by printing the pattern pieces from the tinyurl download page associated with the book—print them on card stock to make your life super easy!
Cutting pieces: remember the nap:
First off, I laid out all of my pattern pieces on the Cuddle, visualizing where each piece would be in the finished egg or animal. I wanted all of my animals to be pet from head to toe with the nap lying down. I marked all the pieces with an arrow for the direction of the nap to help me remember. Later on, when you are ready to sew, pay attention to the direction of the nap once again, especially with the chick pieces that are symmetrical.
The EGG:
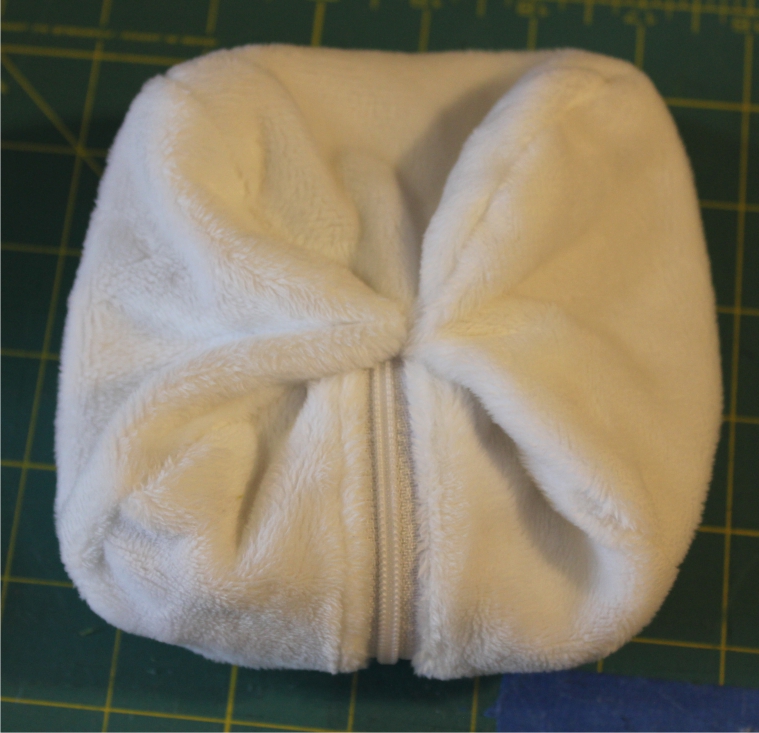
The egg is pretty easy to put together, once you really think through the directions. The illustrations are a bit hard to decipher, and may show a couple steps at once on occasion. For the zipper section, make sure to sandwich the lining piece on the bottom, then the zipper (with tab upwards facing cuddle), then the Cuddle--all fabric right sides together. This insures the Cuddle will be on the outside of the egg with the zipper tab.
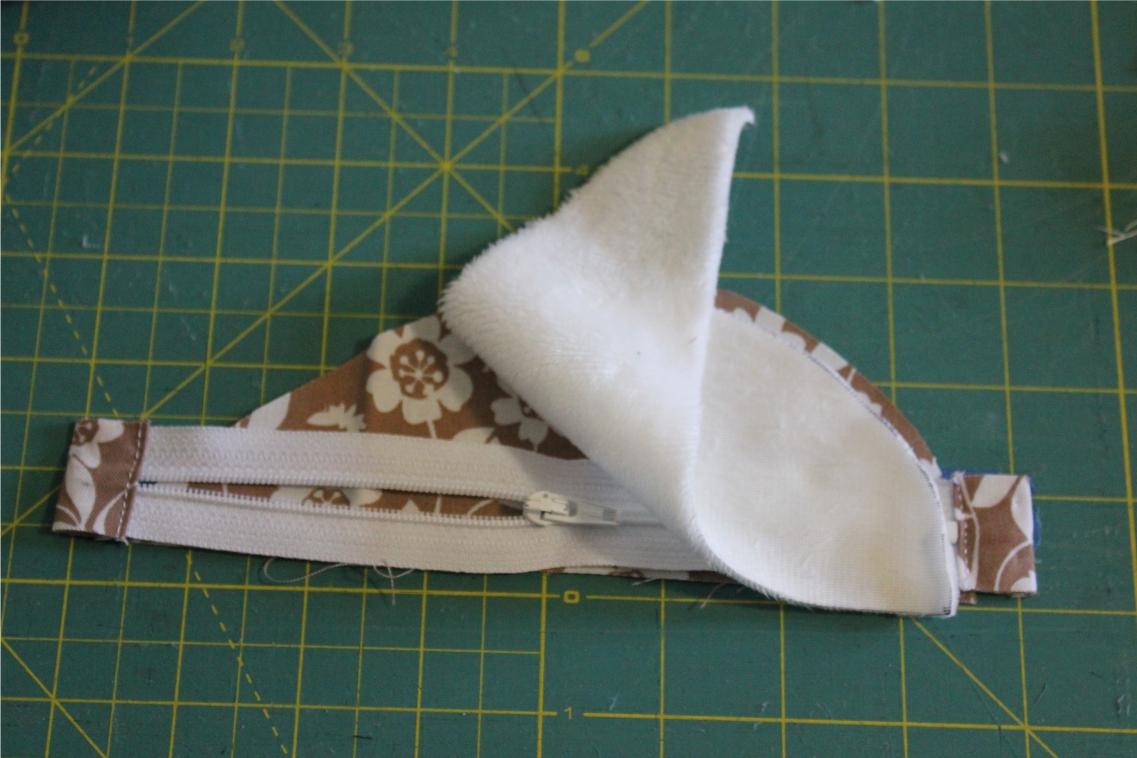
When you sew the first two sides of the egg together, you are ONLY sewing from the top mark (dot), around one side and stopping at the bottom mark each time.
Backstitch on both ends to secure. Do the same for the third side piece,
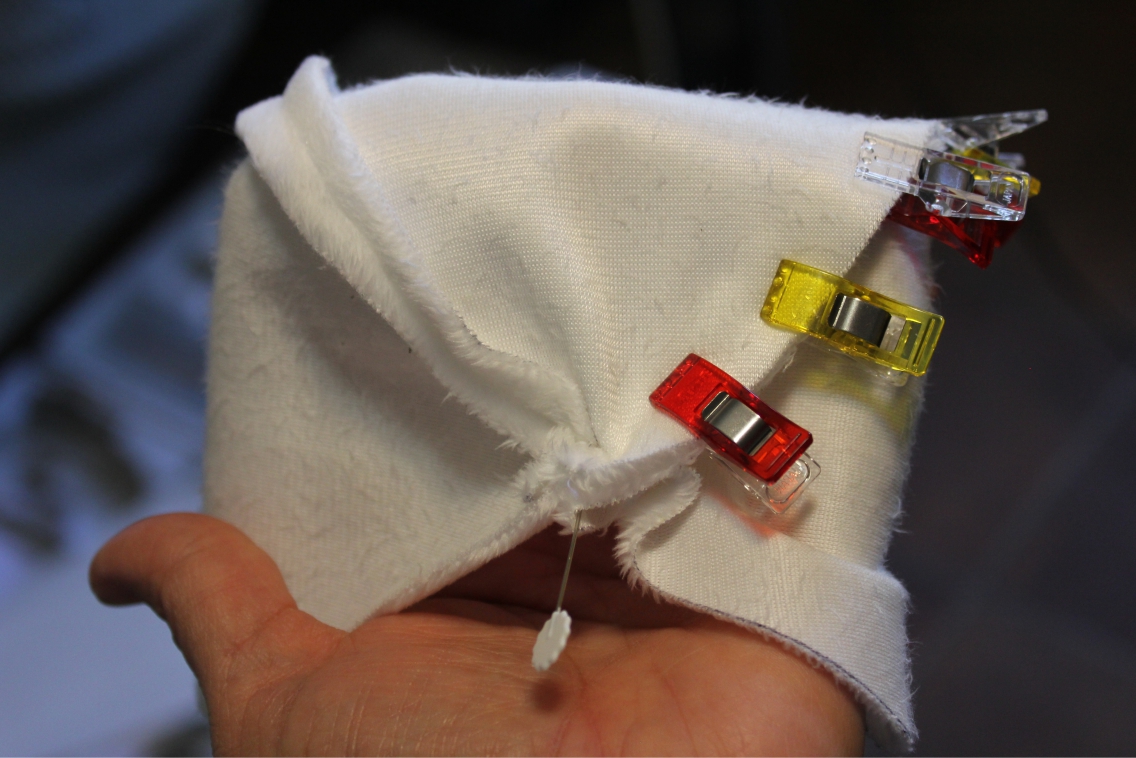
and finally the zippered side. Again, when adding that 4th zipper piece, it gets really tricky to not sew down the lining, and your instinct will be to sew the whole circle in one nice step.
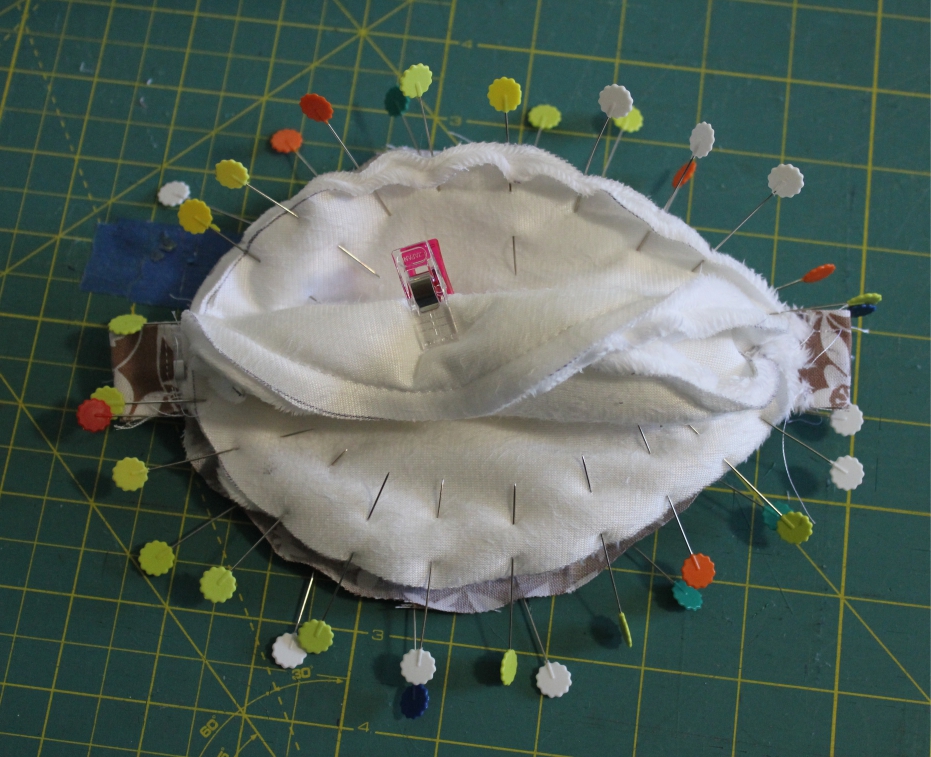
DON’T DO THIS. Instead, sew one side from top mark to bottom mark, then stop (backstitch too). Bring the needle out, flip all the fabrics that are underneath to the opposite side to get them out of the way, then start again, sewing the next side from top mark to bottom mark. In this fashion, you get a nice 4-point intersection on the outside.
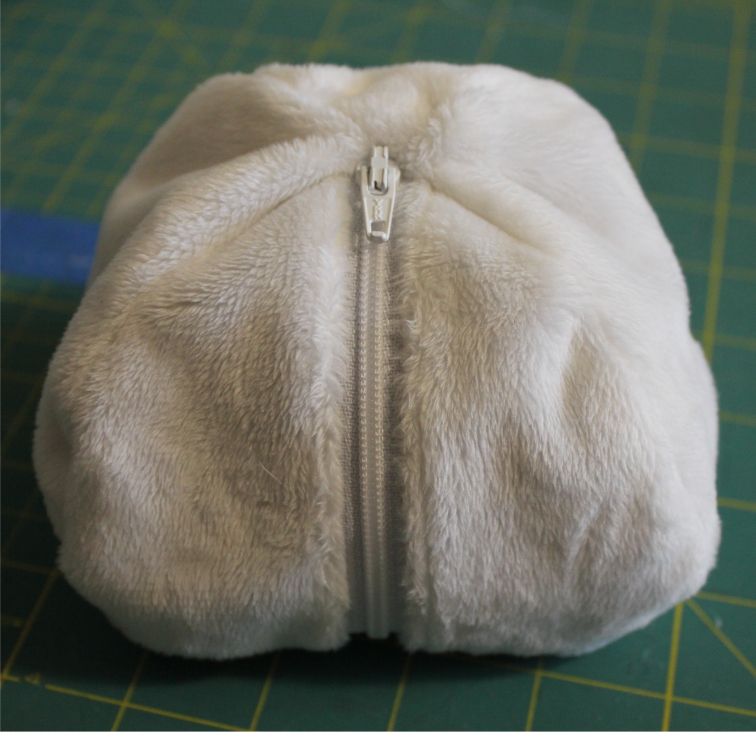
This is what happens if you sew across the whole circle in one go.
Once you learn this trick, it goes for the chick construction as well.
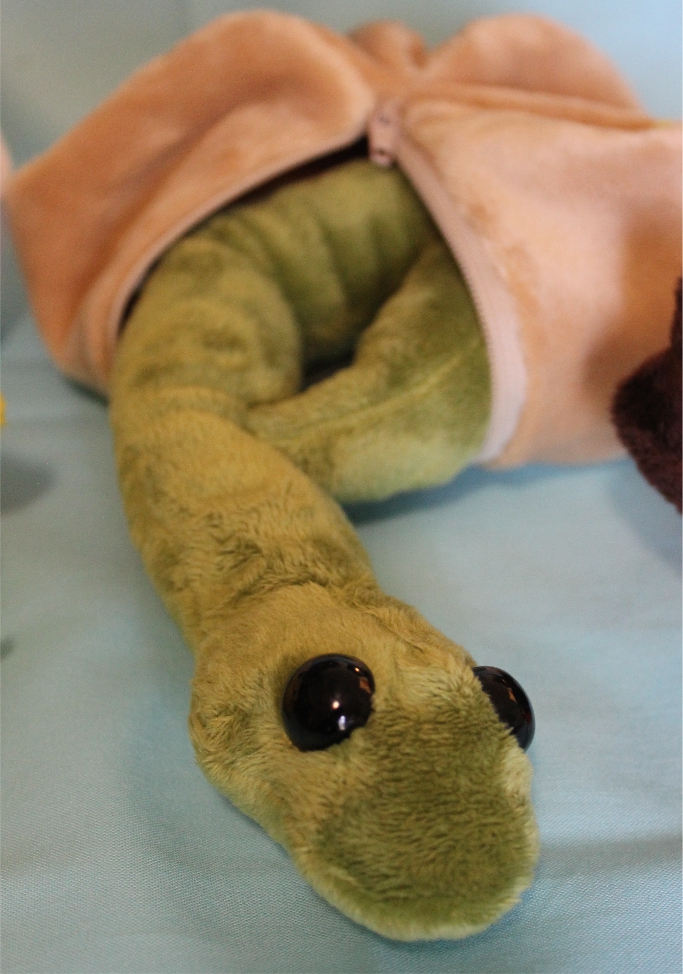
Since Cuddle does not fray, and depending on the look you’d like, you can also make the egg without the lining. I made the snake egg without lining to try it out and it is still sturdy enough for play.
Chick Construction tips:
These are little pieces, so you need to pin, pin, then pin again to keep the Cuddle in place. Here’s something to think about for the little tail and wing pieces—instead of cutting them out and trying to keep them together, instead trace the pattern on the reverse of your Cuddle, then pin two layers (right sides together) together, and sew the seam before cutting out the piece. This method will help you end up with nice even pieces.

Chick Shortcuts and tweaks:
I’m not a fan of hand sewing. I’m more of a pedal to the metal kind of gal, and I like to sew on my machine wherever I can. So, after doing it the way the pattern calls for the first time (the chick), there are a couple of areas I experimented with to reduce the hand sewing when making the robin (same pattern, different fabrics). In the pattern, it calls for the wings, tail, and eyes to be hand sewn. Eyes are an easy fix, now that you can find safety eyes. I used a 12 mm to a 15 mm safety eye, and you must make sure to wait until you have the animal completely constructed before adding the eyes. Once you click them together, they are on, and when you can’t get your presser foot around them, you’re back to hand sewing. Patience is hard when these little guys are so cute!
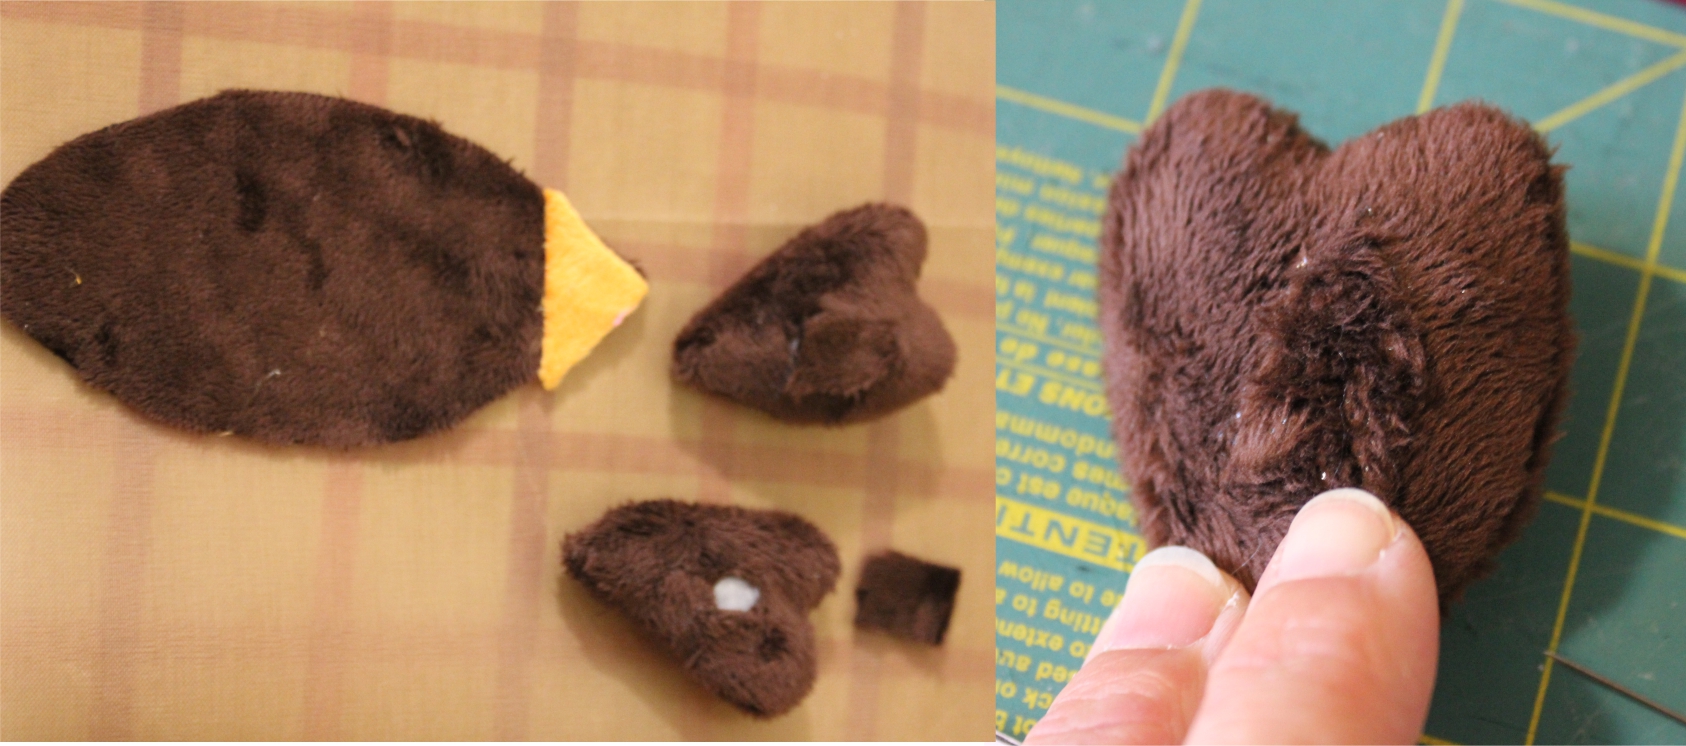
The tail can easily be added to the belly before sewing it to sides. Construct the tail, turn it right side out, then attach it to the tail end of the belly piece. Lay it on top of the belly piece, right sides together, at the point where the width of the tail meets the width of the belly.
Sew one straight line across the back end of the tail, closest to the point of the belly.
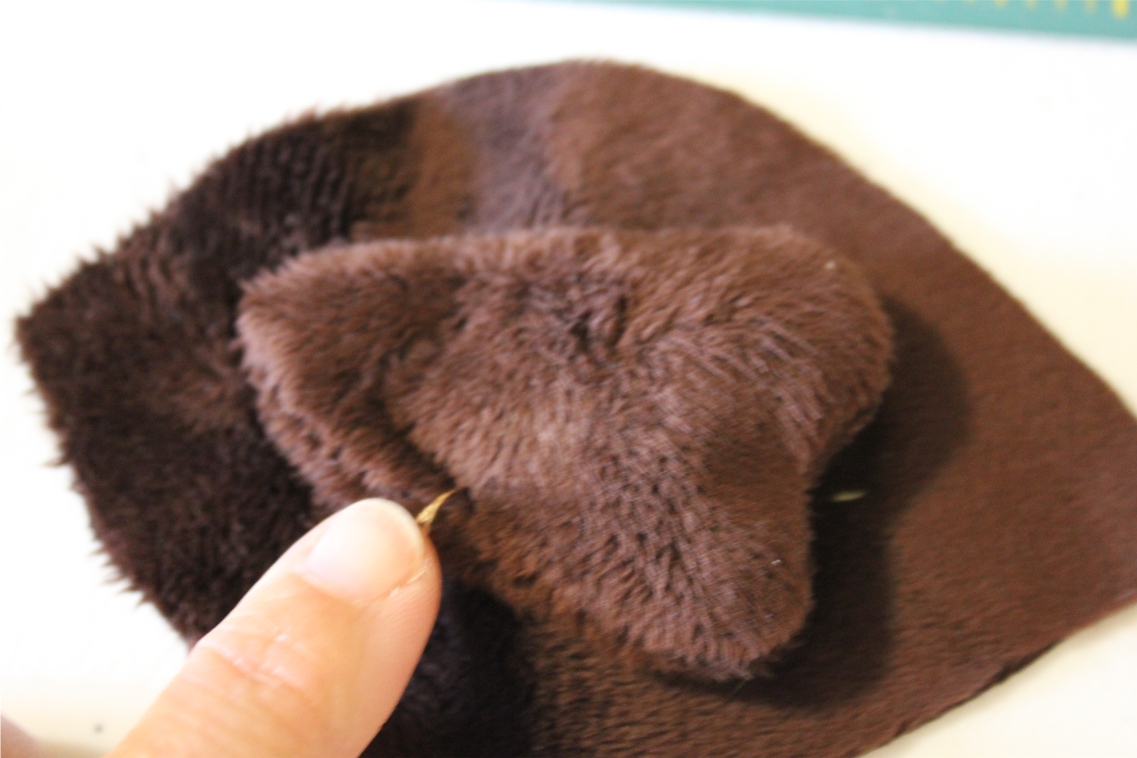
The wings can be attached in a similar fashion. Sew the wings, turn them right side out, put a little bit of stuffing in them, patch the hole on the reverse with a scrap of cuddle and Fuse-it (see below), then sew them to the outside of each side piece.
I used a v-shaped stitch towards the front of the wing, but the thick pile of the Cuddle really hides the stitches, so you have a lot of leeway.
Sew the wings to the side pieces before assembling the chick—and watch the direction of your nap.
My last experiment was with the beak. Since Cuddle does not fray, I decided to try attaching the beak to the top piece before assembling the robin. I fused a triangle to the beak end, then assembled the rest.
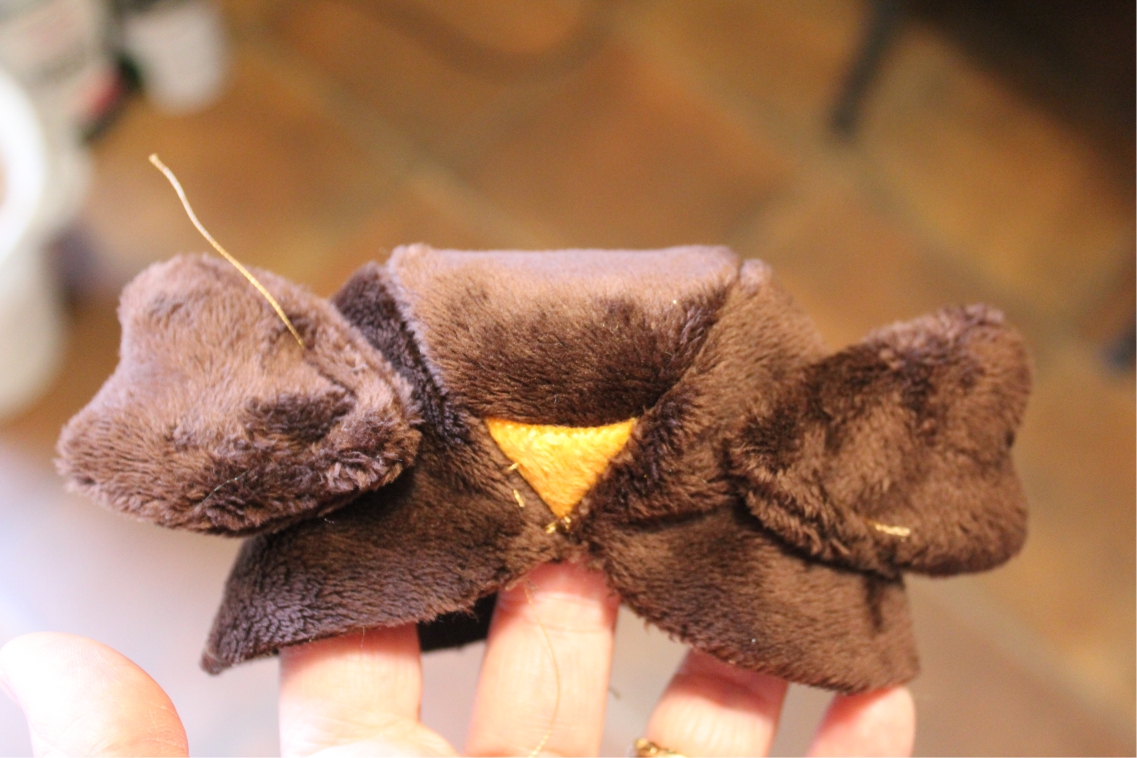
The beak turned out great—it just changes the eye placement somewhat, making the eyes further apart. You could choose to place the eyes closer together above the beak, since eyes are added at the end!
Feet, two ways.
The pattern calls for felt for the beak and feet, but I wanted them soft and cuddly. My first chick has sturdy feet with thick two-sided fusible Peltex on the inside. I fused the cuddle to both sides of the Peltex, then cut out the feet and beak.
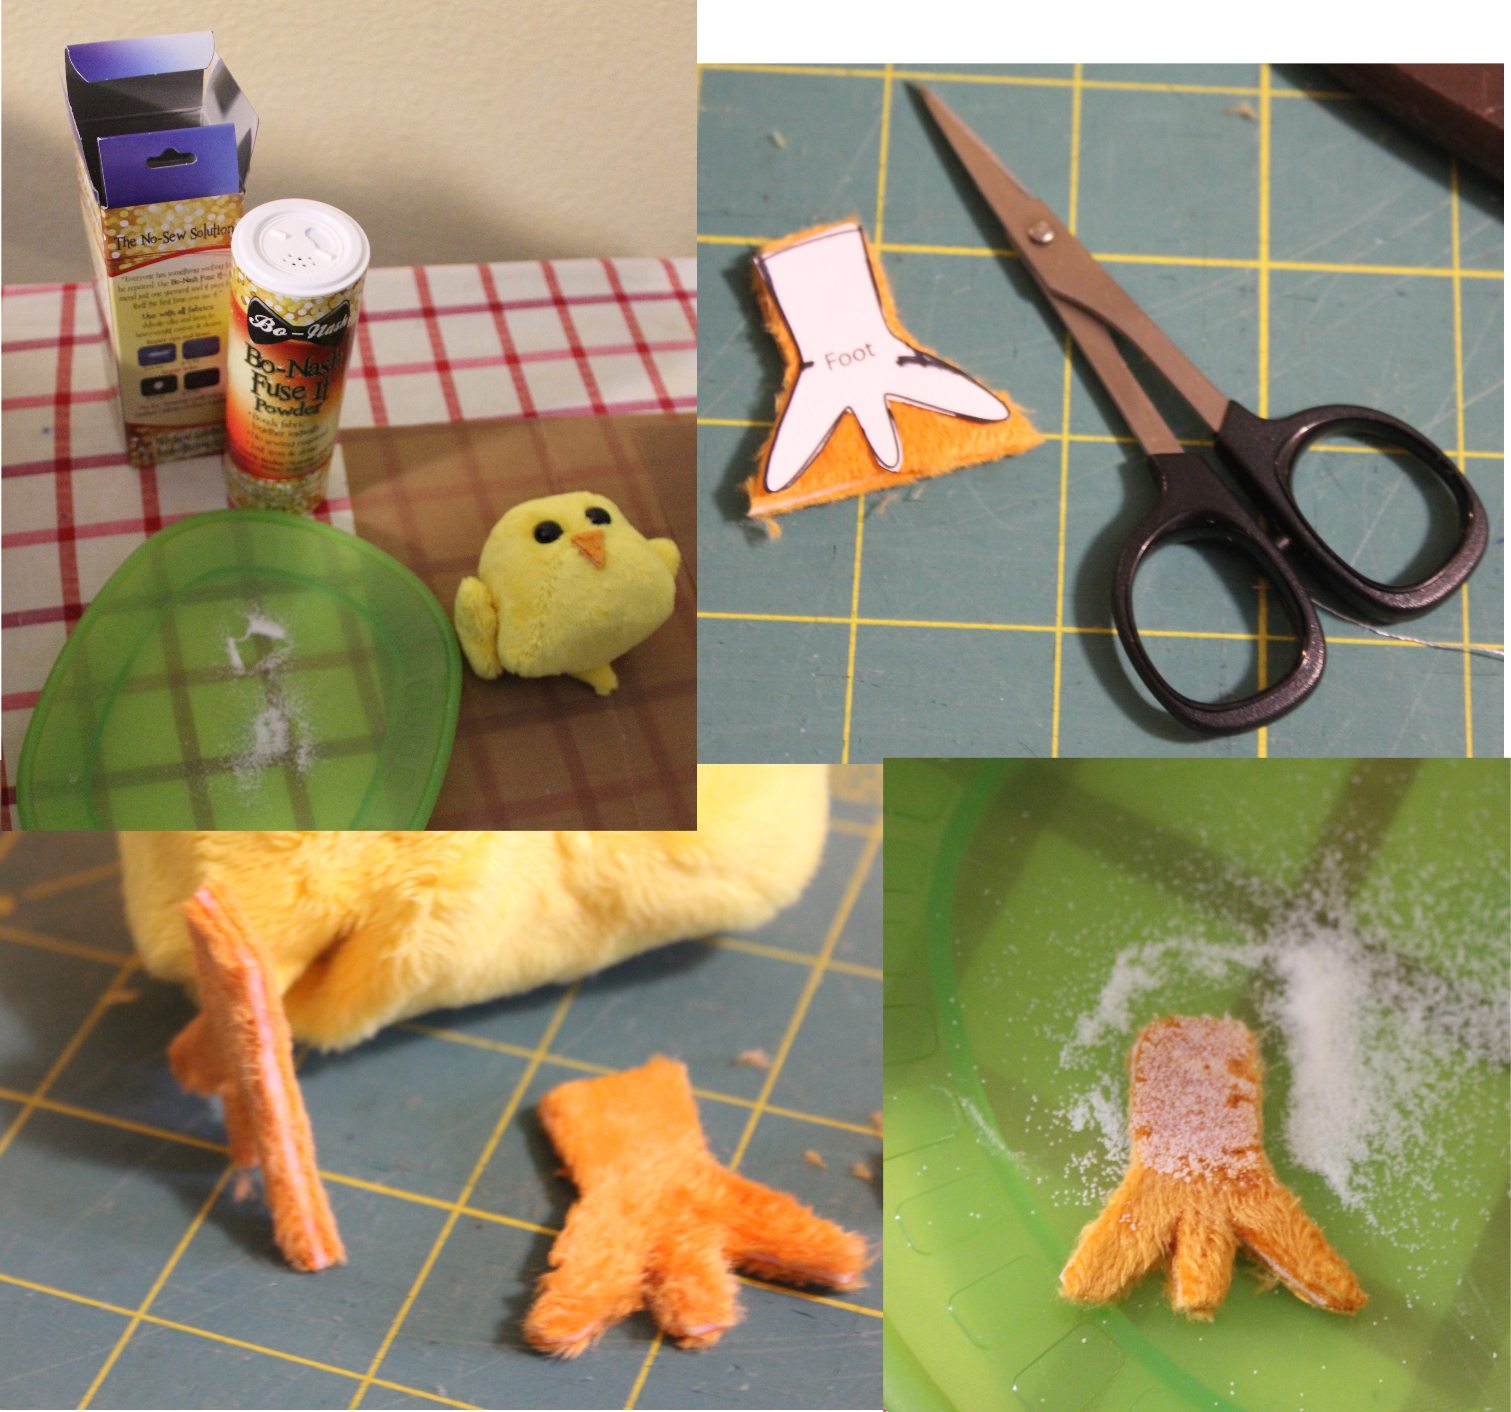
To fuse the pieces to the chick’s body, I used Bo-Nash Fuse-It. It is a fusible powder that will hold up in the wash. Dampen the portion of the feet you’d like the powder to stick to, sprinkle on the fusing powder, tap off the extra, cover with the fiberglass pressing sheet, then fuse with a hot iron.
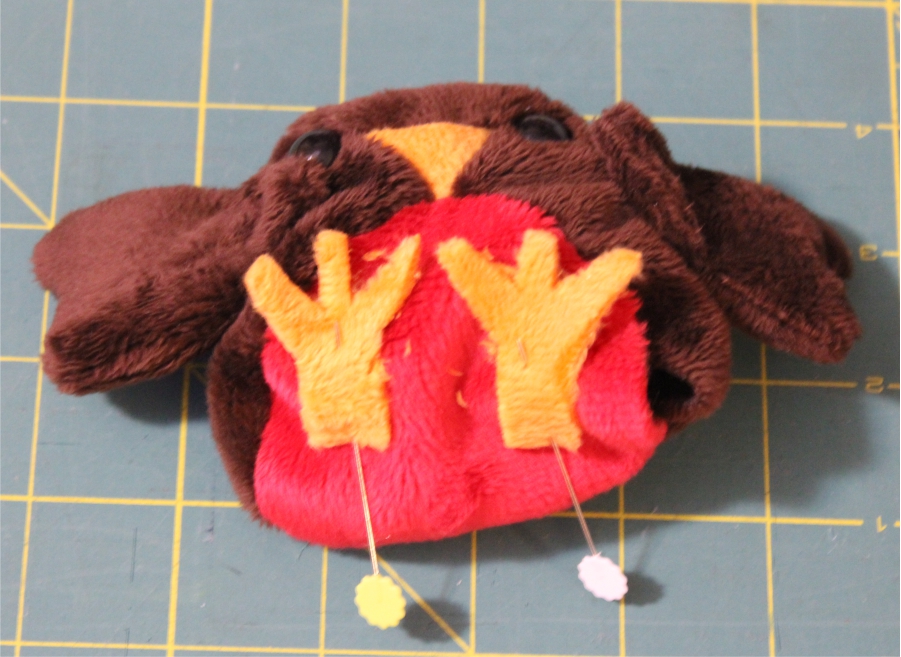
For the robin, I decided to fuse two layers of Cuddle together, wrong sides together. Then I simply cut out the pattern for fluffy feet! Fuse-It sews well without any buildup on the needle. I machine stitched the feet to the robin before stuffing it. You could easily machine stitch the feet to the belly before constructing the body, too. I really like making the animal safer for little ones without glued-on pieces. Easy peasy!
SNAKE:
The snake was a super-quick, easy to build project. Once again, I read “hand stitch” and shuddered in horror. I cut out the four pieces, put the dart in the snake’s head, then stitched each of the head pieces to their body pieces before assembling the whole thing like a giant sandwich.
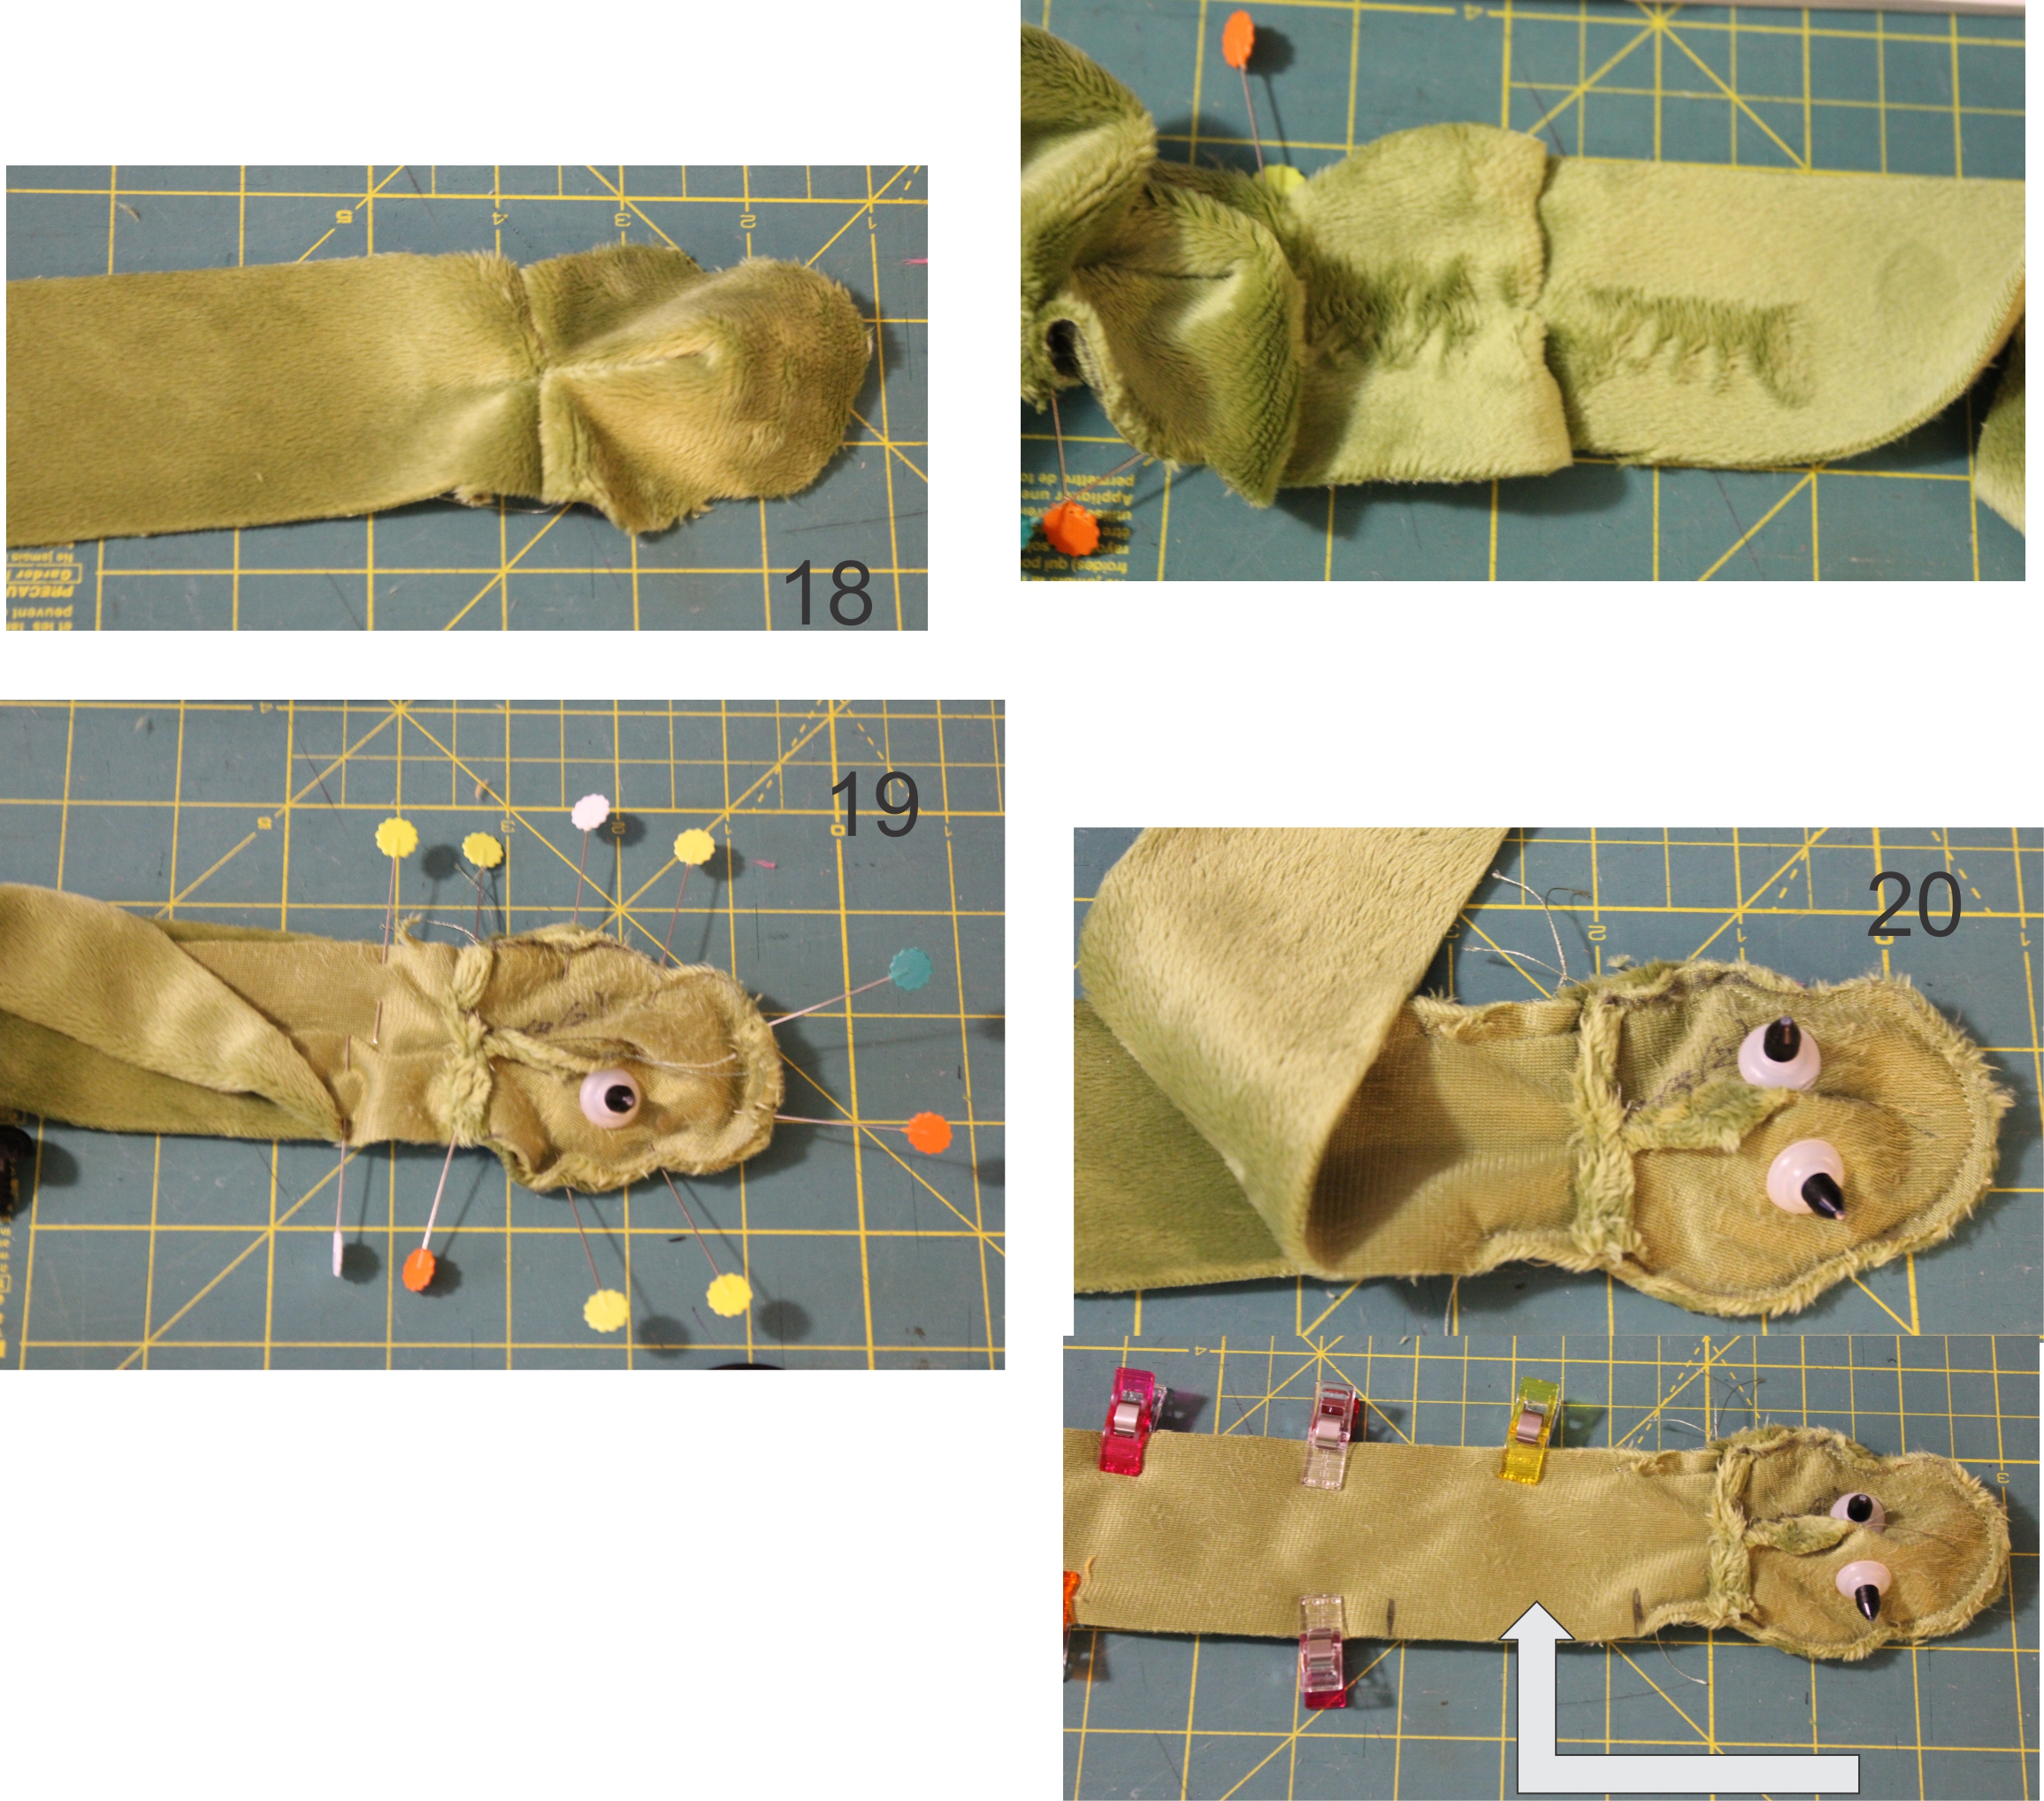
Remember to check your nap! Here’s a tip with the safety eyes: In order to be able to get your hands into the head to snap the back of the eyes on, and to be able to turn the head right side out easily through the small neck aperture, leave your opening for turning near the head.
Send a "Cuddle" their way!
I love little projects like this, and my kids are already asking for their own eggs to pop little cuddly animals in and out of. Once you get the hang of the 4-point intersection, these hatchlings are a breeze!
I hope these tips keep you happily stitching 'Cuddle-y' little gifts for your friends and family! If you make something from this book be sure to share it with the tag #SewCuddlySewAlong. To see other fantastic Cuddle and Embrace projects I’ve made, please follow me on Instagram @aprilsews.
-April Woodside, Shannon Fabrics Brand Ambassador—Florida
To purchase the book from the author, visit her shop Bungalow Quilting. Find Shannon Fabrics at independent quilt shops and fabric stores. Or view their Store Locator to find online shops and shops near you.
Stay in the know! Subscribe to the Shannon Fabrics newsletter. Follow their blog. Connect on social media!
This is the third post of our series—to check out our previous posts, see links below, for more fun projects.
Schedule
- February 4- Intro/ Interview: Emilee Masson with Judy Gauthier
- February 11- Hatchlings: Emilee Masson
- February 15- Hatchlings: April Blazevic Woodside (YOU ARE HERE)
- February 18- Animals Hats: Pat Burke
- February 22- Animals Hats: Naomi Williams Stewart
- February 25- Reading Pillow: Alice Borge
- March 1- Reading Pillow: Karen Fuchs
- March 4- Reading Pillow: Rachel Elkinson Ring
- March 8- Reading Pillow: Barbara Crom
- March 11- Poncho: Susan Hastings
- March 18- Bath Mat: Linda Lingner
- March 22- Bath Mat: Bobbie Norby
- March 25- Sleep Sack: Emilee Masson
- March 29- Sleep Sack: April Blazevic Woodside
- April 1- Colorful Floor Pillow: Teresa Coates
- April 5- Colorful Floor Pillow: Pamela O'Neill


.jpeg?width=640&name=Image%20(5).jpeg)


-Dec-11-2025-10-58-46-1415-PM.png?width=640&name=Untitled%20design%20(3)-Dec-11-2025-10-58-46-1415-PM.png)


.png?width=640&name=SEW%20TOGETHER%20livestream%20promo%20images%20(4).png)
.jpg?width=640&name=gencoreA%20(1).jpg)
-Oct-06-2025-07-25-25-9749-PM.png?width=640&name=SEW%20TOGETHER%20livestream%20promo%20images%20(1)-Oct-06-2025-07-25-25-9749-PM.png)

-4.png?width=640&name=SEW%20TOGETHER%20livestream%20promo%20images%20(3)-4.png)


.jpg?width=640&name=spring%20tea%20party_049%20(1).jpg)


.png?width=640&name=12%20Days%20of%20Cuddle%C2%AE%20(8).png)
.png?width=640&name=12%20Days%20of%20Cuddle%C2%AE%20(3).png)
-2.png?width=640&name=12%20Days%20of%20Cuddle%C2%AE%20(2)-2.png)

-2.png?width=640&name=12%20Days%20of%20Cuddle%C2%AE%20(4)-2.png)
.png?width=640&name=12%20Days%20of%20Cuddle%C2%AE%20(7).png)
.png?width=640&name=12%20Days%20of%20Cuddle%C2%AE%20(2).png)
.png?width=640&name=12%20Days%20of%20Cuddle%C2%AE%20(6).png)


.jpg?width=640&name=P1400457-Edit%20(1).jpg)


Leave a Comment