%20-%20Copy%20copy.png?width=143&height=69&name=Black%20logo%20(002)%20-%20Copy%20copy.png)
My name is Denise and I've been designing sewing patterns for as long as I can remember. You can find me at DIY-Crush, an online marketplace for sewing and craft patterns, and Whimsy Couture Sewing patterns, a website especially for baby and kids sewing patterns. I'm so excited to be here again! Thank you Shannon Fabrics for having me today!
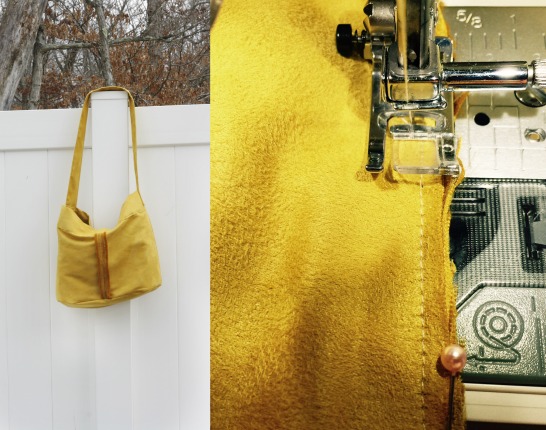
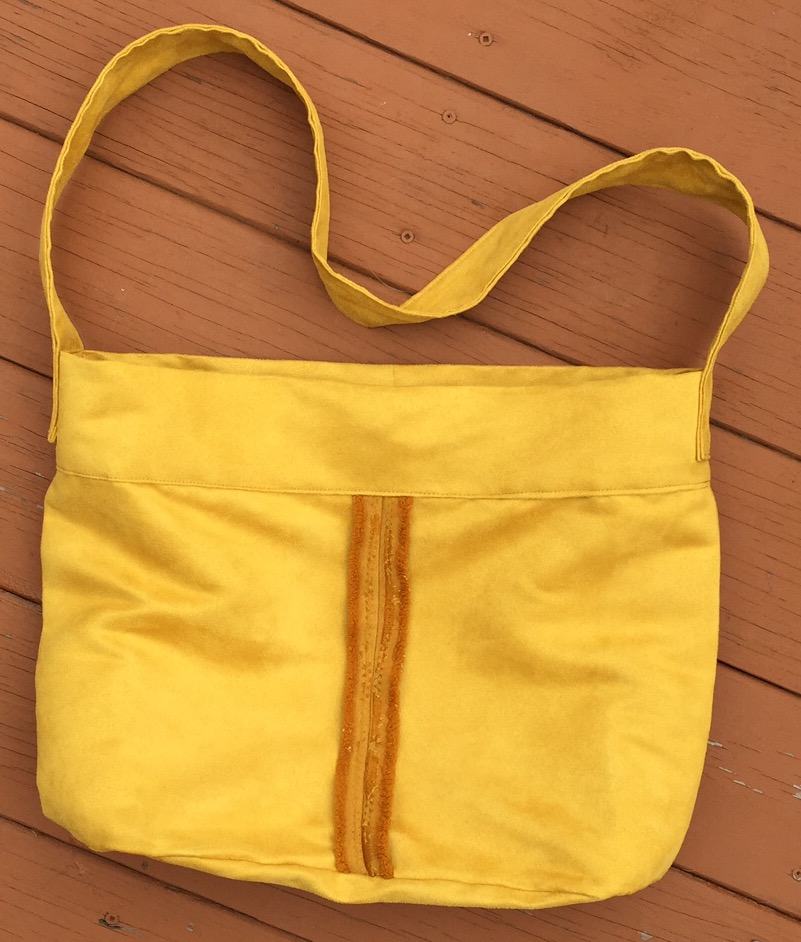
I want to share a free hobo bag pattern made from this wonderful faux suede fabric.
I also wrote up a tutorial with step by step images so you can follow along.
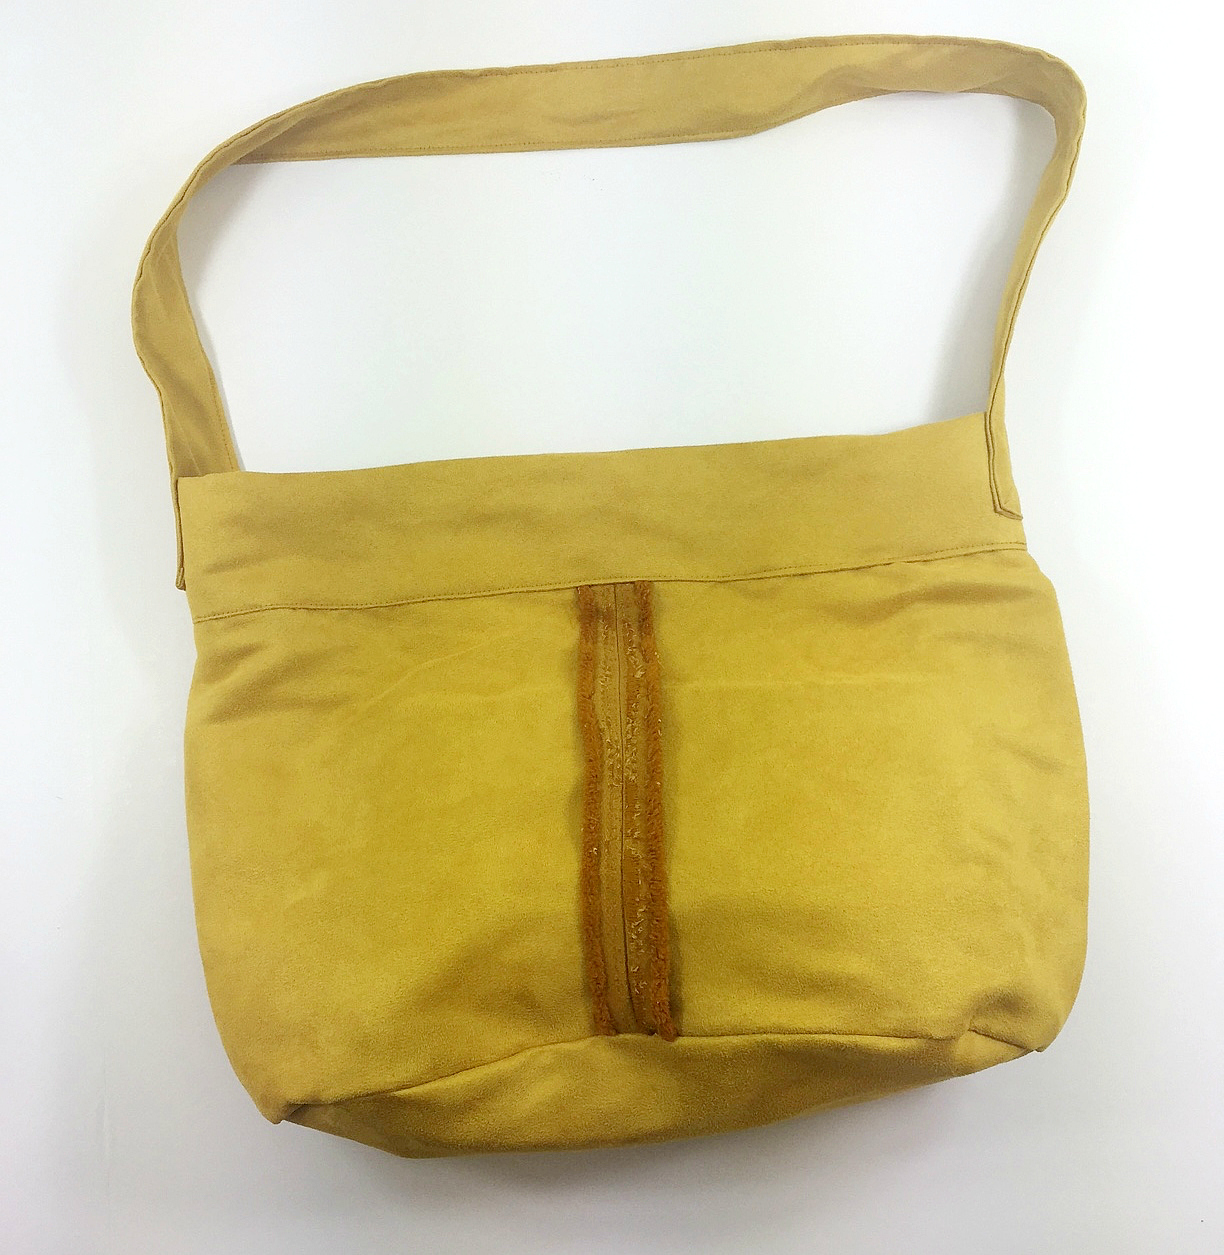
Shannon Fabrics sent me some of their Cuddle Suede Gold. I just love the gold color! Cuddle Suede comes in many colors so you can make one in your own favorite color.

If you need a large bag for the town but still want it to look modern and chic, then this faux suede hobo bag is for you!
It is easy to sew and doesn’t weigh much at all. It folds together nicely when not in use. It could double as a (large) purse if you wanted! Just add some purse organizers to make it functional and add volume.
The design of this bag features the frayed selvages of the faux suede which has pretty neat characteristics. It adds to the Boho inspired design of the hobo bag which often comes with fringe or tassels.
If you do not prefer the rugged look, you can omit having the selvages on the outside by placing the main bag fabric with right sides together instead of wrong sides. Then you can position the seam on the back.
Before you start, you might want to check out these tips from Shannon Fabrics about Cuddle Suede. You can download the tips here: Cuddle Suede Tips.

Take a look at how to make this slouchy hobo bag!
You need the following:
List of materials:
- Cut the following pieces of faux suede fabric:
Main piece: 11” x 60-61” (cut across from selvage to selvage)
Top band: 6.5” x 19.5”
Strap: 3” x 40”
- Sewing machine
- Serger optional
- Heavy duty needle (for denims etc.)
- Cutting mat
- Rotary cutter
- Straight pins
- Scissors
- Iron
Preparing your faux suede fabric:
-Prewash it according to the manufacturer instructions. Most can be washed in cold water with little detergent and no fabric softener.
-Dry in dryer on low heat with NO dryer sheet as they will leave stains on the fabric.
-Press your faux suede on low heat (best setting for me was right before cotton with little steam). Using a pressing cloth is very highly recommended.
Stitch length: 3-3.5
Seam allowance: stated in the tutorial
Print the template on 100% and check the 1 inch print scale. Cut out 2 pages and tape both half circles together on the “tape” line to make an oval shaped template.
Cuddle Suede Hobo Bag bottom template
For the bag’s main area, cut one piece of faux suede on the fold, completely across the fabric's width. From selvage to selvage. The selvage actually will create the front “design”. If you do not prefer this frayed look you can sew the main area of the bag differently (more about this in step 3.)
Follow this picture tutorial:

- Fold your fabric with wrong sides together and pin the template to it. Either directly cut around the template or use a pencil or washable fabric marker to trace around it first. I traced mine.
- Remove pins and remove template, then pin both oval pieces together and sew all the way around using a straight stitch.
- At this point you can decide whether or not you like frayed selvage look on the main area of the bag or not. If you don’t, fold the fabric with RIGHT sides together and sew the edges together with a seam allowance of 1”. If you do like the frayed front seam, fold your fabric with WRONG sides together and sew along the dashes with a 1” seam allowance.
- To sew the bottom (oval piece) to the main piece, mark the center of the oval piece, and place it onto the bottom edge of the bag’s main piece while the main piece’s right side is facing up.
- Start pinning the oval piece to the main piece, only along the straight edge of the oval.
- Repeat step no. 5 with the opposite side of the oval and the main area. Leave the sides open.
- Mark the center of the short oval side and the main area and pin both together with one pin.
The excess fabric on either side of the oval will now be folded in to create a fold or box pleat. Pull the fabric straight as shown here:
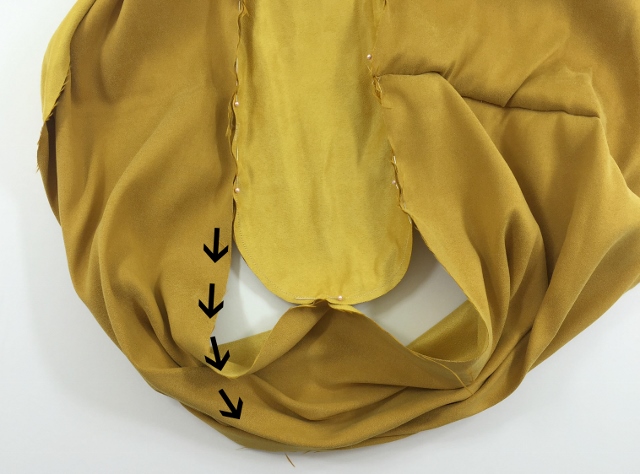 Then (step 8 ) form the extra fabric to match the curve. Both folds will be pinned to the oval to create an even look. Once the entire area is pinned, sew all layers together. Practice extra cautions and sew very slowly over the multi layers, your machine might need a little help with the dial to push the needle through. Overcast/zig zag stitch or serge the seams.
9. Unfold the bag so the seam is facing up and the oval bottom side facing down.
10. Then measure the top edge to ensure it measures exactly 18.5” in circumference. This is important for the top band to fit.
11. Then repeat steps 7 through 9.
12. Take the top band and fold it over sideways with right sides together. Pin and sew the short edges with a ½” seam allowance.
13. Unfold it and fold in the top and bottom edge ½” and press.
14. Fold band in half with wrong sides together and press.
15. Ensure that both folds completely meet.
Second part of the tutorial:
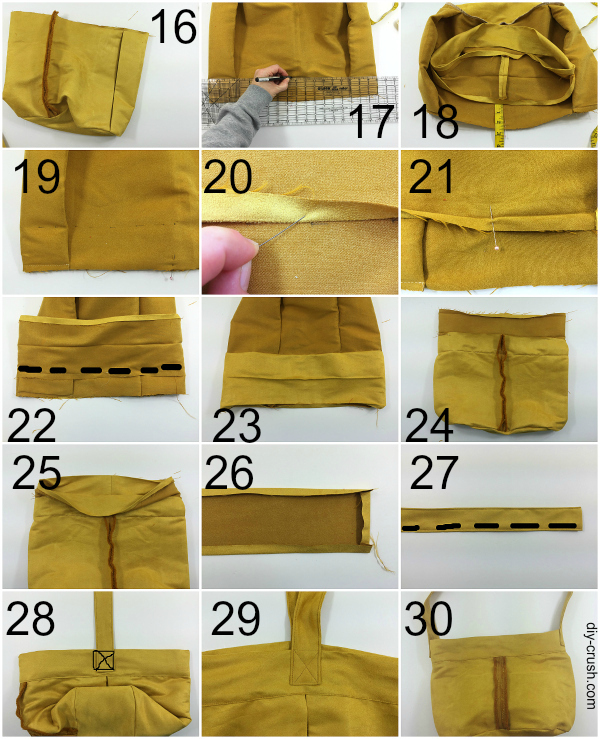
16. Have your bag ready and turn it inside out.
17. Lay it upside down in front of you and with your lip edge ruler make tiny marks 2.5” away from the edge.
18. Place the top band with right side down, aligning the bottom fold along the marked line on the bag.
19. sorry, mixed up images. This one shows the marked line at 2.5” from the edge all the way around.
20. Place your band (fold) right at the marked line.
21. Unfold the fold and pin to bag.
22. Sew band to bag right along the crease of the band.
23. Fold band all the way over the bag.
24. Turn the bag with right sides out.
25. Fold down the top band.
26. Take the strap fabric piece and fold in the sides and top and bottom edge ½” and press in place.
27. Fold strap in half with wrong sides together and press again. Ensure that the folds are meeting all the way through. Sew along the long edges only. Backstitch the beginning and end.
28. Pin the strap ends to the top band of the bag and leave ¼” space before you hit the seam of the top band. Pin in place and sew the straps on with a rectangle and a cross shape.
29. Close up of sewn on straps.
30. Your bag is done! Now go shop for some fabric! ;)

I hope you like this pattern and will make many hobo bags for yourself and for your friends! I'd love to hear your comments on what you think of the bag!
You can visit me at DIY-Crush and Whimsy Couture Sewing patterns for more free patterns.
Bye for now,
Denise
You can find Shannon Fabrics at many local quilt shops and fabric stores, and online at fabric.com, theminkyboutique.com, and fabricdepot.com. You can also their NEW Store Locator to find shops near you: Store Locator.
To stay up-to-date on what is happening, Join the Shannon Fabrics mailing list and Subscribe to their blog, My Cuddle Corner. And, remember to connect with them on social media: Facebook, Pinterest, Twitter, YouTube, Google +, Instagram, Flickr!


.jpeg?width=640&name=Image%20(5).jpeg)


-Dec-11-2025-10-58-46-1415-PM.png?width=640&name=Untitled%20design%20(3)-Dec-11-2025-10-58-46-1415-PM.png)


.png?width=640&name=SEW%20TOGETHER%20livestream%20promo%20images%20(4).png)
.jpg?width=640&name=gencoreA%20(1).jpg)
-Oct-06-2025-07-25-25-9749-PM.png?width=640&name=SEW%20TOGETHER%20livestream%20promo%20images%20(1)-Oct-06-2025-07-25-25-9749-PM.png)

-4.png?width=640&name=SEW%20TOGETHER%20livestream%20promo%20images%20(3)-4.png)


.jpg?width=640&name=spring%20tea%20party_049%20(1).jpg)


.png?width=640&name=12%20Days%20of%20Cuddle%C2%AE%20(8).png)
.png?width=640&name=12%20Days%20of%20Cuddle%C2%AE%20(3).png)
-2.png?width=640&name=12%20Days%20of%20Cuddle%C2%AE%20(2)-2.png)

-2.png?width=640&name=12%20Days%20of%20Cuddle%C2%AE%20(4)-2.png)
.png?width=640&name=12%20Days%20of%20Cuddle%C2%AE%20(7).png)
.png?width=640&name=12%20Days%20of%20Cuddle%C2%AE%20(2).png)
.png?width=640&name=12%20Days%20of%20Cuddle%C2%AE%20(6).png)


Leave a Comment