%20-%20Copy%20copy.png?width=143&height=69&name=Black%20logo%20(002)%20-%20Copy%20copy.png)
Hi, I’m Ann. I started embroidering almost 16 years ago, and have been digitizing as A Creative Medley for about eight years. I’m a big believer in making the most of what I already have, and we have all seen how the same design made with different fabrics can look entirely different. Sometimes you can take it a step further and transform it into something completely new by using the right fabric and skipping a step or two.
See Related: The Cutest Minky Fabric Vest Pattern for Kids (Free Acorn Vest Sewing Pattern)
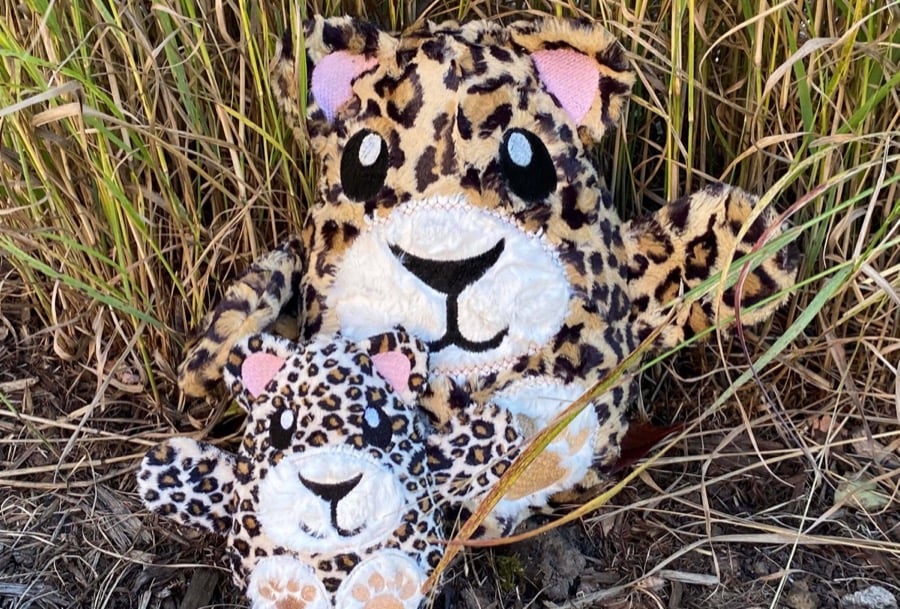
Always read the terms of use on designs you purchase, but most do not mind if you get creative – and some (like me) enthusiastically encourage it! In this project I am using the Peekaboo Tiger design from A Creative Medley and making it into a leopard or cheetah with a few simple changes. The most noticeable change is that I am using Shannon Fabrics Cuddle® Cheetah in tan/brown. I am also skipping a few colors in the design, which is easy to do on my machine without any computer software.
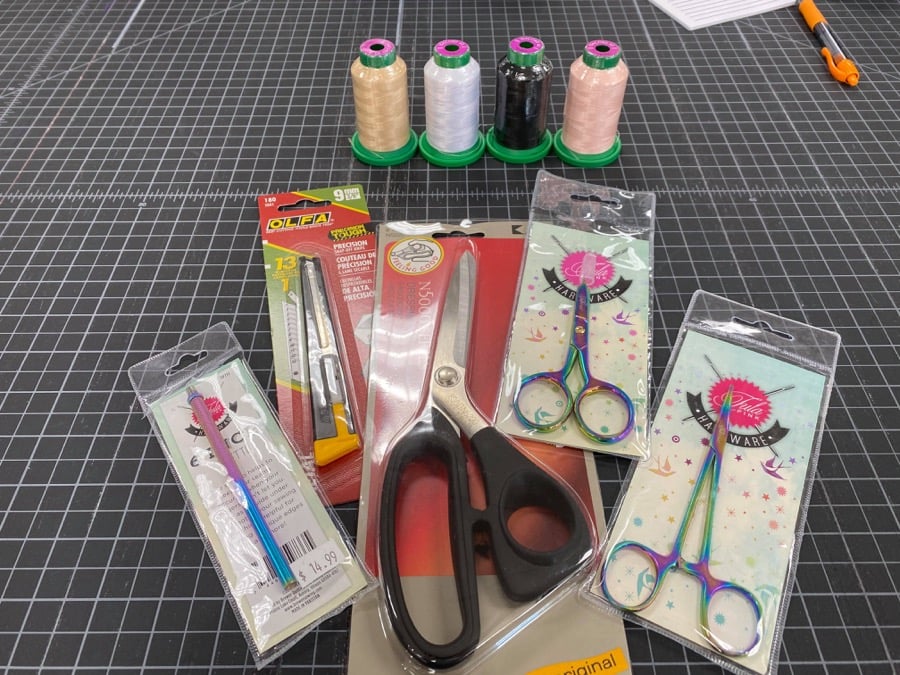
Tools and Notions Used to Make a Softie Peekaboo Cheetah
- Peekaboo Tiger design from A Creative Medley
- Heavy scissors
- Small scissors for trimming
- Cutaway stabilizer
- Water soluble topper
- Cutting blade
- Embroidery thread
- Optional Dritz adhesive spray and/or low residue tape
- Optional stylus
- Optional hemostats for turning ears and arms
How to Sew and Embroider a Softie Peekaboo Cheetah
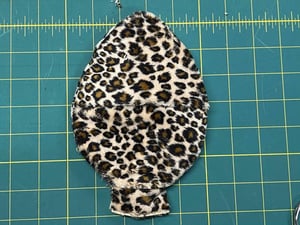
Following the step by step photo directions that come with every Peekaboo design and the fabric recommendations, I have pre-cut my fabric for my Cheetah. I have saved scraps from other projects and I am using those for the face and feet appliques. It’s a great way to easily add some different textures.
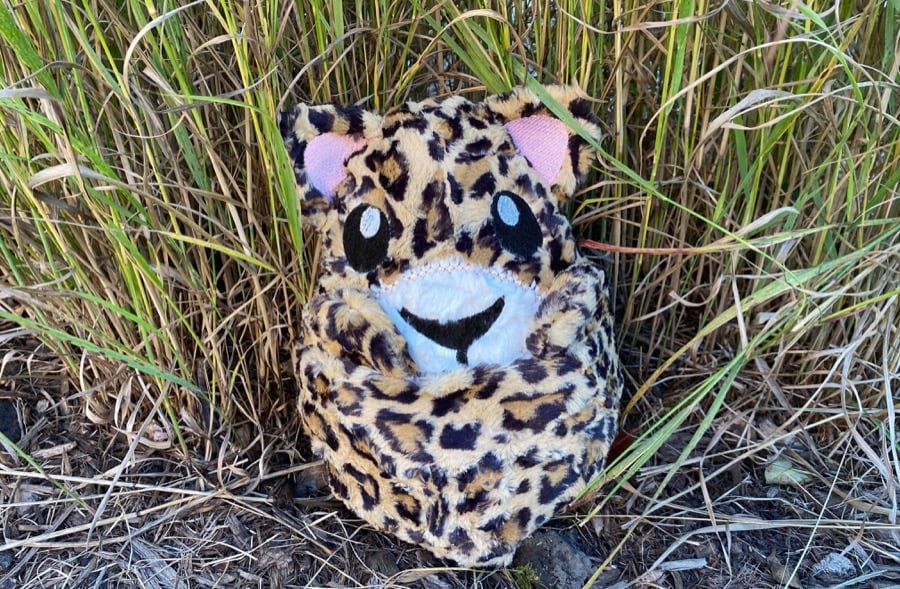
This project is done in two hoopings, which means that I am going to load one file, stitch it out completely and set those pieces aside for later. Then I will load the second file and follow the directions to stitch that one out. In the first hooping, I will create the arms and ears.
First Hooping
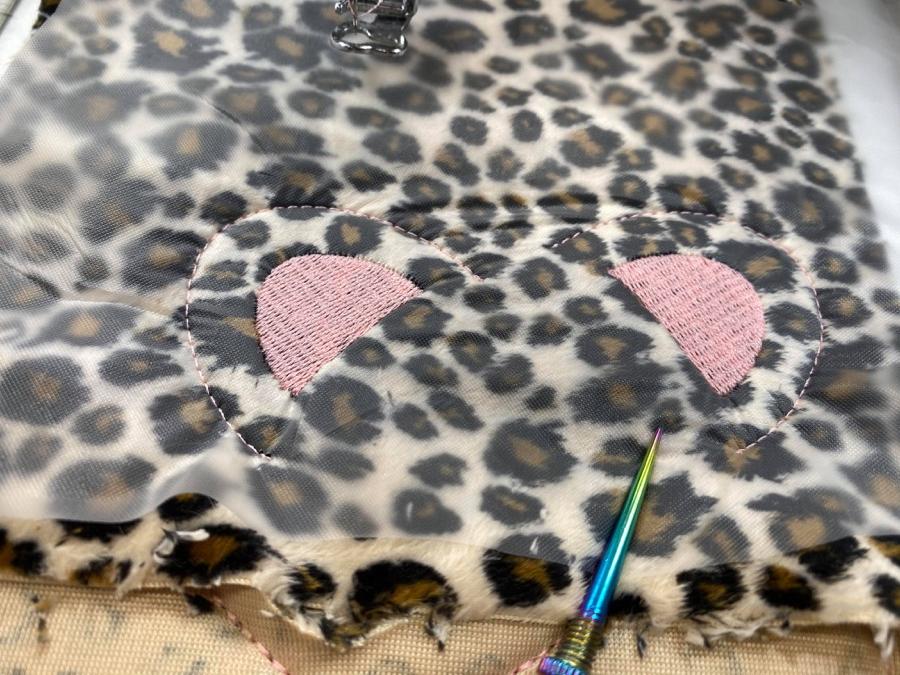
I hoop my cutaway stabilizer. The first steps have me stitch out a placement and stitch the arms together. A light coat of spray adhesive (spray well away from your machine!) onto the stabilizer can help hold the fabric in place for the next step or you can tape it down with a little clear tape. After stitching the ears placement, I tack down my fabric and stitch the ears detail.
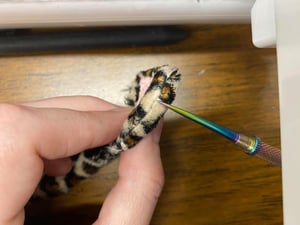 When I am stitching on wonderfully fluffy fabrics like Cuddle®, I don’t skimp on the water-soluble topper. Adding a layer before stitching the detail on the ears keeps the fluff around my stitches, not in between them. The first hooping finishes by adding the back to the ears. When that is finished, remove them from the hoop, trim around the outside of each piece, leaving 1/4 - 1/3-inch seam allowance and then turn them right side out. You can run a stylus along the seam to release any fluff that was caught.
I set these aside for now – I’ll need them later.
Second Hooping
In the second hooping, I am going to create the body and add the arms and ears. Cutaway stabilizer works best for this step as well – the details like the eyes and nose need good support. Like the first hooping, the first step is a placement stitch right onto the stabilizer and the second step is a tackdown.
When laying out my fabric, I am careful to smooth my hand over the fabric to make sure the nap is pointing down if there is a direction to it – and most importantly, I make sure the stretch is going side to side. This is the difference between a nice chubby cheetah and a long skinny one.
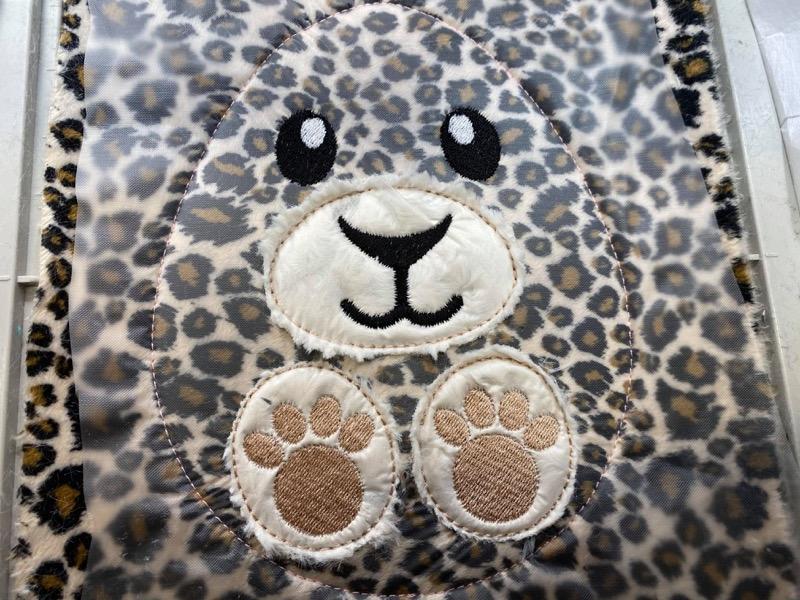
I use lots of my water-soluble topper again – it is especially important when I am stitching the details like the pawprints and the face. If I place it down before the appliques, it’s easier to trim them without catching the fabric below. I stitch out the placement stitch for the nose, lay down the fabric (with more water-soluble stabilizer on top) – I’ll need it later and having it tack down now keeps it in place - and stitch the tackdown.
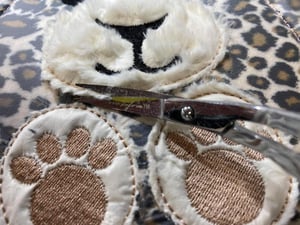 After the tackdown, I trim around the stitches, getting as close as I can without cutting the stitches. This is where the directions will tell me to stitch the finishing stitch – the design offers a satin stitch, vintage stitch or zigzag. I am going to skip it altogether – I want my fluffy fabric to be the star and the triple stitch tackdown is enough to hold it all together. Then I use the tip of my little scissors or a stylus to fluff all of the fur out of the stitches. I repeat that for the feet and stitch the paws. The tiger stripes are next, but this is a cheetah, so I just skip past those. I finish it off with the face.
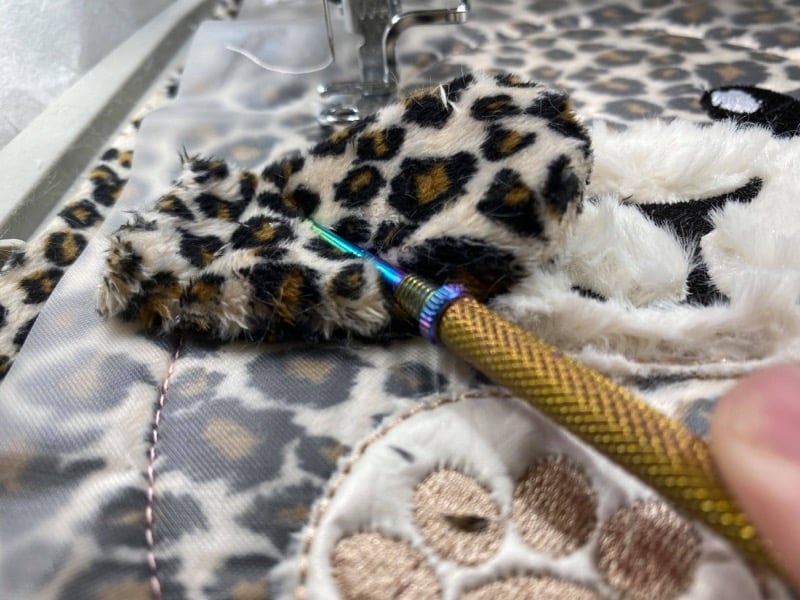
Attach the Arms and Ears
The next steps attach the arms and ears. If I wasn't using a heavier needle yet, I switch to a 90/14 at this point. I will be going through several layers and it is much easier with a heavier needle. I also raise the presser foot if I am using a machine that has that option and set the machine as slow as I can.
 Finally, I add the pockets and the back. Just like my front fabric, I make sure the stretch is going side to side for a chubby cheetah and I make sure the nap smooths downward on the back piece. Overlap the pockets by about an inch. Go slow and don’t be afraid to stop and readjust if needed. It’s a lot of layers, but despite the fluff, Cuddle® isn’t actually that thick, so it compresses down nicely. Your stylus can help compress the fabric ahead of the foot – NO FINGERS near the needle!
Cut it out, flip it right side out and stuff it. Sew the opening shut and open the pockets. Peekaboo!
There are lots of designs that can benefit from the Cuddle® animal prints – save time on Peekaboo Cow or Giraffe by using the fabric rather than stitching the print. Turn Peekaboo Unicorn into Peekaboo Zebra or Peekaboo Puppy into a Dalmatian.
Happy sewing!
If you have any questions about Cuddle® minky plush fabrics or any of our Cuddle® Kits, feel free to contact our friendly, no-pressure customer service team at 866-624-5252.
Ready to start creating with Cuddle® minky fabric? Use our store locator to find a selection of Cuddle® minky fabric online or near you.


.jpeg?width=640&name=Image%20(5).jpeg)


-1.jpg?width=640&name=Image%20from%20iOS%20(9)-1.jpg)


Leave a Comment