%20-%20Copy%20copy.png?width=143&height=69&name=Black%20logo%20(002)%20-%20Copy%20copy.png)
Cuddle® Self-Care Spa Set for Moms
For this month, we wanted to highlight a special Spa Day serger pattern that is designed specifically with Cuddle® fabric with instructions just for your serger! Complete with a spa mask and headband, it's the perfect gift for mom and the perfect way to treat yourself!
Skill Builders: Here are some of the skills you'll learn when you try this pattern
- Serging with Cuddle® fabrics
- Curved seams with Cuddle on the serger
- Combining Cuddle® fabric with Silky Satin fabric
Project info:

Materials:
- Luxe Cuddle® Seal in Snow
- Quilting Cuddle® Stonewash in Denim
- Silky Satin Solid in White 355
- Fusible batting (I’m using 100% polyester fusible fleece)
- 100% Polyester serger thread. like Mettler Seracor® Serger Thread
- Odif 505 Temporary Adhesive Spray or Glue Stick
- 90/14 Stretch serger needle (check your serger manual for the exact type your machine requires!)
- Permanent felt-tip marker
- Rotary cutter and mat
- Olfa SAC-1 blade
- Micro-serrated scissors
- Clover flower head pins
- Clover Wonder clips
- Clear pattern template plastic
- Optional: Iron heated to medium heat
Instructions
First, you want to be sure to get the pattern designed specifically for serging Cuddle® fabrics. This pattern by Sue O’Very from Sookie Sews is terrific because it incorporates her knowledge of serging AND working with Cuddle® fabric, so you are getting expert guidance! Included with your purchase of this pattern is a very extensive video course, holding your hand through the entire serging process.
Then, you'll choose fabrics to make this spa set from. I am choosing a gorgeous batik-inspired Quilting Cuddle® fabric, Stonewash, in the color Denim. I cannot get enough of this fabric and the print - it’s so good! And because I love contrasts, I’m making a second set using some Luxe Cuddle® Seal in Snow. I think pairing both of these luxurious fabrics with the Shannon Fabrics Silky Satin Solids in White 355 is a great combination.


After I have chosen my fabrics I need to get the pattern pieces cut for them. I first traced the patterns onto template plastic since I am making a few sets of these Serenity Spa Sets. I place the template plastic over the printed pattern page and simply trace around the outlines with a permanent felt-tip marker. When I’m making a template to reuse like this I am careful to make all the pattern notes on the template so I remember what patterns the templates belong to. Any notches or indications of nap, fabric grain or placement lines are important to mark as well. This helps me remember to transfer those markings to my fabric if I need to also.

Once my templates are done, I can cut them out with scissors and use them to mark on the back of my chosen fabrics. I did not need to make markings on my satin fabric at all, I just cut that with my rotary cutter and set the appropriately sized strips aside. For the Cuddle® fabrics, though, I traced all the template pattern pieces on the back side of the fabric using a very fine point permanent felt-tip pen.

Once all my patterns have been transferred to the fabric I can cut them out. I used a rotary cutter to cut my Quilting Cuddle® pieces, but for the Luxe Cuddle® Seal fabric, I used my Olfa SAC-1 blade to only slice through the backing, not the luscious fibers on the front side. Get more tips about sewing with Cuddle® minky fabric here.

Using a sharp blade like the Olfa SAC-1 blade means that I have less to clean up, but in case you have any fibers that get caught under the blade, a quick clean up with my hand held sewing room vacuum comes to the rescue before things get out of hand.

After I have all my pieces cut and ready, I can start serging. The pattern has very good tips for setting up your serger for the best results with Cuddle® fabric, and I found the included video tutorial really helpful as well, because sometimes using a serger can feel a little intimidating. No need to panic about using the serger, though, as even the written instructions have clear details explaining how to optimize the machine for the best stitches with Cuddle® fabrics.

Let’s start serging! I’m all set up with a 4 thread overlock stitch using the left and right needles in the serging position and the upper and lower loopers threaded. I’m choosing a longer (3.5 to 4 mm) stitch length for the part of the pattern where I’m using Cuddle® and then a 2.5 mm stitch length for the satin seams. I have the stitch width WIDER so that the bulkier Cuddle® fabric seams neatly, but I always recommend that you check both the front and back of your work after running a seam through so that you can verify that all the layers of your pieces got seamed properly. If you have a gap or a place where one piece of fabric didn’t quite catch all the way, just place the piece back under the needles and run that gap again. You can tidy up the serger tails or simply leave them as is. No one will ever know they are there inside the piece once you are done.
As I’m serging, I’m really not worried about the fluff from Cuddle® getting away from me because the serger is equipped with a convenient cut-off bin. The Cut-Off Bin catches all the trimmed fabric as I serge, and with Cuddle® I simply empty the bin into the trash when I am done. I love how tidy serging Cuddle® is!

As an aside, but important note, I have minimized my use of pins when serging, especially with Cuddle®. Instead, I use Clover Wonder clips to keep everything together, and as I serge slowly around curves I will remove the clips and attach them to the cut-off bin to keep track of them on my workspace.


Another thing that I have adjusted is the presser foot pressure for the bulkier Luxe Cuddle® fabric. Since Cuddle® is a knitted fabric, even though it is stable, there is still some stretch and so lowering the presser foot pressure helps the thicker fabric not stretch out of shape while seaming. You want the machine to work on fabric that is relaxed and happy, not stretched or pushed out of shape, and relaxing the presser foot pressure helps with both the stretch and the bulk of serging Cuddle®.

Now that I’m set up, I will seam all the pieces for both the Relaxation Eye Mask and the Spa Headband, and using the EZ-Point and Turner tool, turn all the serged pieces right sides out. I also use the tool to help insert the elastic into the tubes that call for elastic and follow the instructions in the pattern for placing my safety pins so that they are well out of the stitching area of the serger and its blade.
After I get all the parts seamed up, it’s time to put them all together. Each accessory (the eye mask or the bow hairband) has its own construction steps, so pay attention to the right parts. This is another place where the video can be super helpful!

When attaching the satin and elastic bands, your fabric may be pretty thick. You may need to slow down and stitch slowly. With those layers of thicker fabric under your presser foot, you may need to turn the handwheel manually, but I didn’t have any issues at all with the Luxe Cuddle® Seal or Quilting Cuddle®, even with several layers of fabric plus the elastic. The trick is to slow down and notice what is happening. Is your fabric feeding evenly? Maybe you need to adjust the differential feed DOWN so that it has a little tension on the layers. Is it bunching or bubbling at the toe of the presser foot? Try stopping with the needles down in the fabric, lifting up the presser foot and putting the fabric back under the foot where it needs to be.

Remember that it is better to check both sides of your serging to be sure that all the layers of fabric were caught in the stitching. Sometimes one of the layers slips away, even when we think we have everything pinned correctly, so check each seam after stitching to make sure that everything is seamed well.
It’s so exciting to have such a fun project that finishes so nicely with the serger! I love serging because it seams and trims the seam allowances at the same time and when I serge on Cuddle® fabric, the serged seam is less bulky than a seam sewn with a sewing machine!
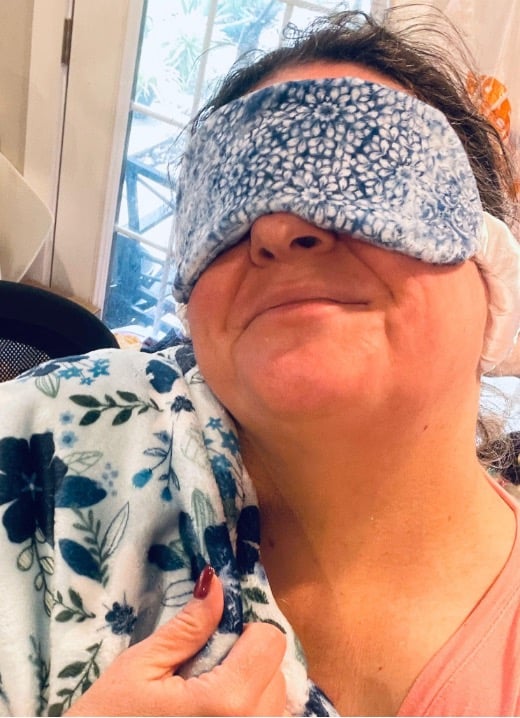
Once the satin bands are attached to each of the projects, the eye mask and the headband, they are ready to finish! The bow gets tied around the headband for a very cute finish, and the eye mask just has a few stitches needed to close up the turning hole!

That does it, and now I have some beautiful Spa Gifts to share! Or first I might just use these myself. It’s been hard work sewing and serging all day!


.jpeg?width=640&name=Image%20(5).jpeg)


-Dec-11-2025-10-58-46-1415-PM.png?width=640&name=Untitled%20design%20(3)-Dec-11-2025-10-58-46-1415-PM.png)


.png?width=640&name=SEW%20TOGETHER%20livestream%20promo%20images%20(4).png)
.jpg?width=640&name=gencoreA%20(1).jpg)
-Oct-06-2025-07-25-25-9749-PM.png?width=640&name=SEW%20TOGETHER%20livestream%20promo%20images%20(1)-Oct-06-2025-07-25-25-9749-PM.png)

-4.png?width=640&name=SEW%20TOGETHER%20livestream%20promo%20images%20(3)-4.png)


.jpg?width=640&name=spring%20tea%20party_049%20(1).jpg)


.png?width=640&name=12%20Days%20of%20Cuddle%C2%AE%20(8).png)
.png?width=640&name=12%20Days%20of%20Cuddle%C2%AE%20(3).png)
-2.png?width=640&name=12%20Days%20of%20Cuddle%C2%AE%20(2)-2.png)

-2.png?width=640&name=12%20Days%20of%20Cuddle%C2%AE%20(4)-2.png)
.png?width=640&name=12%20Days%20of%20Cuddle%C2%AE%20(7).png)
.png?width=640&name=12%20Days%20of%20Cuddle%C2%AE%20(2).png)
.png?width=640&name=12%20Days%20of%20Cuddle%C2%AE%20(6).png)


Leave a Comment