%20-%20Copy%20copy.png?width=143&height=69&name=Black%20logo%20(002)%20-%20Copy%20copy.png)
Hey everyone! I'm Jennifer Mathis, a designer, modern quilter and blogger at Ellison Lane. I'm delighted to be here today to share with you an easy and oh-so-comfy blanket tutorial for Cuddle fabric.
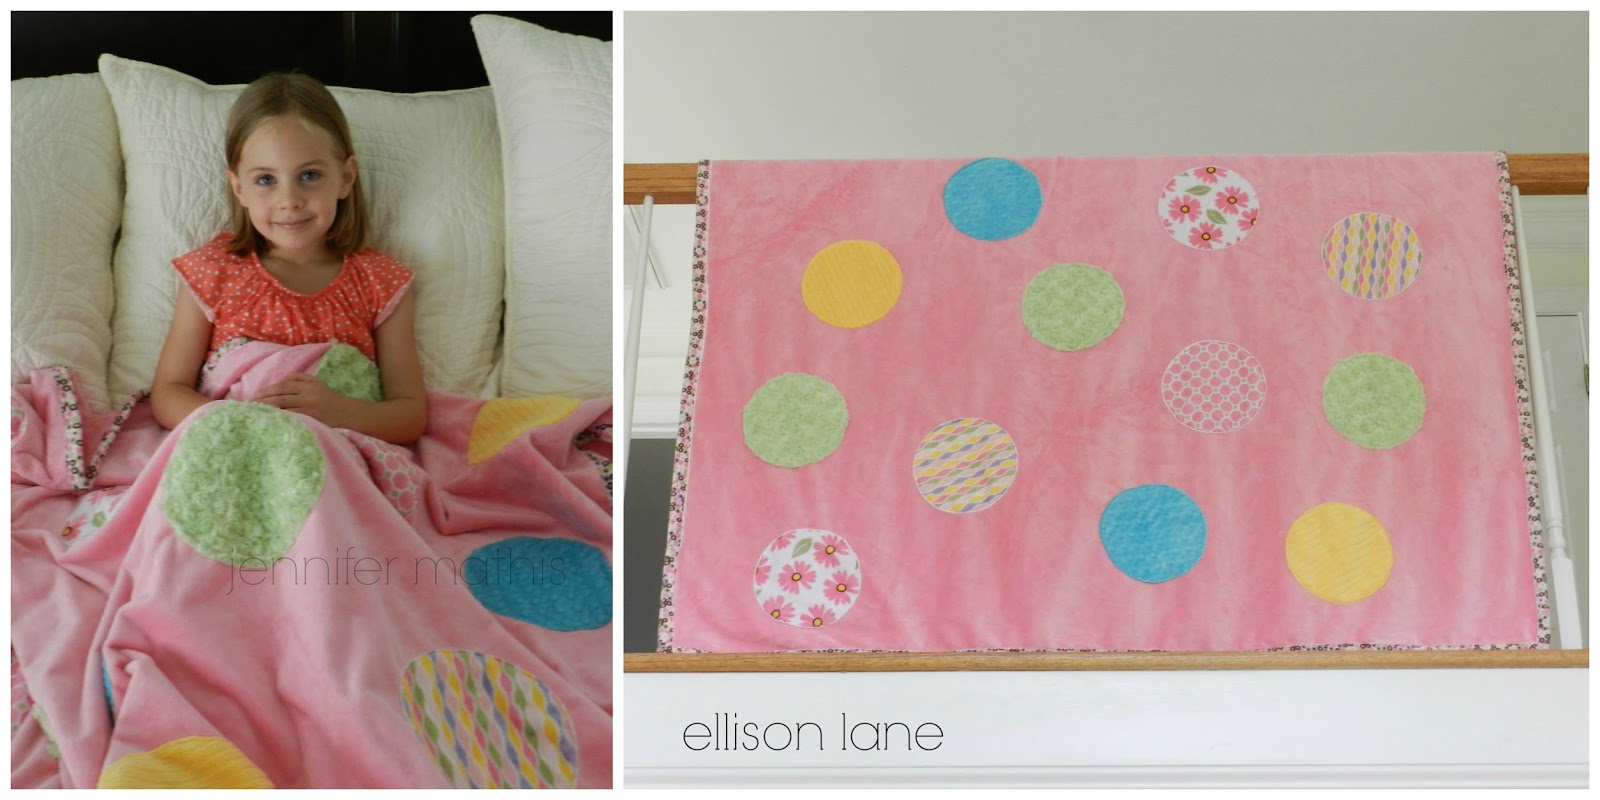
I first sewed with Cuddle 3 years ago when I made a throw blanket for my son's nursery. Well, my daughter fell in love with it, claimed it for her own and has slept with it every night for the past two years. She's growing like a weed and that blanket that started out being big for her, now hardly covers her long tall legs. It was high time I made her a new one!
She helped me design this one and could hardly wait until I sewed the last stitch to snuggle under it. I'd say it's a big success!
The Bubblegum Blanket
Time frame: a weekend
Materials:
3 yards pink Cuddle
1 box Izzy Pastels or 6 various 1/4 yards cuts of Cuddle fabrics
1/2 yard floral Cuddle for binding
basting spray
stretch needles 90/14
coordinating thread
scissors
ruler
small bread plate
paper, pencil
binding clips
walking foot for sewing machine
Tips and Tricks for working with Cuddle:
* toss your cut pieces into the dryer to eliminate shedding
* Cuddle does not fray so raw edge applique is a perfect technique to use
* Do not iron Cuddle fabric
* Use a walking foot and a stretch needle
* Spray baste
* Use an all-purpose thread
1. Cut the pink fabric into 2 pieces, each 56" x 62." Set aside.

2. Using the small plate and paper, trace and cut out a circle for your template. I used a bread plate.
3. Using the template, trace circles onto the wrong side of the Cuddle prints and solids. Cut 3 - 4 circles from each fabric.
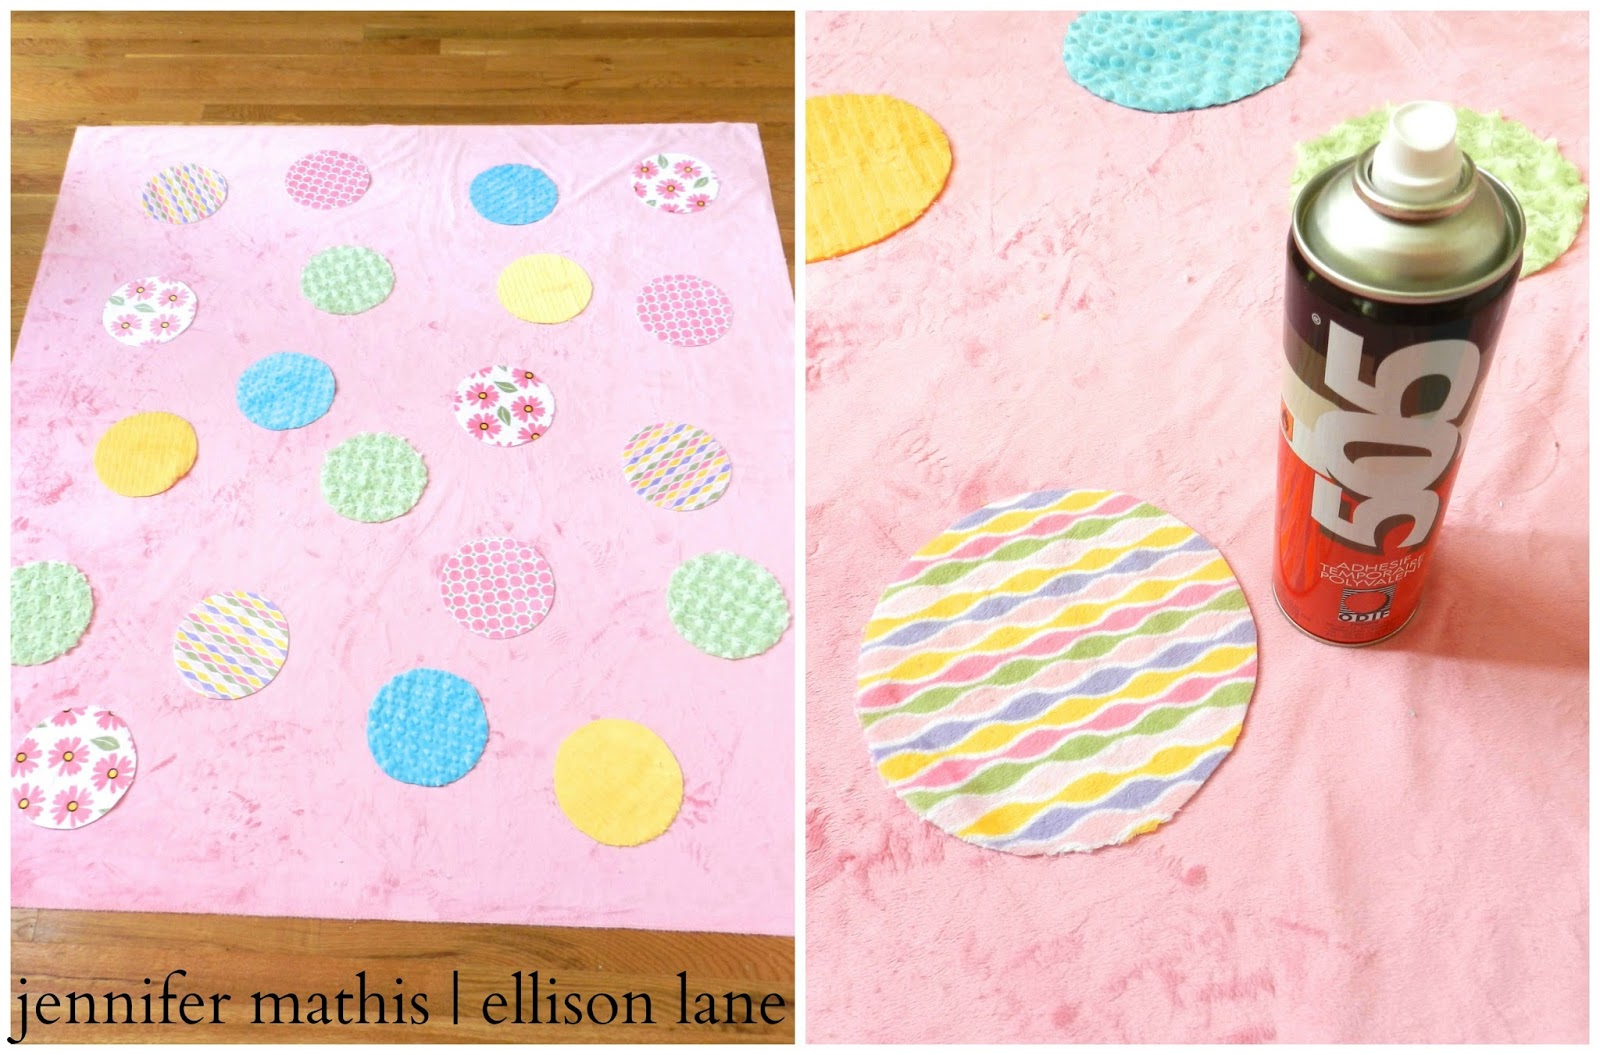
4. Audition the layout of the circles by placing them on the pink fabric. Once you are content with the layout, spray baste the circles onto the pink fabric. Be sure to leave at least a 2" margin around all sides of the blanket.
5. Lay the pink backing fabric on the floor, wrong side up. Spray baste the top with the circles onto the backing fabric, smoothing out any wrinkles.
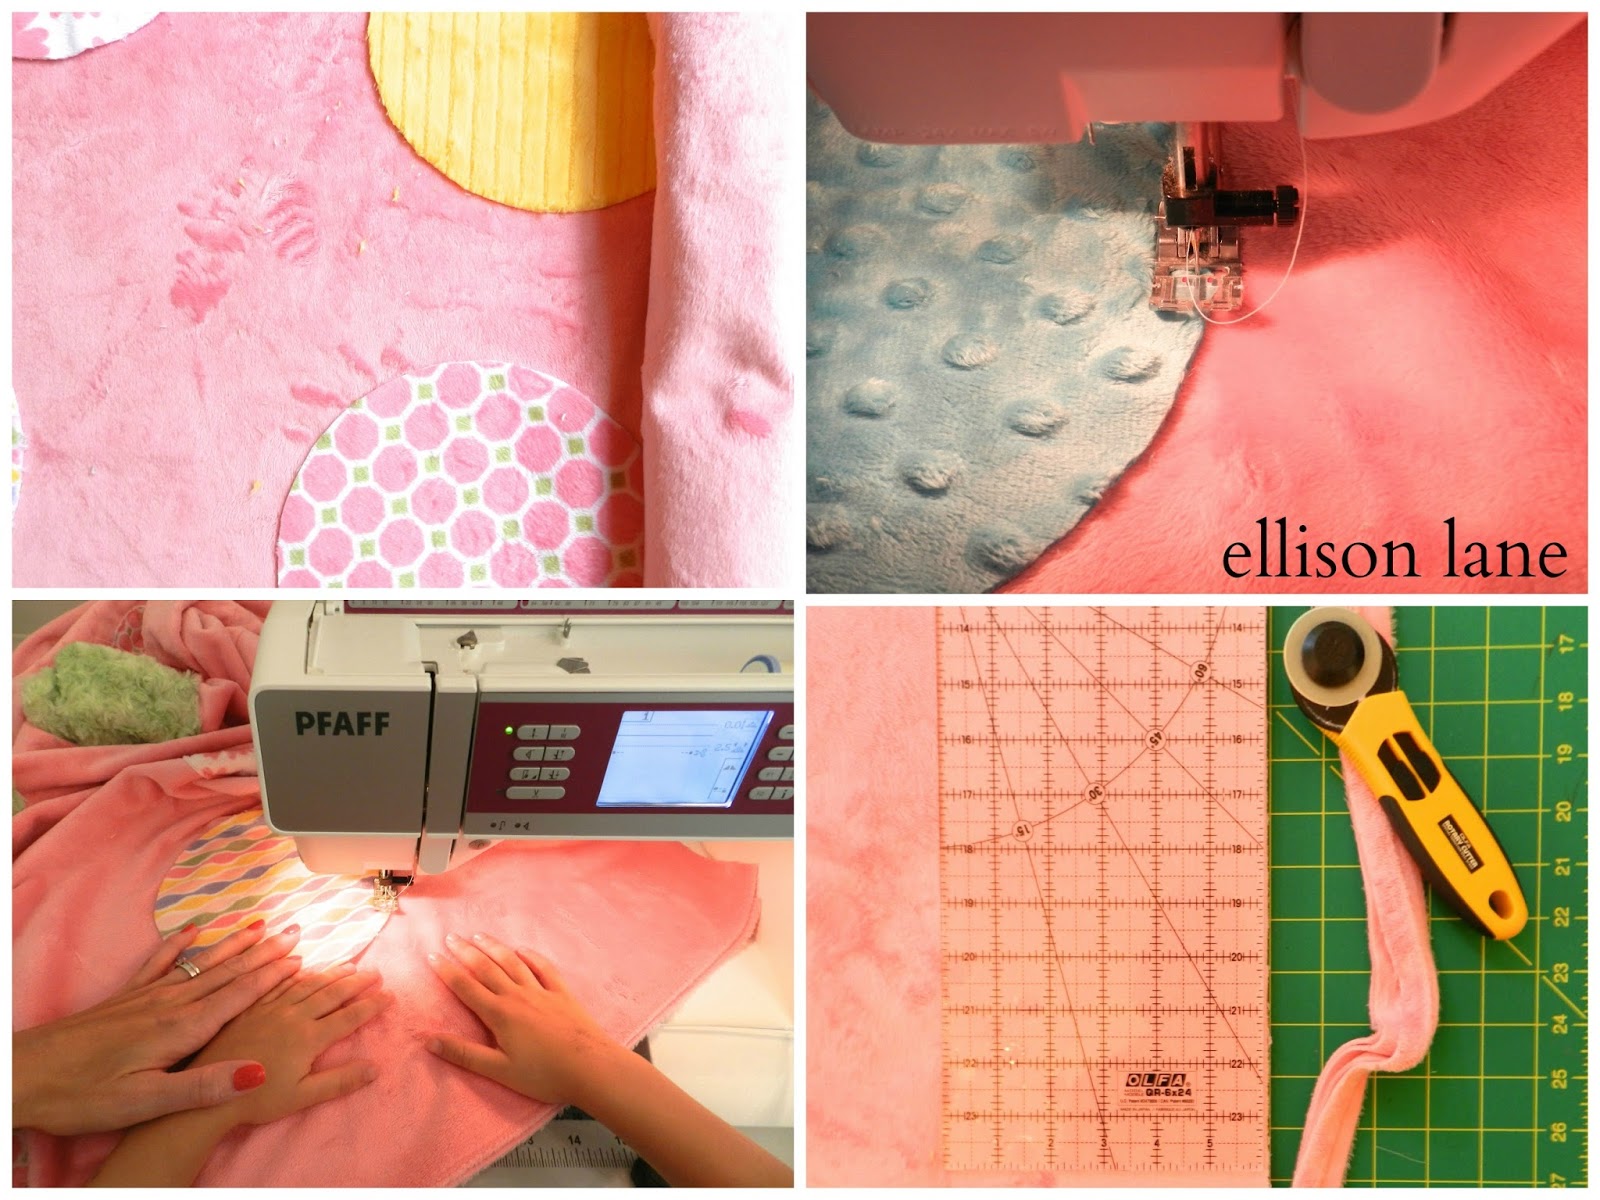
6. Using your walking foot, applique each circle onto the blanket with a 1/8th seam allowance. Use a straight stitch and backstitch at the beginning and the end.
7. Once all of your circles are sewn on, square up your blanket and trim excess. Set aside.
8. From the half yard floral binding fabric, cut 6 binding strips 1.5" x WOF. This will make single fold binding. Tip: Toss the strips in the dryer for a few minutes to eliminate shedding.
9. Sew the binding strips end to end with a 1/4" to make one continuous strip.
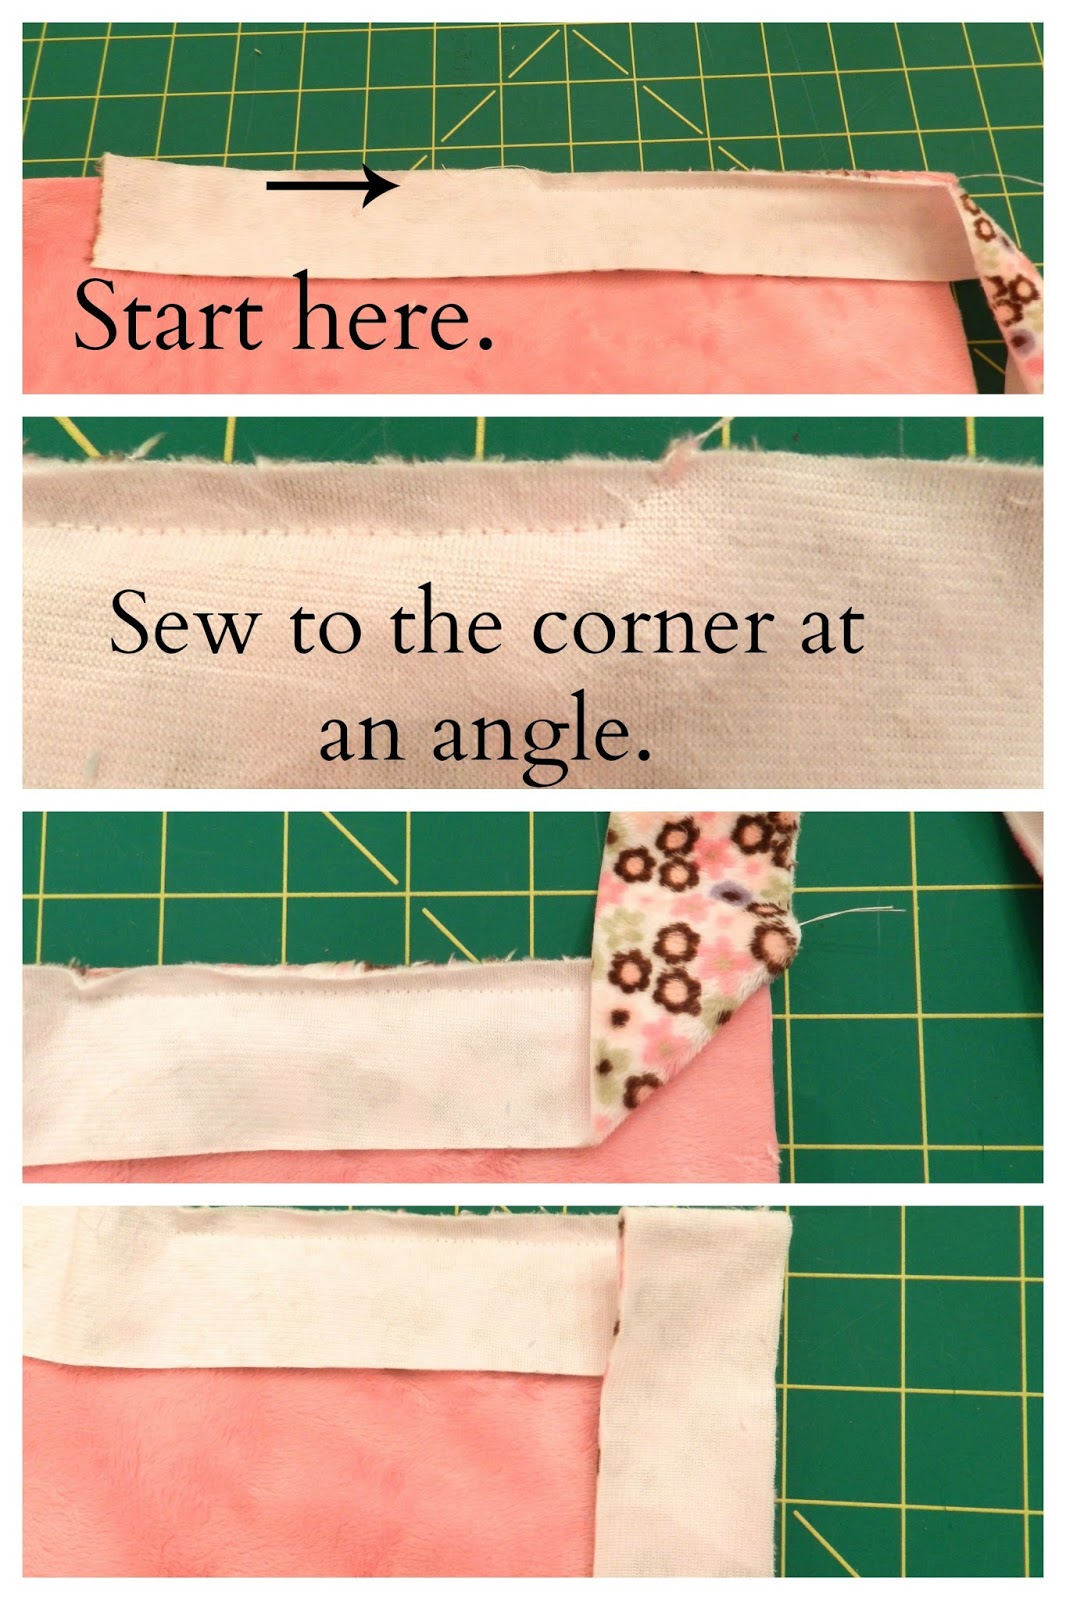
10. Sew the binding onto the back side of blanket with a 1/4" seam. Start at the bottom right corner and place binding strip right down on blanket back, right sides together. Leave a 5" tail, backstitch and sew toward the corner, stopping a 1/4" before the end. Angle your stitch and sew off the corner.
11. Make mitered corners. Fold the fabric up over the corner then back down on itself. See picture above.

12. Starting at the folded corner, sew along the side, backstitching at the beginning. Repeat for all 4 corners. Sew until you get within 5" of the starting tail. Backstitch and leave a 5" tail. Overlap the tails, trim so they only overlap by 1/2." Sew the tail ends together, RST with a 1/4" seam allowance.
13. Finish sewing the binding on the back, backstitching at beginning and end.
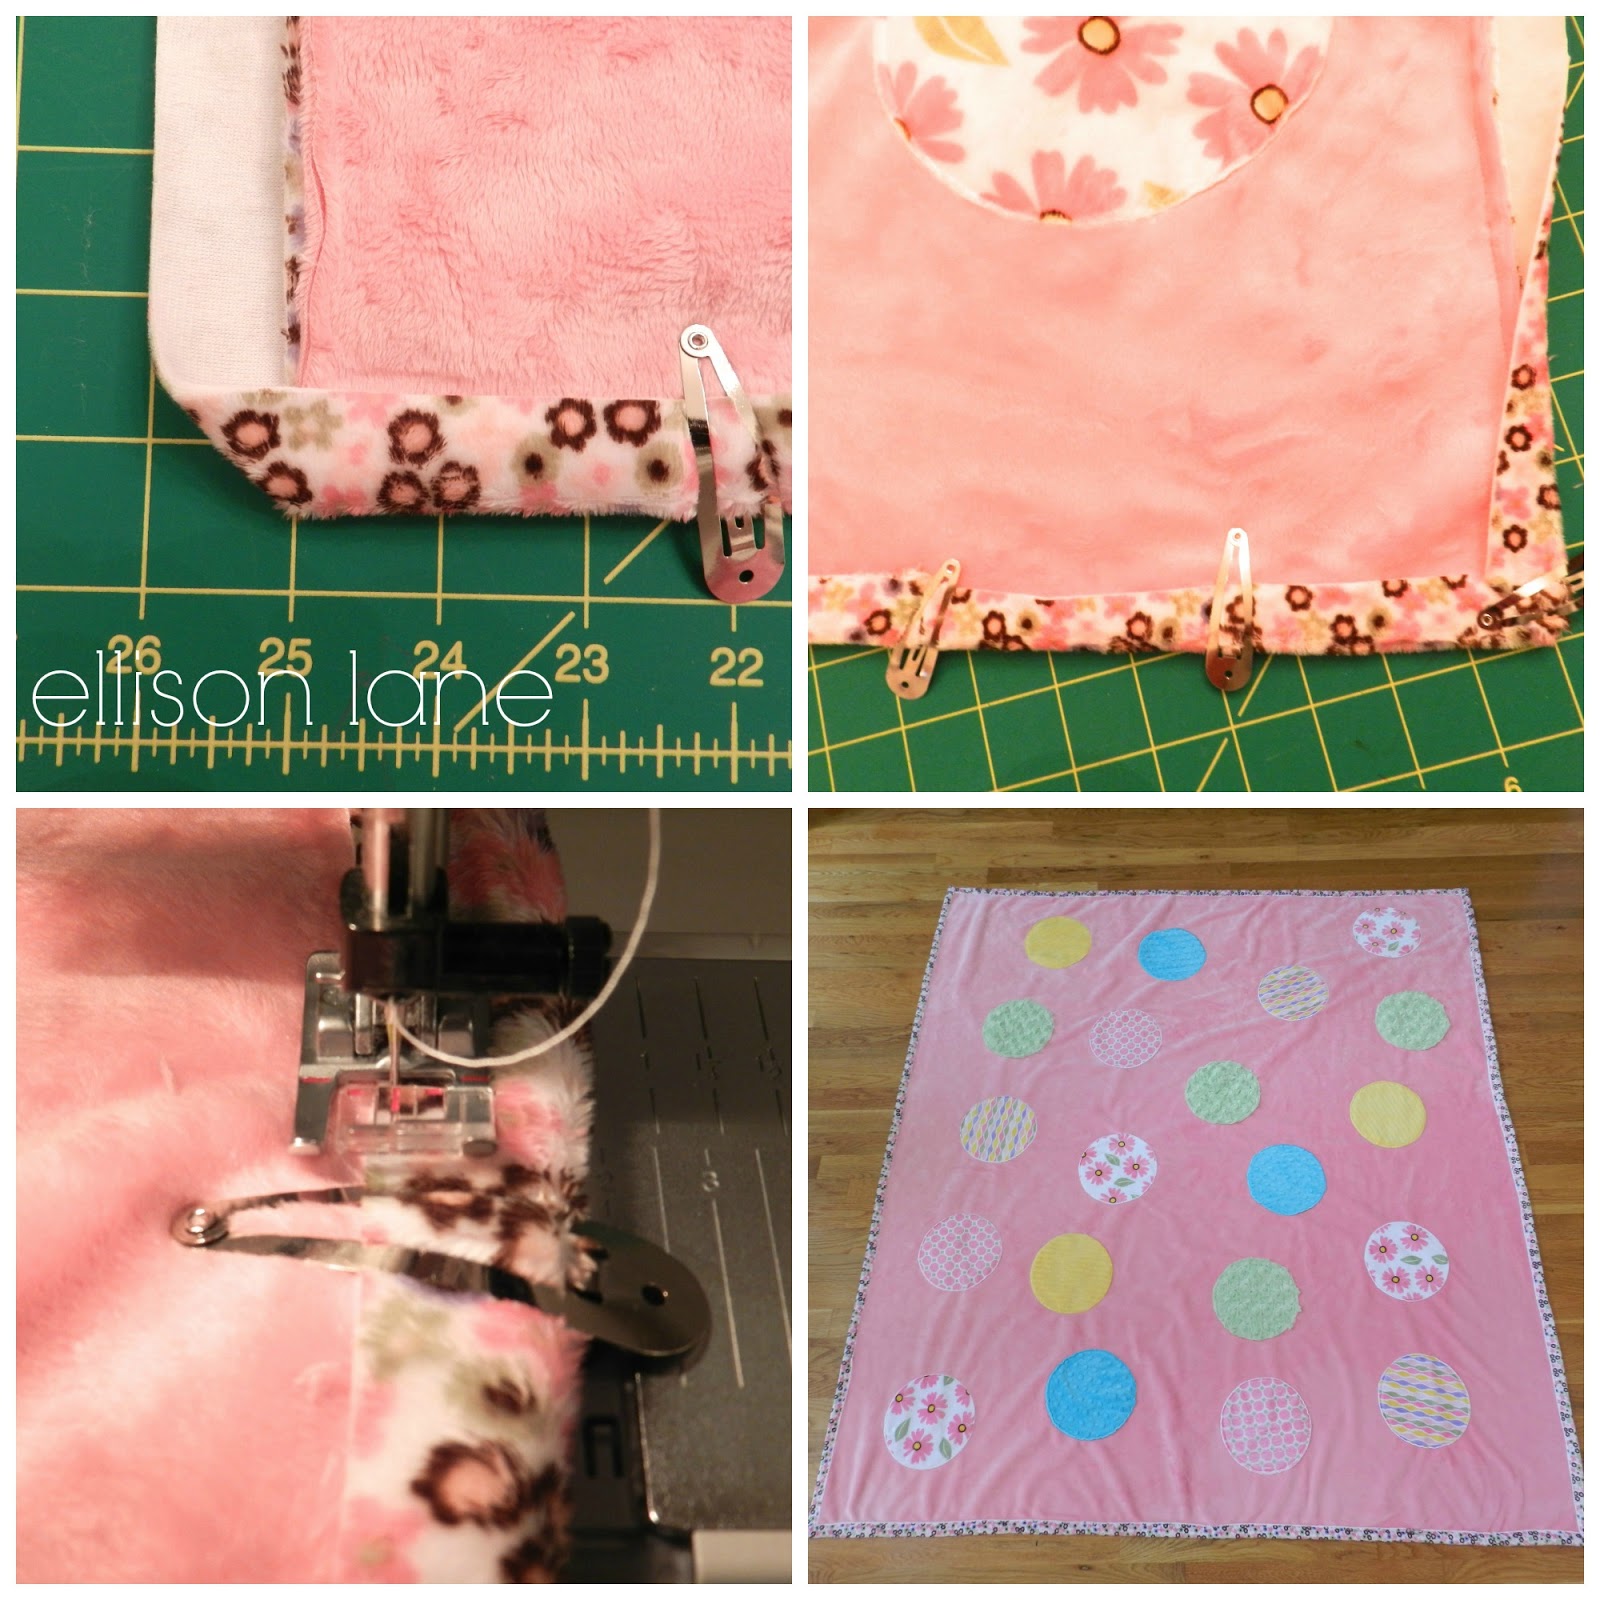
14. Flip the binding over to the top of the blanket and clip in place with binding clips. Miter the corners.
15. Sew along the edge of the binding, about 1/8" from the edge, backstitching at the beginning and end.
Ta-da! Now give that snuggly new blanket to someone special to enjoy.
I hope you enjoyed this tutorial! Please stop by my blog and say hello. Check out all my other tutorials too!
xo,
Jennifer


.jpeg?width=640&name=Image%20(5).jpeg)


-Dec-11-2025-10-58-46-1415-PM.png?width=640&name=Untitled%20design%20(3)-Dec-11-2025-10-58-46-1415-PM.png)


.png?width=640&name=SEW%20TOGETHER%20livestream%20promo%20images%20(4).png)
.jpg?width=640&name=gencoreA%20(1).jpg)
-Oct-06-2025-07-25-25-9749-PM.png?width=640&name=SEW%20TOGETHER%20livestream%20promo%20images%20(1)-Oct-06-2025-07-25-25-9749-PM.png)

-4.png?width=640&name=SEW%20TOGETHER%20livestream%20promo%20images%20(3)-4.png)


.jpg?width=640&name=spring%20tea%20party_049%20(1).jpg)


.png?width=640&name=12%20Days%20of%20Cuddle%C2%AE%20(8).png)
.png?width=640&name=12%20Days%20of%20Cuddle%C2%AE%20(3).png)
-2.png?width=640&name=12%20Days%20of%20Cuddle%C2%AE%20(2)-2.png)

-2.png?width=640&name=12%20Days%20of%20Cuddle%C2%AE%20(4)-2.png)
.png?width=640&name=12%20Days%20of%20Cuddle%C2%AE%20(7).png)
.png?width=640&name=12%20Days%20of%20Cuddle%C2%AE%20(2).png)
.png?width=640&name=12%20Days%20of%20Cuddle%C2%AE%20(6).png)


Leave a Comment