%20-%20Copy%20copy.png?width=143&height=69&name=Black%20logo%20(002)%20-%20Copy%20copy.png)
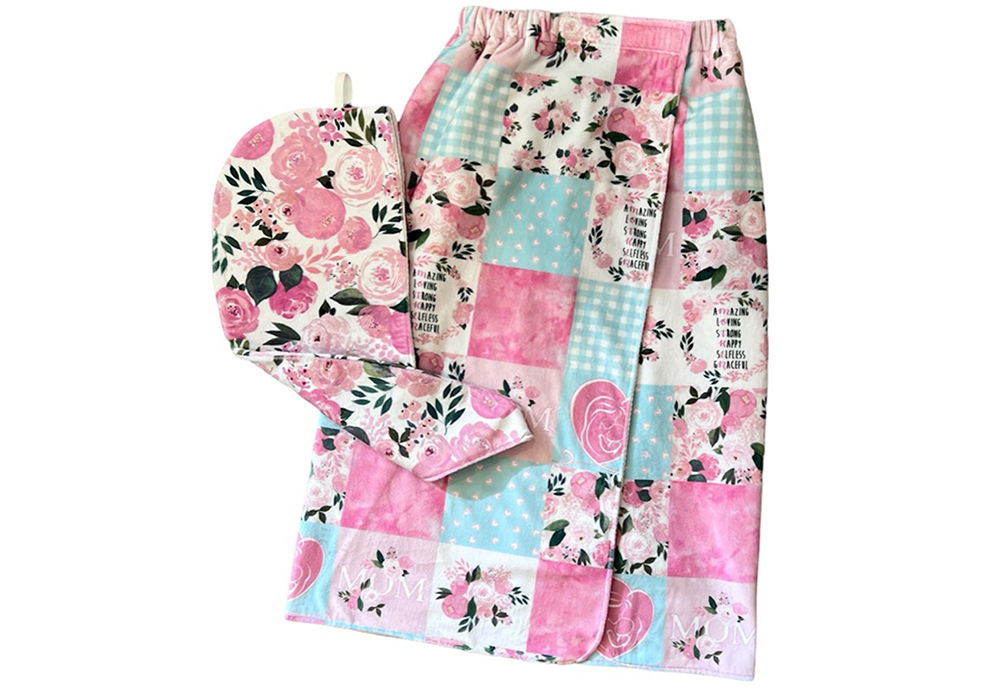
Treat the mother figure in your life with a pretty head and body wrap set for Mother’s Day! They’re both easy to make and stitch up beautifully in soft Cuddle® fabric prints. Add a few bath bombs, lotions and maybe a bottle of her favorite perfume, and you’ll have a gift fit for a queen on her special day.
I chose to use Mother’s Bouquet Digital Cuddle® in pink as the main fabric and Cuddle® 10-ounce Turkish Waffle Weave for the lining in both projects as it’s soft and absorbent. Both are light enough not to be too heavy when used together.
See Related: In the Hoop Bunny Treat Sack in Cuddle® Minky Fabric
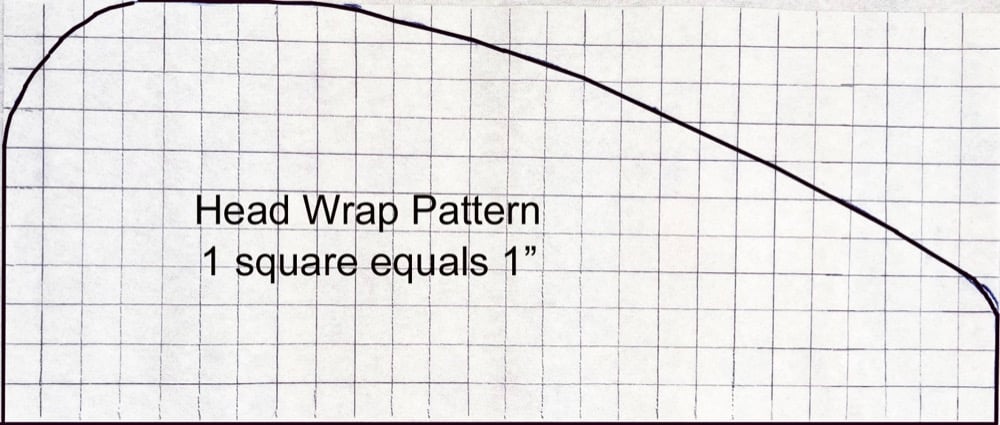
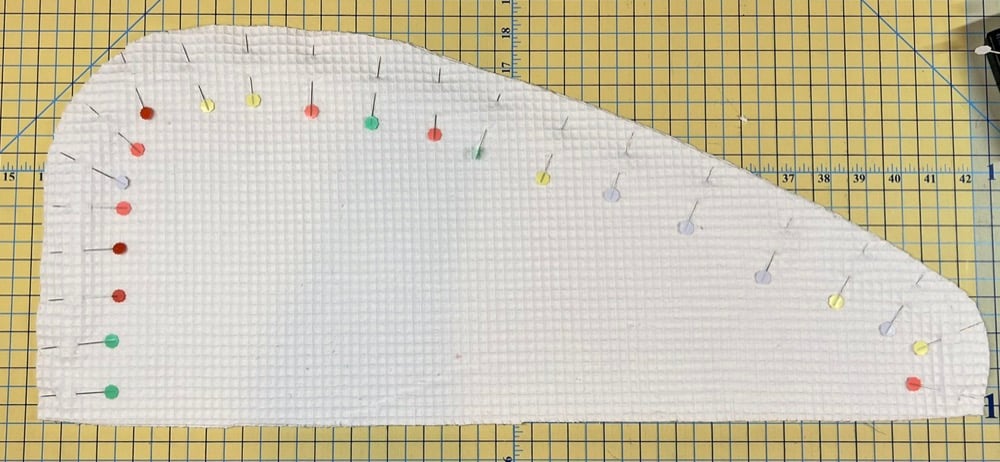
To recreate the pattern for the head wrap, tape four sheets of computer paper together and cut it to measure 11” high by 26” wide. Draw 1” squares across and down the paper. Redraw my pattern below onto your paper and cut it out. Don’t worry, it doesn't have to be exact (Tip: You can use an old head wrap as a pattern).
Recommended fabrics and notions for making a Cuddle® head wrap and body wrap
I’ve listed supplies you’ll need for each project and some optional tools you may find handy when working with Cuddle®.
Head Wrap
- 2 pieces of Mother’s Bouquet Digital Cuddle® Pink - 11” high x 26” wide
- 2 pieces of Cuddle® 10-ounce Turkish Waffle Weave - 11” high x 26” wide
- 1 piece of 3/8” elastic 6” long
Body Wrap
- 1 yard of I Love Mom Digital Cuddle® Pink
- 1 yard of Cuddle® 10-ounce Turkish Waffle Weave
- 7” of sew-in 1” – 1.5” Velcro
- 1” elastic approximately 23” long
Optional supplies for working with Cuddle®
- 90/14 stretch machine needle — SCHMETZ
- Craft knife — OLFA
- Fabric clips — Clover
- Felt tip marker or ballpoint pen
- Long, flower head pins — Clover
- Micro-serrated scissors — Karen Kay Buckley, Famore or Kai
- Polyester thread — Metrosene by Mettler
- Rotary cutter and mat —OLFA
- Stiletto and Pressing Tool — ByAnnie
- Walking foot
How to sew a Cuddle® head wrap
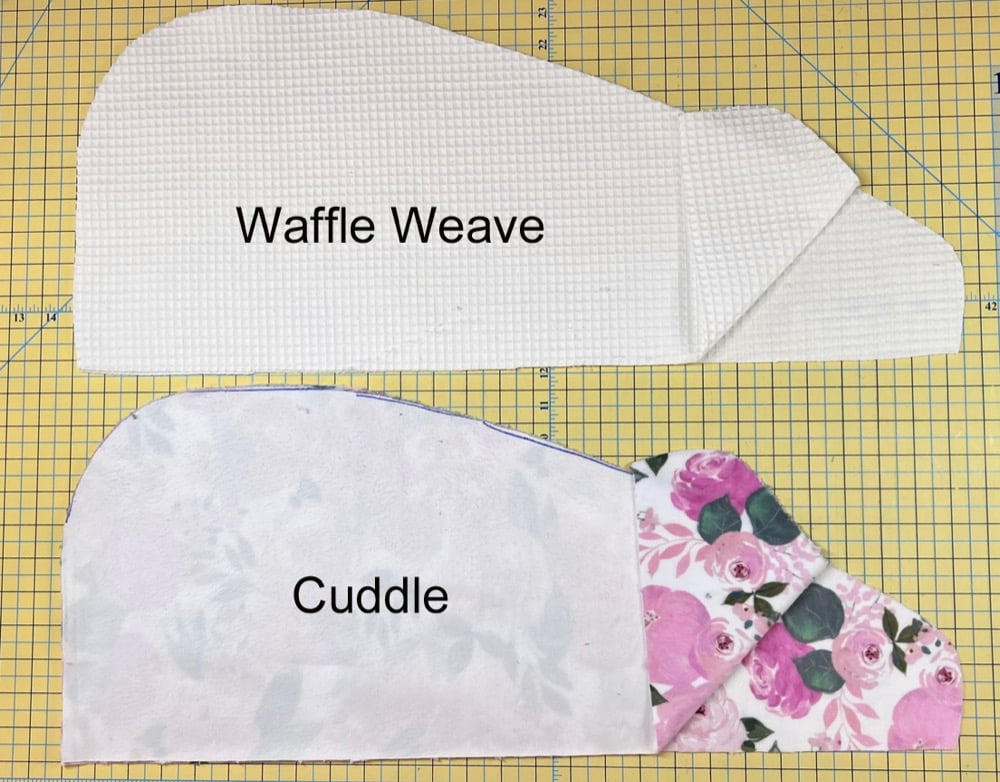
Place the 2 pieces of Cuddle® right sides together and cut out the pattern. Have the nap of the Cuddle® going downward.
Place the 2 pieces of waffle weave right sides together and cut out the pattern.
On one of the Cuddle® pieces, measure up 3.50” from the bottom straight edge on the largest end. Fold the elastic in half and place the cut ends ½” past the edge. Clip or pin in place.
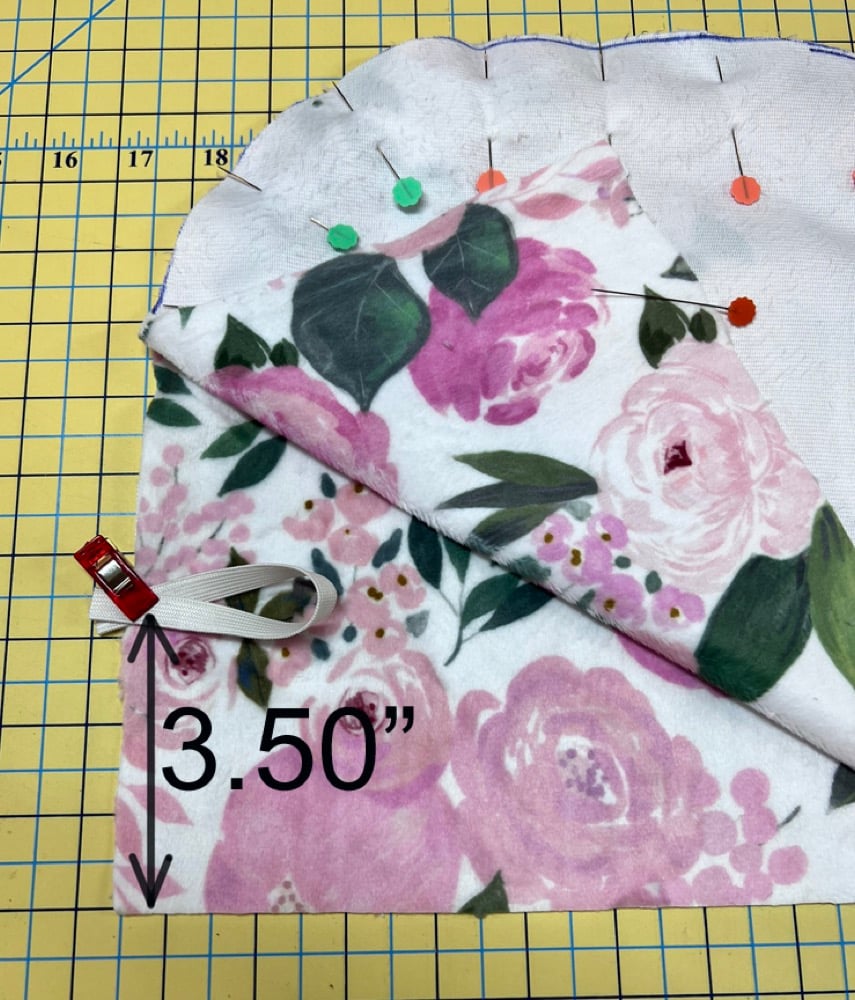
Pin the 2 pieces together along the sides and top. The long straight edge will not be pinned.
With the right sides of the waffle weave together, pin along the sides and top. The long straight edge will not be pinned.
Sew each of the sections together along the pinned edge with a 3/8” seam. Backstitch at the beginning and end. Stitch back and forth over the elastic ends a few times to secure them. Clip into the curves being careful not to clip the stitching.
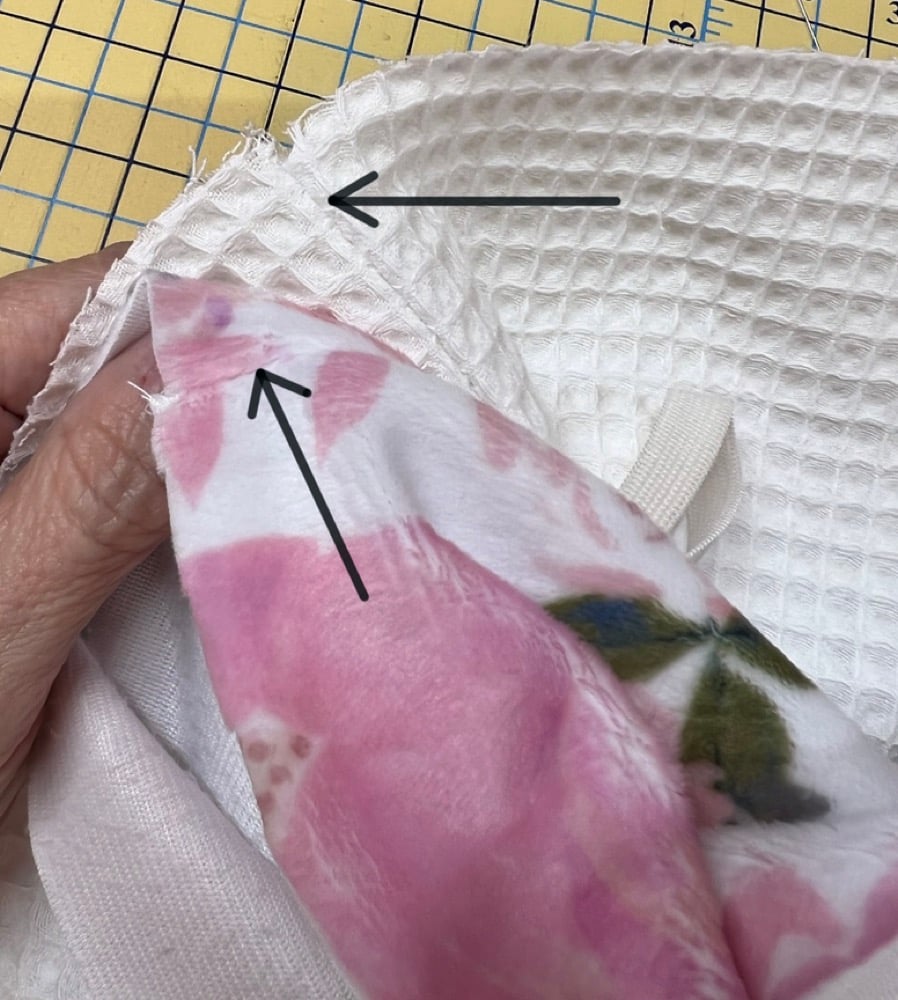
Place both sections with right sides together matching the center back and front seams along the straight edges.
Pin the straight edge all around keeping the two edges even. Leave about 4” open for turning.
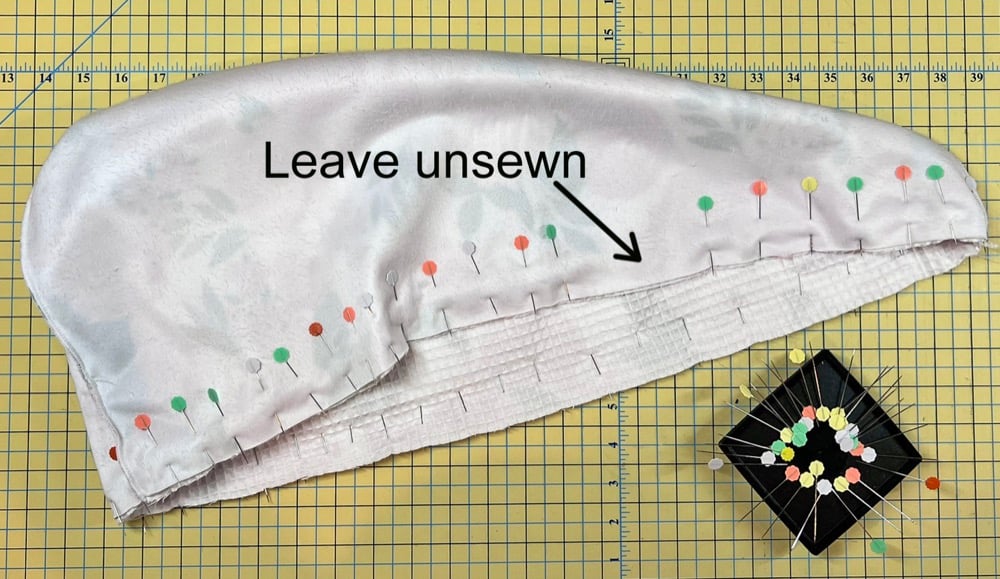
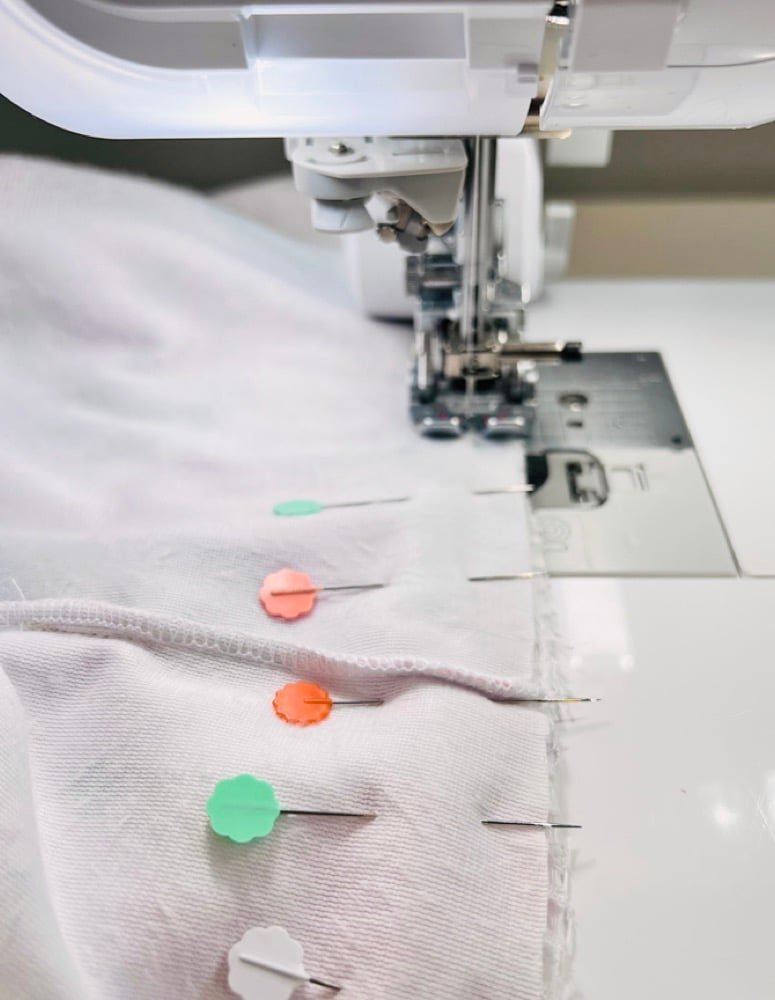
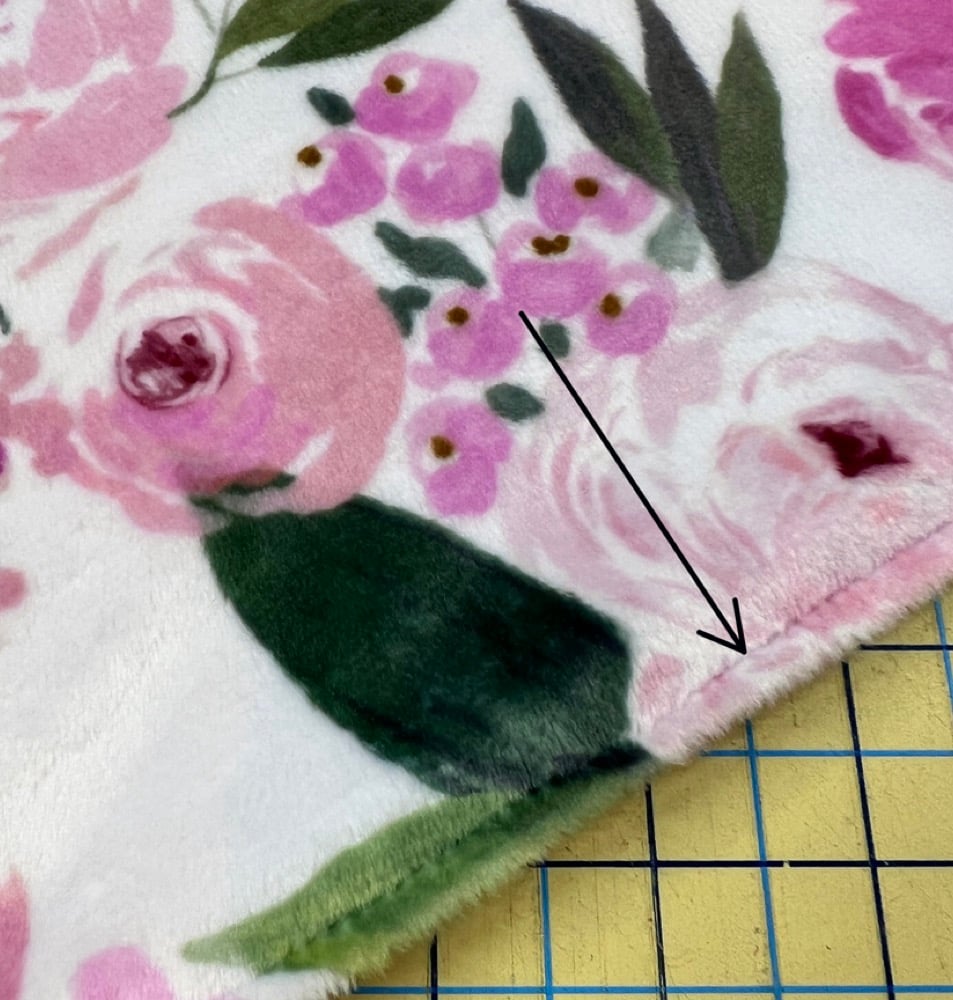
Sew around the edge with a 3/8” seam back stitching at the beginning and end of the opening. Tip: Sew with the Cuddle® on top to control it and any puckering that could happen.
Turn the head wrap through the opening. Turn the raw edges in at the opening and clip or pin closed.
Make sure the seam along the edge is even meaning you can’t see the Cuddle® on the inside or the waffle weave on the outside.
Tip: Lightly press from the waffle weave side and clip all around the edge to keep it nice and even.
Increase your stitch length a little and topstitch around the straight edge ¼” from the edge. This will close the opening and create a nice edge. You could use a decorative stitch if desired.
To wear the wrap, bend at the waist and put the large end of the wrap over your head. The elastic will be near your neck. Twist the smaller end until the edges are against your head. Bring the twisted tail over your head and place the end through the elastic.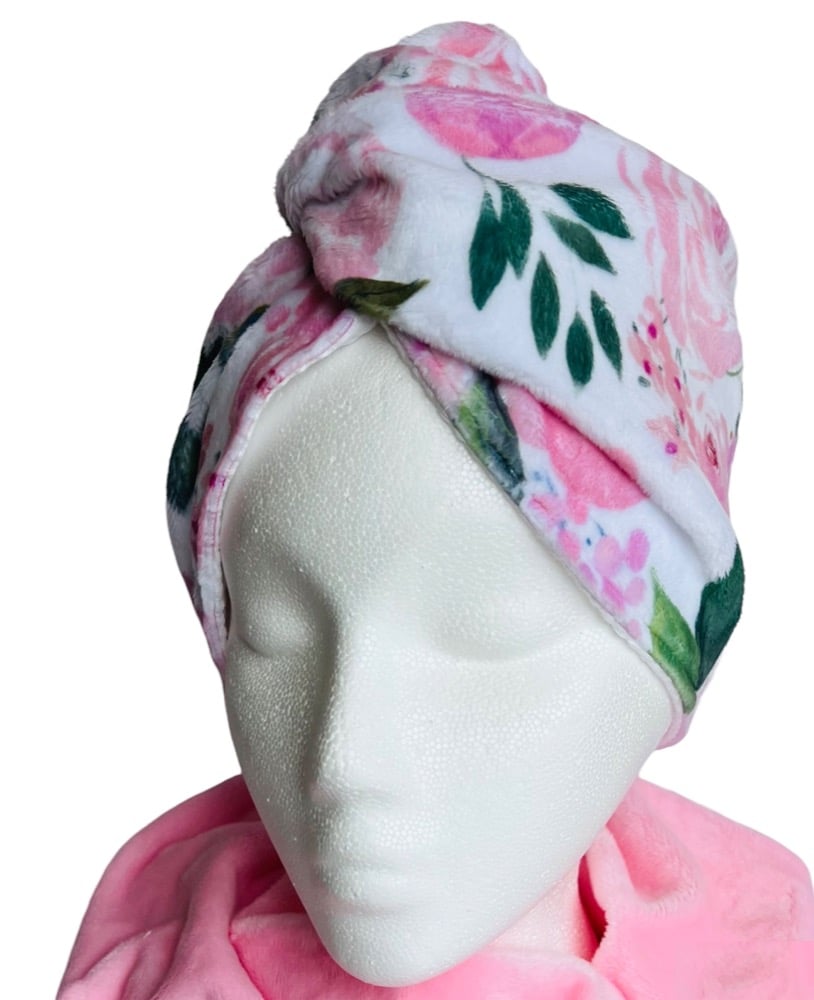
How to sew a Cuddle® body wrap
The wrap should fit most adults. I cut both pieces 56” wide x 34” high. There is approximately a 7” overlap in the front for the Velcro closure. When finished, the bottom edge will hit close at the knee. The middle back is gathered with the elastic.
When cutting and sewing, be aware the I Love Mom Digital Cuddle® is directional.
Place the Cuddle® and waffle weave right sides together matching the edges and cut accurately. Pin securely all around. I like to use a double row of pins.
Use the edge of a saucer to round the 2 bottom corners. It’s optional, but if you do it make sure you are rounding the bottom corners.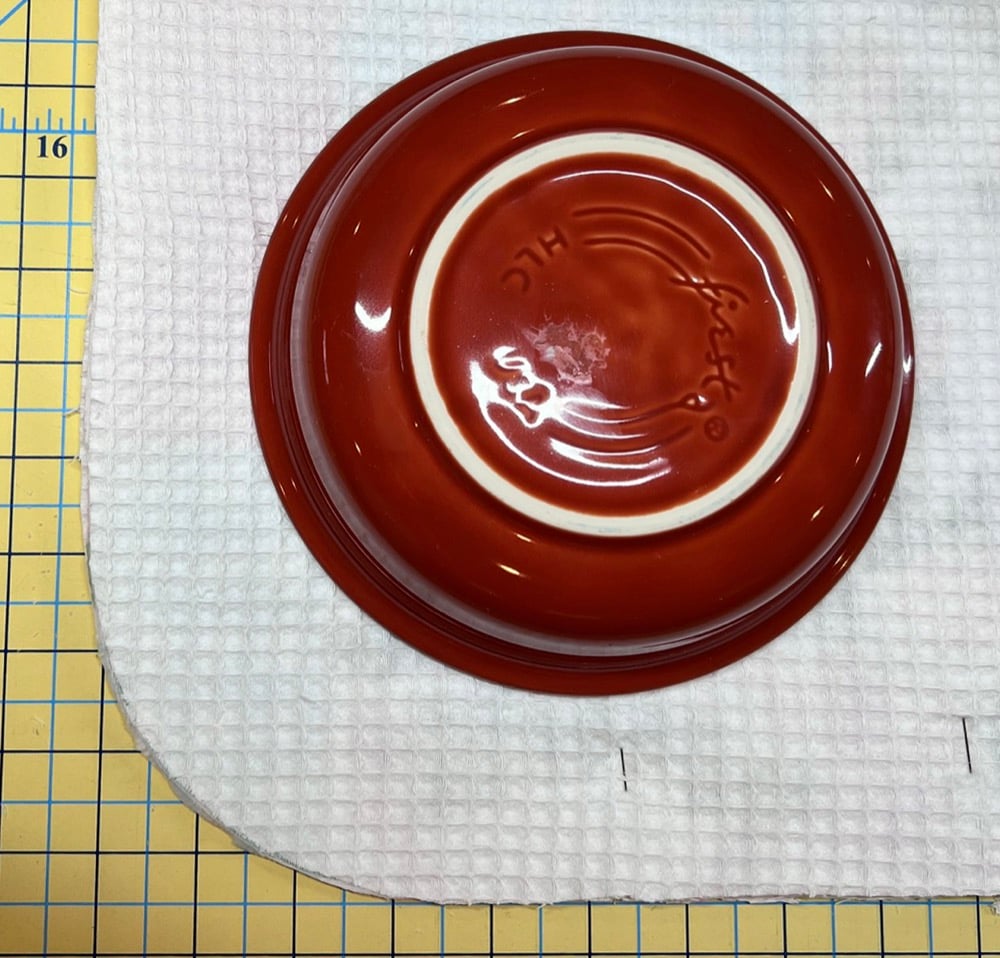
Sew using a 3/8” seam around the edge leaving an opening at the top center large enough to turn it to the right side.
Turn the wrap to the right side through the opening. Push out all the corners.
Make sure the seam along the sides and bottom is even. If you had a little shifting, it can be hidden along the top edge.
Turn the raw edges at the opening in and pin.
Increase your stitch length a little and topstitch around the edge ¼” from the edge along the sides and bottom. We’ll take care of the top edge later.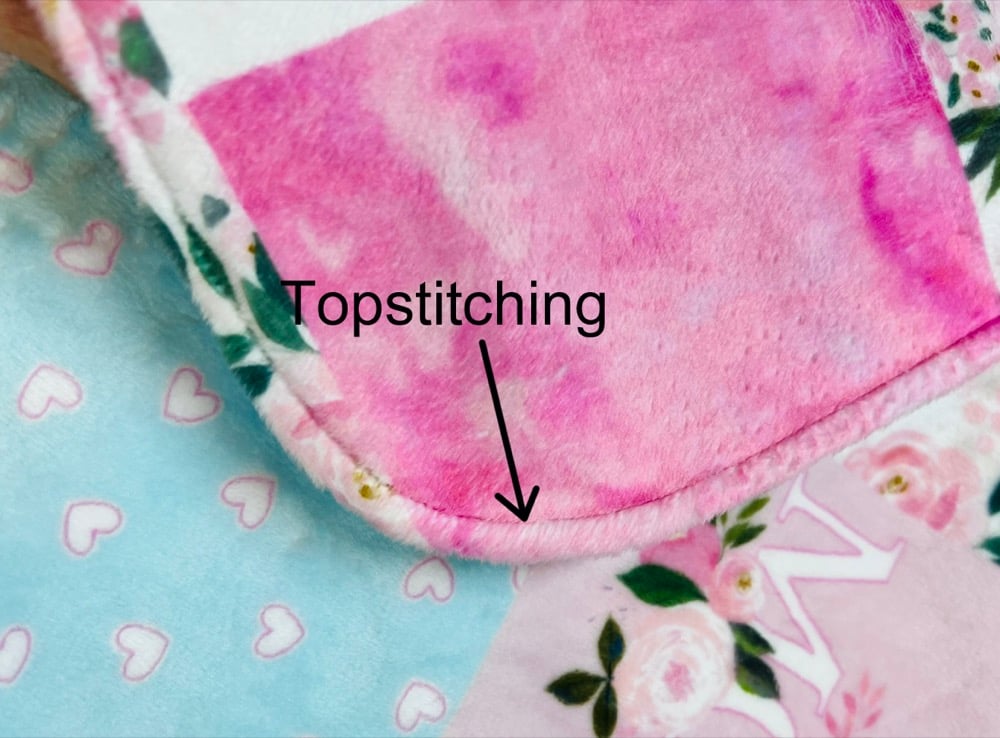
Turn the top edge under 1.75”. You can lightly press the edge and clip for now to hold it in place.
Start stitching from the back side as shown about ¼” from the edge stopping 8” from the opposite end. You are forming a casing.
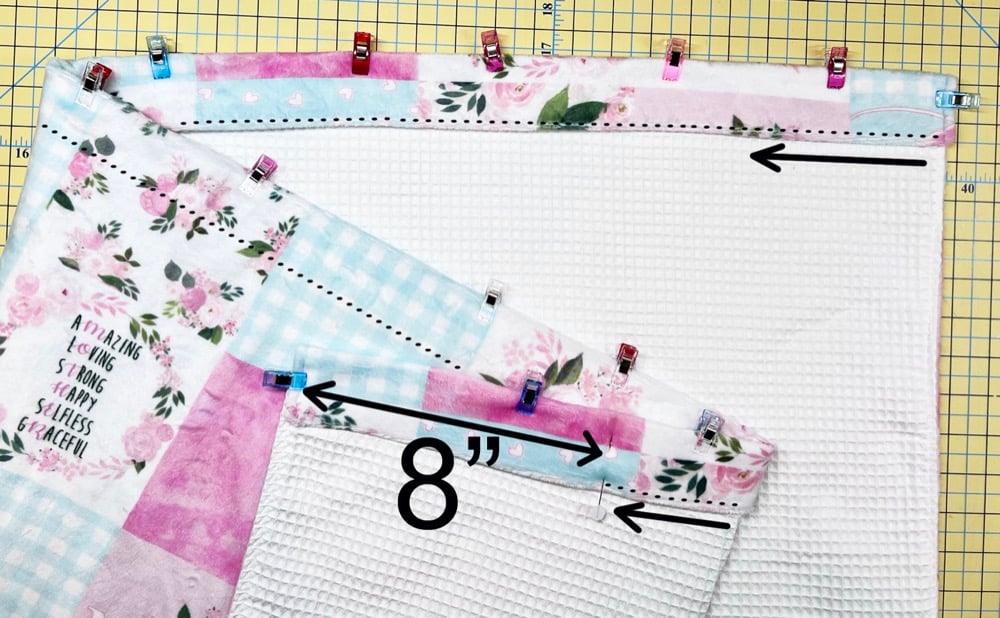
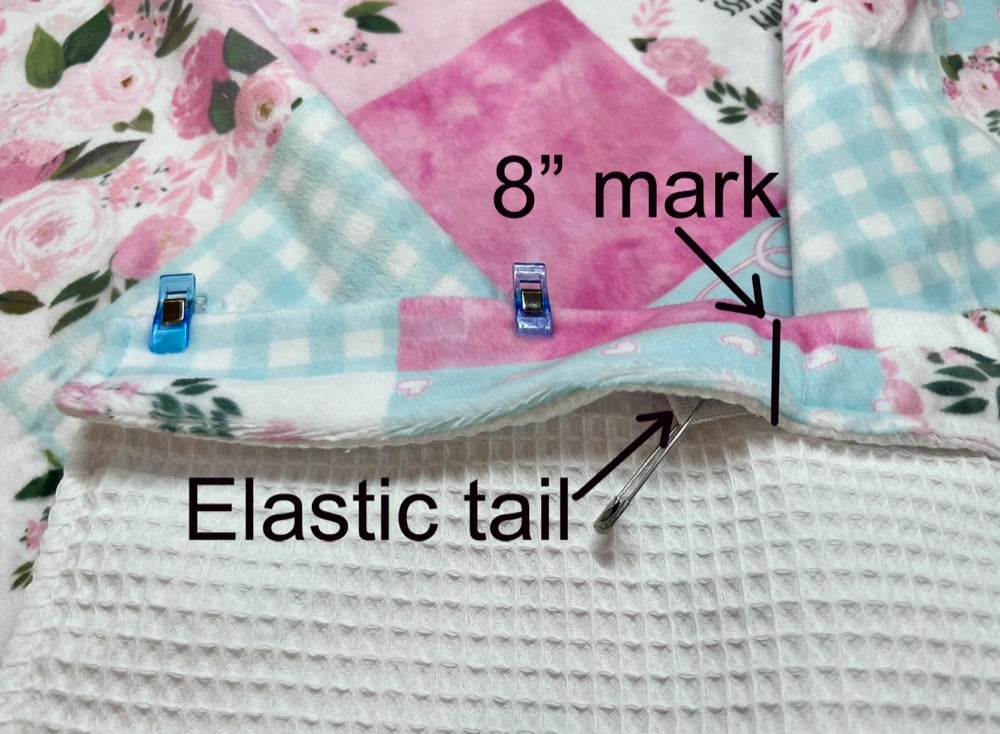
Measure 8” from the sewn end of the casing and mark it. I attach a safety pin to one end of the elastic and feed it through the casing from the sewn end.
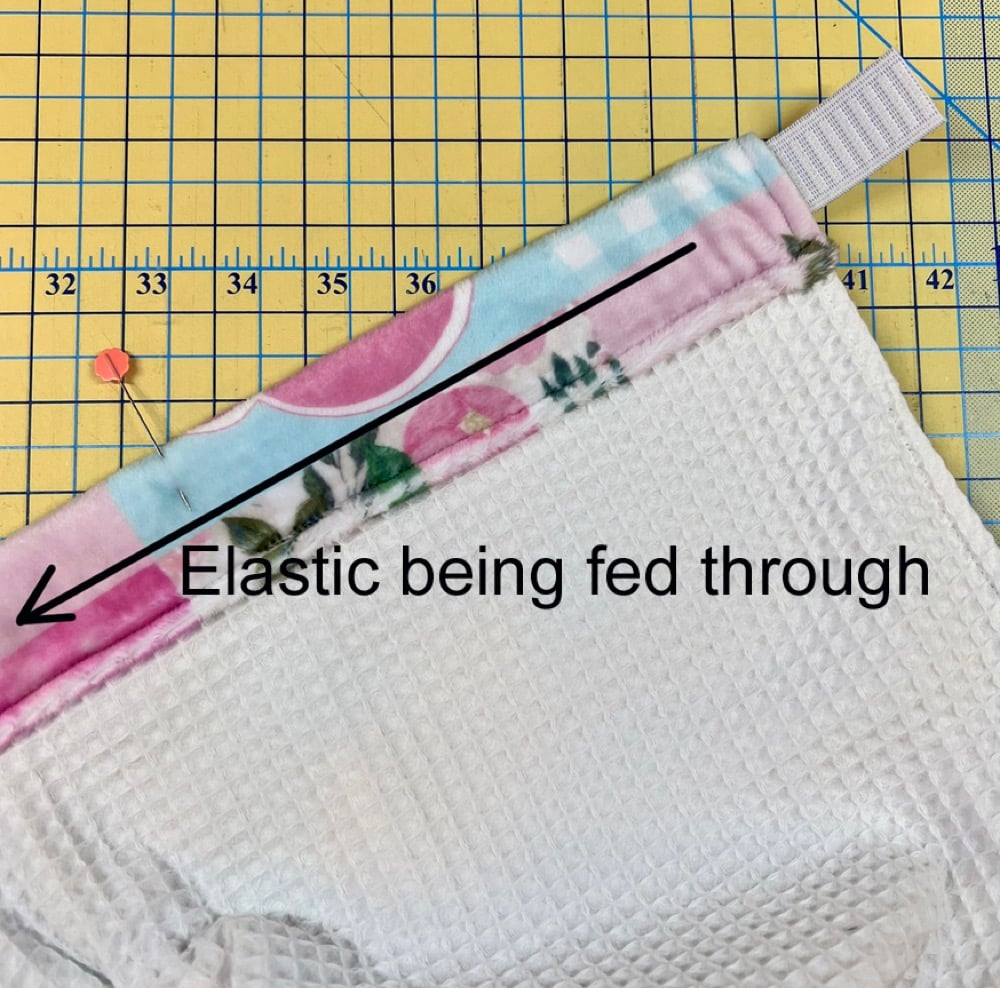
Use your fingers to feel the end of the elastic only pulling it so that the end is about ½” before your mark. Stitch back and forth a few times at the 8” mark to secure the elastic end.
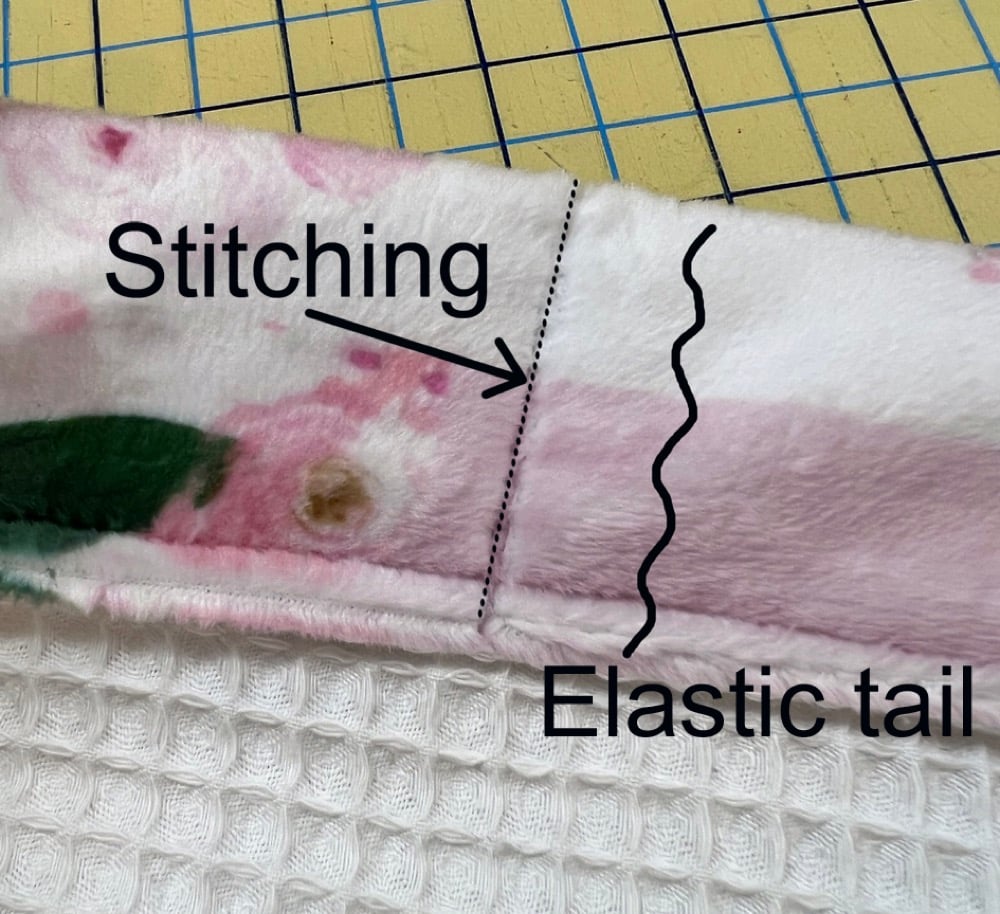
Continue feeding the elastic through the casing until you reach the point you stopped sewing it at the opposite end. Pull the end of the elastic about ½” past your stop point. Stitch back and forth a few times at the 8” mark to secure the elastic end. Remove the safety pin (this is why we stopped sewing the casing earlier so we could remove the pin). Finish sewing the casing.
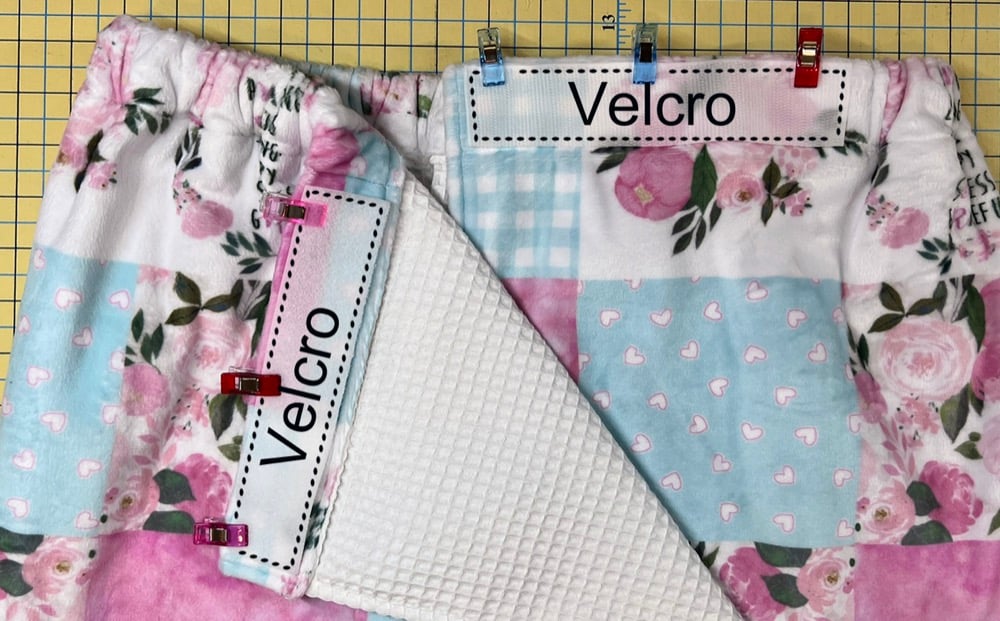
Determine which side of the wrap you want to fold over across your body and securely stitch the Velcro in place in the flat areas at each side.
Follow Embroidery Garden on Facebook and Instagram to see more projects I have stitched using Cuddle® fabrics.
-RW
If you have any questions about Cuddle® minky plush fabrics or any of our Cuddle® Kits, feel free to contact our friendly, no-pressure customer service team at 866-624-5252.
Ready to start creating with Cuddle® minky fabric? Use our store locator to find a selection of Cuddle® minky fabric online or near you.


.jpeg?width=640&name=Image%20(5).jpeg)


Leave a Comment