Hi there! We are so pleased to share this “Land of Sweets Doll Quilt” pattern by Michelle Freedman. Michelle made this quilt for a challenge we did with the Portland Modern Quilt Guild and Northwest Quilters to support the Oregon Ballet Theater's performances of The Nutcracker.
For the challenge, we provided Cuddle 3 from Kozy Cuddle™ solids. The Cuddle 3 colors, Red, Teal, Ivory, Paris Pink and Dark Lime, were selected from a palette we created using the OBT 'Welcome to the Land of Sweets' artwork.
Land of Sweets Doll Quilt designed by Michelle Freedman
finished size: 16 ½” x 20”
For this quilt, Michelle used some of the Cuddle challenge fabrics in Cuddle 3: Paris Pink and Teal.
Fabric and Yardage:
Fabric A Pink Cuddle ½ yard
Fabric B Teal Cuddle ¼ yard
Fabric C White ground cotton print ¼ yard
Fabric D Turquoise cotton print 1/8 yard
Binding Fabric B
Backing Fabric A
Cutting:
Fabric A Cut 5 squares 4 ½” x 4 ½”
Fabric B Cut 4 squares 6 ½” x 6 ½”
Fabric C Cut 20 squares 2” x 2”
Fabric D Cut 2 strips 21/2” x 16 ½”
Binding Cut 80” (or two WOF strips) 2 1/2” wide
Backing Cut one piece 21” x 24”
Make your Doll Quilt!
Fabric A Unit: make 5
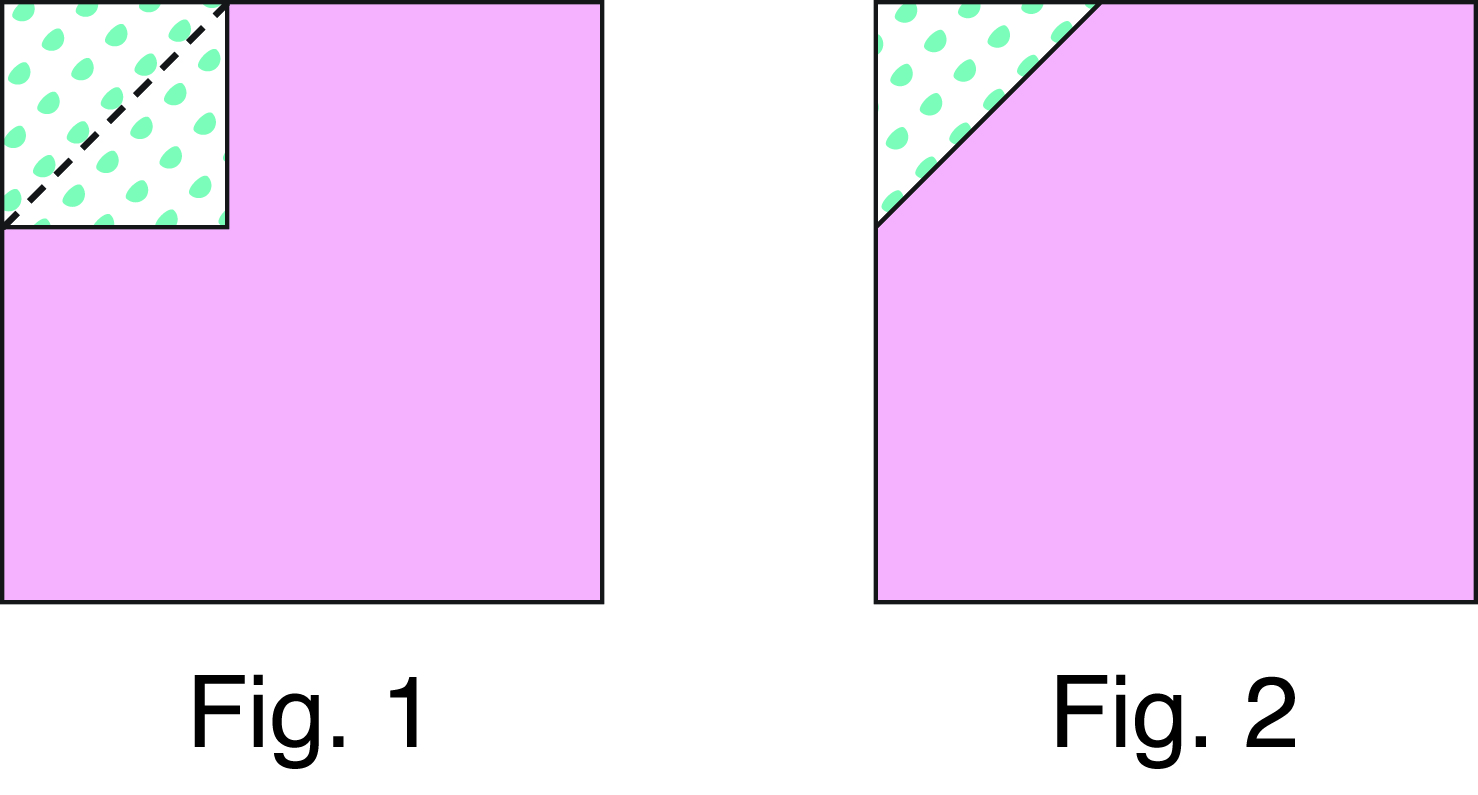
1. Place one 2 ” Fabric C square on the top left corner of one 4 ½” Fabric A square, right sides together. Stitch across the diagonal of the smaller square from the upper right corner to the lower left corner. (Fig 1.) Flip open the triangle and press seam allowances away from the center. (Fig. 2). Trim away the excess fabric 1/4” away from your stitching.
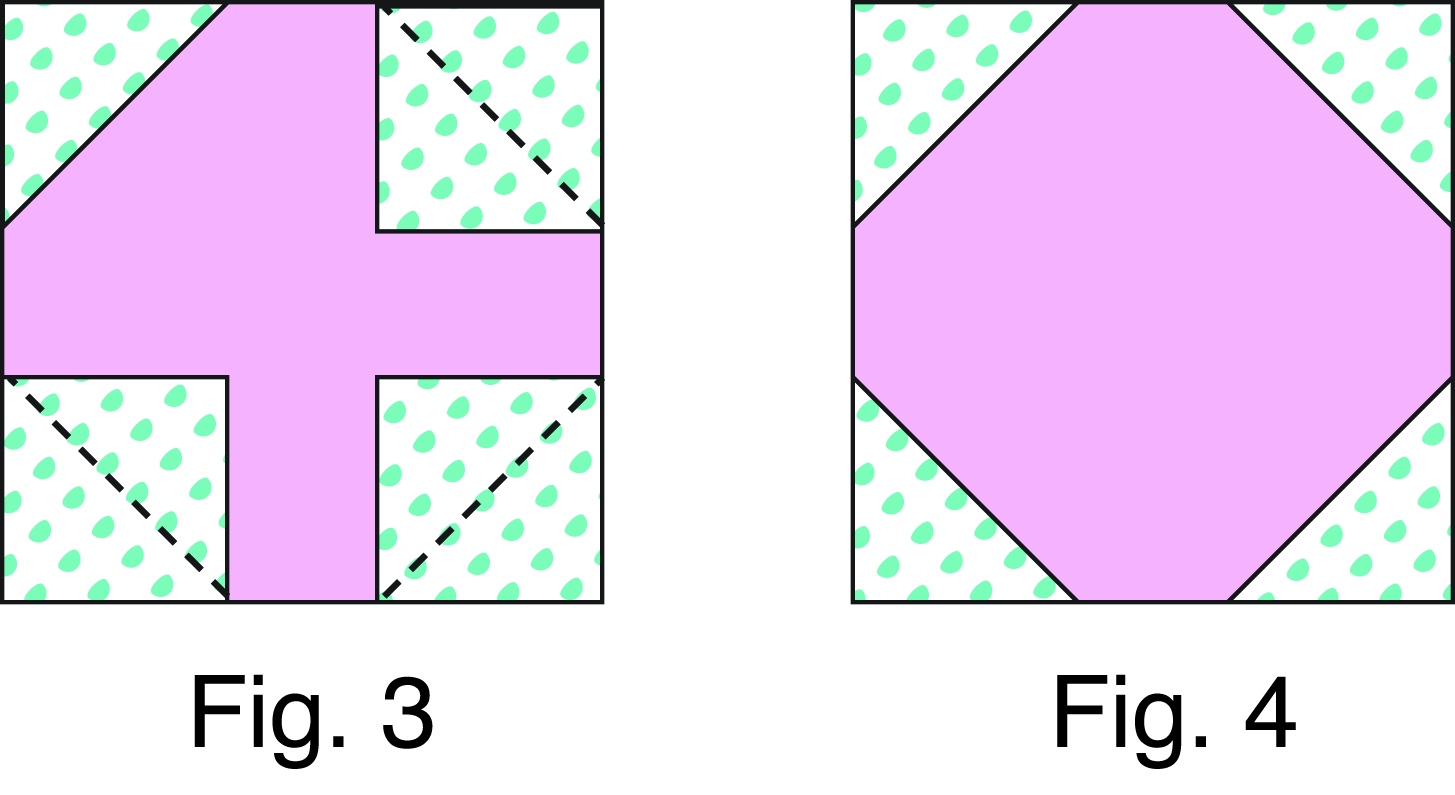
Repeat step one on the remaining three sides of your Fabric A square. (Fig. 3-4).
2. Make a total of 4 fabric A units.
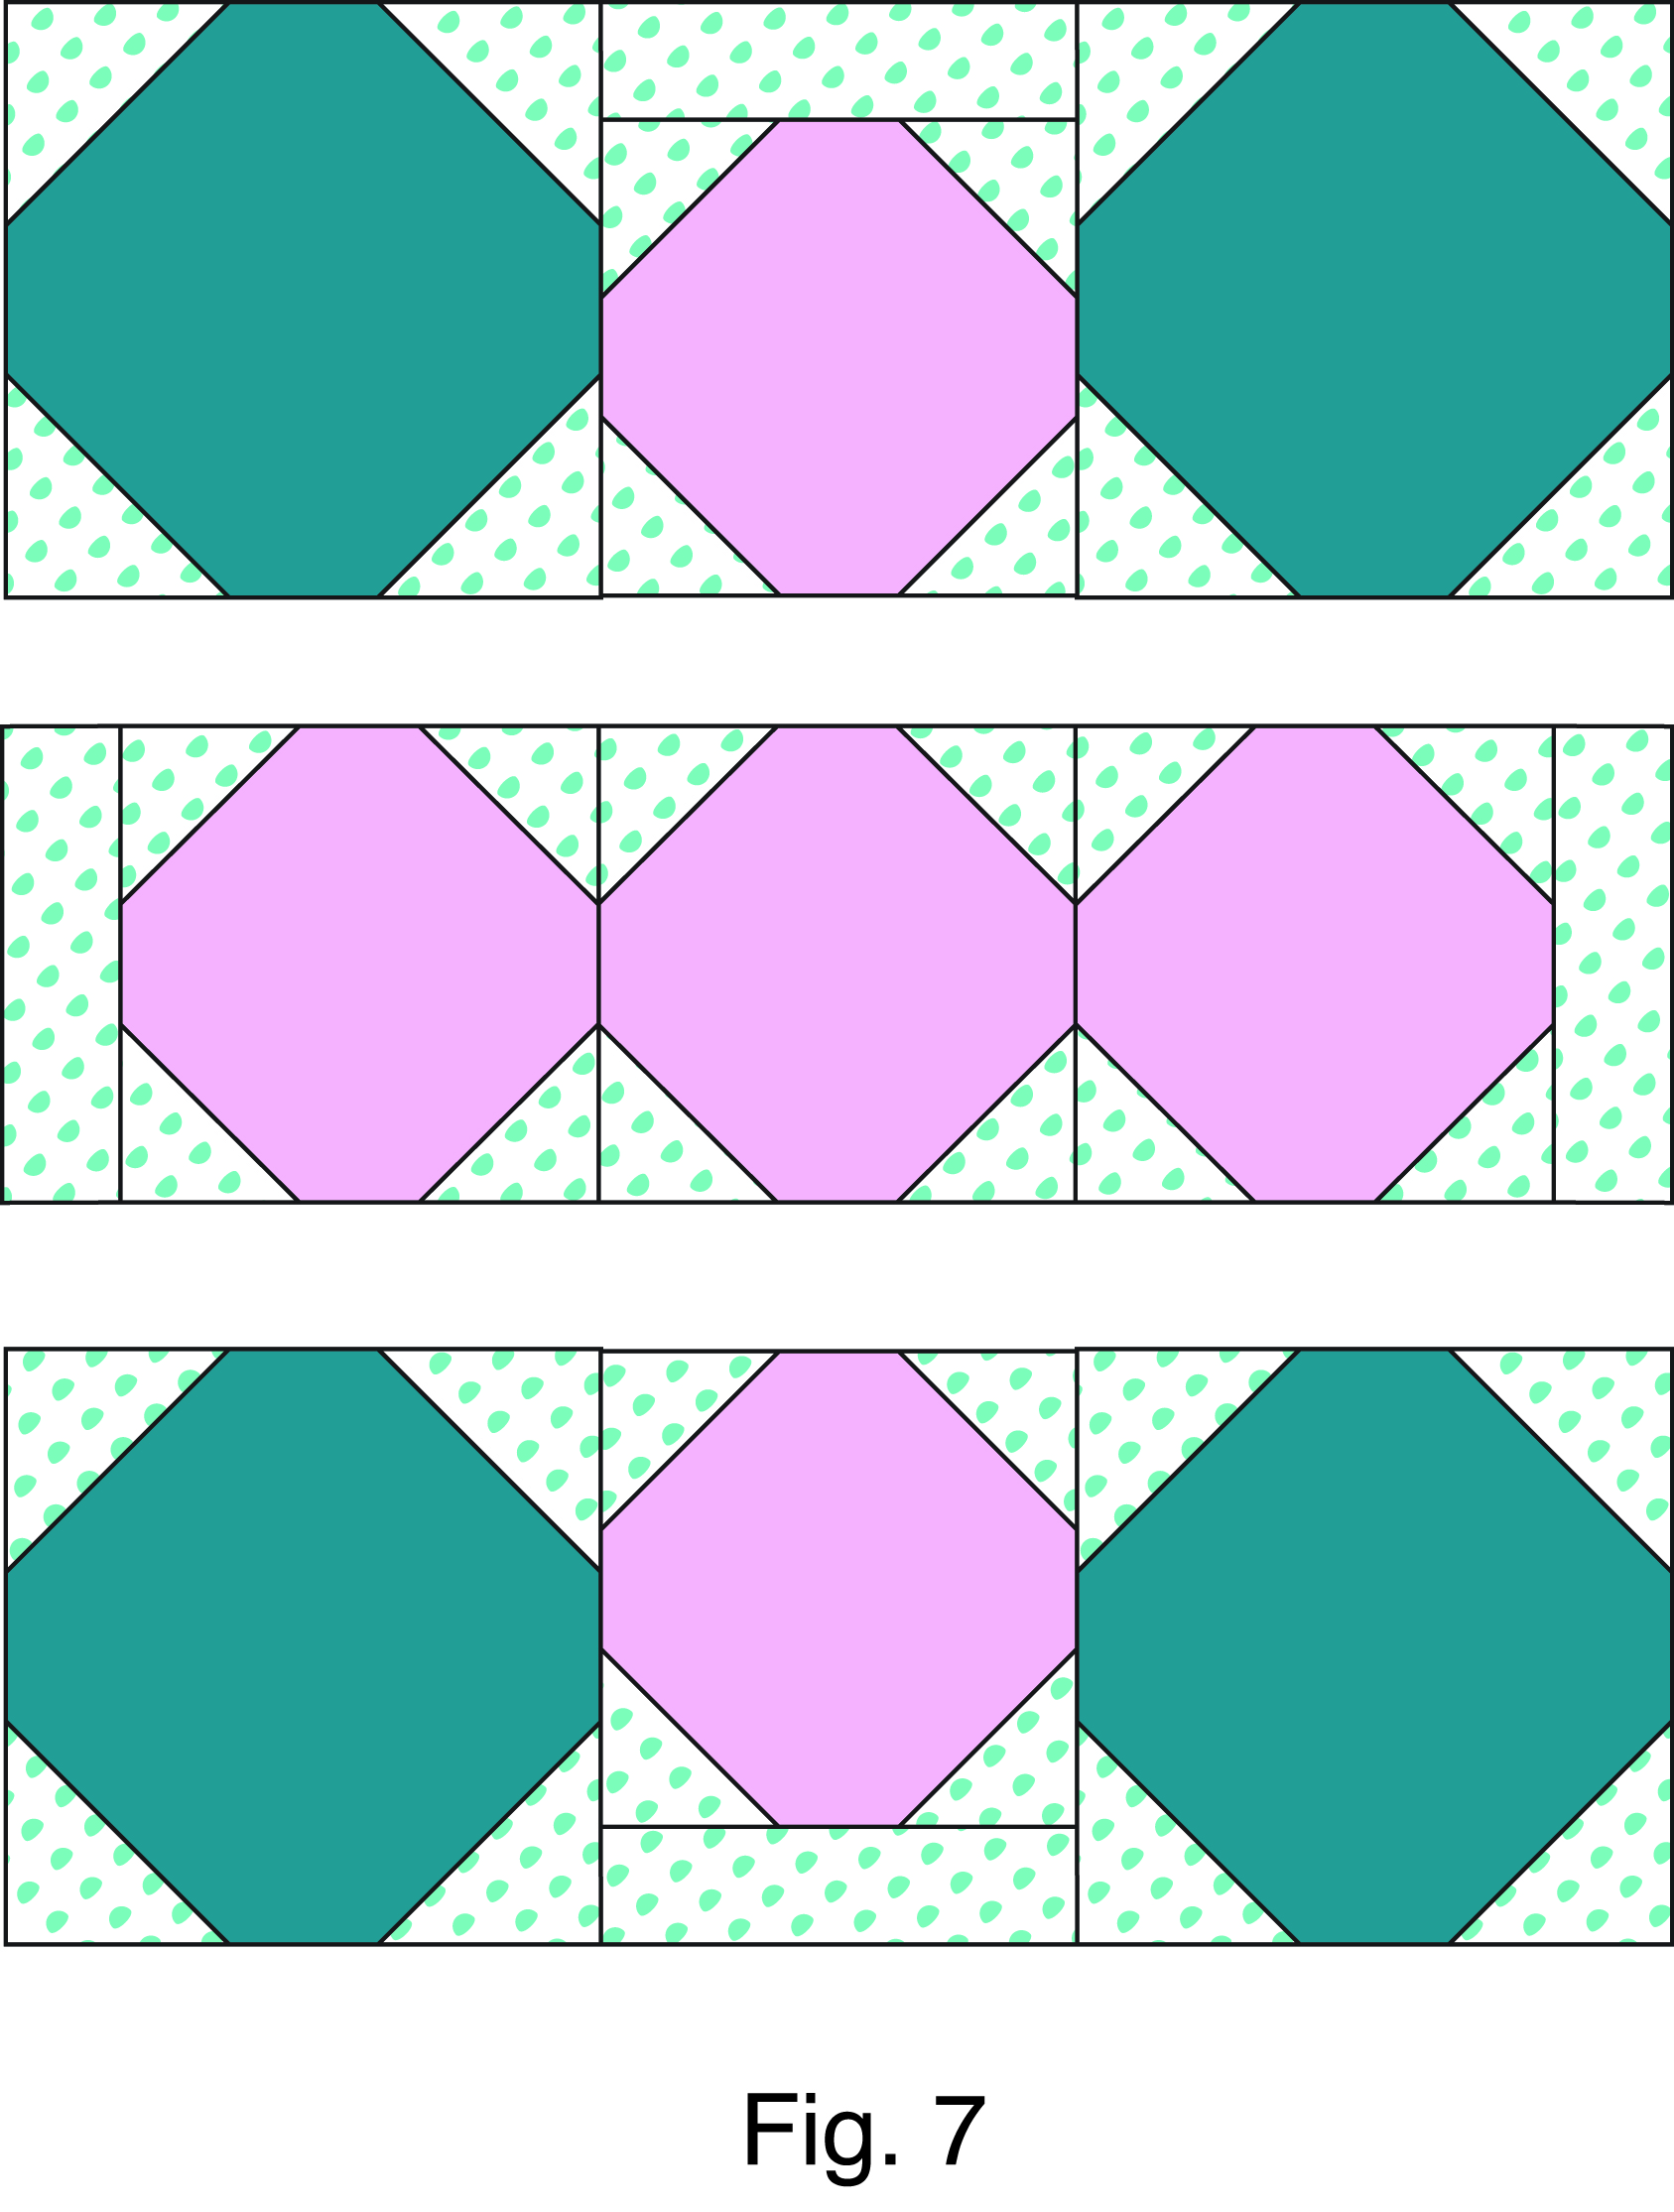
3. Sew one Fabric A unit to one 2 1/2” x 4 1/2” Fabric C strip. Press seam allowances away from the Fabric A unit. Repeat on three of the remaining four Fabric A units. *The center Fabric A unit will not have the strip attached. (See Fig. 7)
Fabric B Unit: make 4
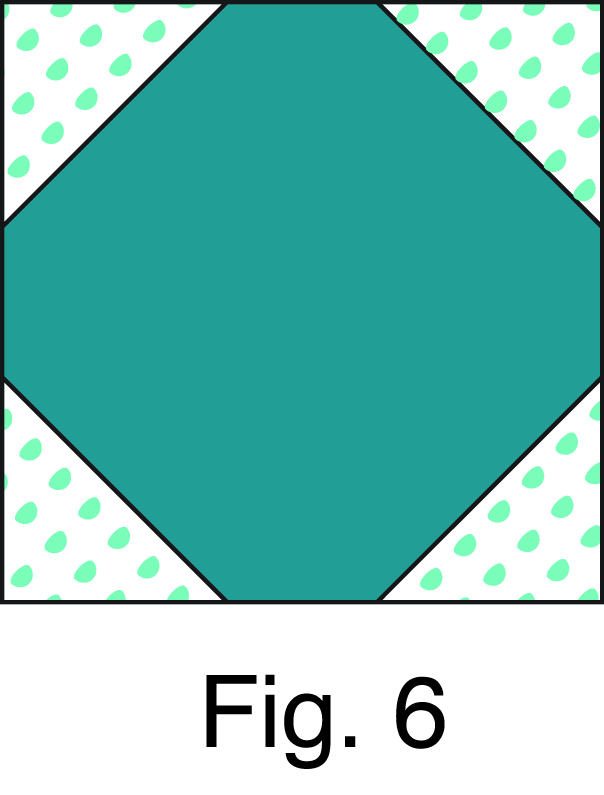
4. Place one 2 1/2” Fabric C square on the top left corner of one 6 ½” Fabric B square, right sides together. Stitch across the diagonal of the smaller square from the upper right corner to the lower left corner. Flip open the triangle and press seam allowances away from the center. Trim away the excess fabric 1/4” away from your stitching.
5. Repeat step 1 on the remaining three sides of your Fabric B square (Fig. 6).
6. Repeat step 4-5 on the remaining three fabric B units.
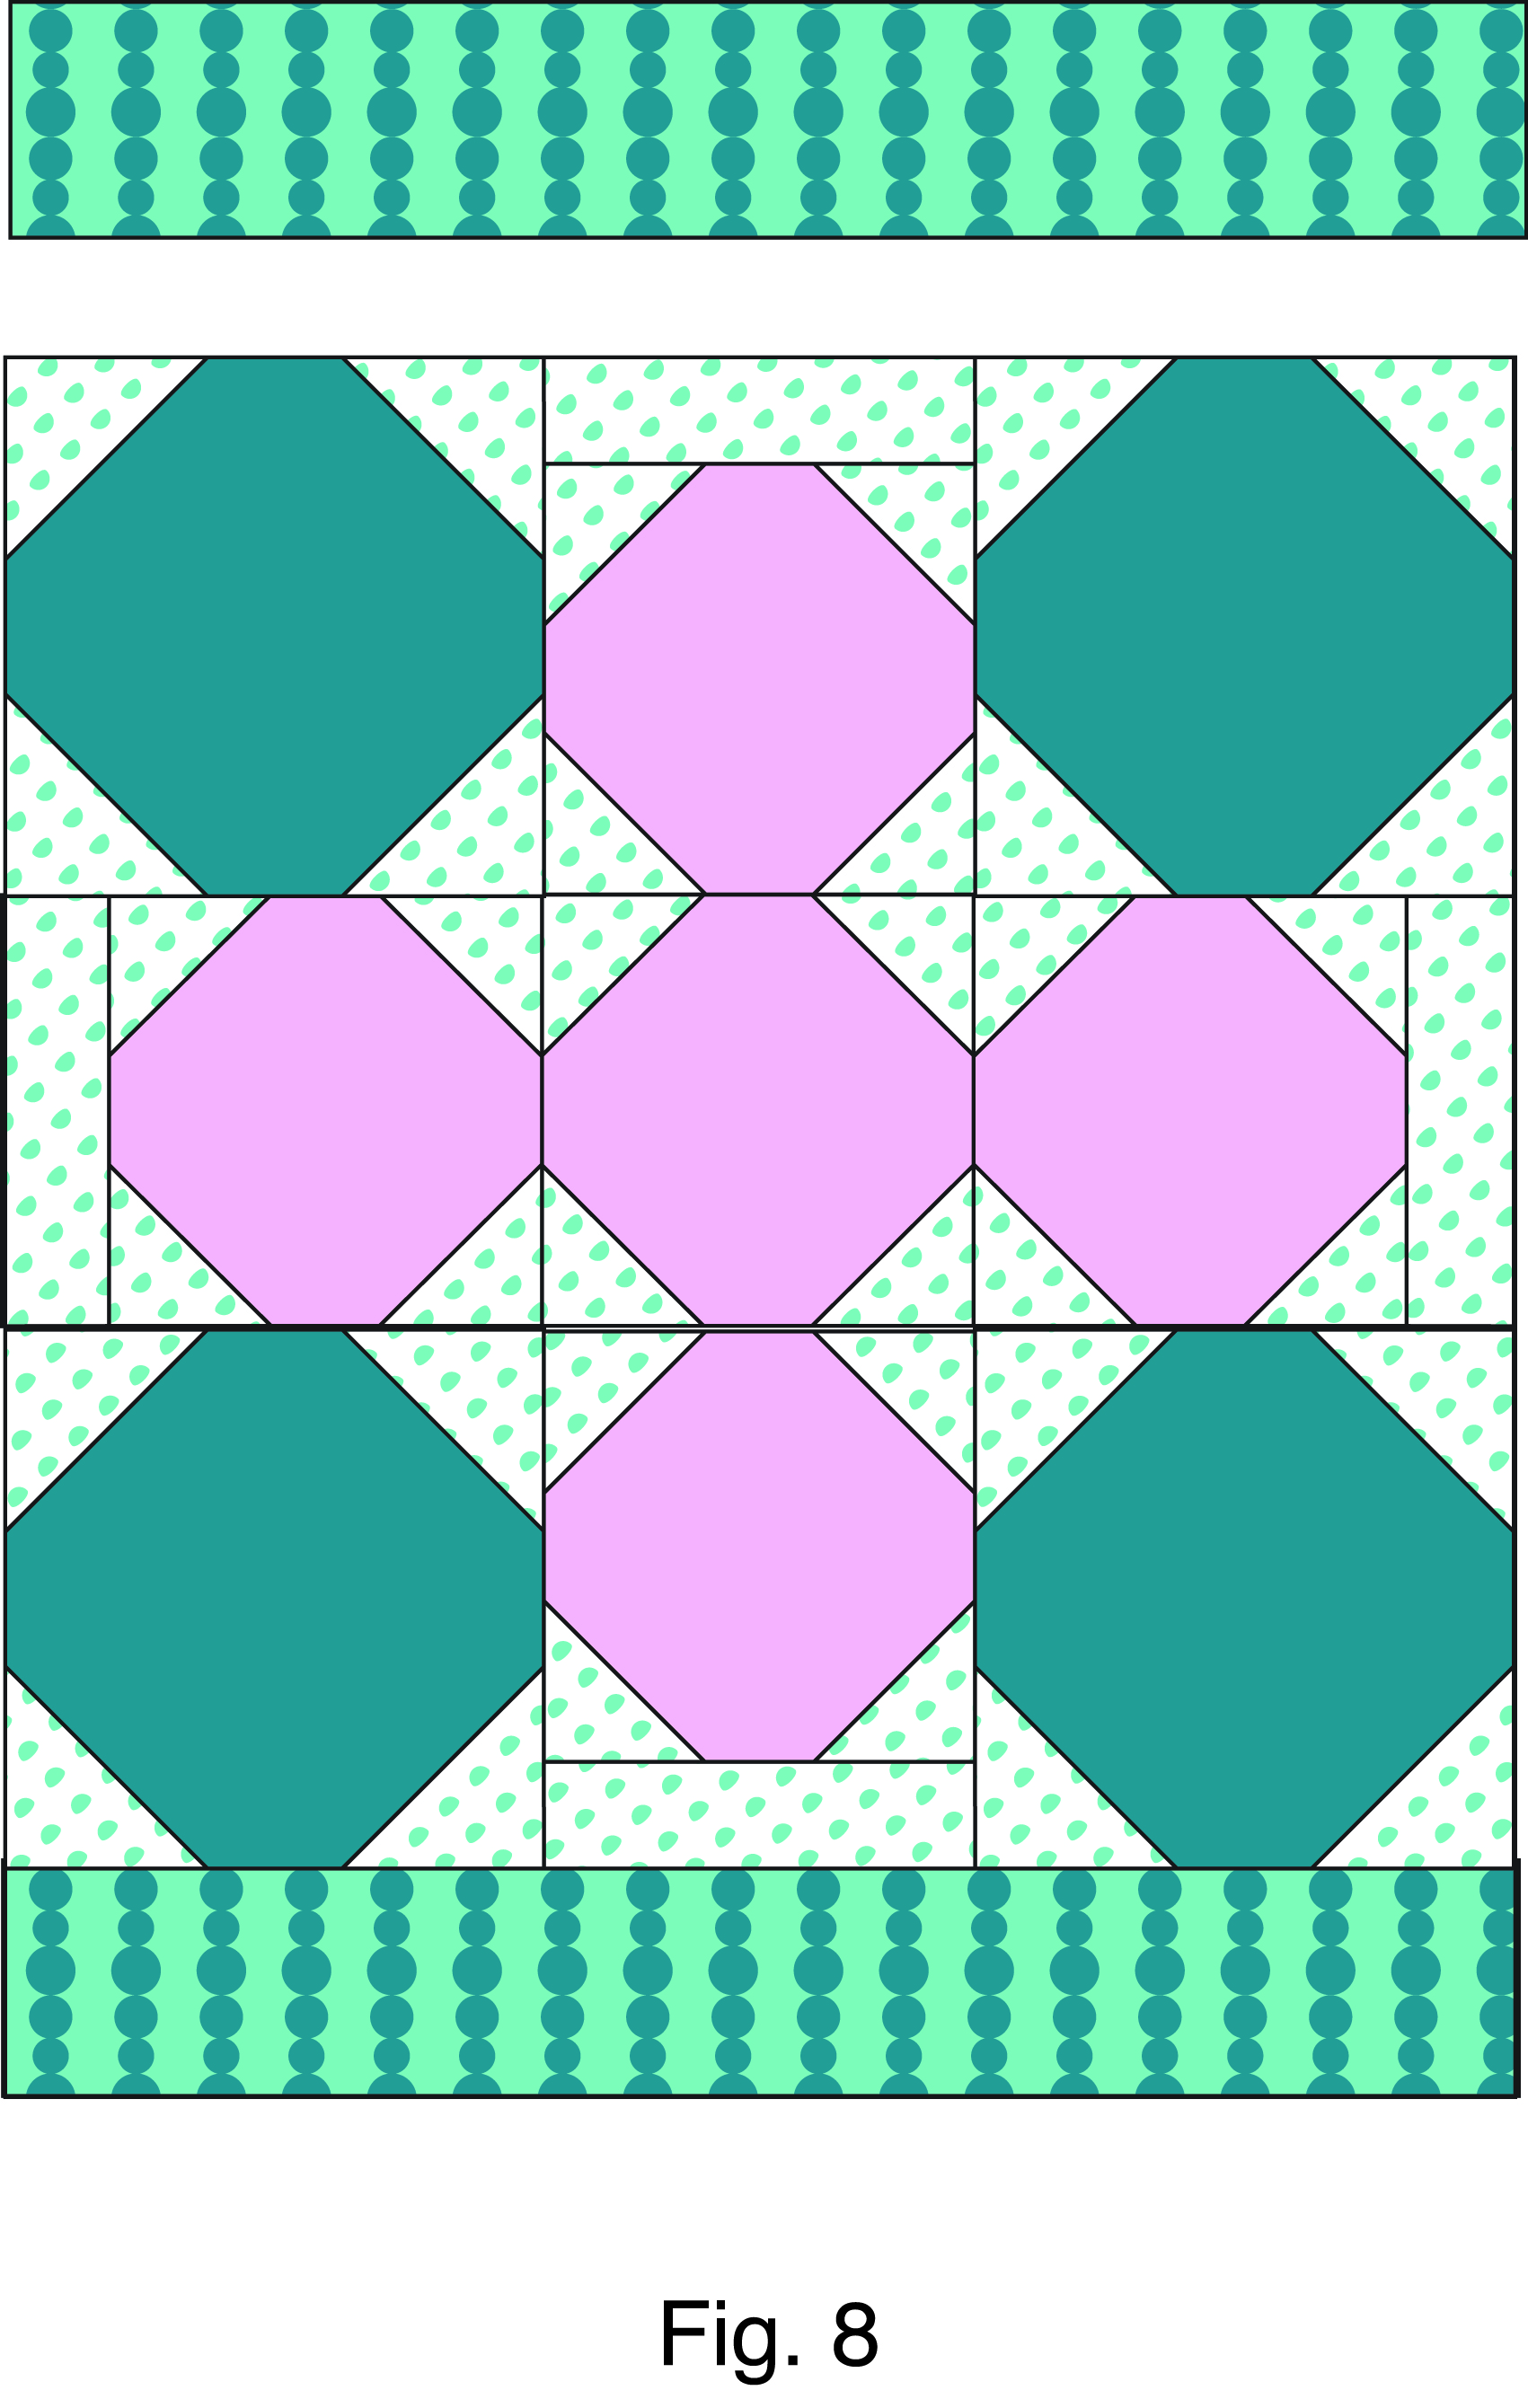
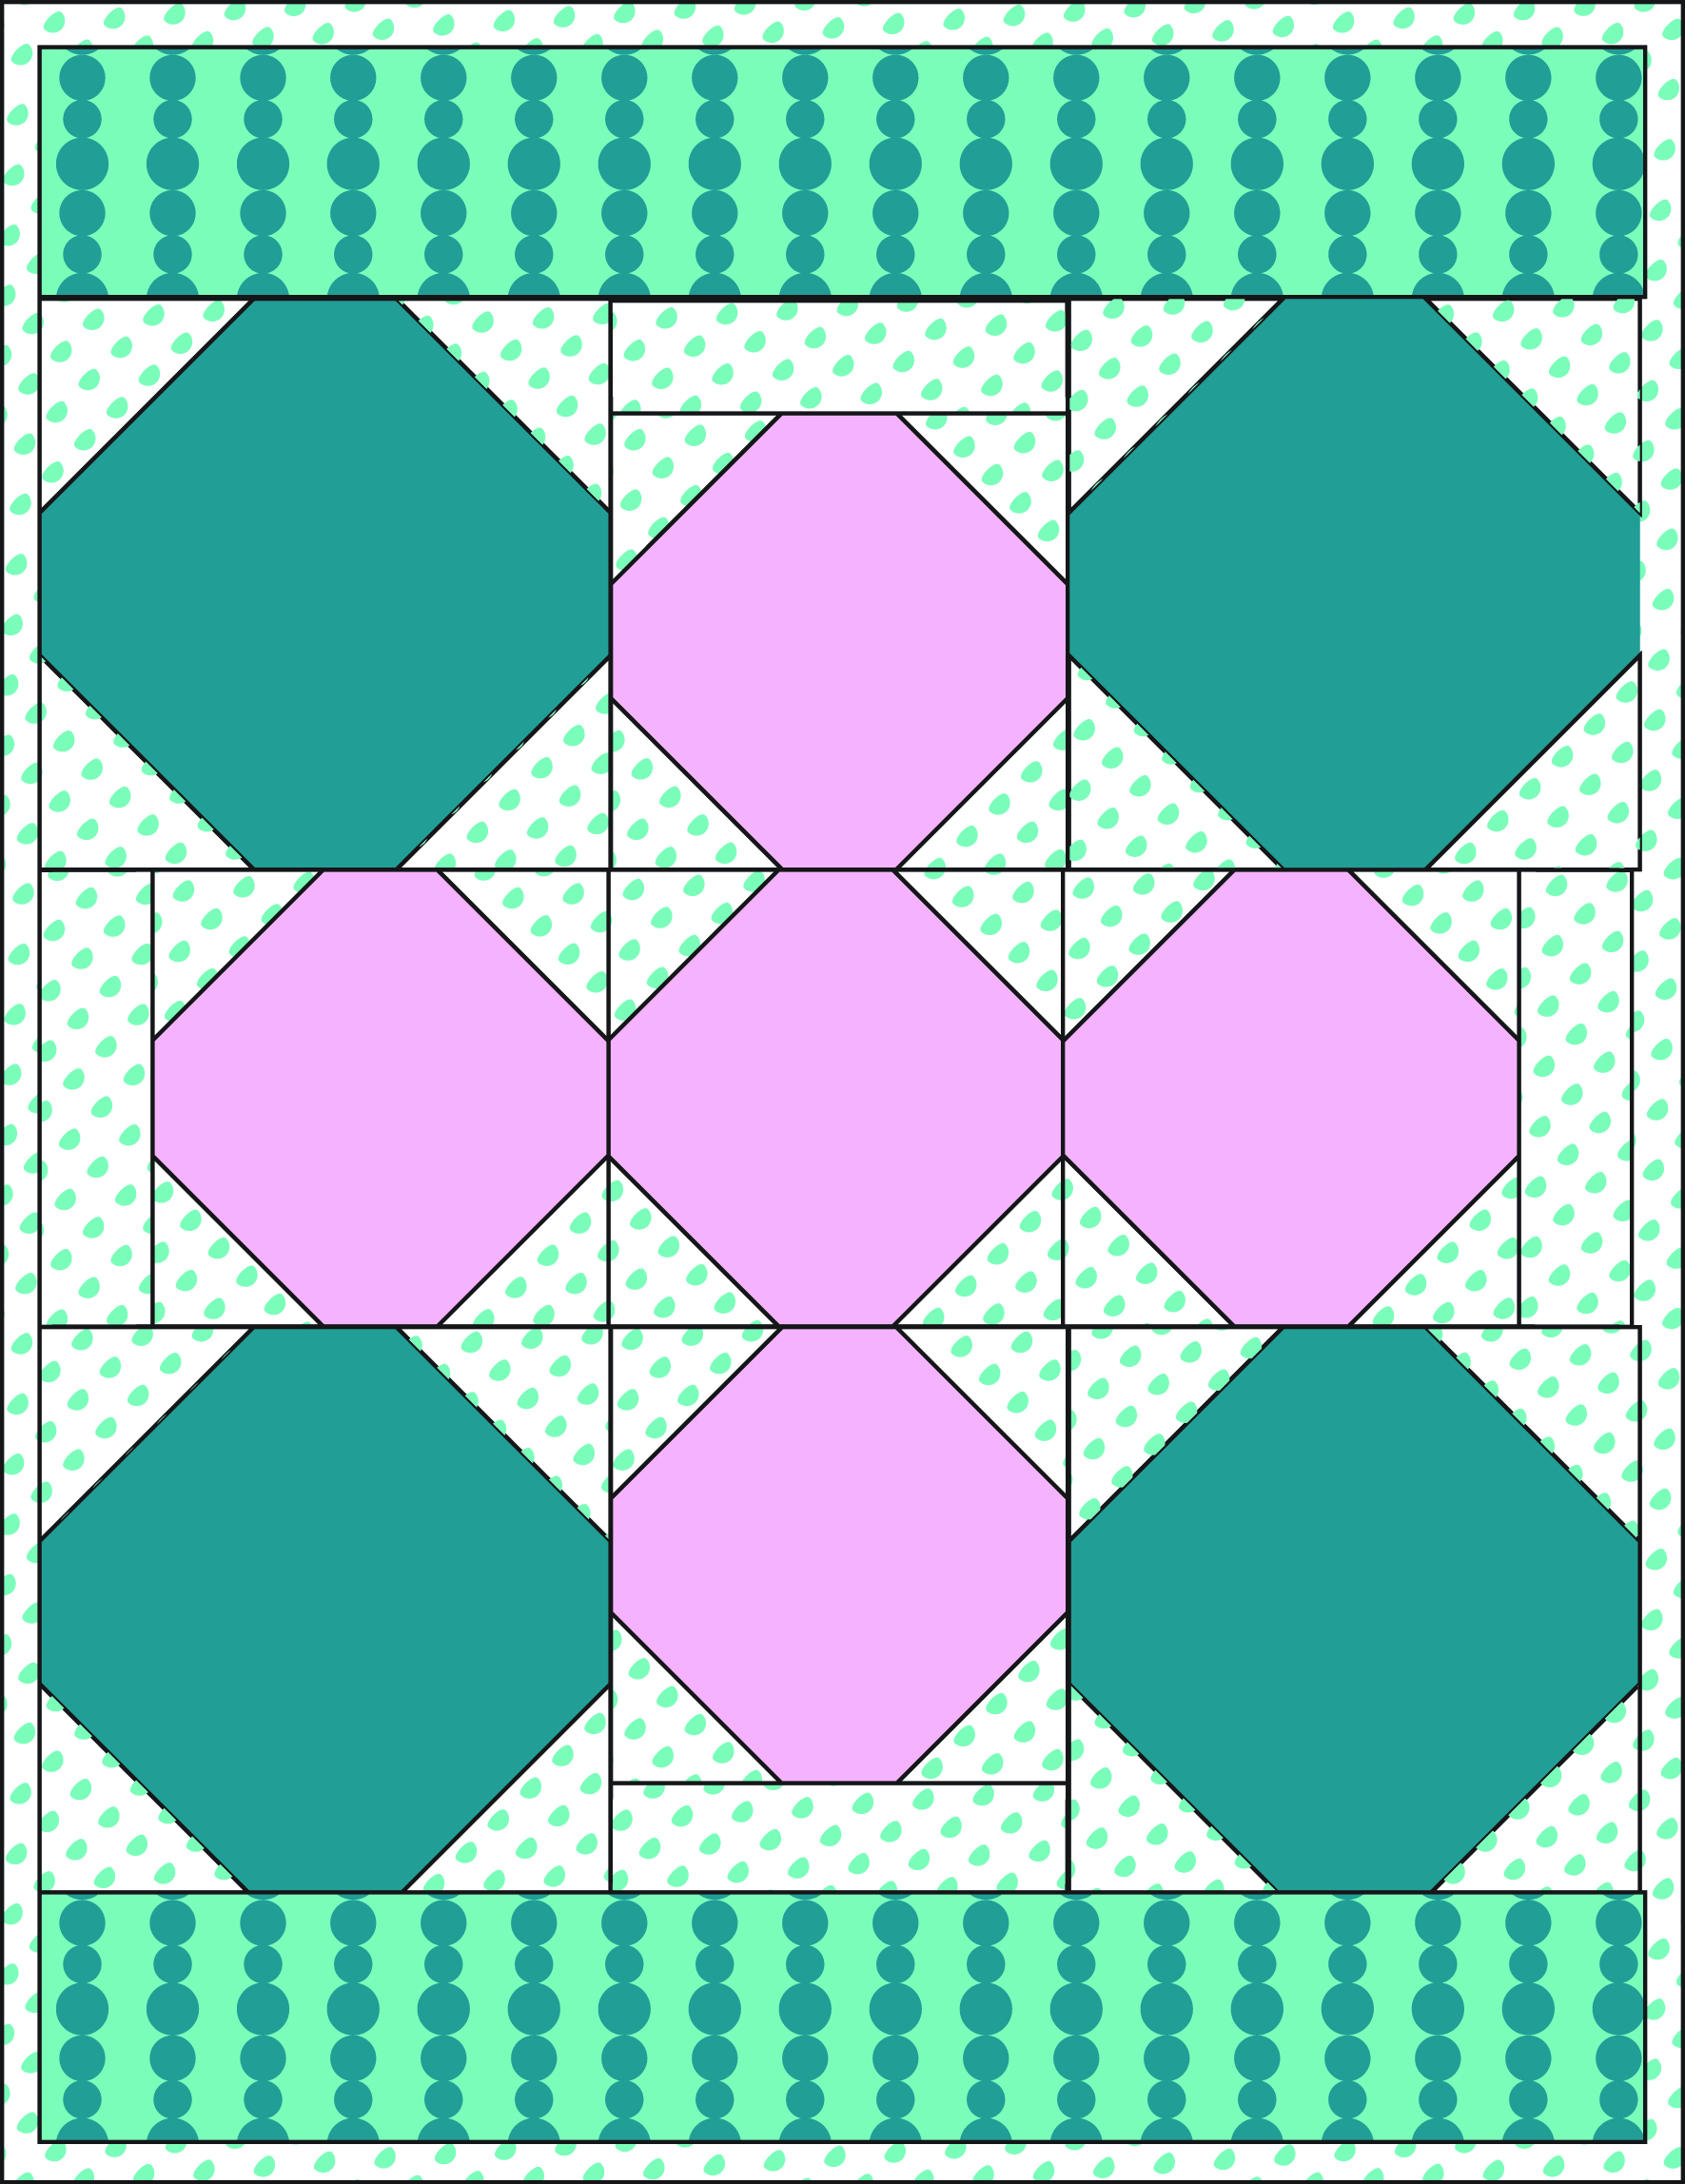
Assemble the Top: *Follow Figure 7 to assemble the top of your doll quilt.
7. Top Row: Stitch together two Fabric B units to one Fabric A unit.
8. Center Row: Stitch together three Fabric A units.
9. Bottom Row: Stitch together two Fabric B units to one Fabric A unit.
10. Stitch one 2 1/2” x 16 1/2” Fabric D strip to the top edge of your assembled units. Press seam allowances toward the strip. Repeat on the bottom edge (Fig. 8).
Finish your Quilt
11. Layer the quilt top, batting and backing to make your quilt sandwich. Baste the layers together.
12. Quilt as desired.
13. Square up the quilt top and trip the excess batting and backing.
14. Prepare a double fold, straight grain binding. Bind your quilt and add a label.
To read the other posts about this challenge, click here and here.
We’d like to thank Michelle for donating her precious time and talent to this project.
Have you ever made a doll quilt? We’d love to see yours!
Cuddle Hugs,
Ellen