Hi! I’m Jeni from jeni ro designs! I love making baby blankets, kids’ toys & stuffed animals with Shannon Fabrics Cuddle™. Today I wanted to share a fun project- a Cuddle Lion Pillow!
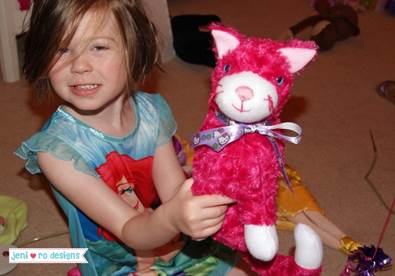
But first, here's a peek at my kid’s birthday critters I made with Cuddle!
For the Lion project, I used a very cool Shannon Fabrics product – Shaggy Cuddle! This stuff is so fluffy and soft and a little goes a long way! To highlight this awesome fabric (that I often use as trim for my baby blankets), I designed a super fun LION PILLOW – the shag material is perfect for a fluffy mane!
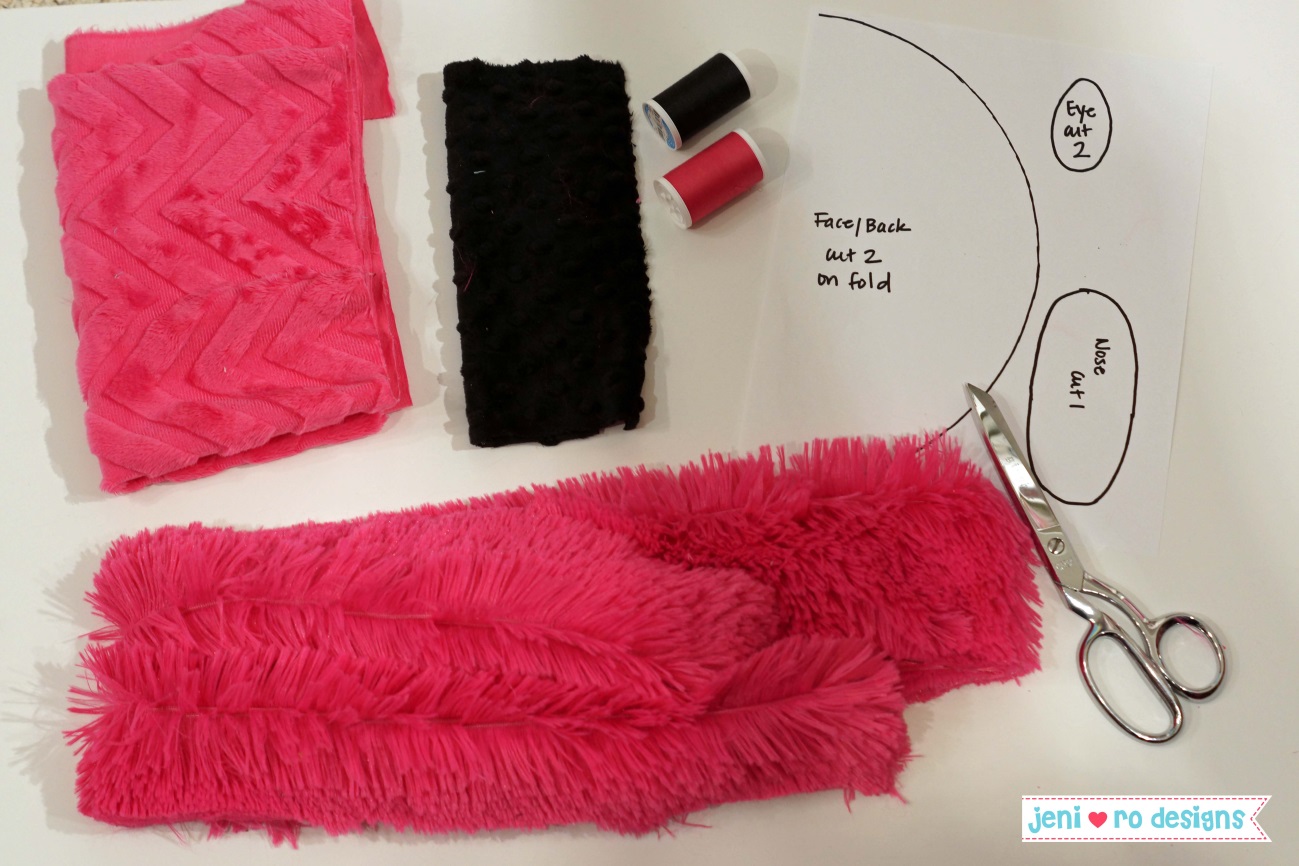
Here is what you will need:
- Pattern pieces – Download HERE Lion Pillow pattern
- Cuddle for front and back of pillow (I used Shannon Fabrics Fuchsia Embossed Chevron) – approx. ½ yard
- Cuddle, Fleece or Felt for eyes and nose (I used Shannon Fabrics Black Cuddle Dimple) – scrap
- Cuddle Shag for mane (I used Shannon Fabrics Fuschia Shaggy Cuddle ) – 4” by width of fabric.
- Matching thread
- Poly-fil stuffing (not shown, but I used Fairfield Polyester Fiberfill)
- Sewing Machine (not shown, I use Schmetz Microtex Sharp Needles when sewing with Cuddle).
- Walking foot (optional)
Step 1: Gather materials (shown and listed above).
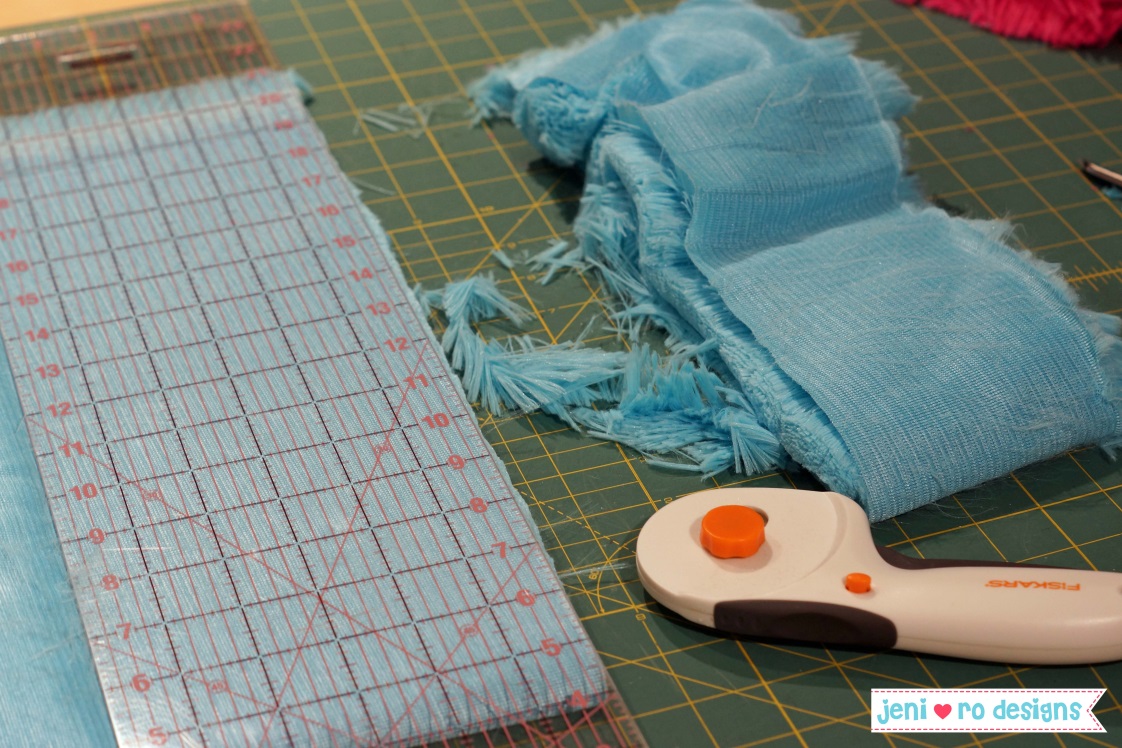
Step 2: Cut out your pieces using the pattern you downloaded.
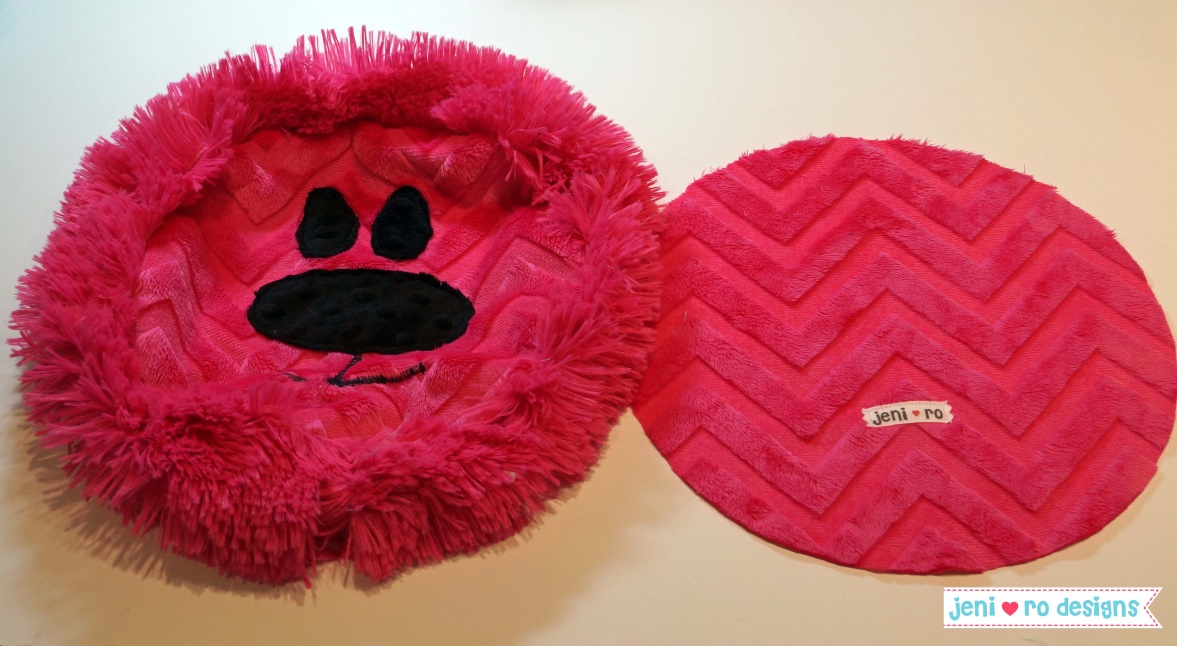
- Cut 2 front/backs on the fold from main Cuddle.
- Cut 1 nose from black fabric.
- Cut 2 eyes from black fabric.
- Cut a strip of Shaggy Cuddle – 4” by width of fabric.TIP: I fold the Shaggy Cuddle selvages together and then fold again, cut with a ruler and a sharp rotary cutter. Remember to give the Shaggy Cuddle a good shake (in an easy to clean area) to remove any extra fur that was cut.
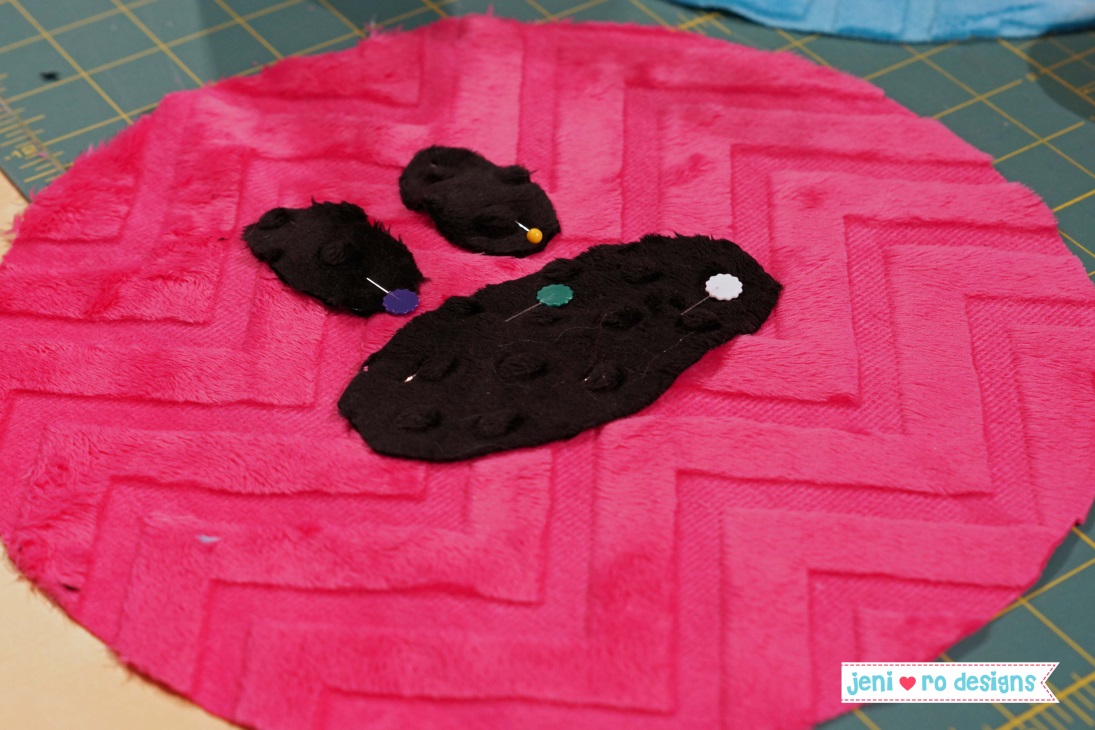
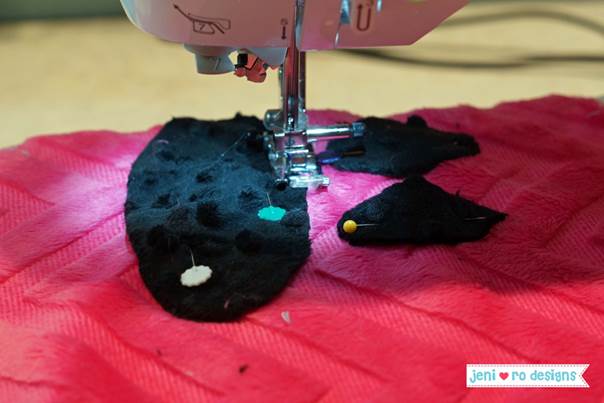
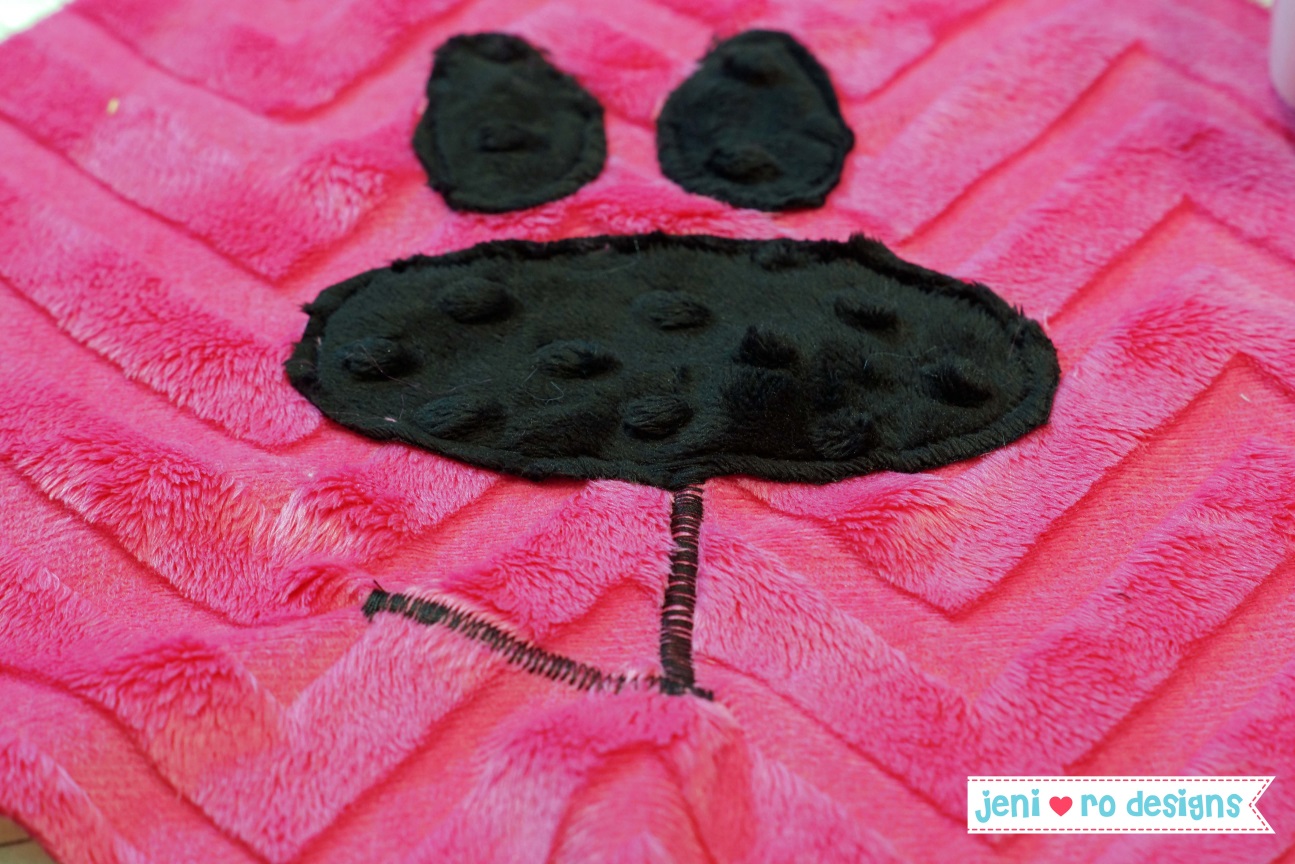
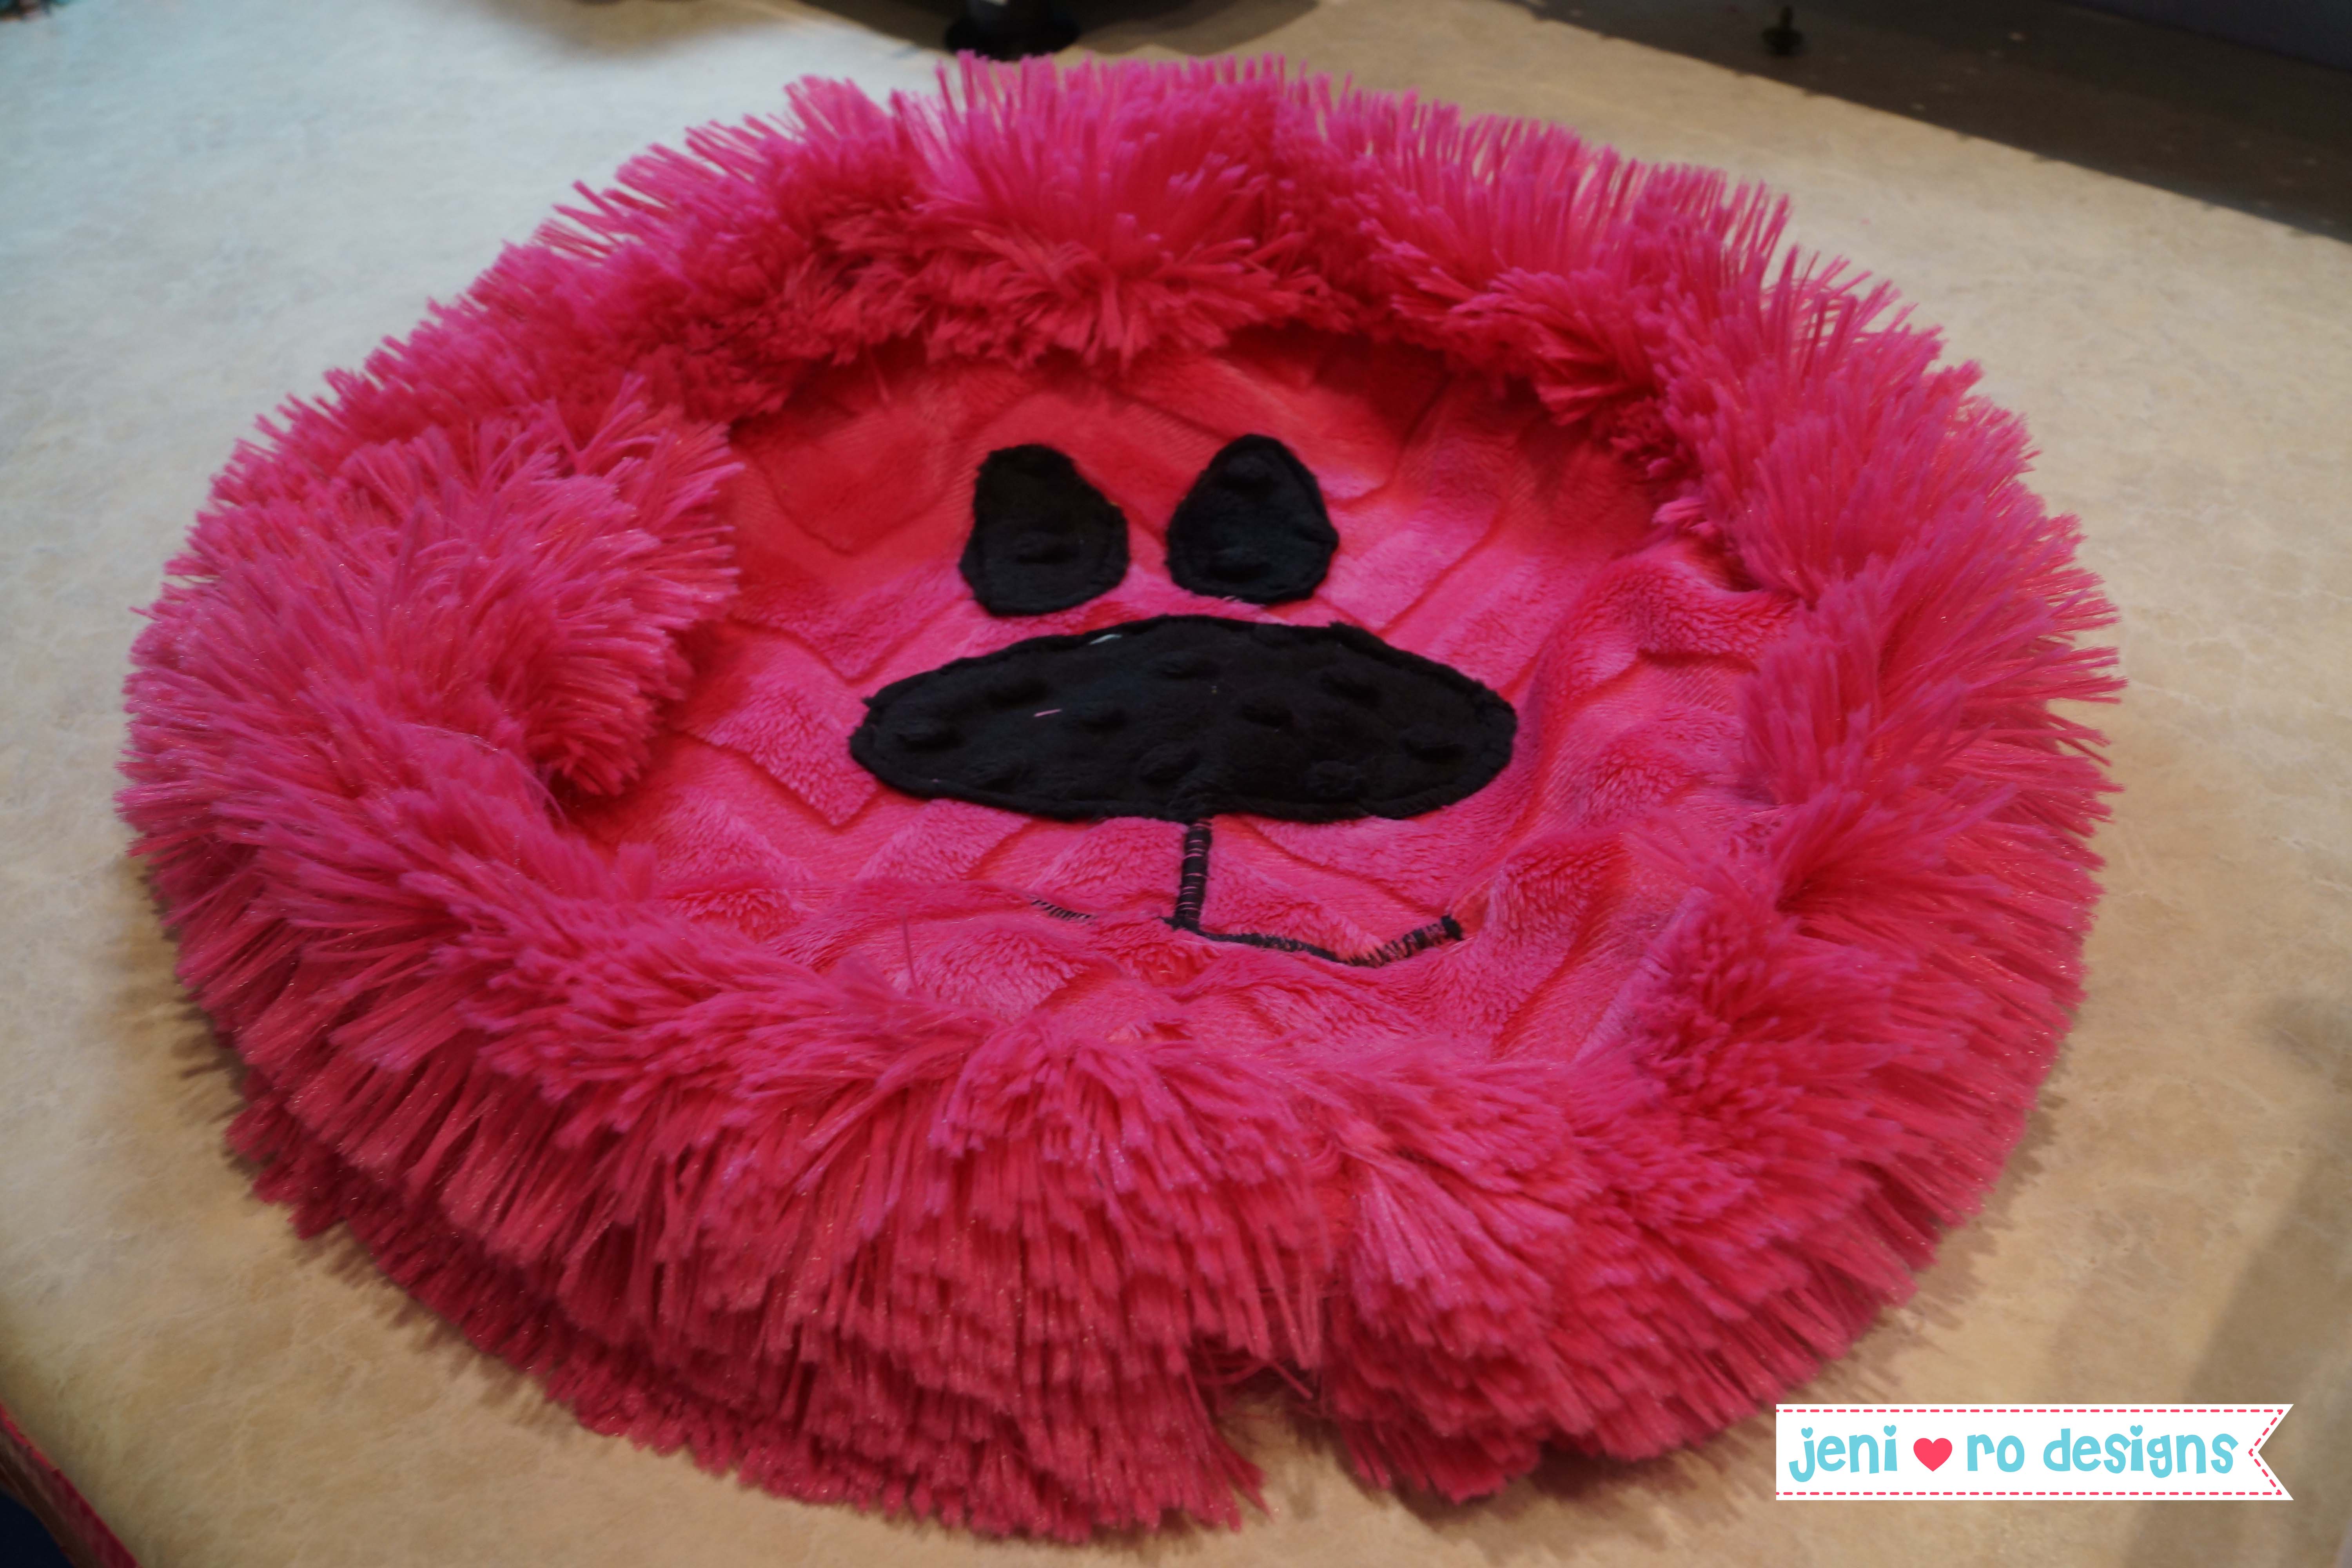
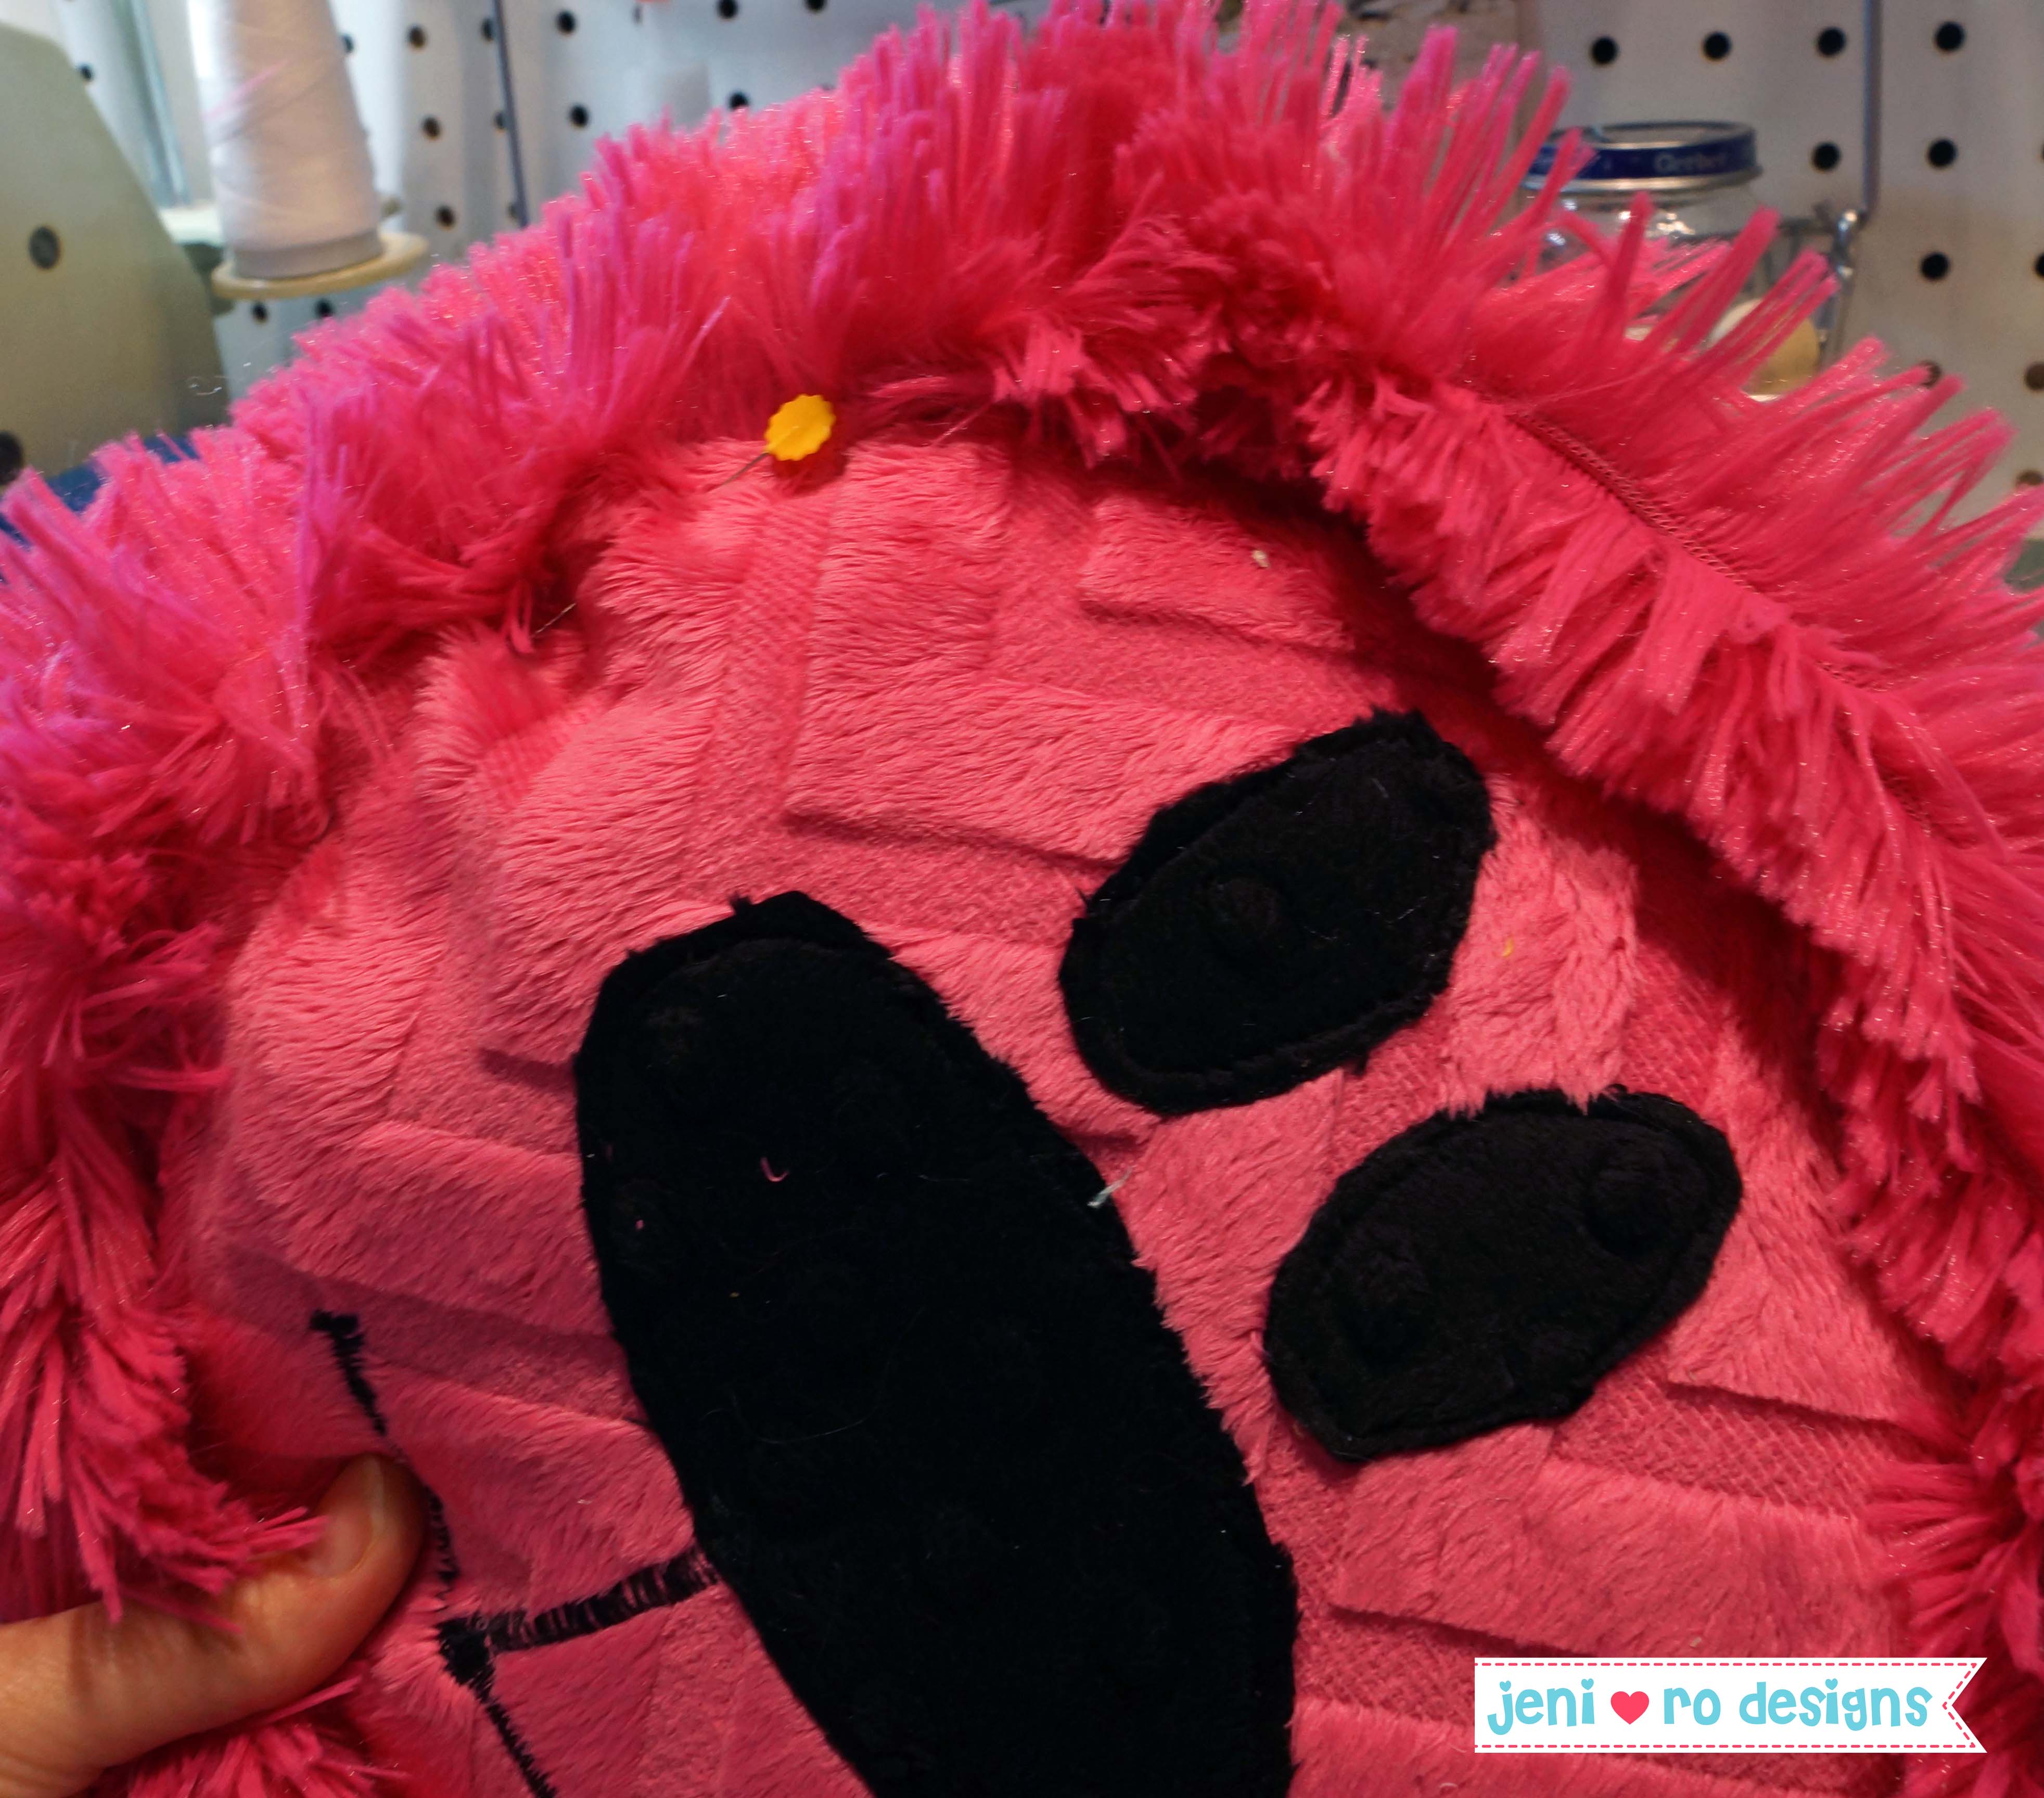
Step 3: Apply the face.
- Pin the nose piece to the middle of the front circle. Pin eyes above nose as shown. I used Dritz Flat Flower Head pins they are cute and easy to use!
TIP: Keep a lint roller handy, it will be very helpful when working with Cuddle.
Step 4: Sew nose and eyes on to front.
- With a matching thread, sew close to the edge of the nose or eye pieces. Cuddle (fleece or felt) won’t fray so there is no need to zig zag unless you prefer it. Remove from machine and clip threads.
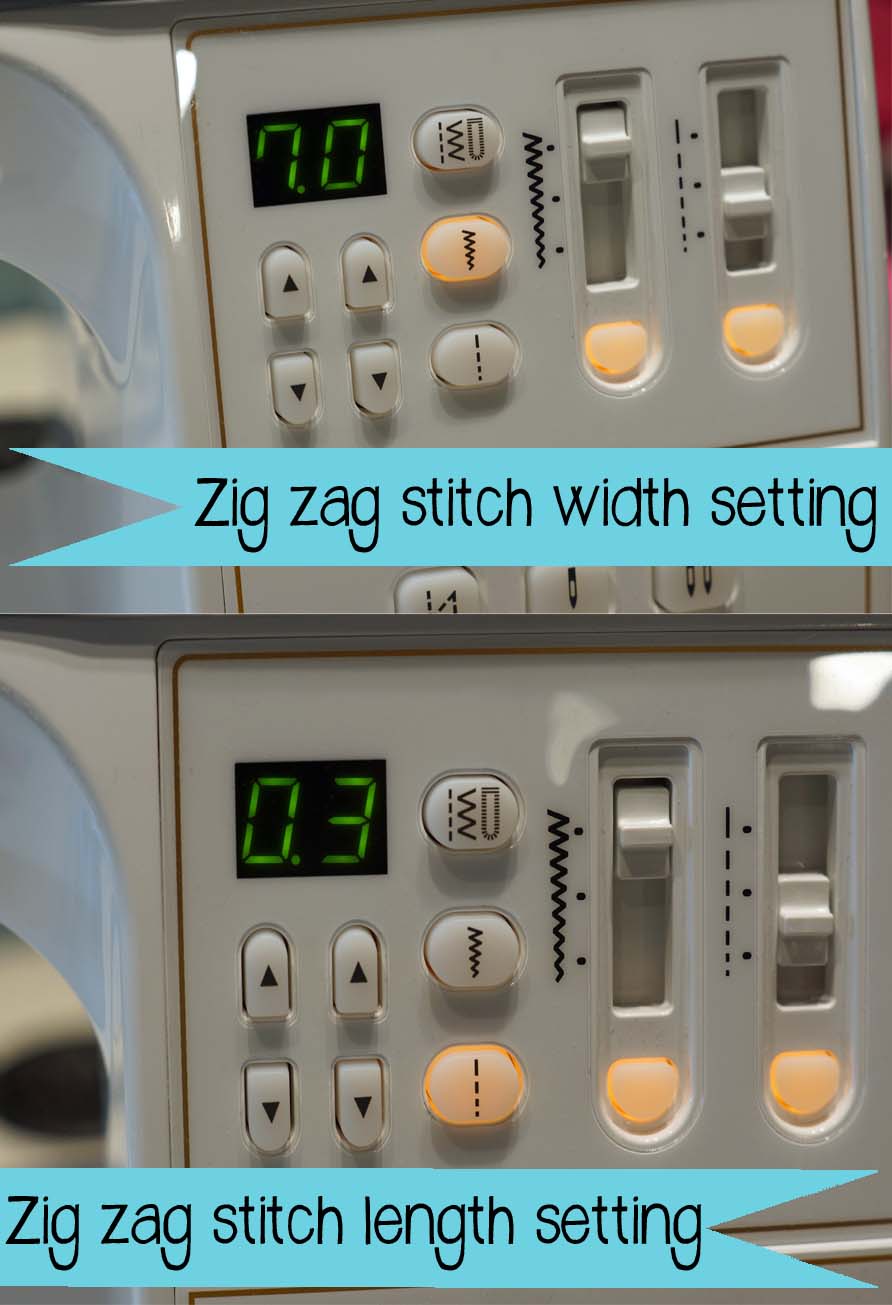
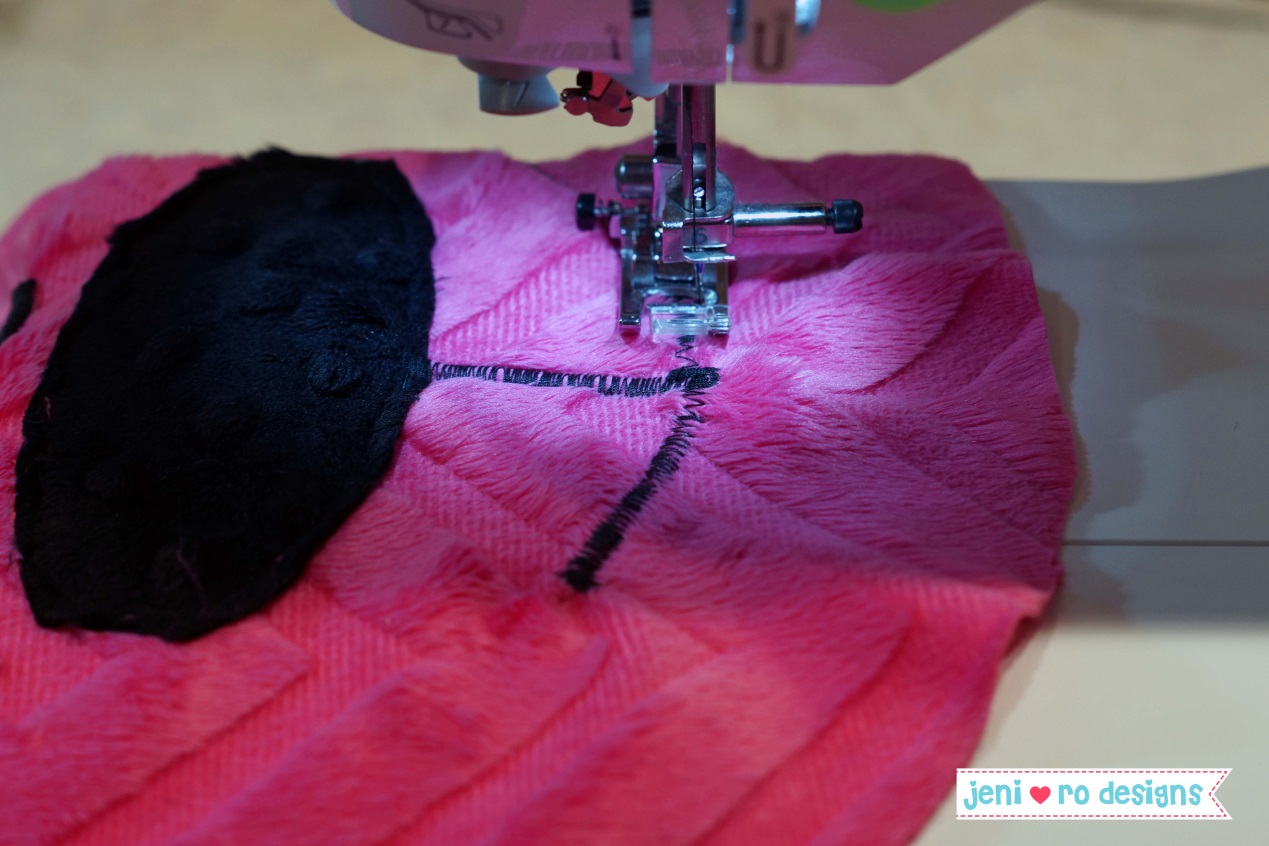
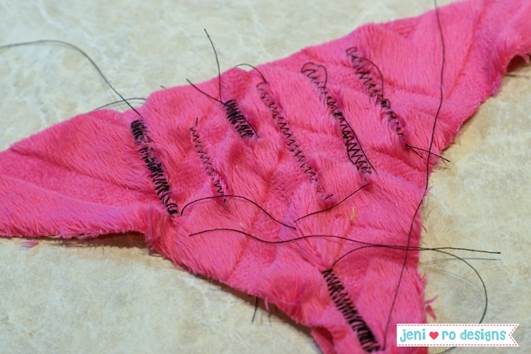
Step 5: Sew a mouth. I tried a fabric mouth in my first test of the lion pillow, but wasn’t happy with how it looked. I tried a wider & tighter zig zag stitch instead and it looked great!
- Set your zig zag stitch to: 7.0 Width and 0.3 Length on your machine
- Start at the middle bottom of the nose and zig zag down approx. 2”. You will have to pull gently on the fabric (in the back) to move it through the machine, otherwise it may get stuck.
- Lift the presser foot (leave the needle down in the fabric) and rotate the face to the left so the needle is angled slightly up toward the nose.
- Zig zag again 1-1/2” to 2”. This time backstitch at the end. You will need to pull a little more this time since you will likely be working on the stretch. Remove from machine and clip threads.
- To make the other side of the mouth, put the face into the machine with the needle at the bottom of the center line at an angle toward the right side of the nose.
- Sew another 1-1/2” to 2”, backstitch at the end. Remove from machine and clip threads.
- There may be some stitches that are too spaced out due to having to pull the fabric. You can go back and zig zag over to fill it in if you like.
This whole process can be tricky, but even though the mouth isn't perfect, its still a really cute mouth!
- You can always practice on a scrap first as well.
Step 6: Sew tag on the back piece if desired.
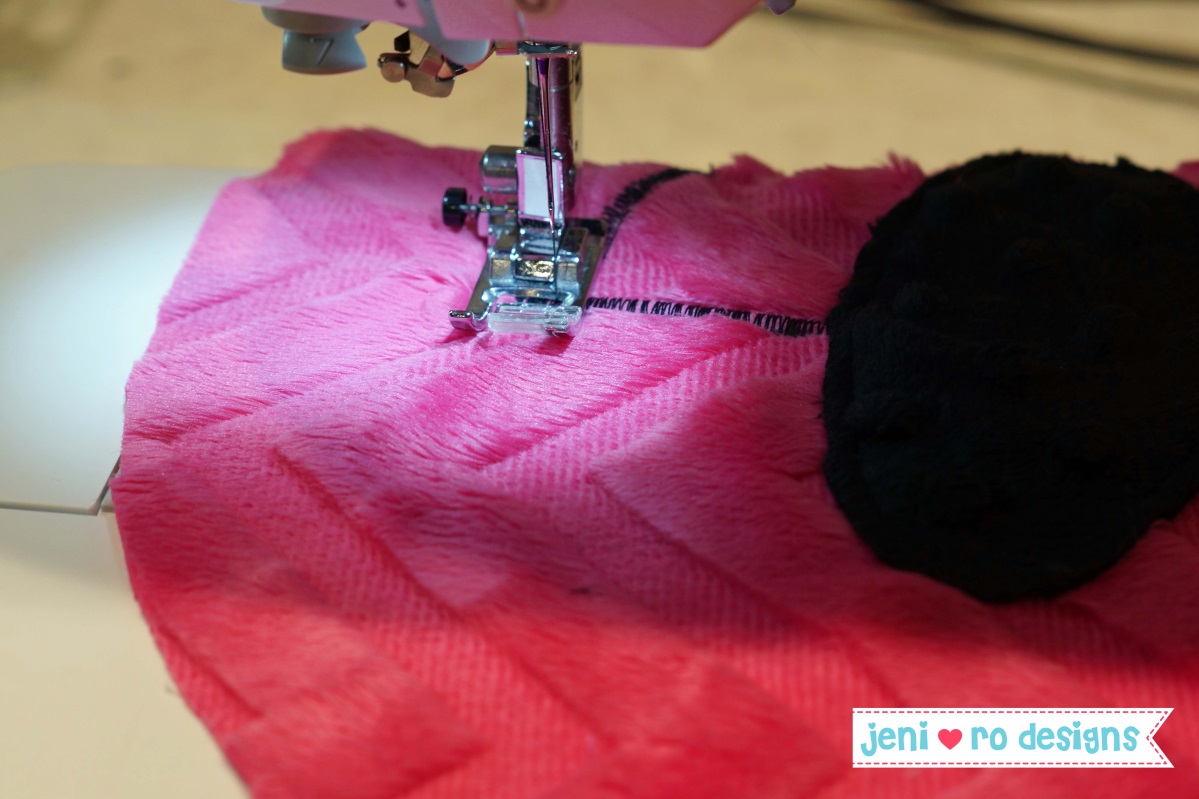
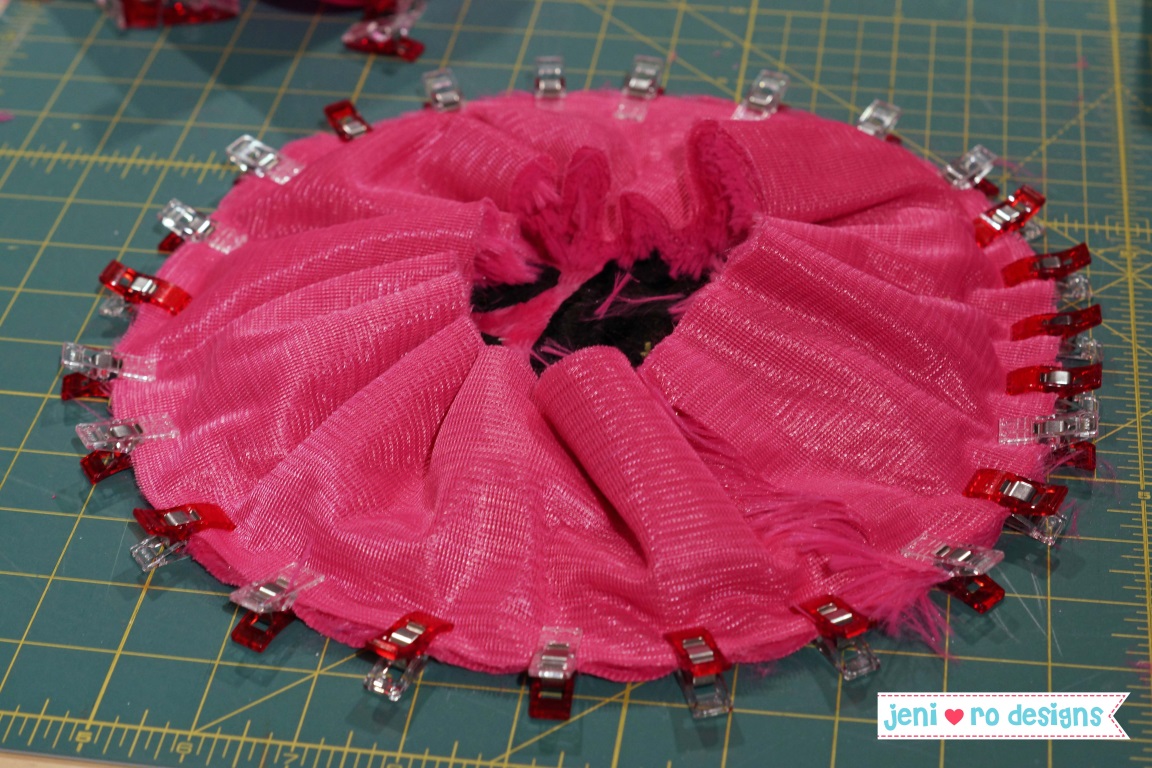
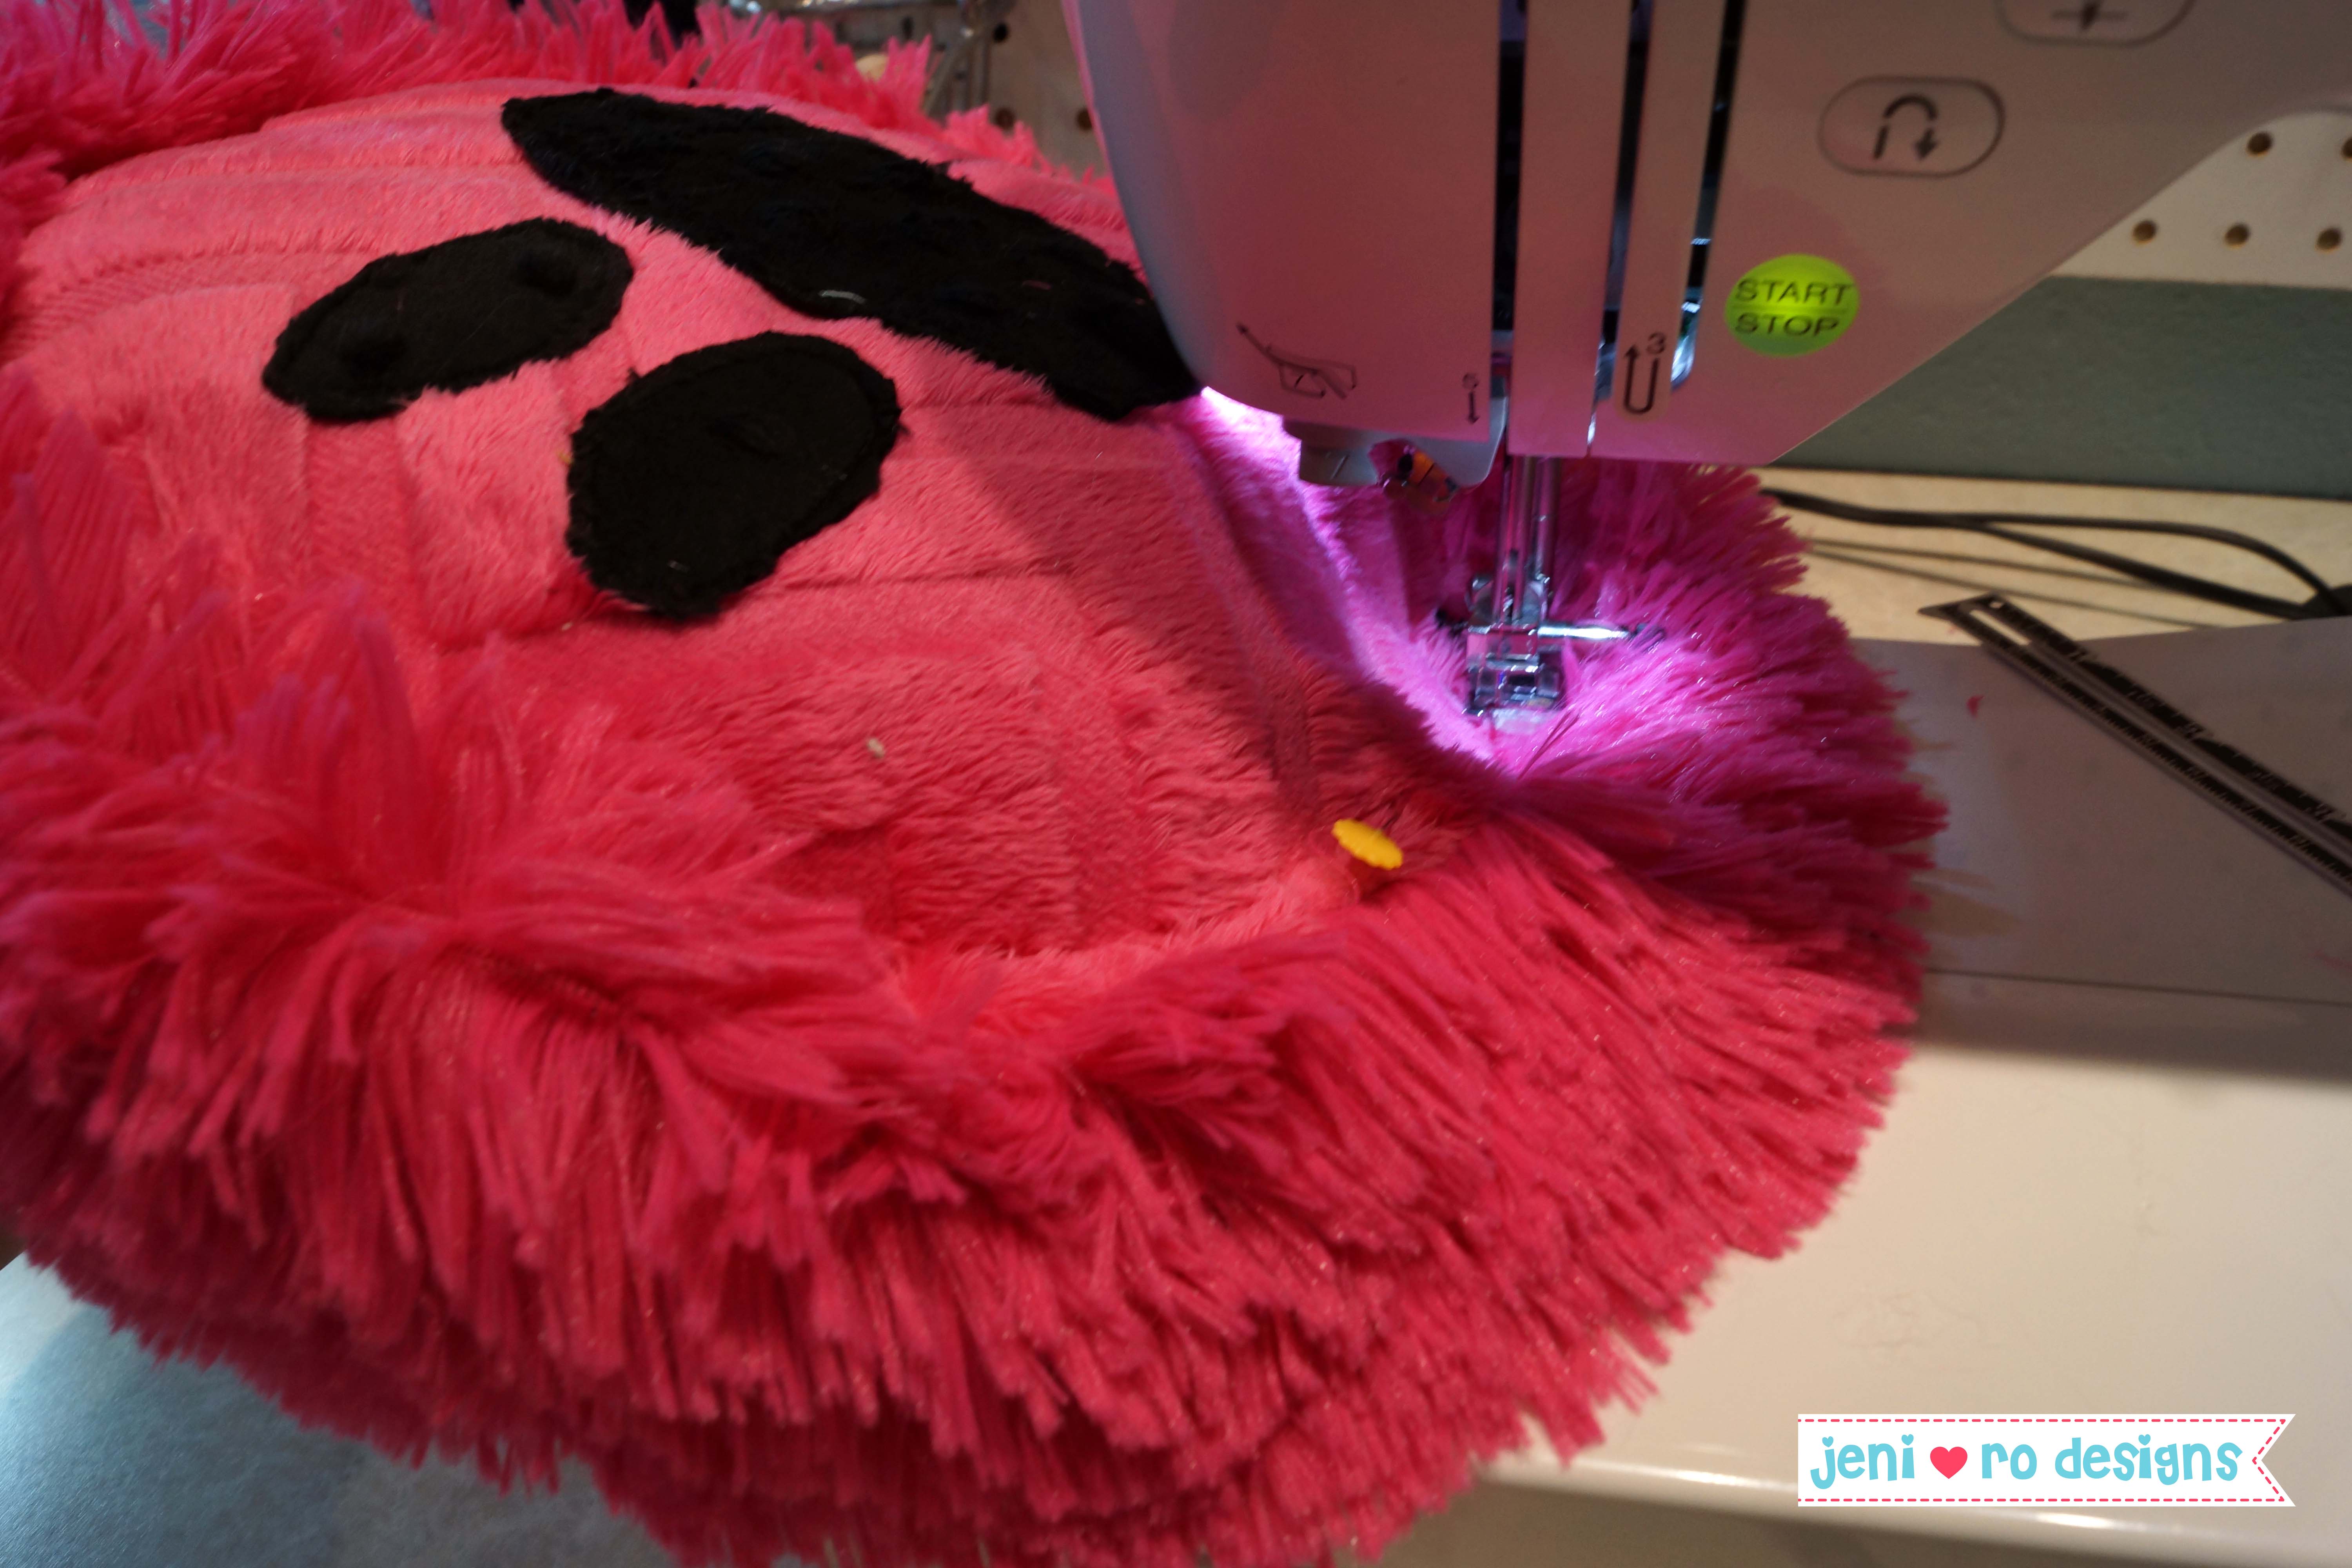
Step 7: Pin one long edge of the Cuddle Shag to the front (face) piece.
- Pin all the way around the front – starting at the bottom. Leave an overlap of the shag about 4” and cut off the excess.
TIP: Tuck in the long Shag as you pin/clip. It’s okay if it all doesn’t tuck in. Do your best.
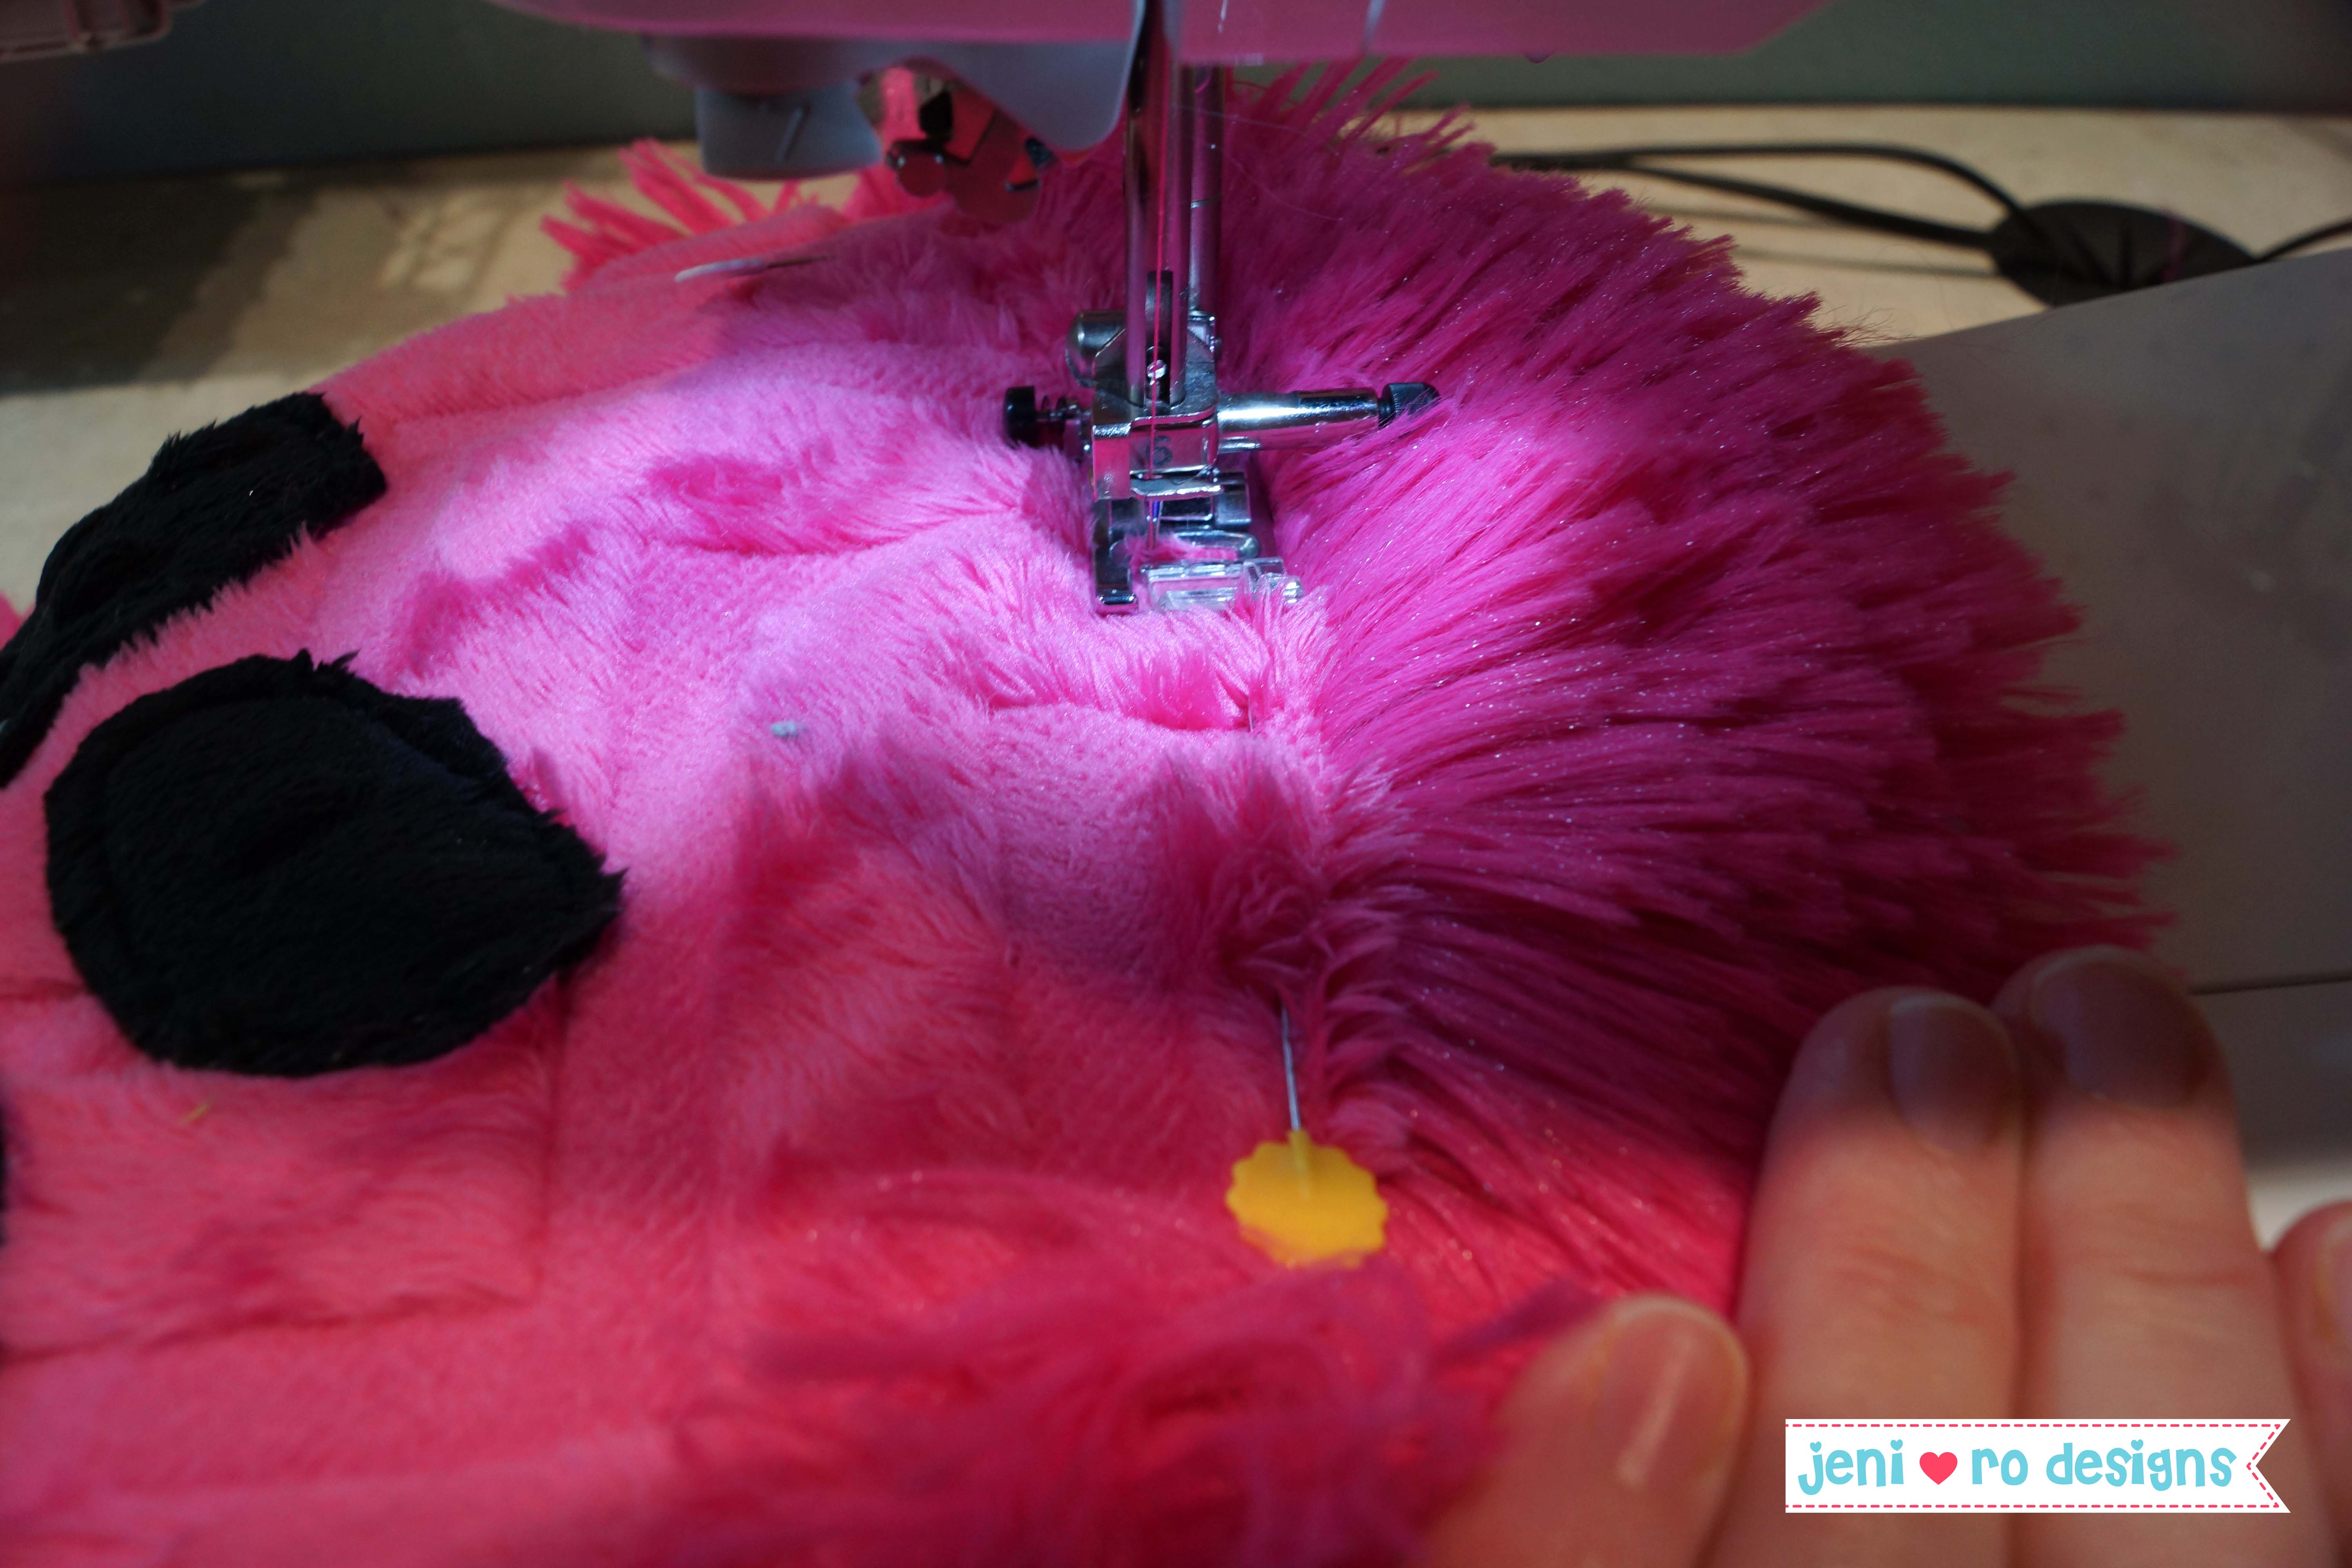
Step 8: Sew on the Shaggy Cuddle.
- With a ½” seam, sew the Shaggy Cuddle onto the front (face) piece.
- If you have a walking foot, it may make this process easier, but it’s not required. I made mine without a walking foot (although for bigger Cuddle projects, like baby blankets, a walking foot is VERY helpful!).
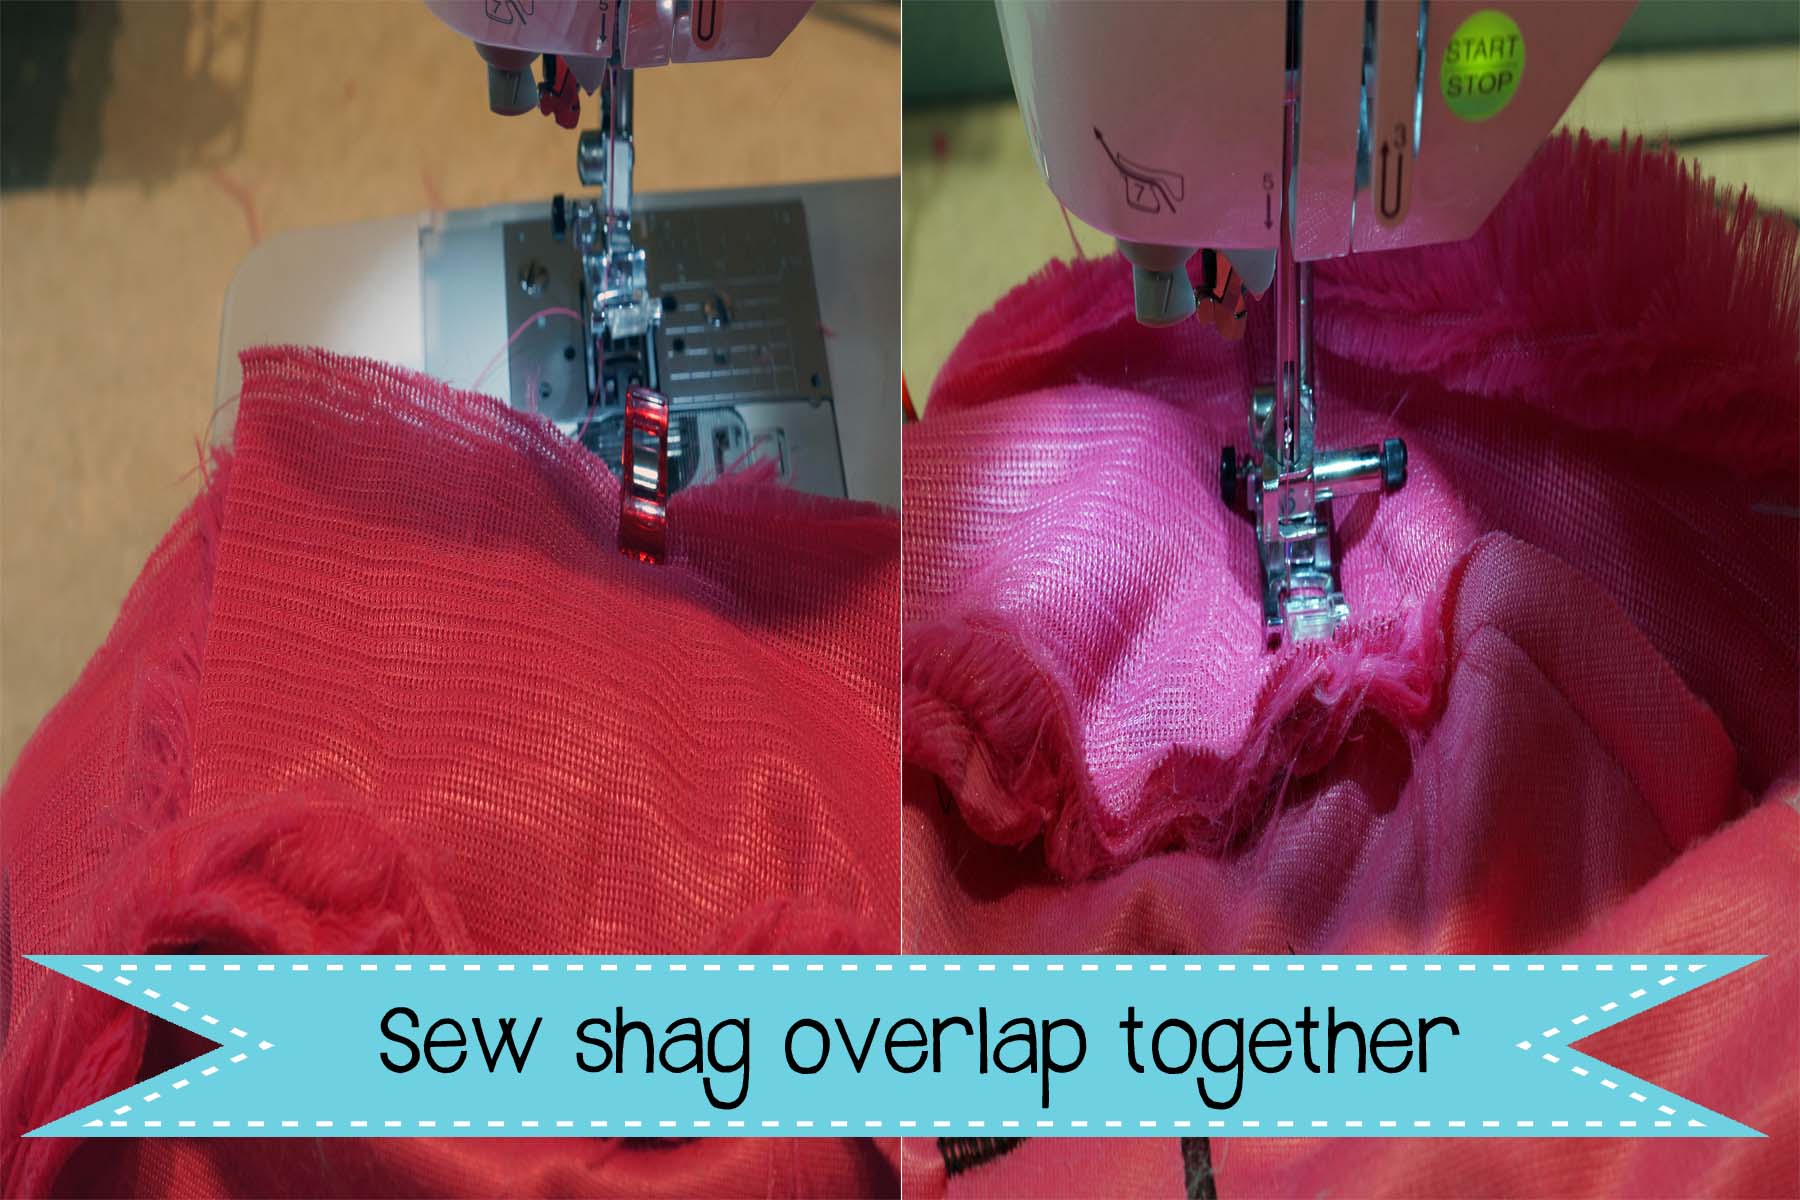
- After you have sewn around attaching the Shag to the front piece, you need to sew down the overlap. Topstitch from the edge of the Shaggy Cuddle to your joining seam to secure the overlap of Shag.
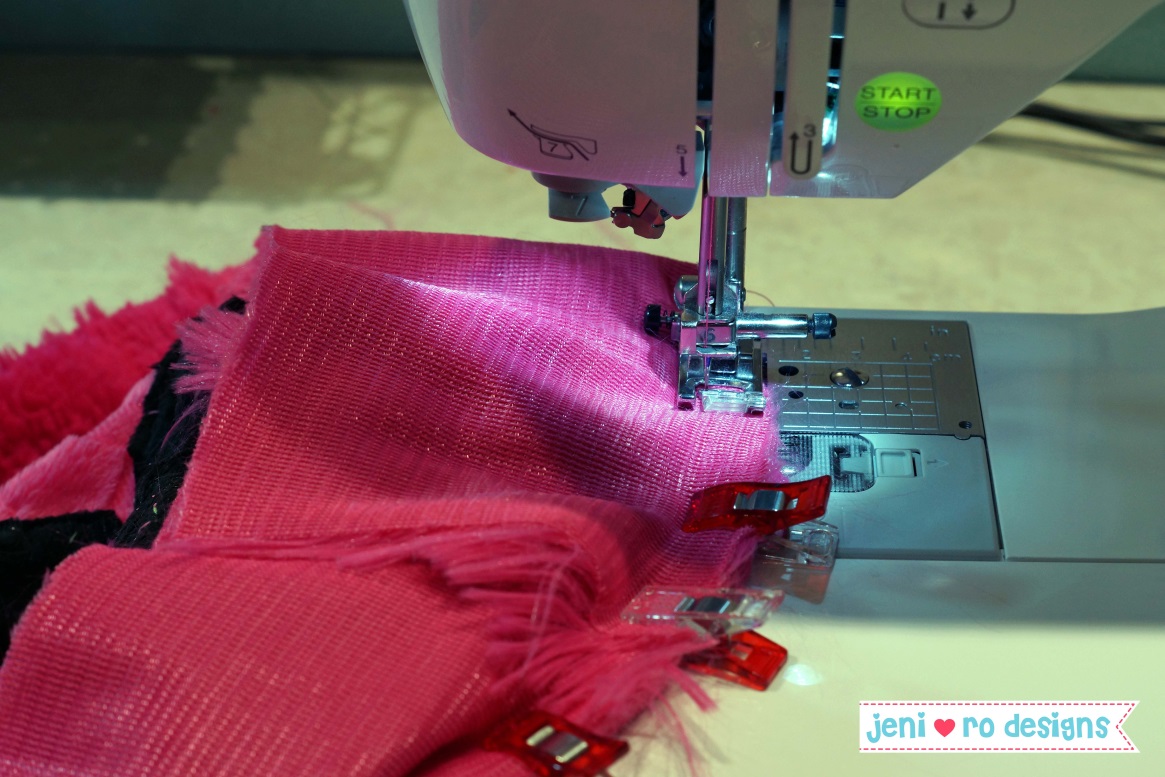
Step 9: Pin the front (face) piece (now with Shaggy Cuddle attached) to the back piece.
- Pin (excessively) the other long edge of the Shaggy Cuddle to the back piece, making sure to pin down both layers at the overlap section. Remember to tuck in the Shag as you pin.
Step 10: Sew the back to the front
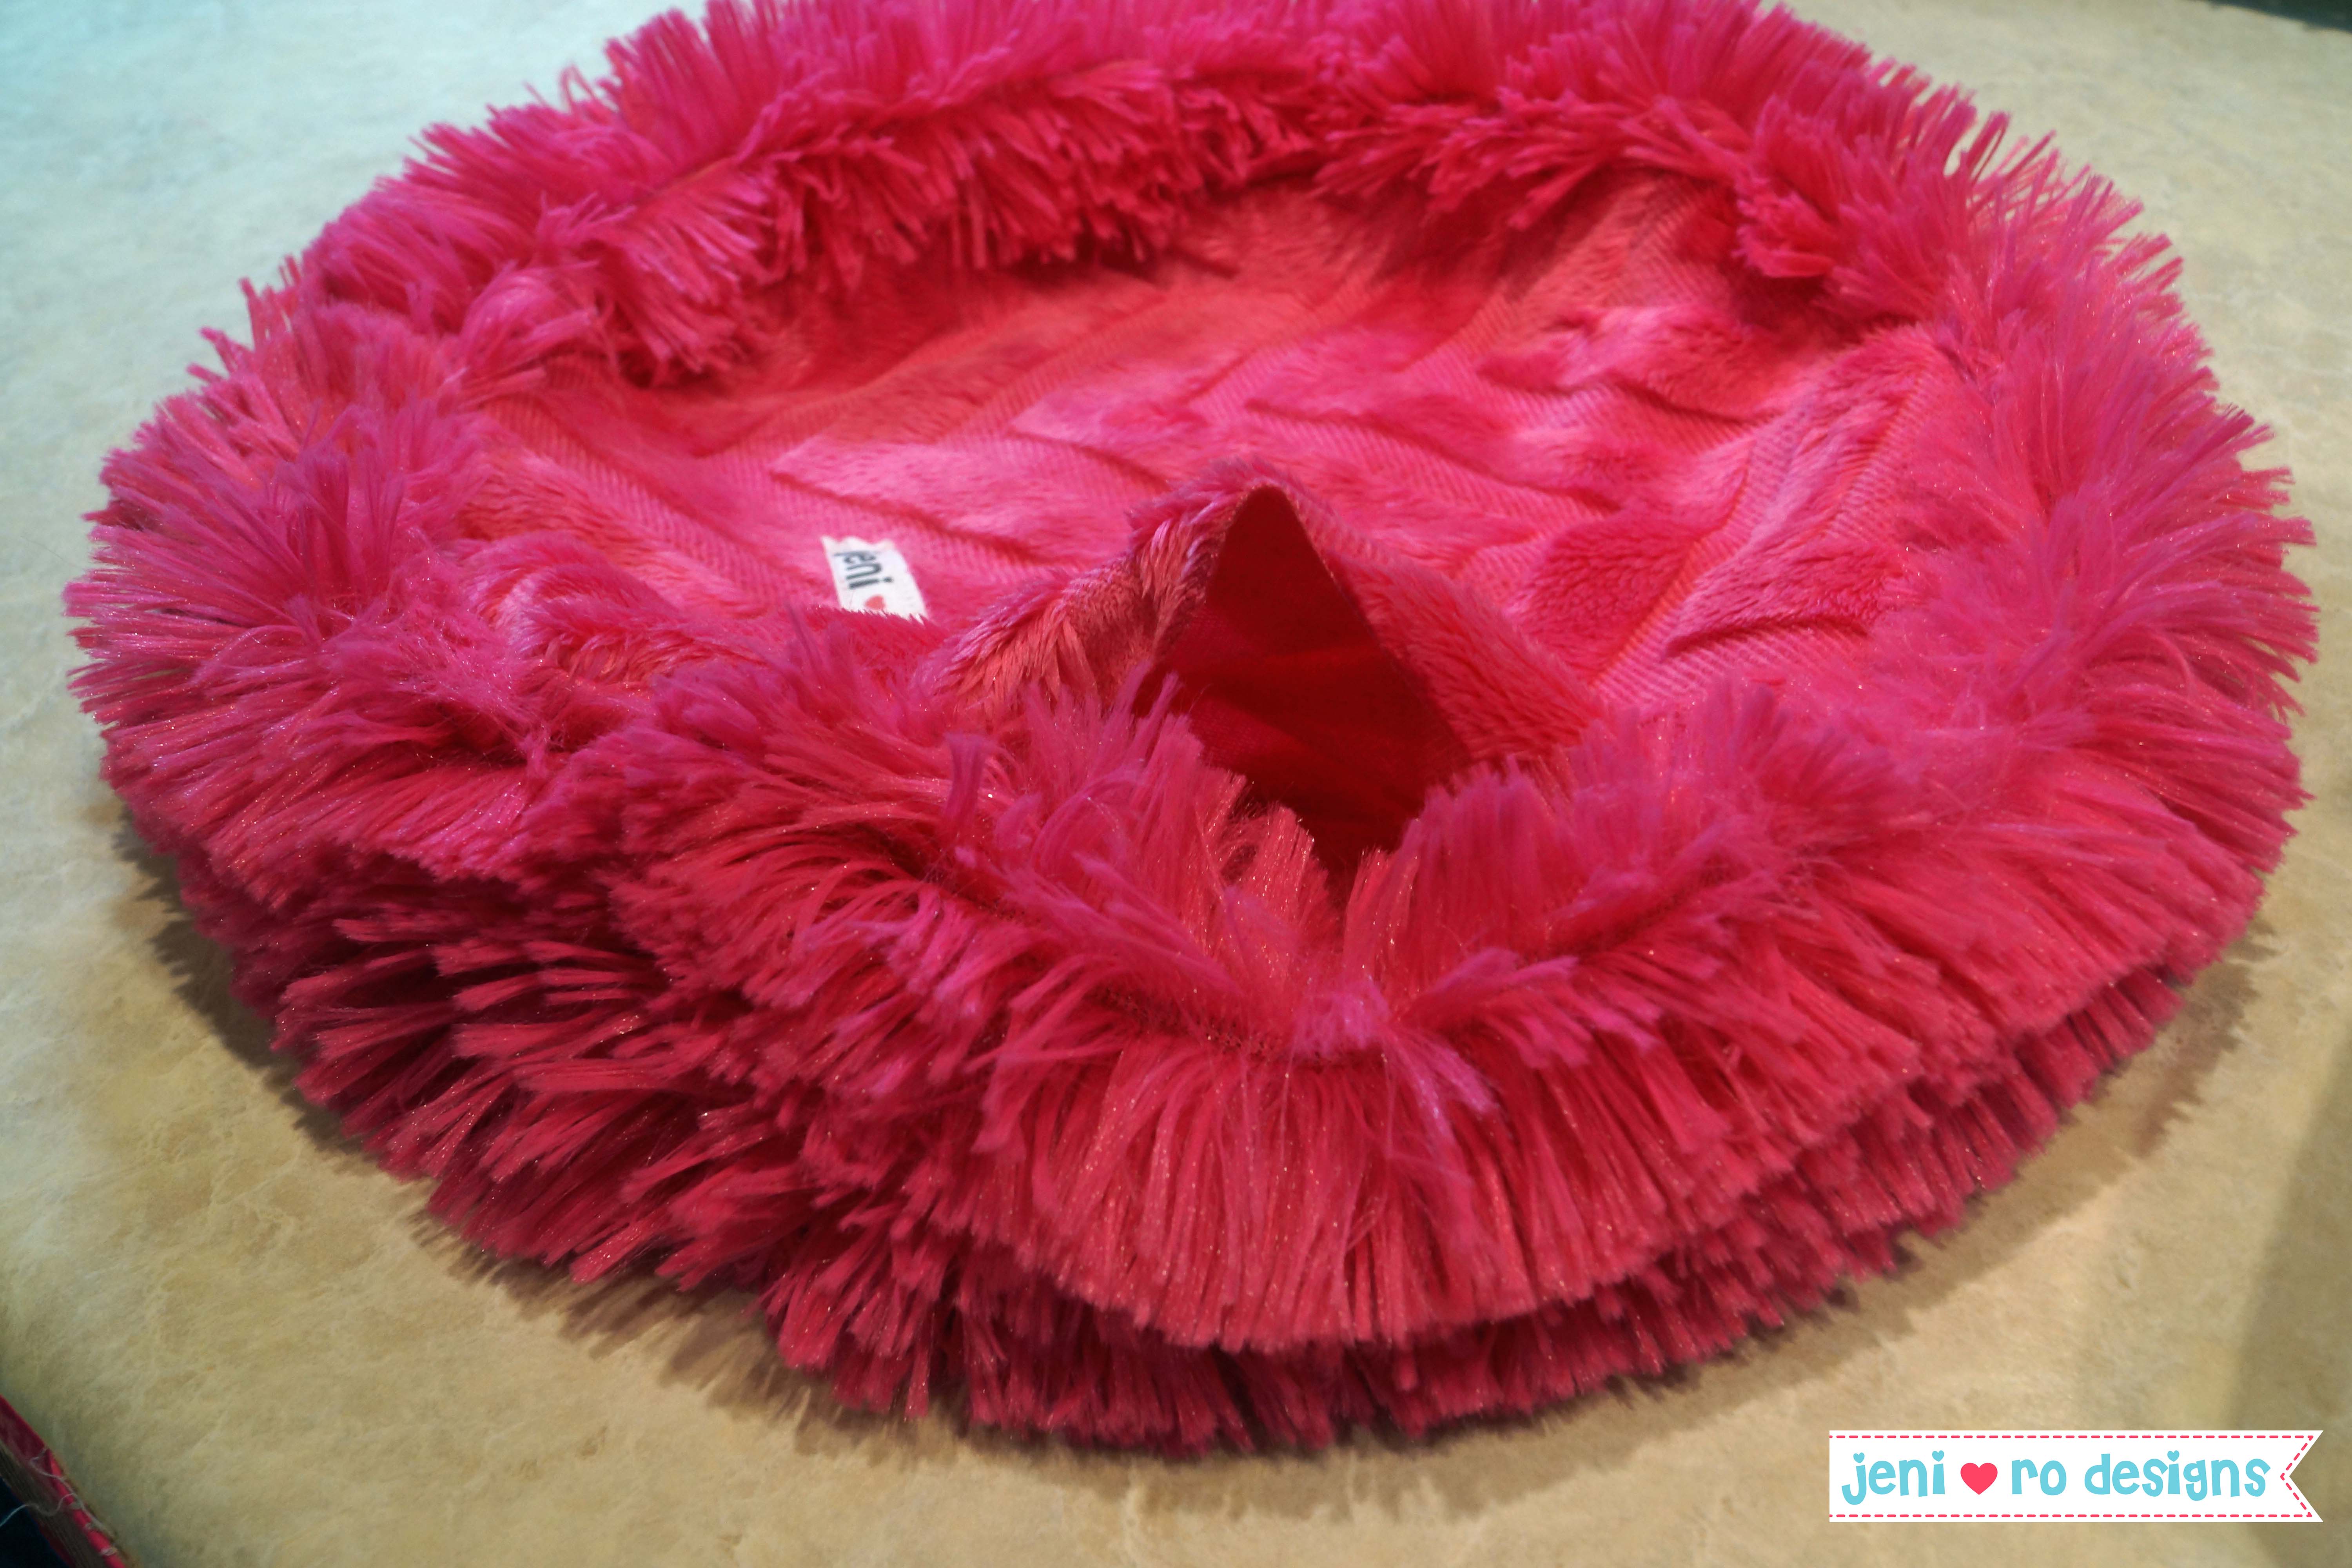
- Using a ½” seam, sew the Shaggy Cuddle to the back piece. Leave a 3” opening for turning.
- Turn lion pillow right side out and give it a good shake to fluff the Shaggy Cuddle and remove any loose fibers! Some of the Shag might be caught in the seam, but you can pick that out later with a pin if it bothers you.
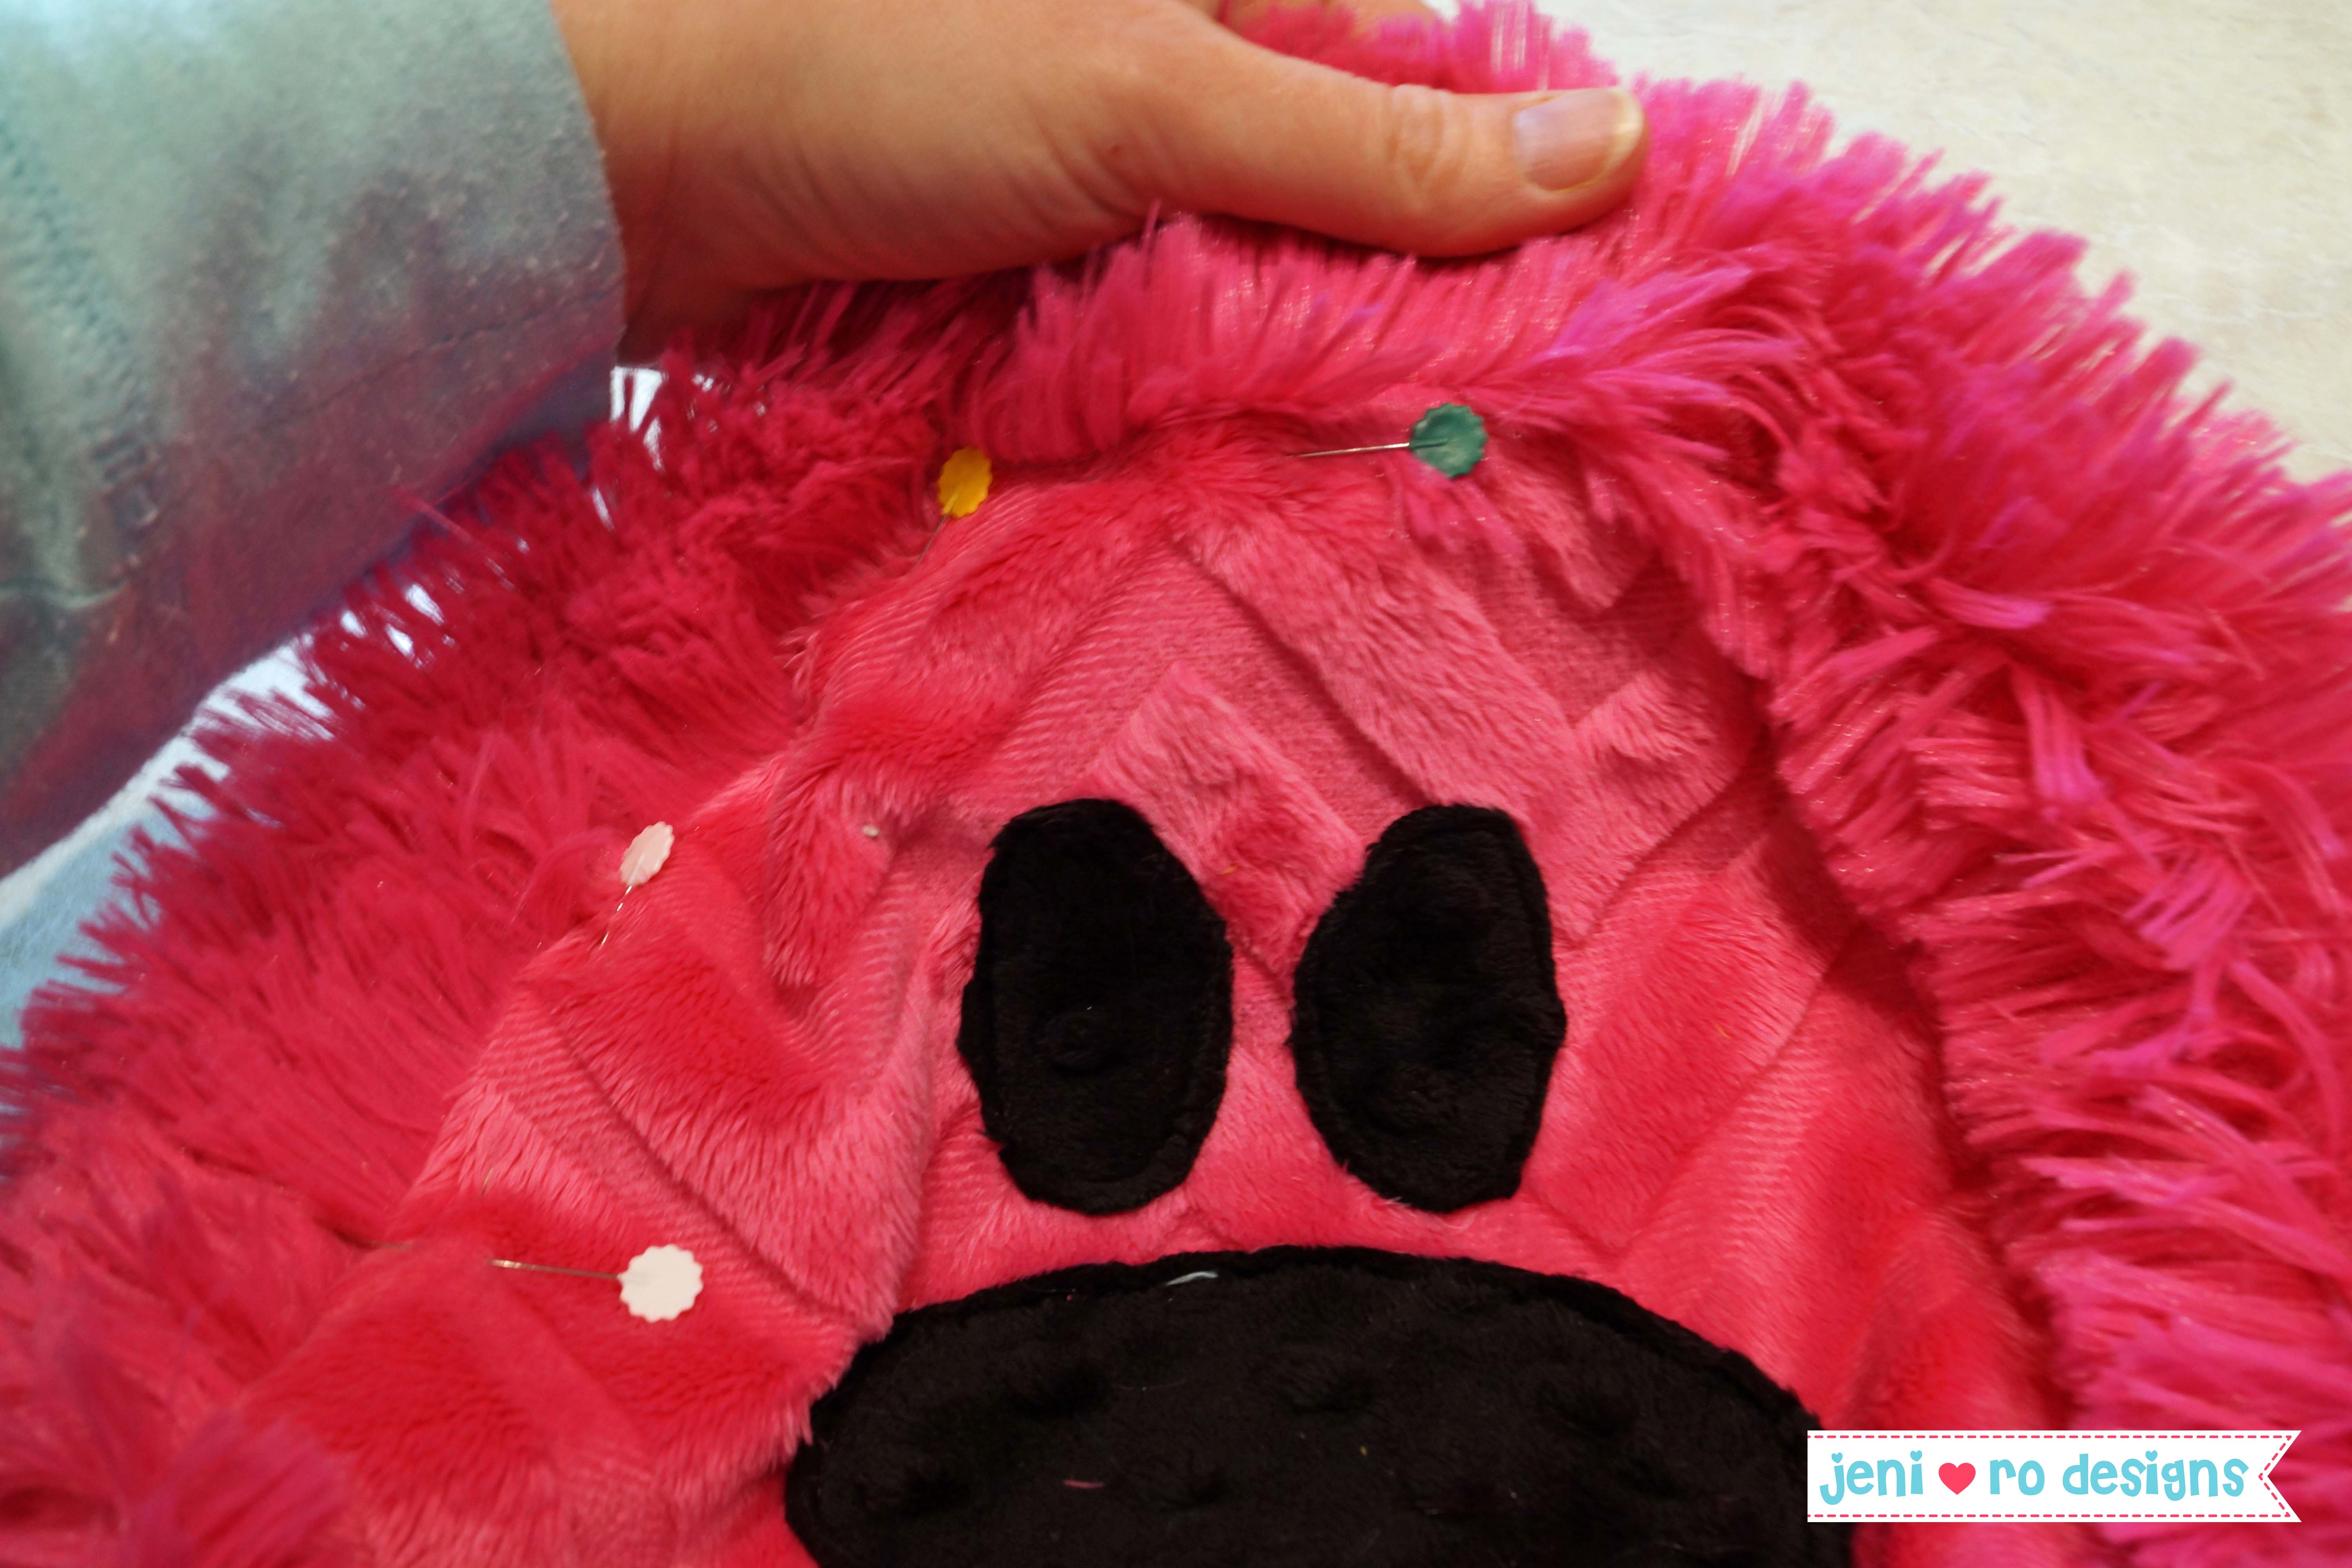
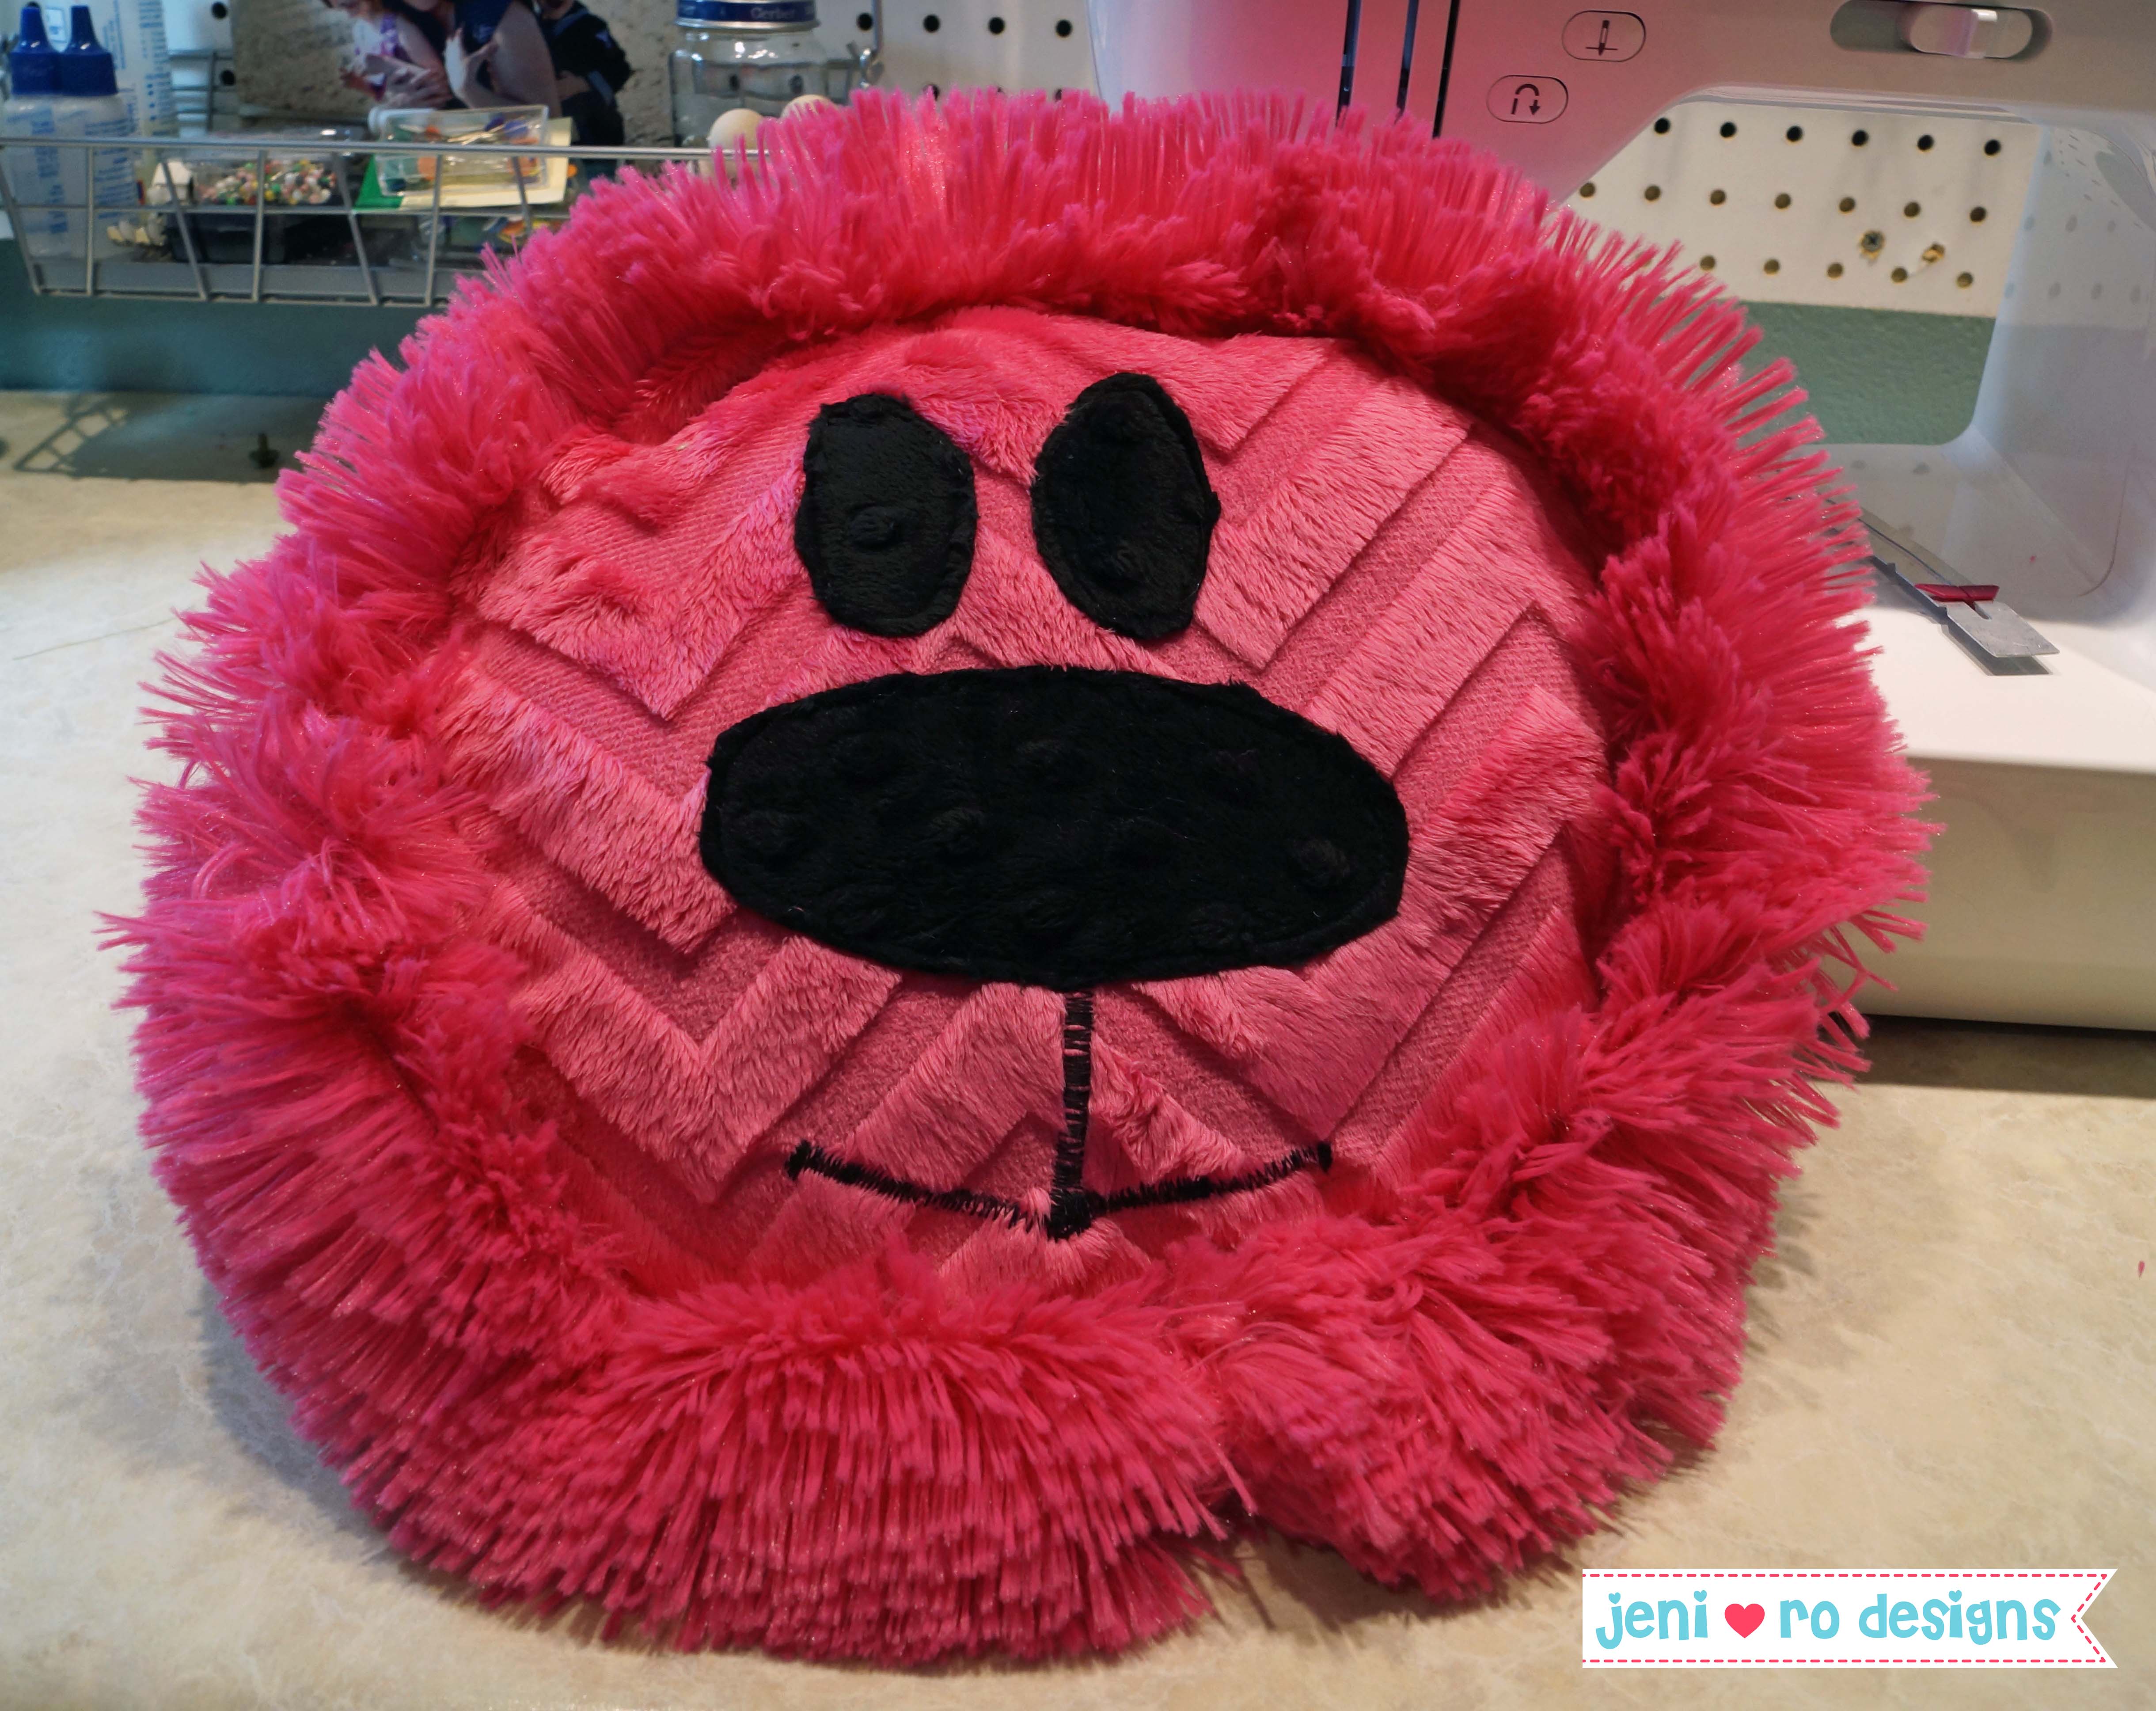
Step 11: Topstitch to form the pillow pocket.
Ok, this part is a little tricky only because you are managing a lot of fluffy Shag! You need to topstitch around the face so the stuffing will be contained to the middle and not move into the mane section.
ALTERNATE VERSION: If you would like to skip STEP 11 and get a little different look, go ahead and stuff the lion pillow and close the hole with a ladder stitch and you’re done! It is a little larger and a different looking pillow but still adorable!To create a floppy “mane” (as in the title picture) continue below:
- Start at the opening that you left to turn the pillow – mark the opening with a pin. Pin around the pillow, pinning the front and back together keeping the Shaggy Cuddle out of the way. This will involve a lot of feeling since the Shaggy Cuddle will impede your visual. Just do your best and pin around stopping at the other side of the opening. I promise it will be adorable!
- Topstitch (on the face side) about ¼” to 3/8” from where the face and Shaggy Cuddle meet, starting at the opening and ending at the other side of the opening in the back – so you can still stuff your pillow!
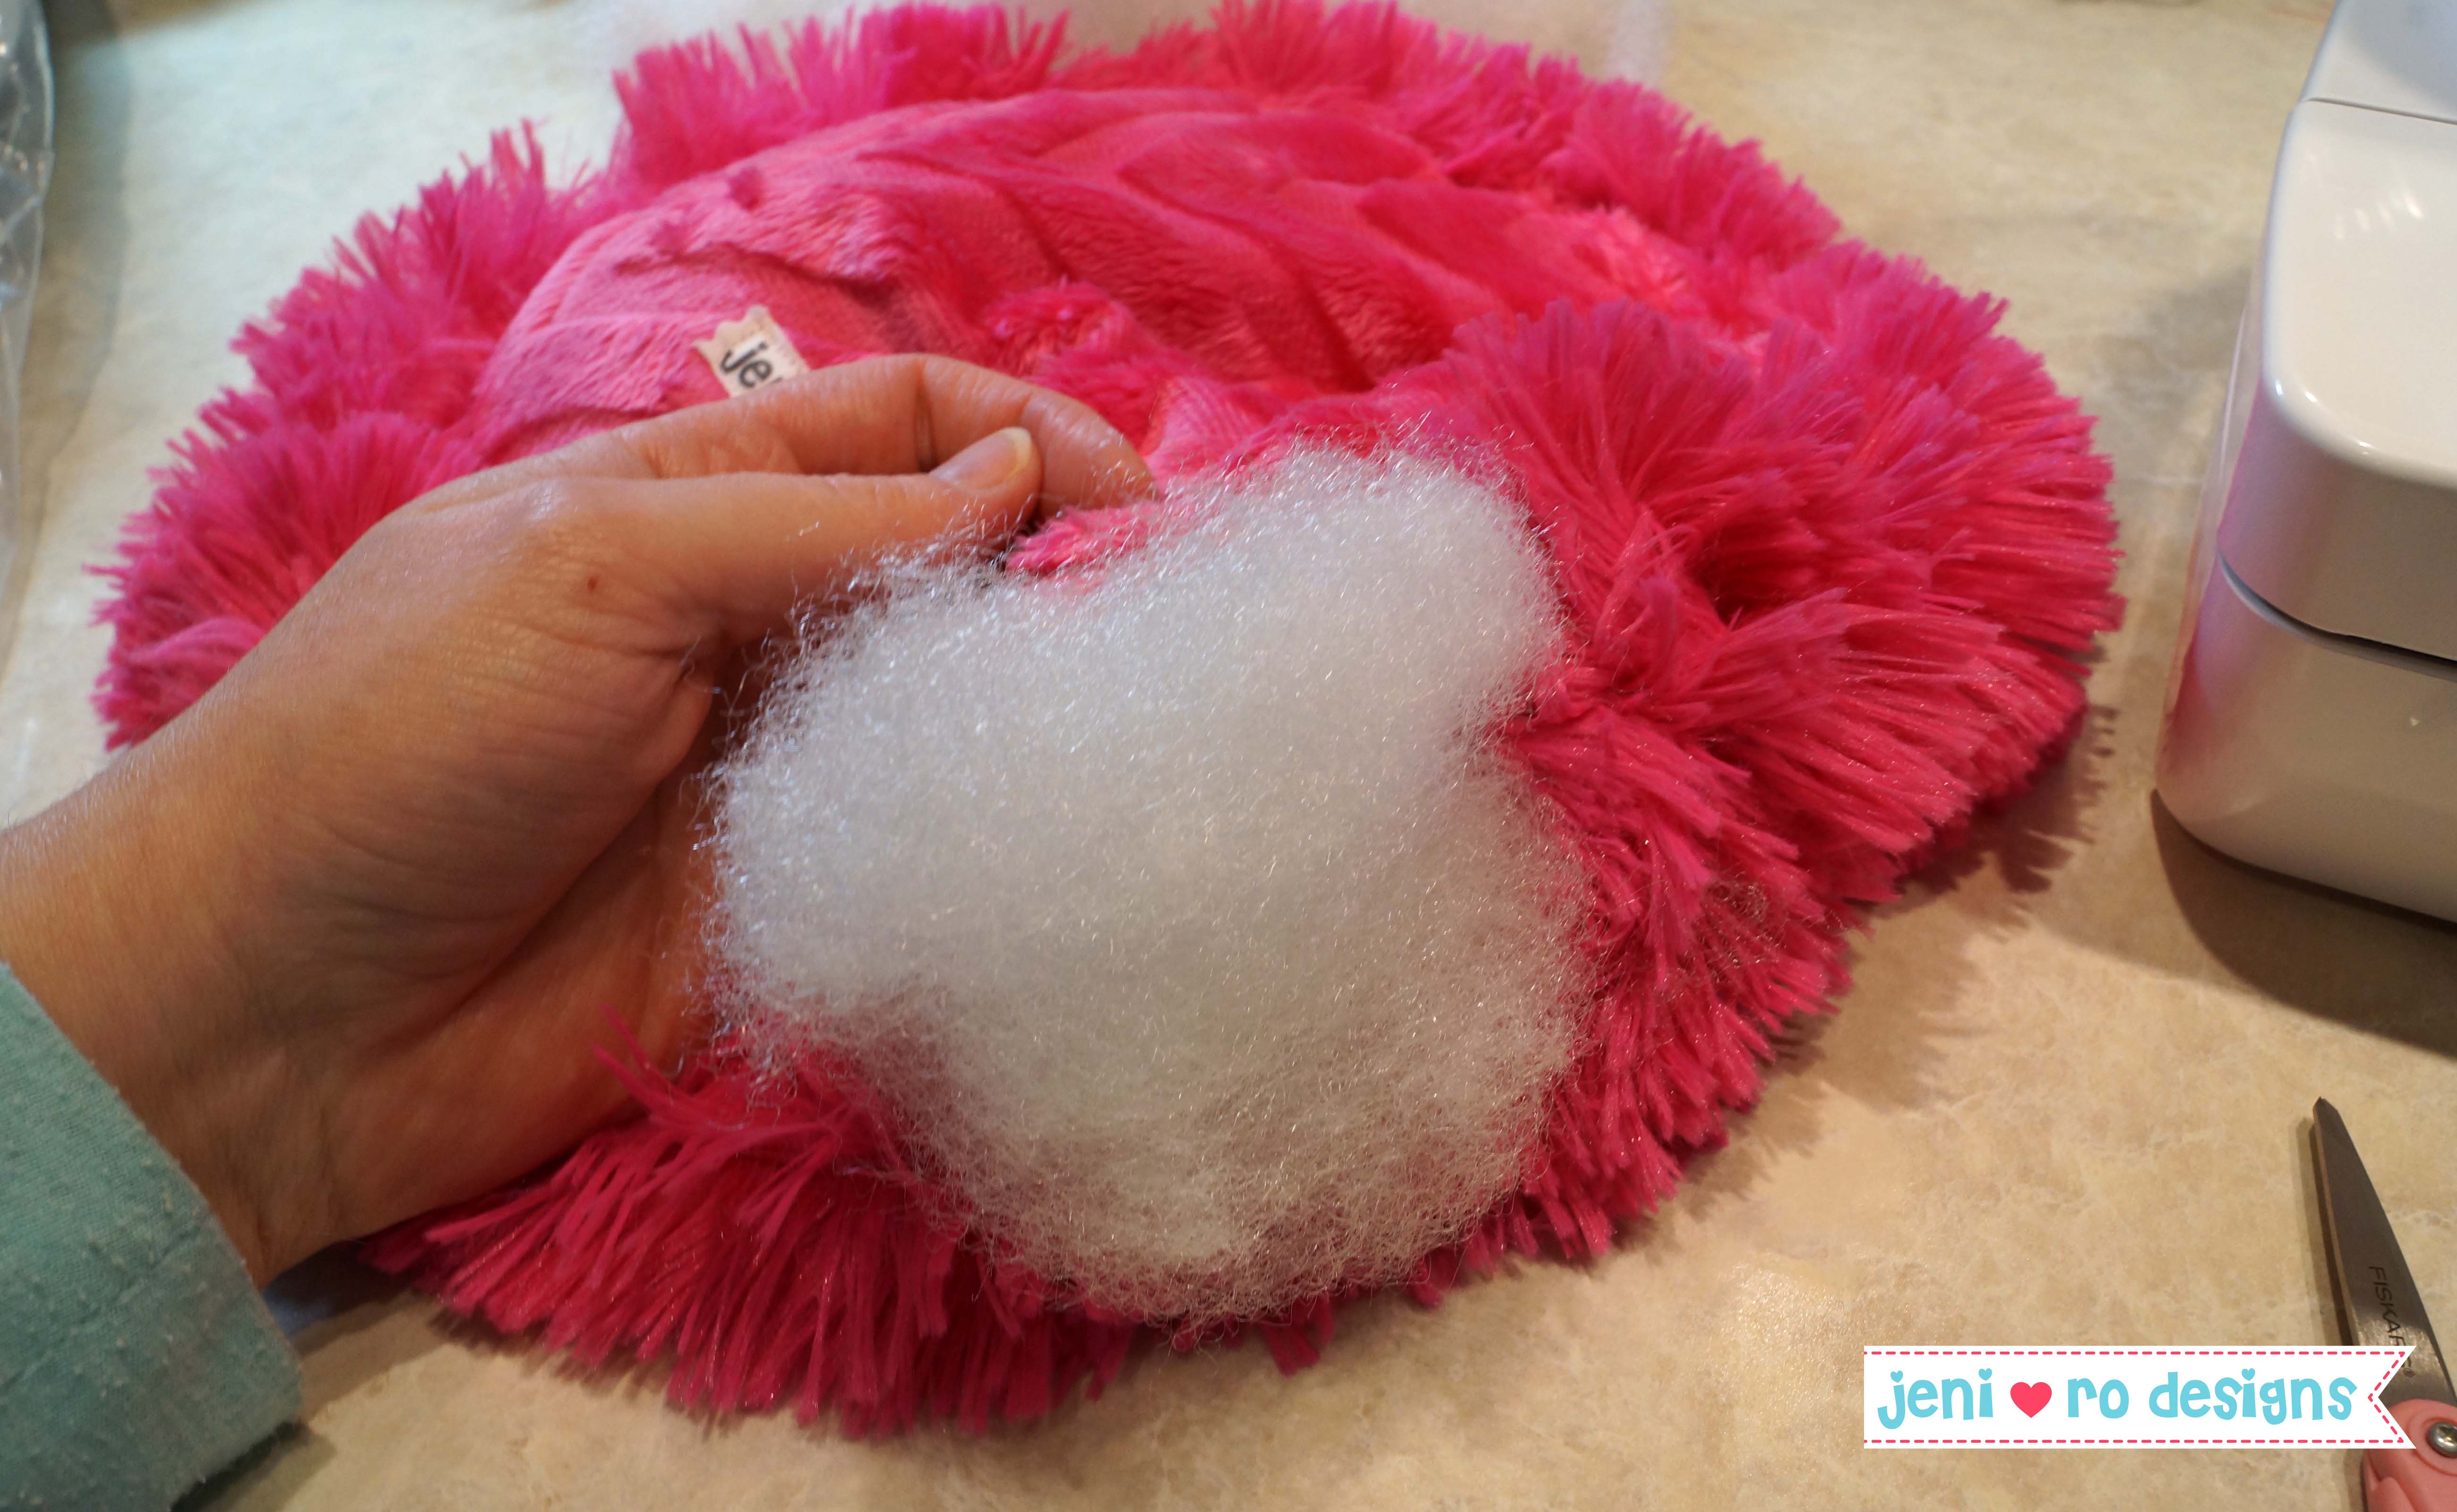
Step 12: Stuff and finish the Lion Pillow.
- Stuff the pillow not too firmly but enough to fill out the shape.
- When you are happy with the stuffing, push the stuffing over a bit so the opening is clear.
- Turn the edge on the back piece over and pin through ALL 4 layers – back, Shag, Shag, front.
- Start topstitching where you stopped before and continue the line to close the hole.
- If you don’t catch all the layers on the first try, you can go over it again. Or, if the hole has been closed but the back layer didn’t turn, you can finish it by hand stitching it over and closed.
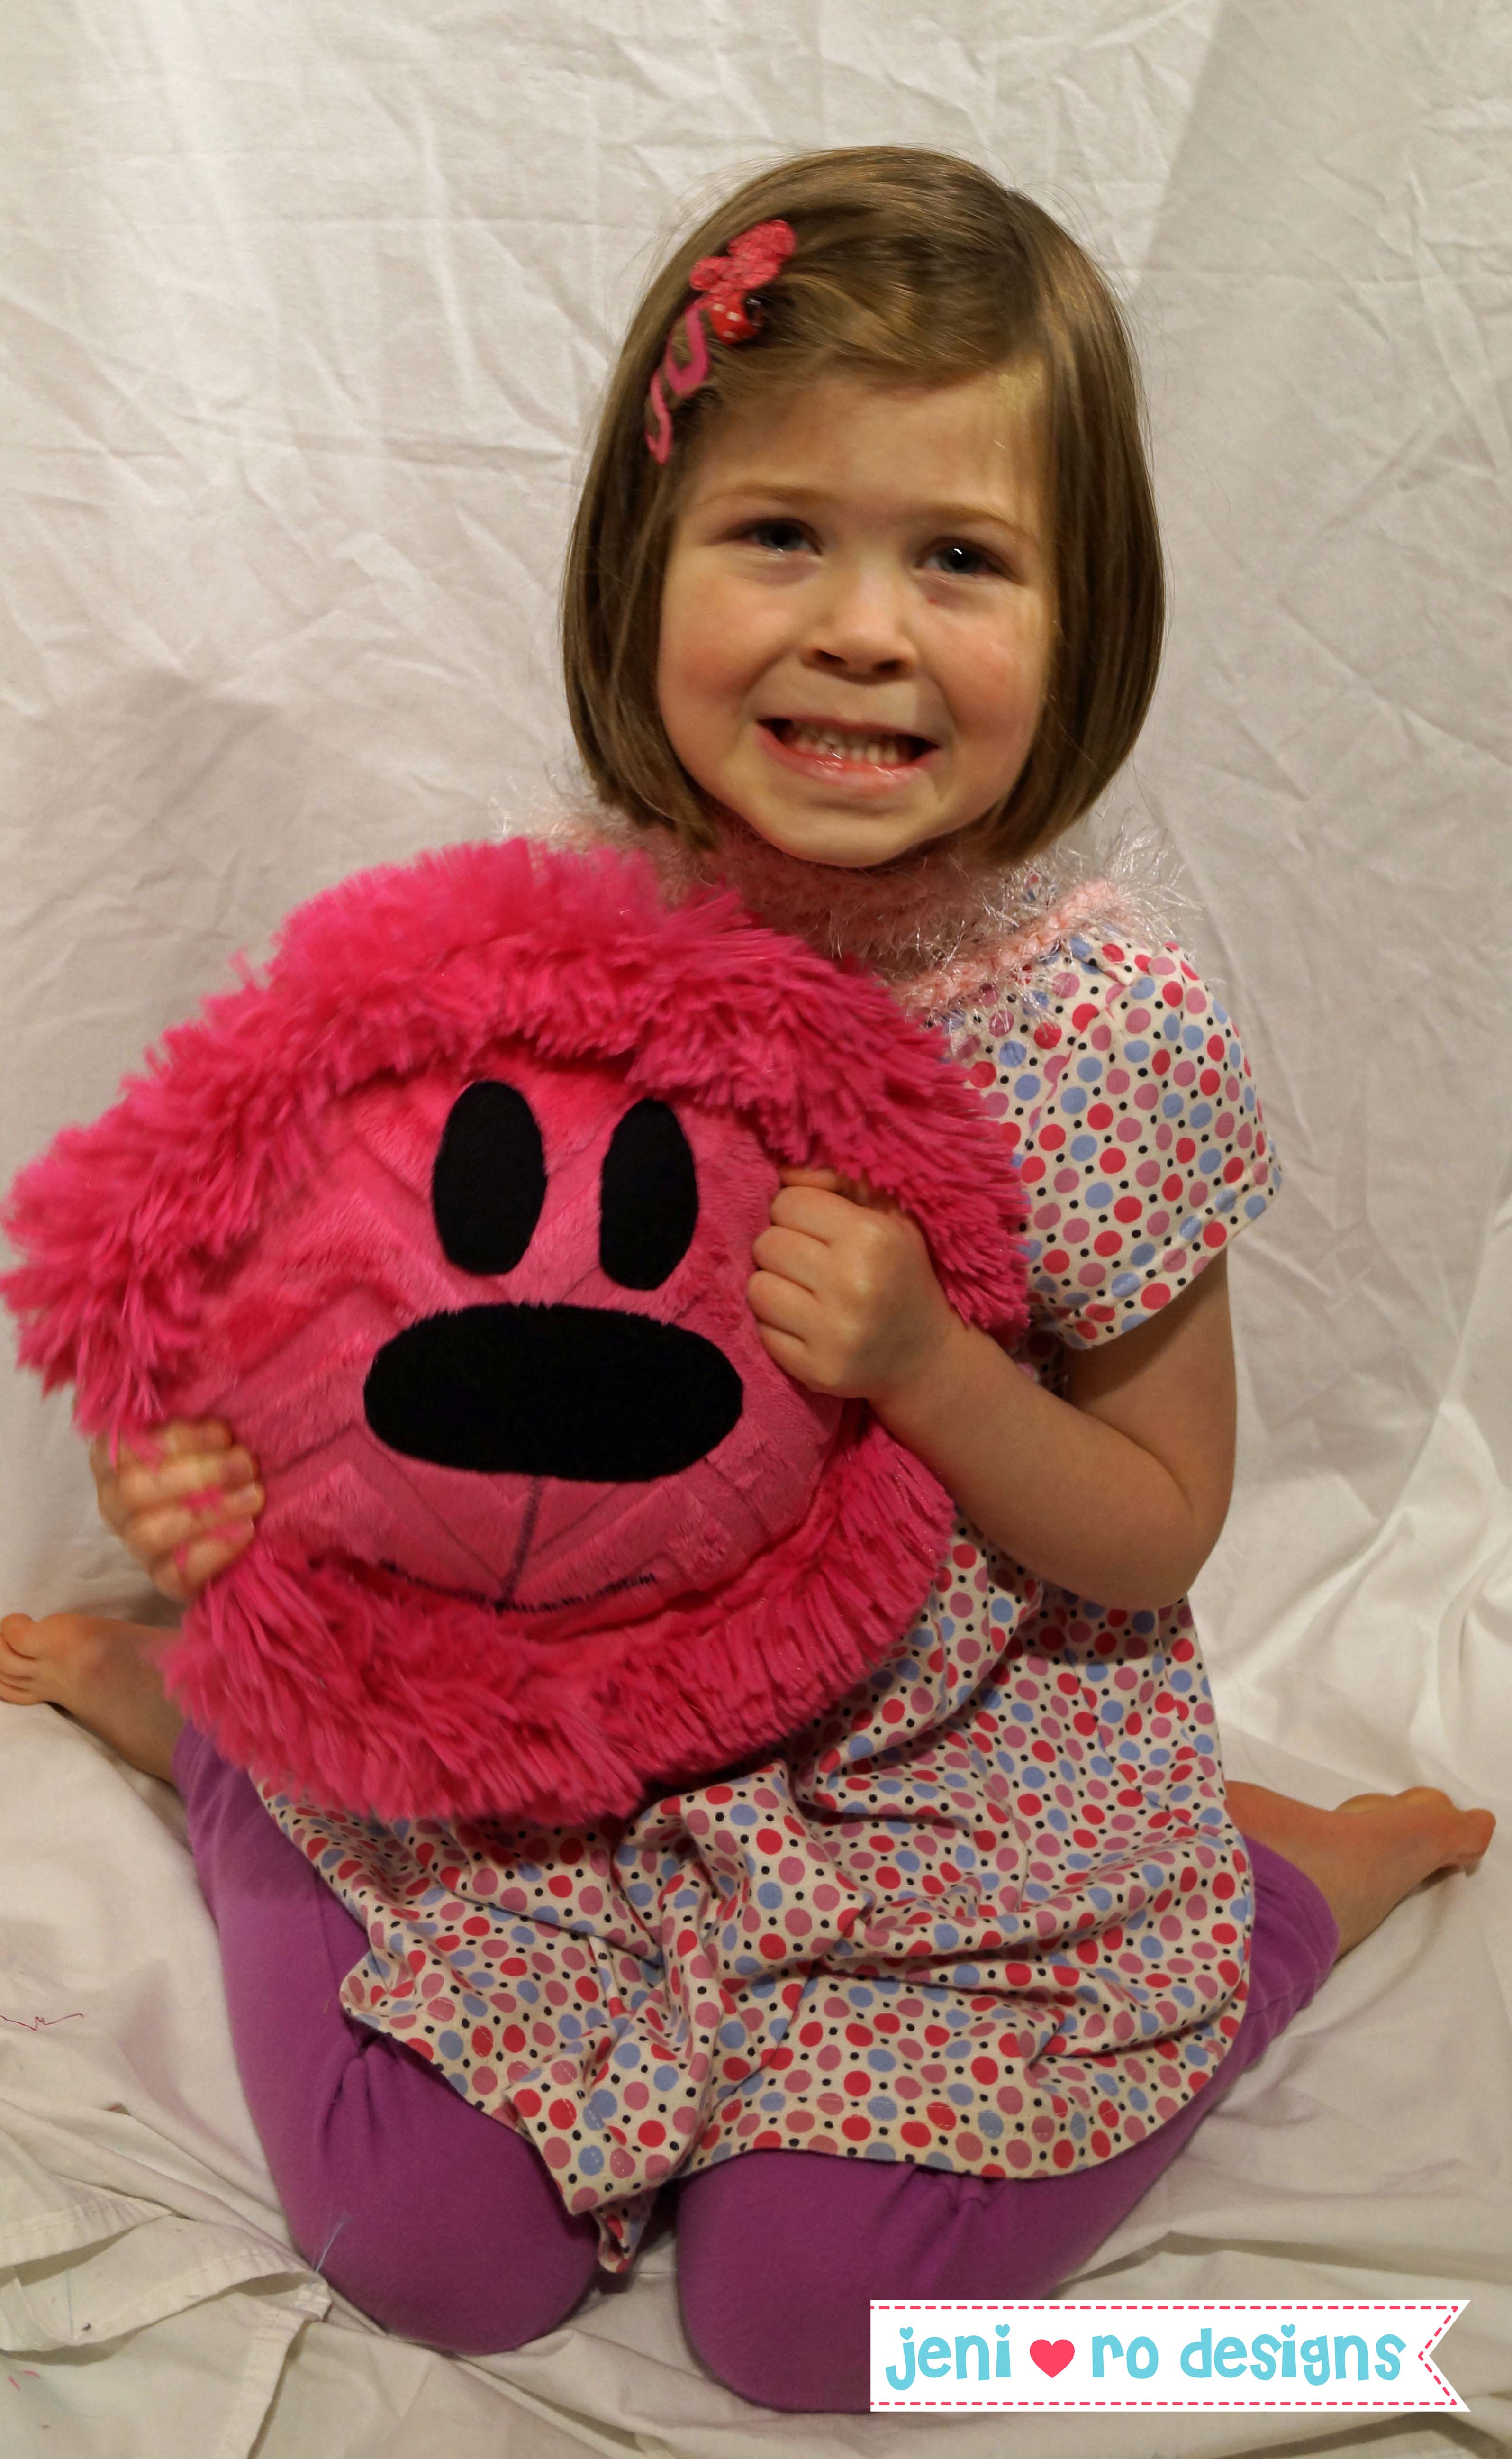
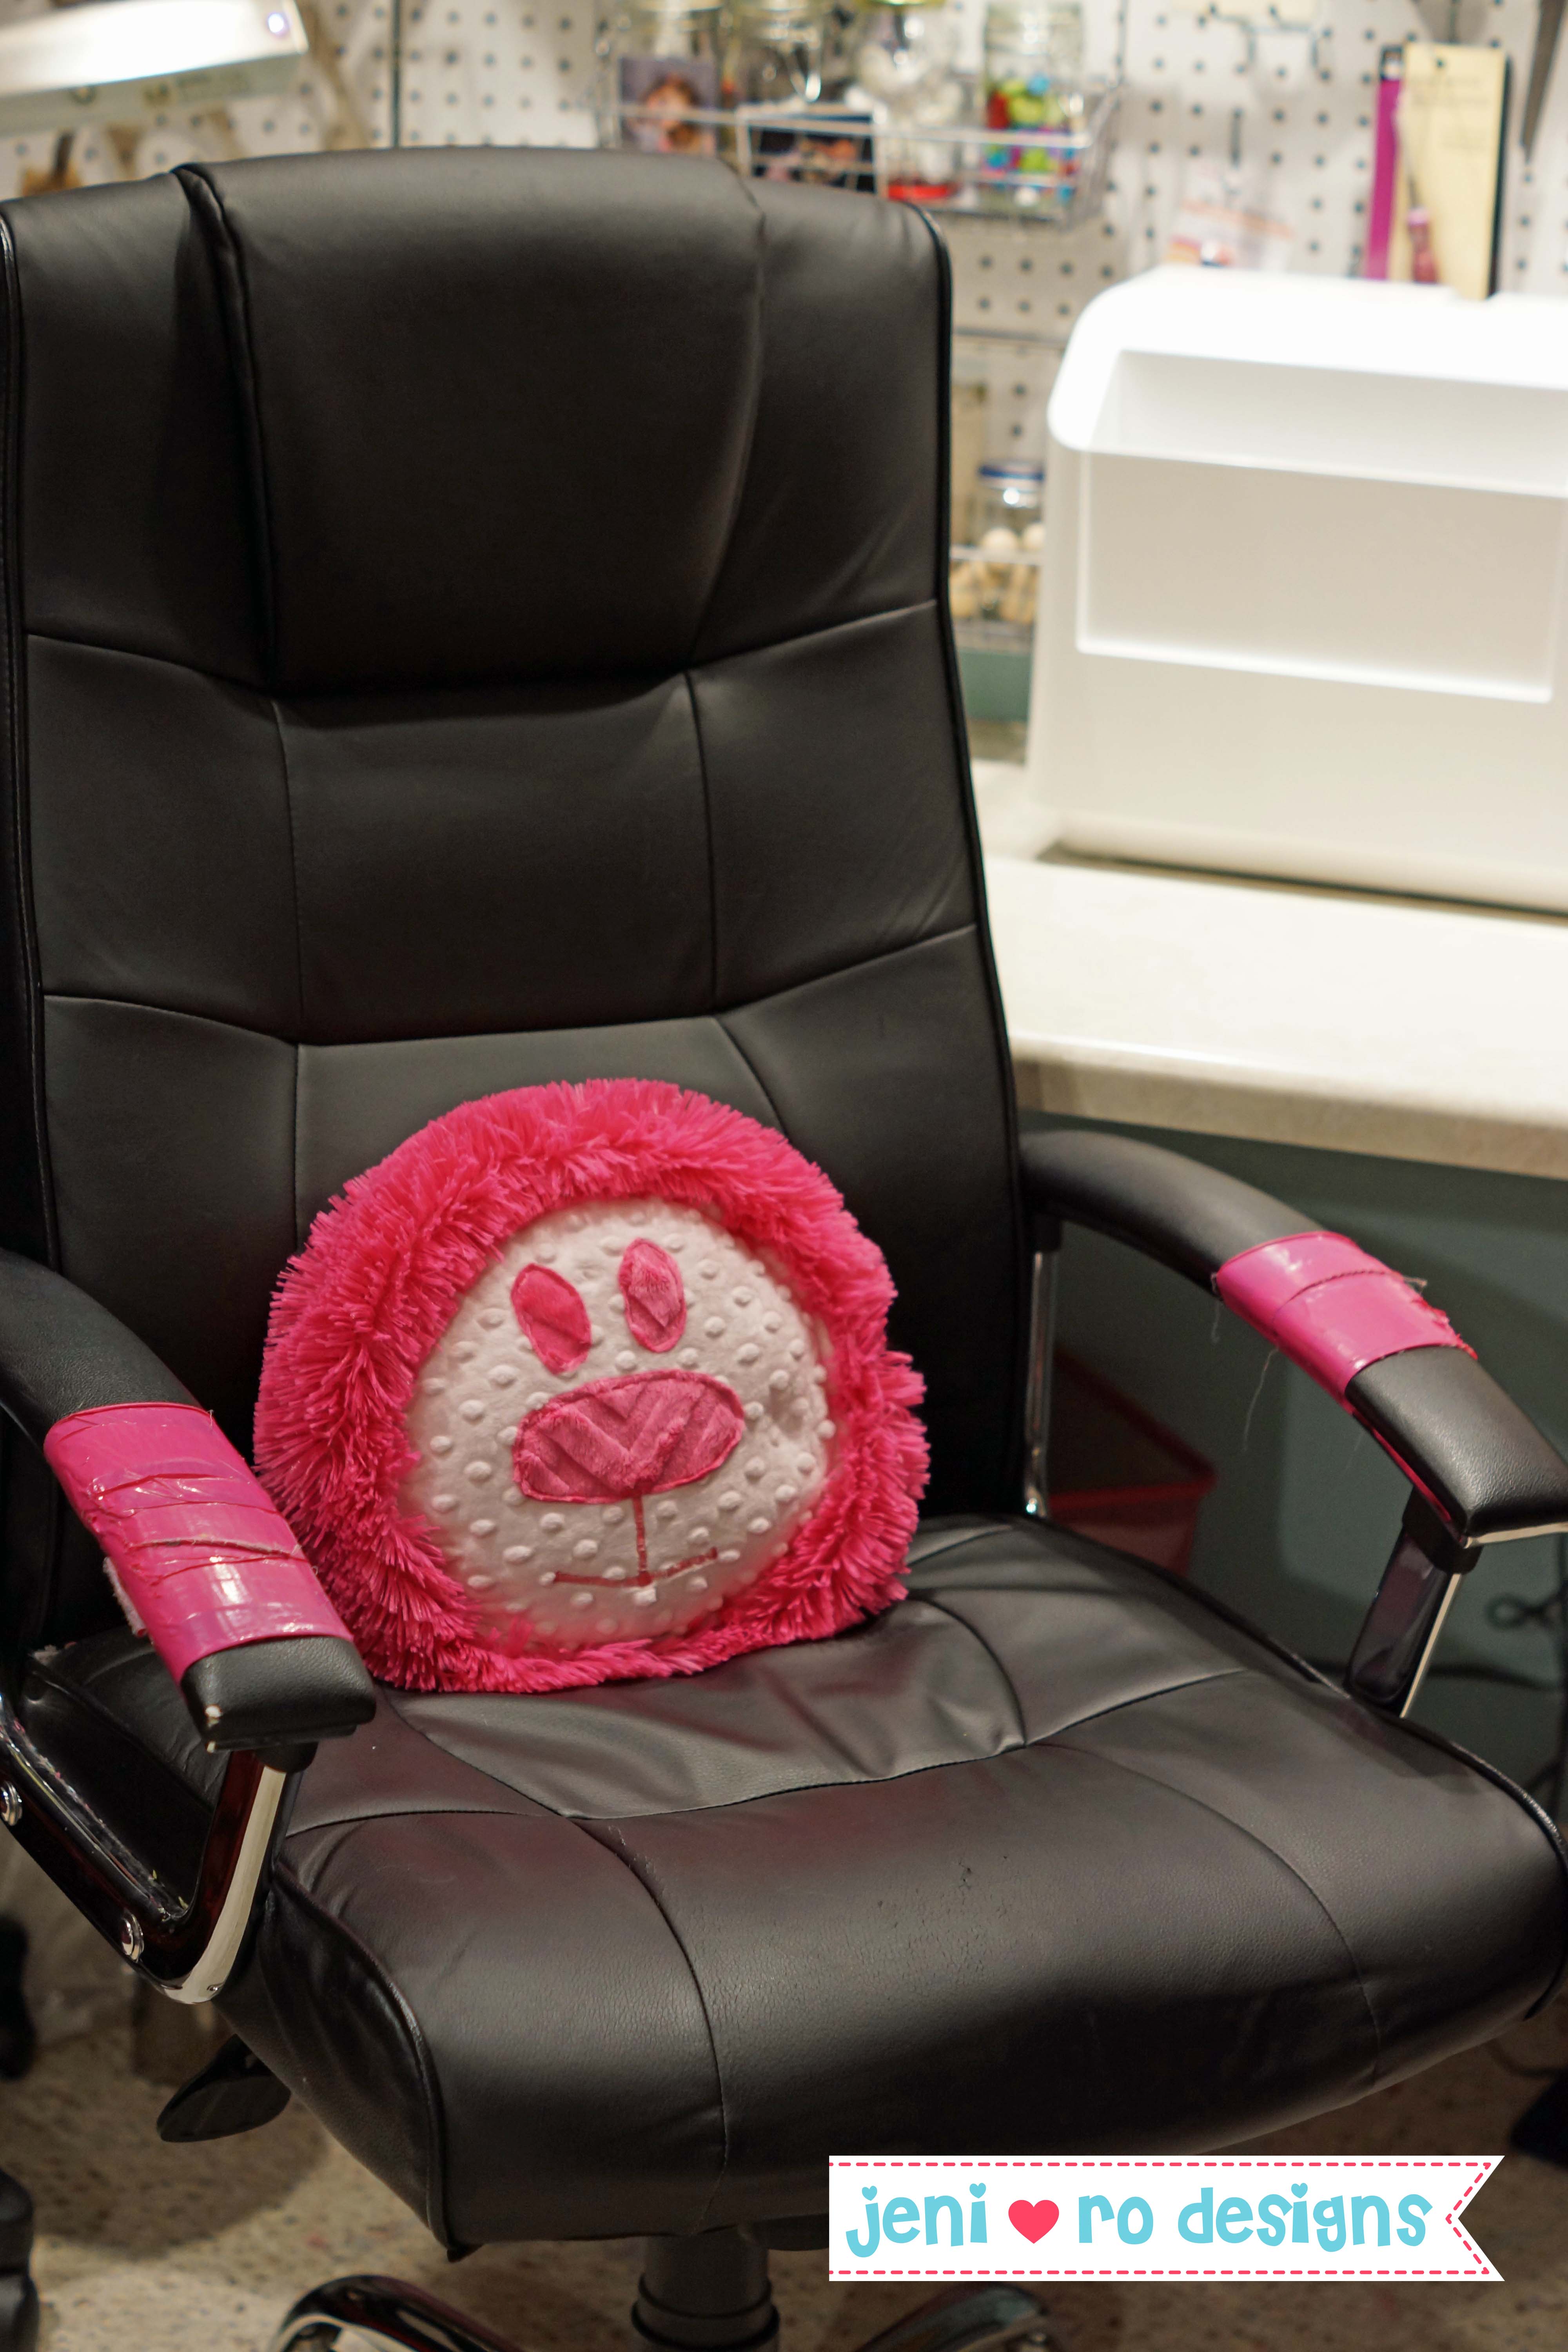
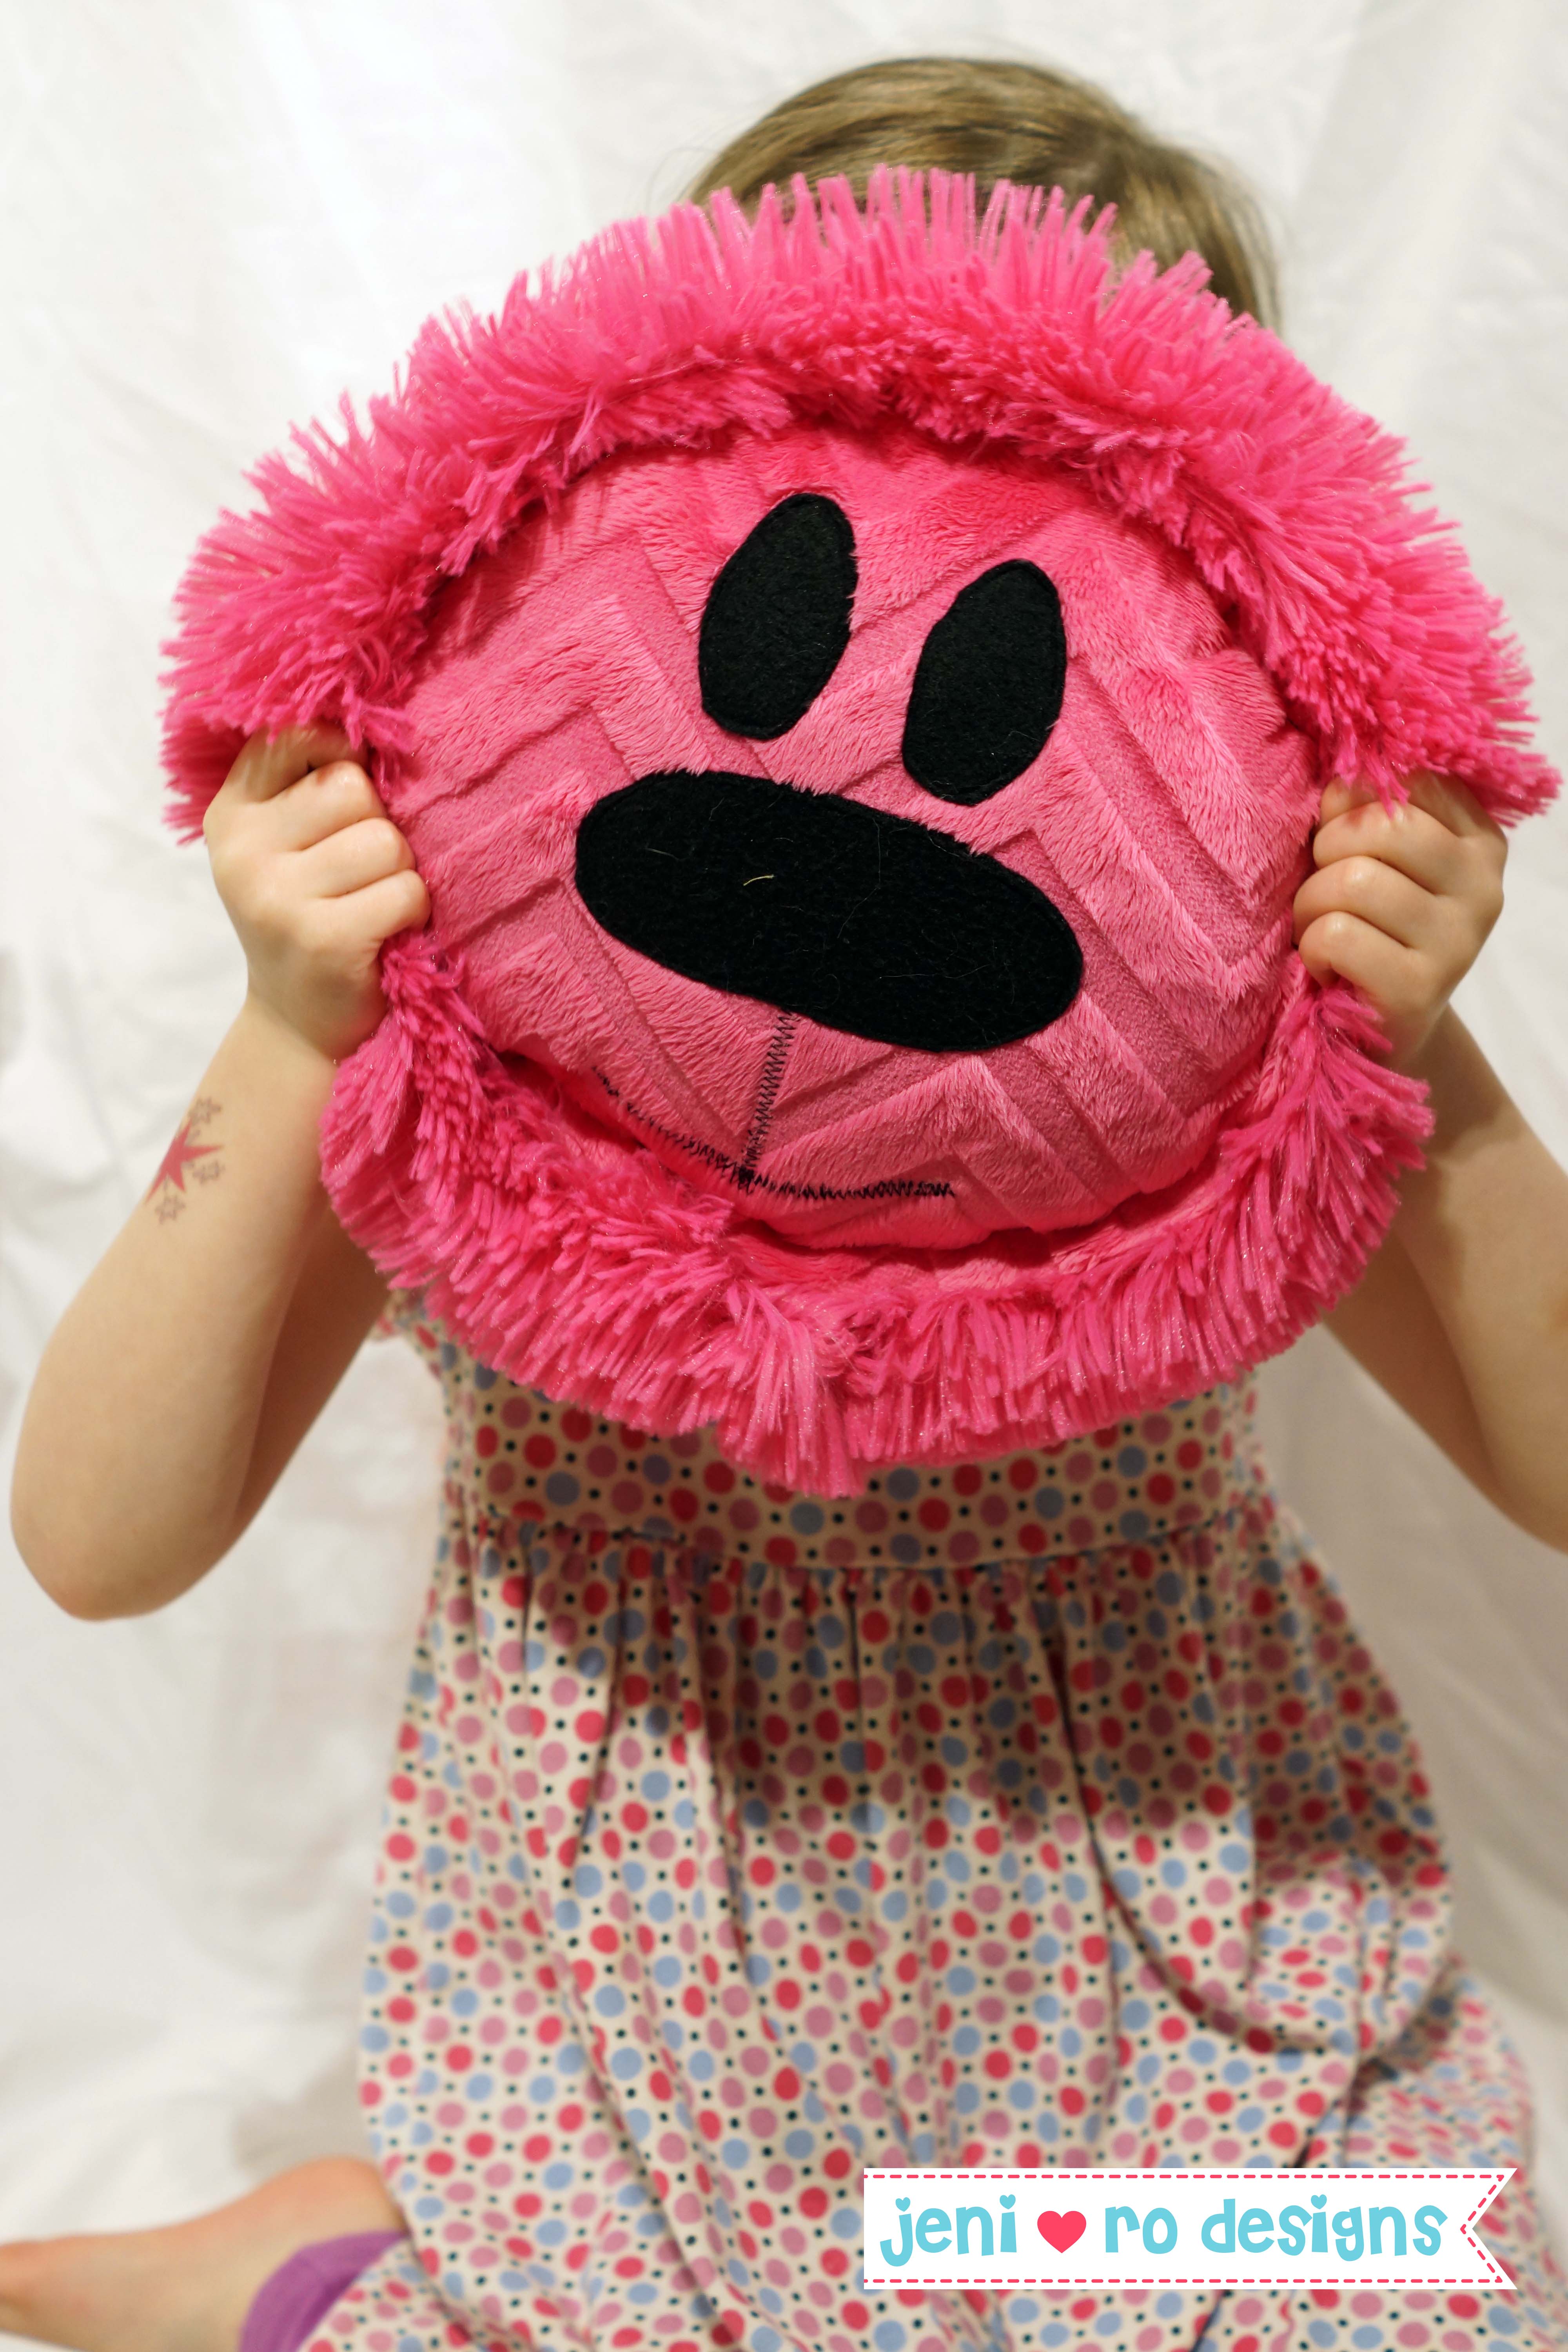
Step 13: Give it another shake, hug and admire your cute CUDDLE LION PILLOW!
My daughter adores her lion pillow and it’s perfect for an accent on a kid’s bed.
You can vary the colors and create some super cute pillows to match any decor!
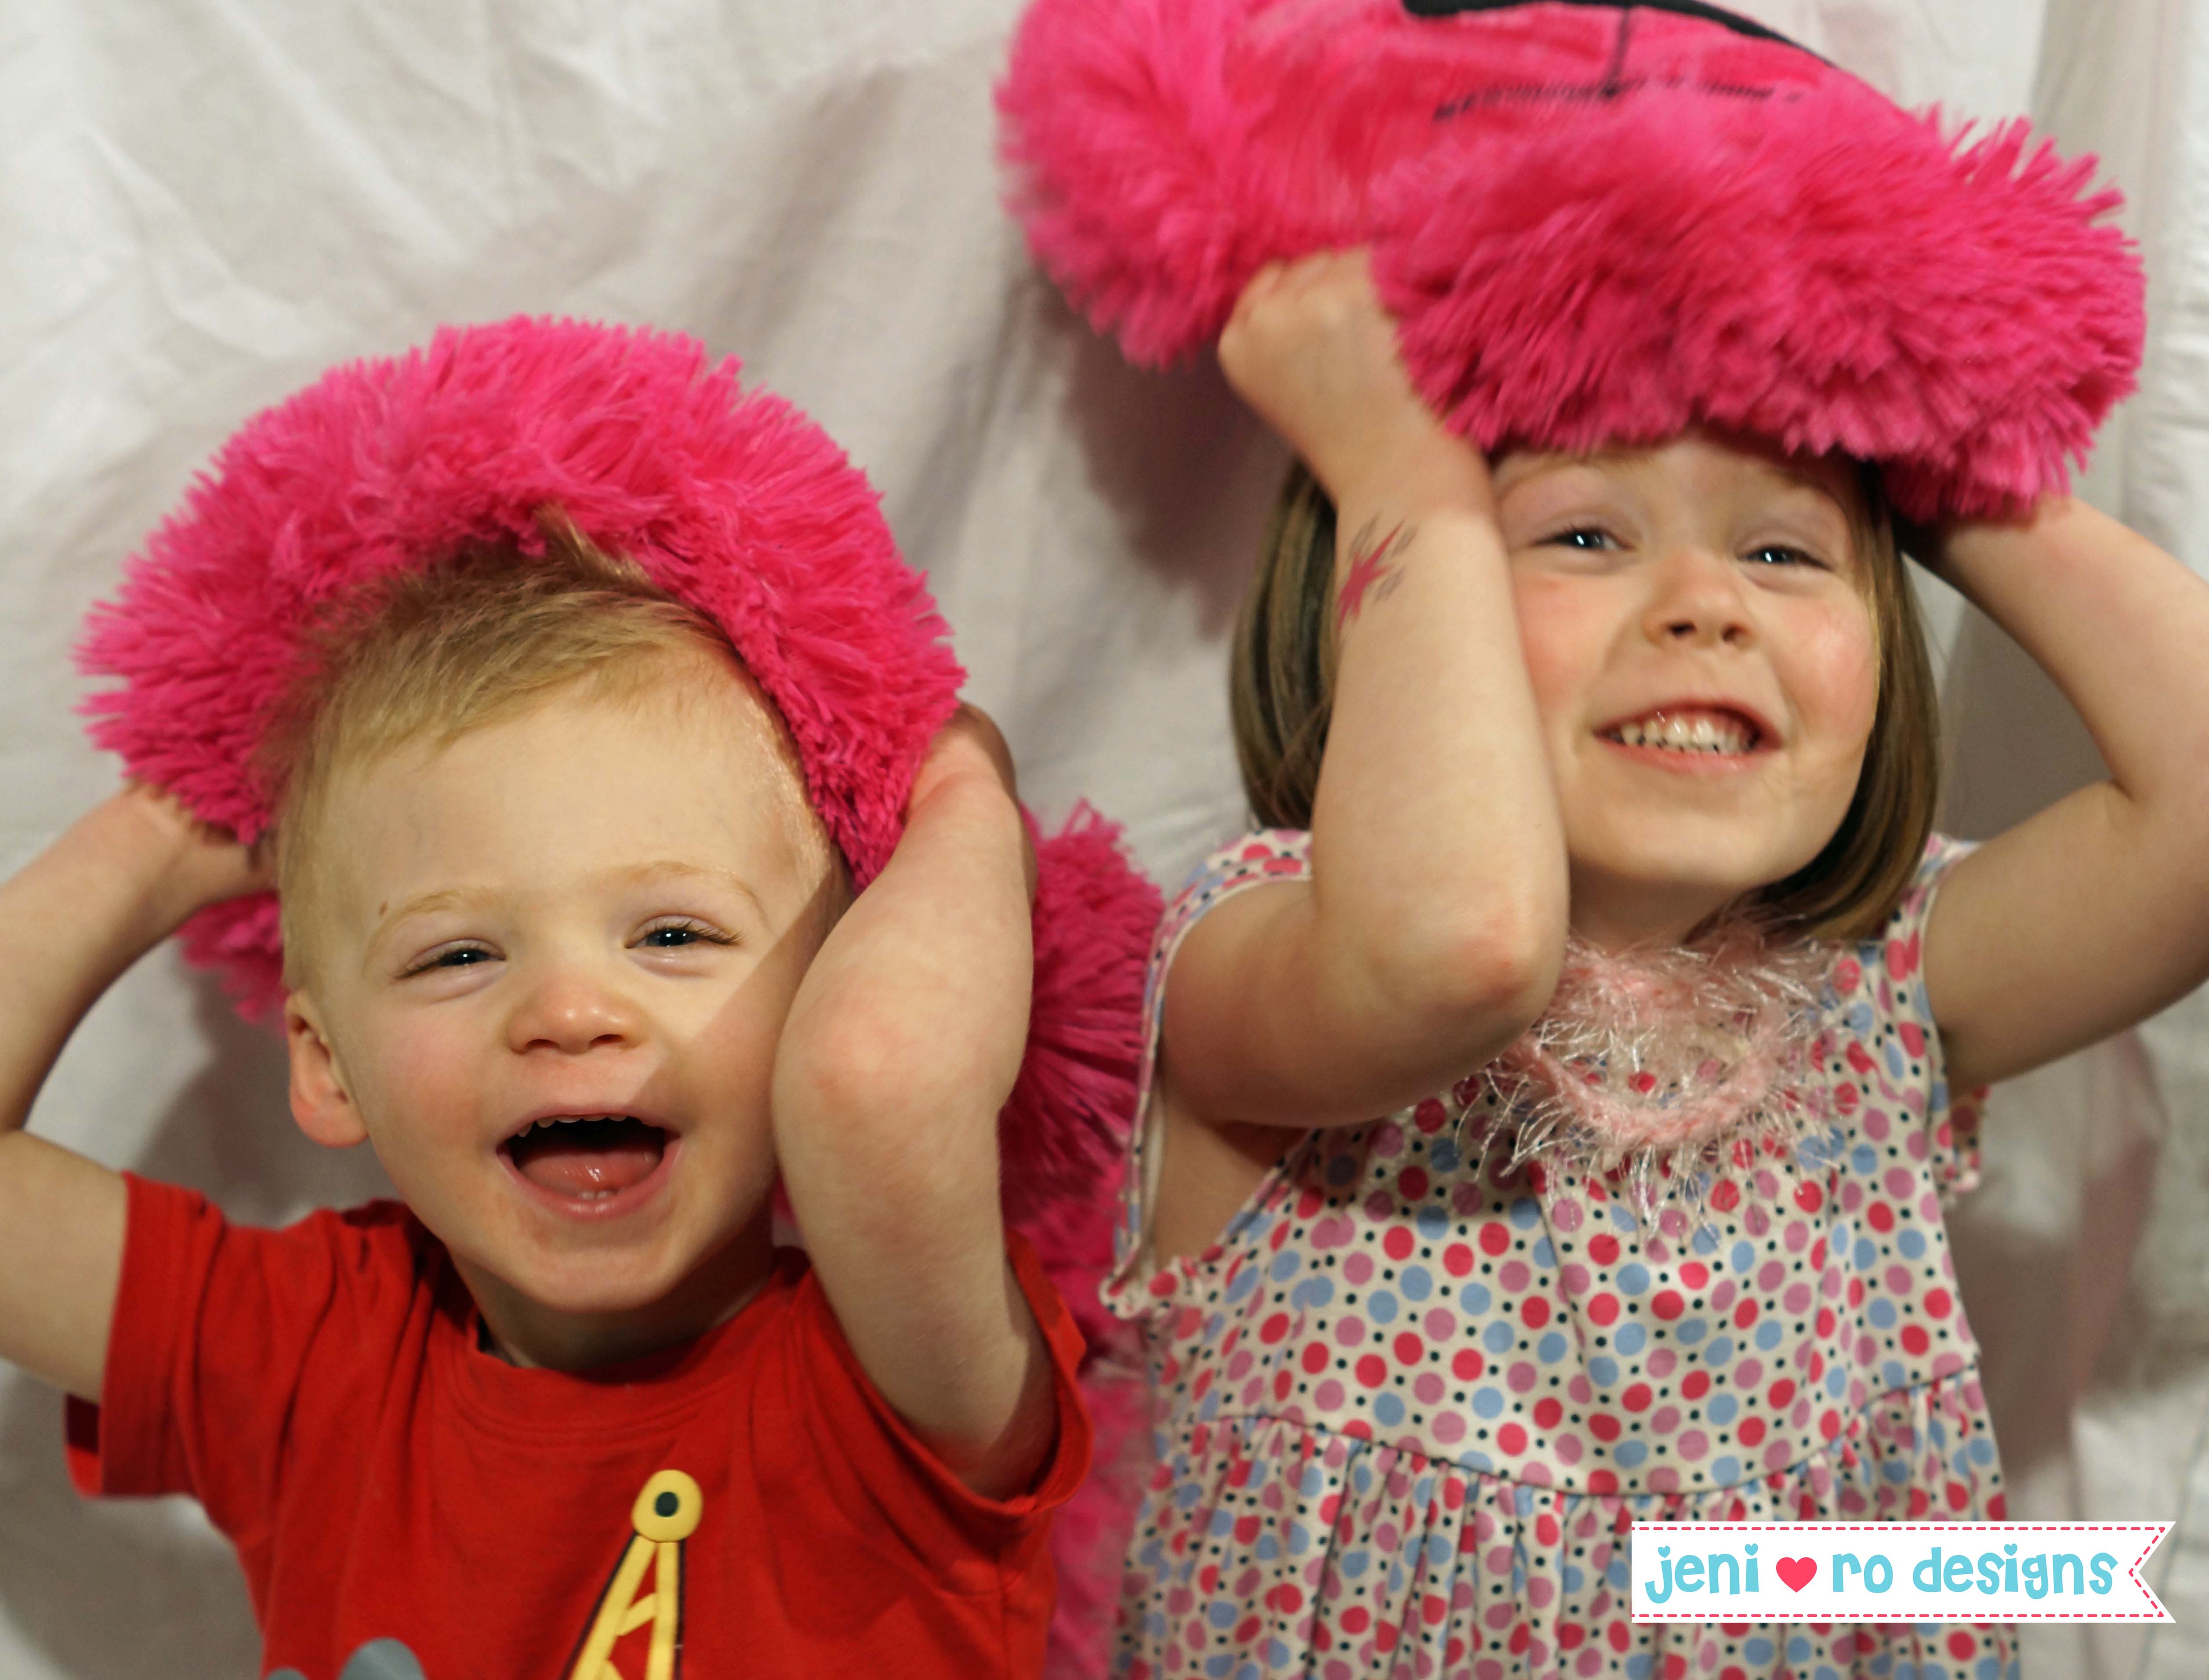
Here are my kids being silly with the lion pillows!
And I am keeping this one for myself! Perfect back pillow for my sewing chair!
Thank you for letting me share my little creation. For more jeni ro designs creations and general fun – visit my Etsy shop at jenirodesigns.etsy.com and my blog www.jenirodesigns.com
And a big thank you to Shannon Fabrics for having me on their blog! I can’t wait to get more Cuddle!