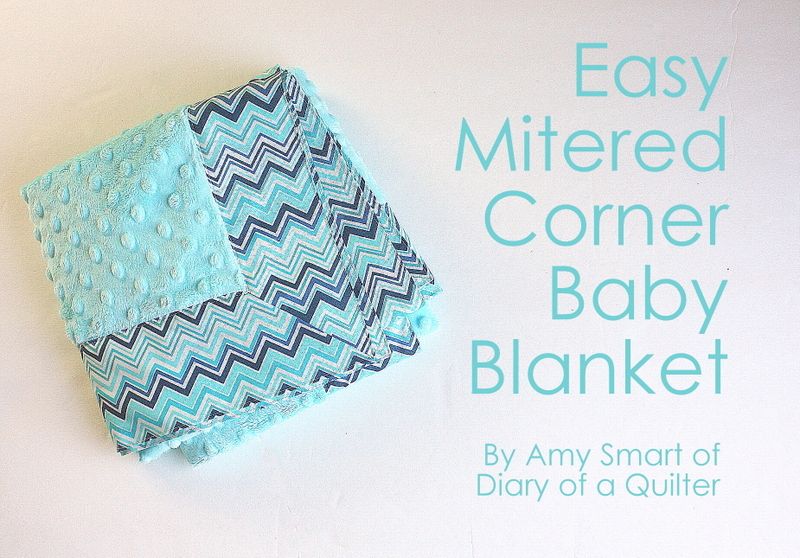
Hello fellow Cuddle fabric lovers! I'm Amy Smart and I write a blog about my sewing and quilting adventures at Diary of a Quilter. Today I'm going to share with you a simple project to make a sweet receiving blanket using regular cotton fabric and some baby soft Cuddle fabric.
Fabric requirements:
Tools needed:
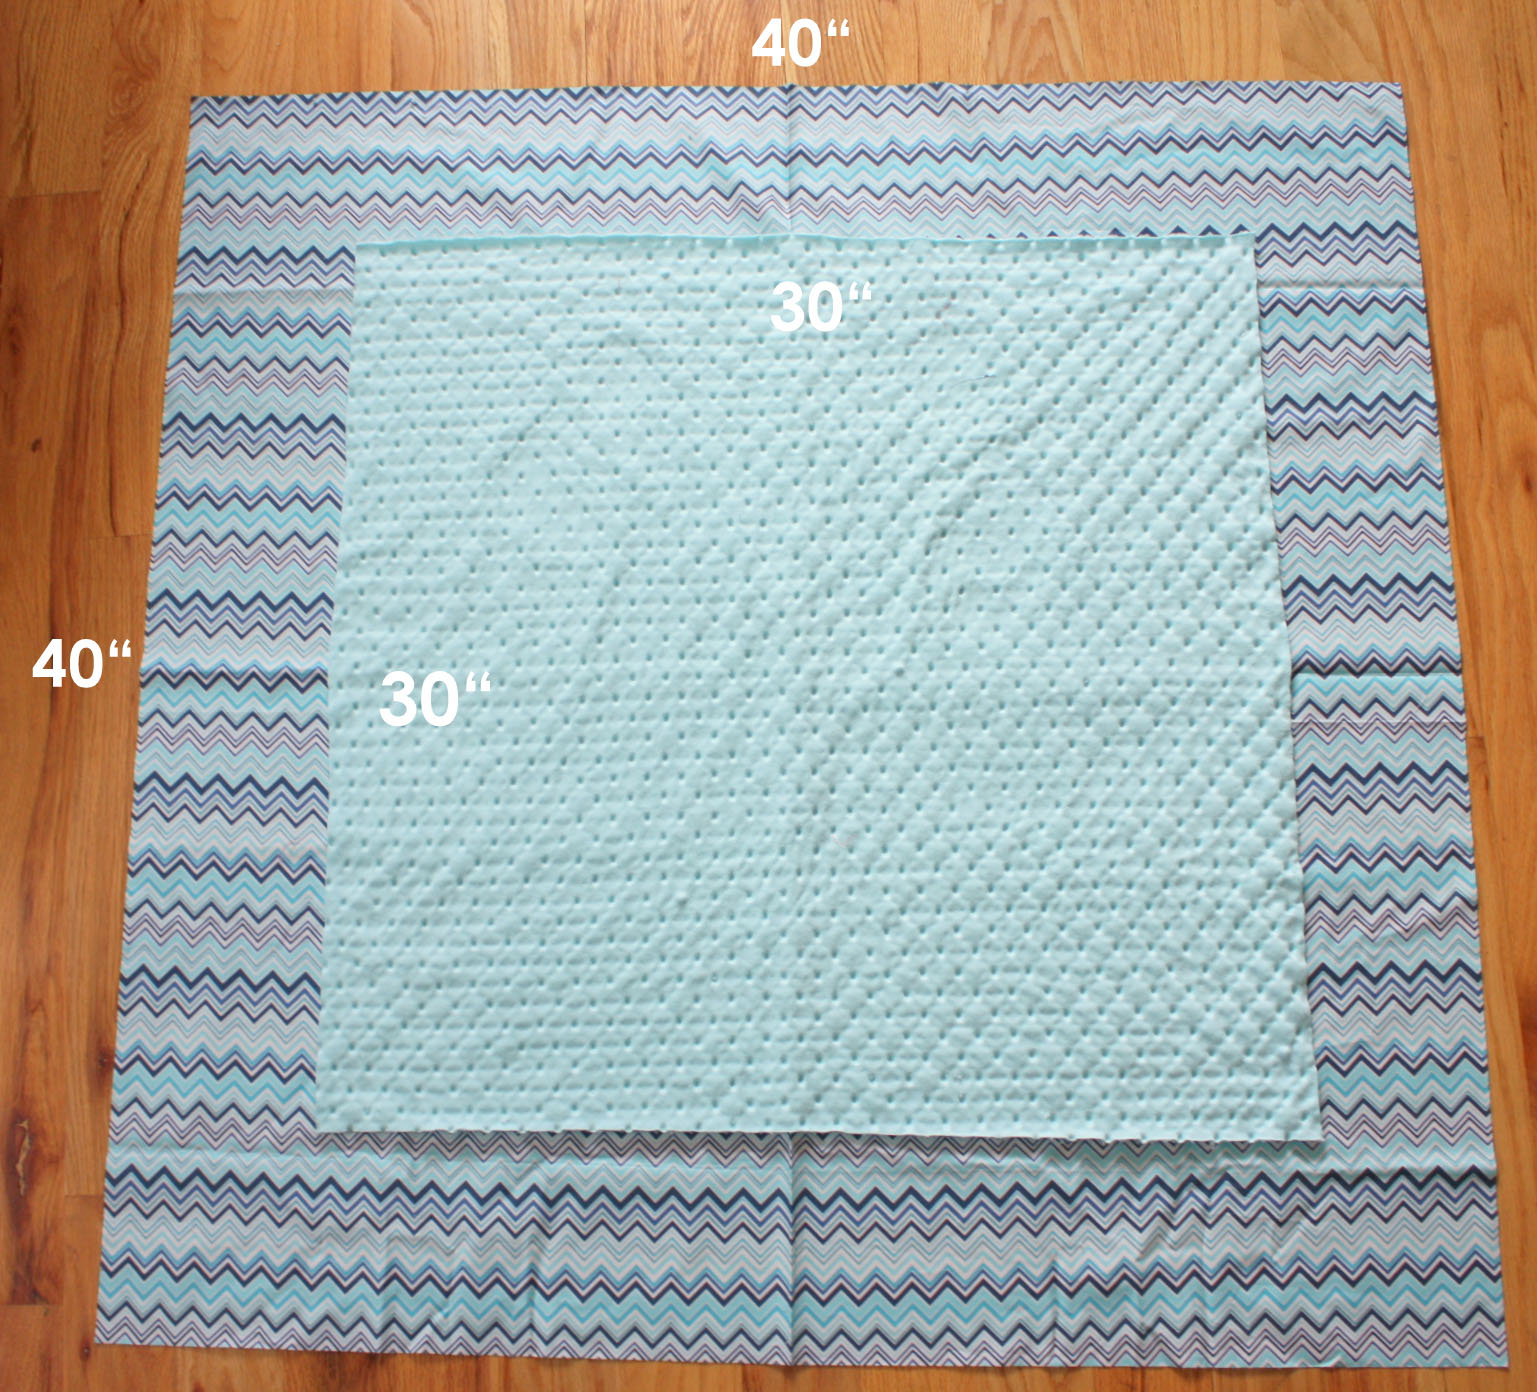
1. Cut cotton fabric into a 40" x 40" square and Cuddle fabric into a 30" x 30" square. Fold your squares diagonally to make sure they are truly square pieces.(If your yardage is not quite wide enough, you can cut your squares smaller, just keep the cotton 10" bigger than the Cuddle fabric.)
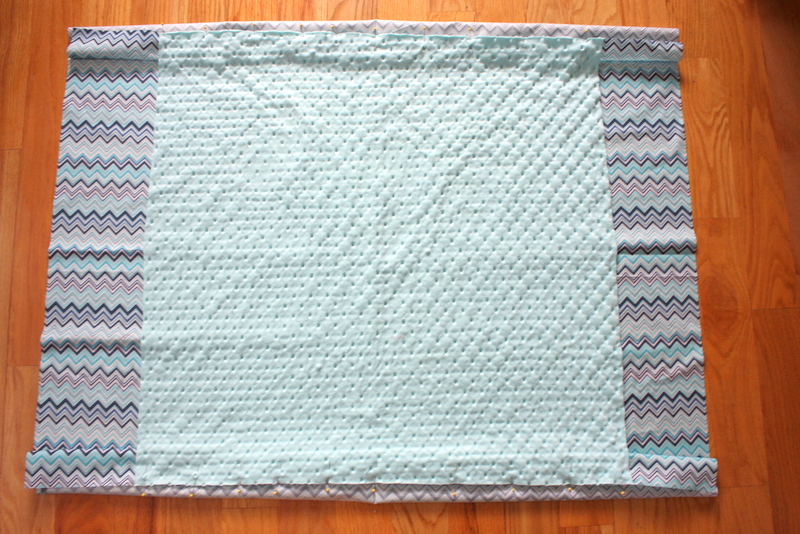
2. Place your Cuddle fabric, right sides together and centered in the middle of your cotton square.
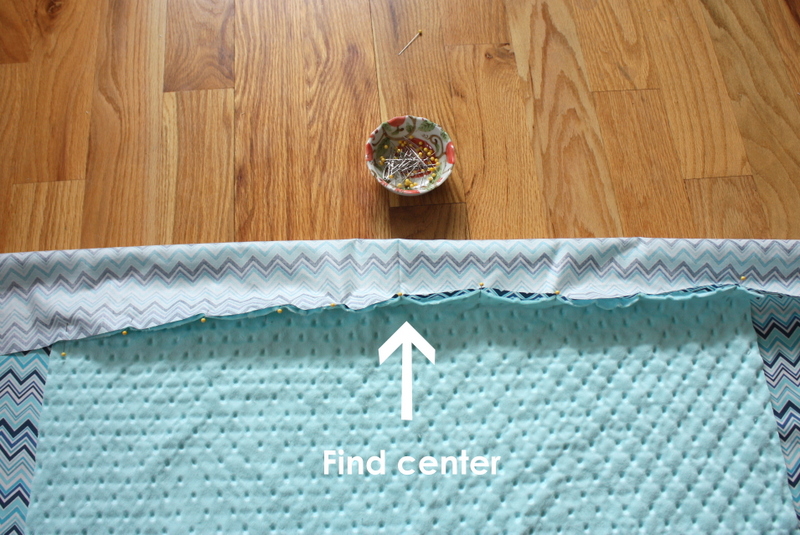
3. Find the center of one side of your Cuddle fabric and one side of your cotton fabric. Pin at the center and then pin edges of Cuddle fabric to the edges of the cotton. Don't pin all the way to the corners of the Cuddle fabric - leave about 1 inch on either end un-pinned.
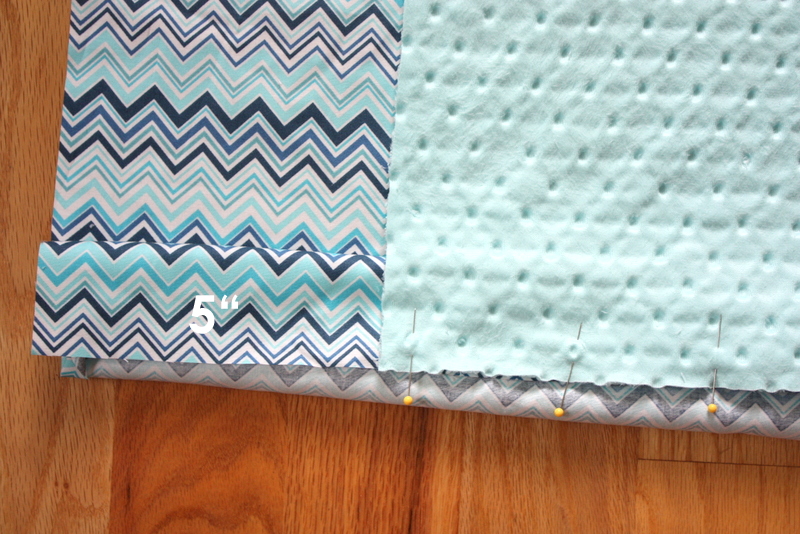
You will have a 5" space of left-over cotton fabric on either side.
4. Repeat on opposite side and then on remaining two sides.
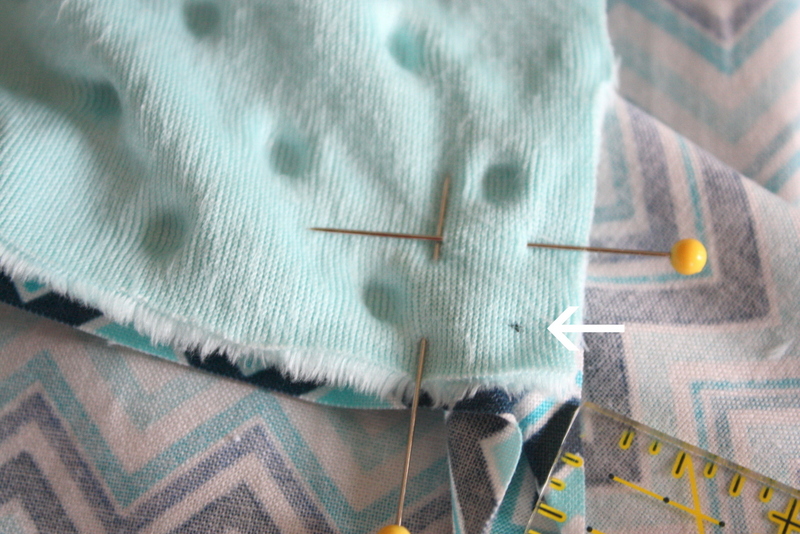
5. Using a ruler, mark a small dot 1/4" in from both edges at all four corners.
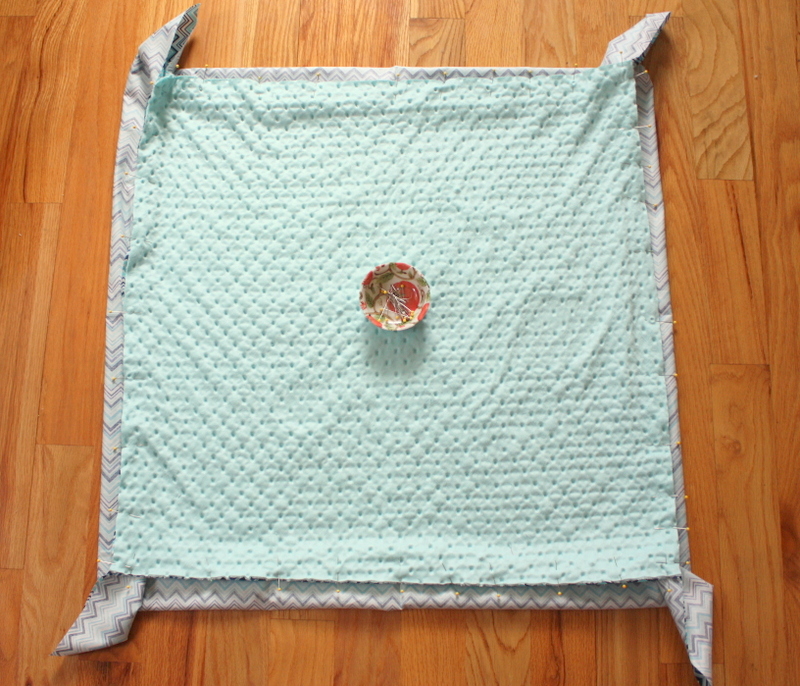
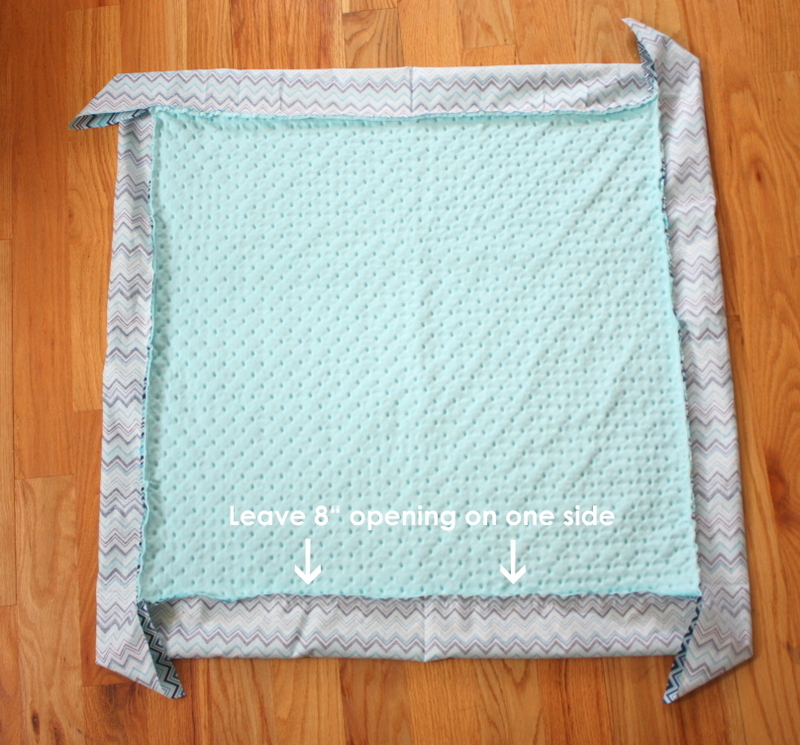
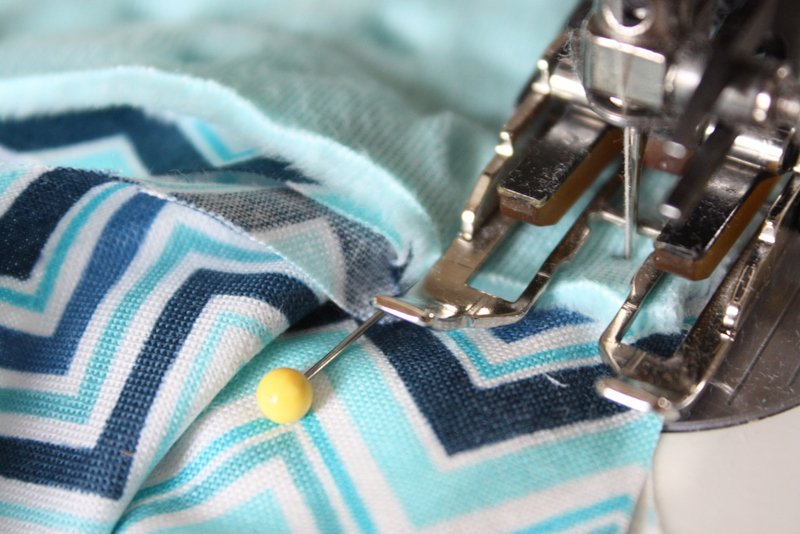
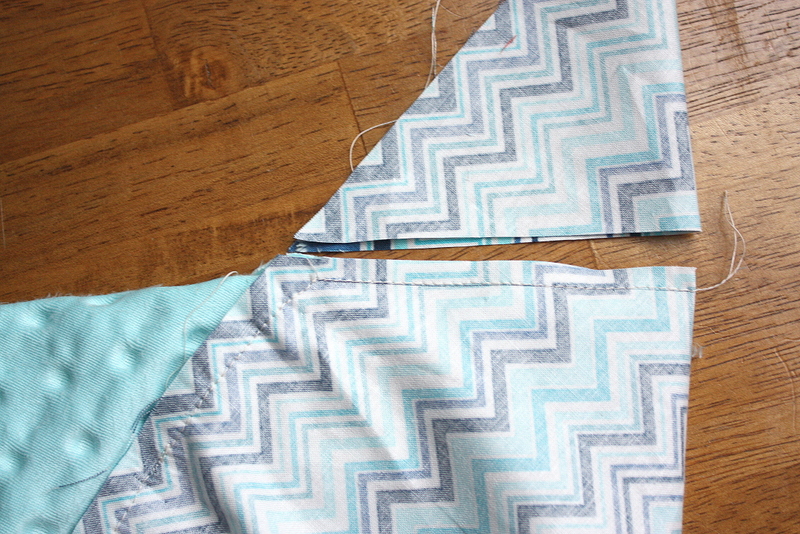
6. Sew all four edges together using a 1/4" seam allowance. On one side, leave an 8" opening for turning blanket right-sides-out. I highly suggest using a walking-foot if you have one to avoid any stretching or puckering.
As you are sewing each side, pull the next side out of the way and sew seam until you get to the marked 1/4" dot. When you get to the quarter inch dot lift the needle and turn the blanket. Pull the side of the cotton fabric you just sewed away and start sewing the new side of cotton fabric to the Cuddle fabric beginning at the 1/4" dot.
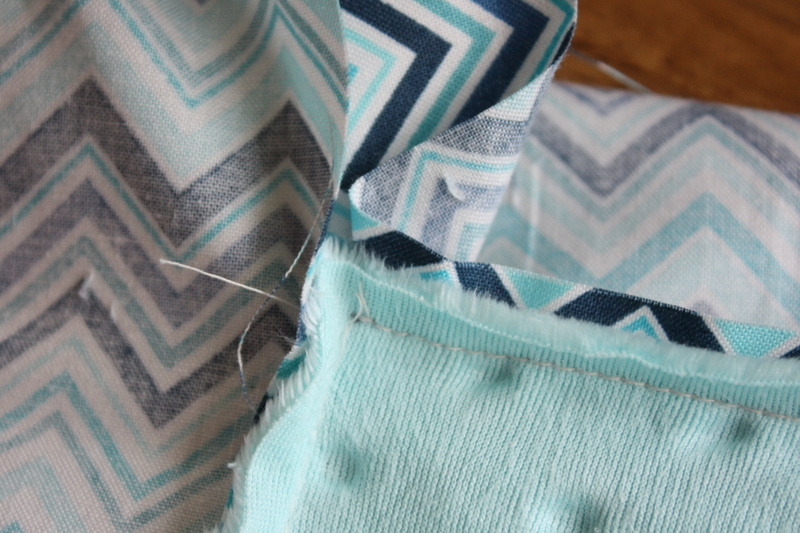
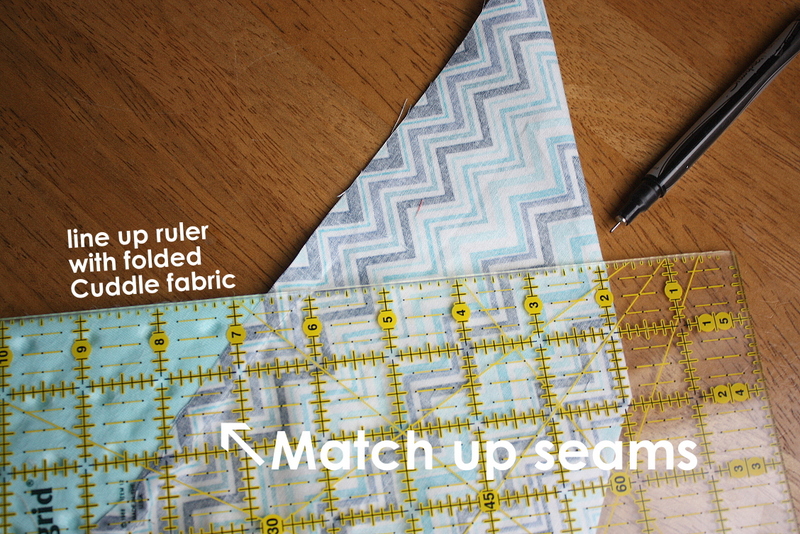
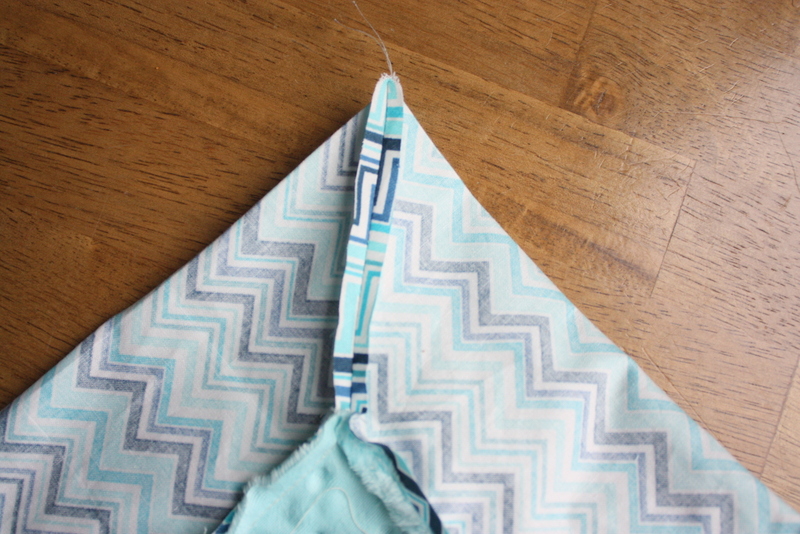
7. To make mitered corners pull the Cuddle fabric away from the cotton fabric. Start with one corner and pull the corner 'flap' taught, matching up raw edges to create a triangle. Fold the Cuddle fabric in half diagonally on itself, matching up intersecting seams for that corner. This should create a 45 degree angle next to the triangle 'flap.' Line up a ruler with the folded edge of the Cuddle fabric and mark a line.
I'd suggest putting a pin in to hold everything together while you take it to your machine.
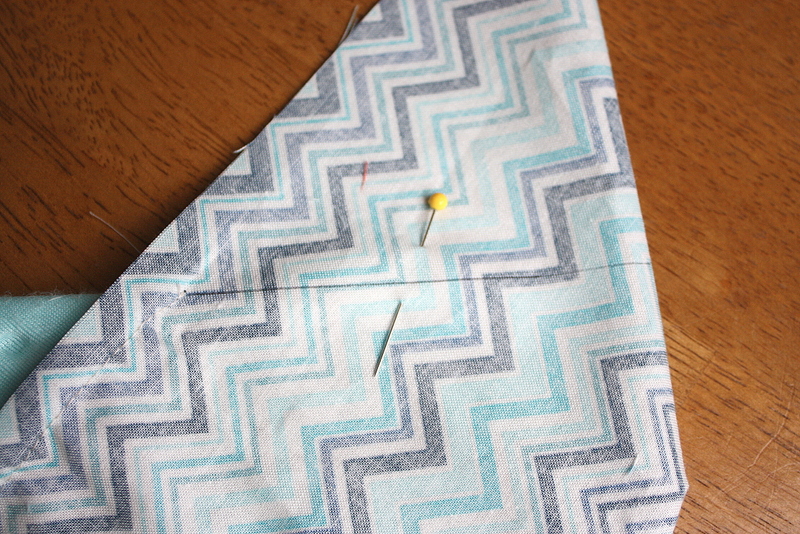
8. Starting at the 1/4" endpoint of original seam, sew directly on the line to the edge of the folded cotton fabric. Trim excess triangle 'flap' 1/4" away from the new seam
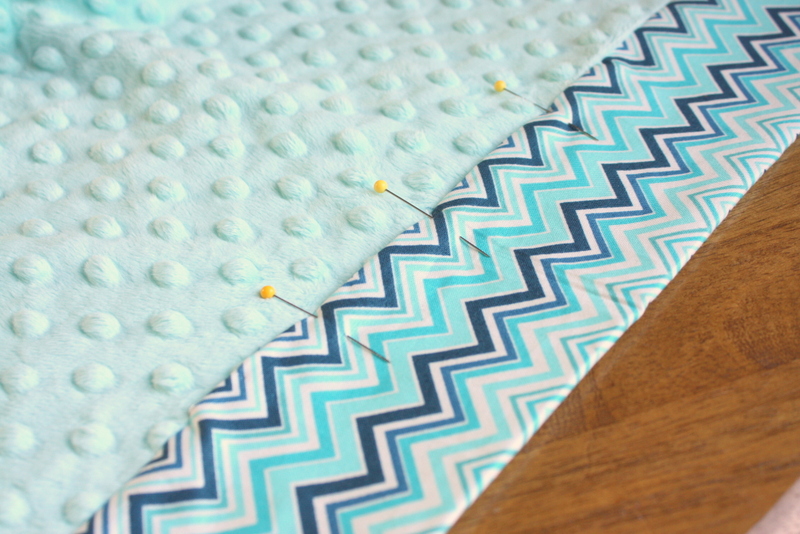
10. When all four corners are mitered, turn blanket right-sides out. Carefully shape the blanket including the self-binding cotton edge. Press outside edges. Tuck edges of Cuddle square toward the cotton fabric. Pin together open edge.
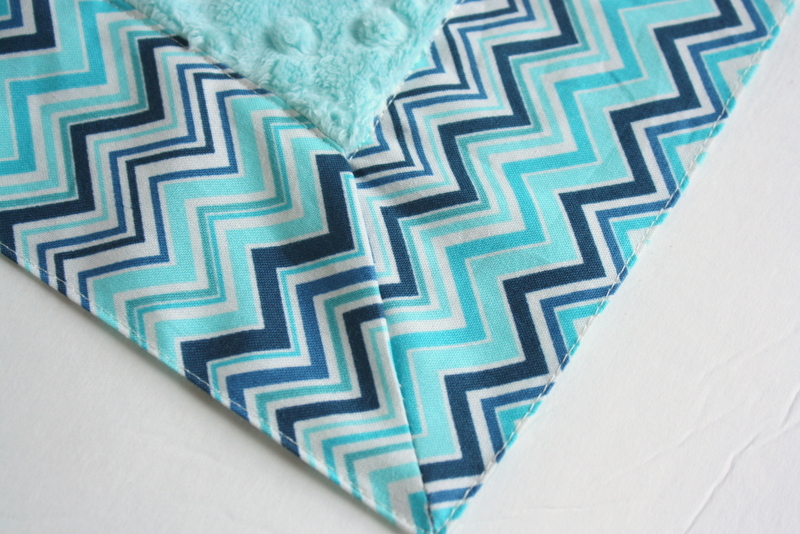
11. Top stitch all the way around the outside of the Cuddle fabric, at the same time closing the opening used for turning. Top stitch around the outside blanket edge to give it a crisp finish. I also choose to draw a 12" square in the middle of the Cuddle fabric with an eraseable pen and top stitch on that line as well to keep the center portion of the quilt from shifting when it's washed.
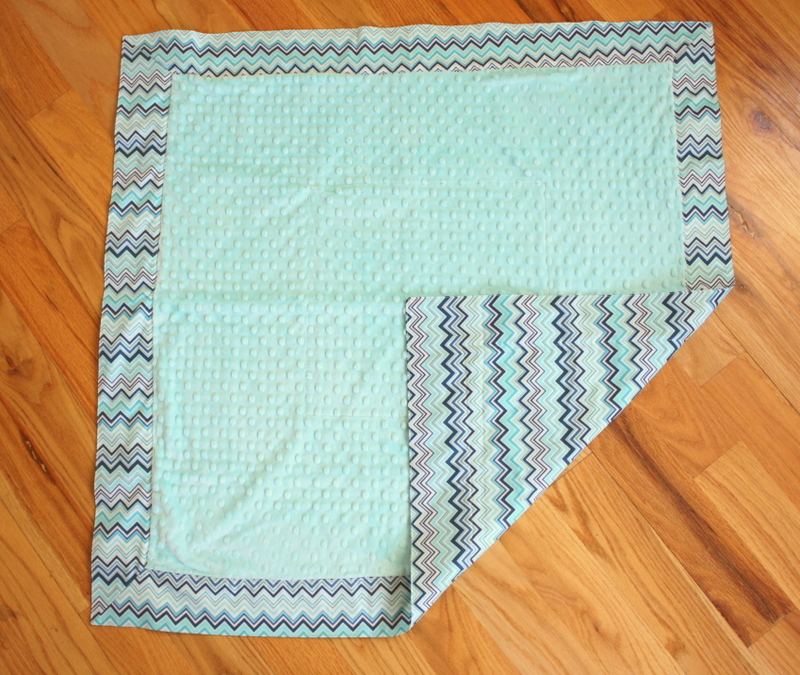
And there you have it. The first time you try this method it will probably take a little bit of time and effort to get things right, but I guarantee after that first time, you will be able to whip these suckers out for all your favorite new babies in no time.
Thanks for having me! Feel free to drop by Diary of a Quilter for more sewing and quilting tutorials!